UPS
- Navigate to App menu > Credential Setup
- You will land on the Credential setup page where you have Payment, Shipment and E-Commerce tabs.
- Click on the Shipment Tab
- Click “New” to add UPS setup record.
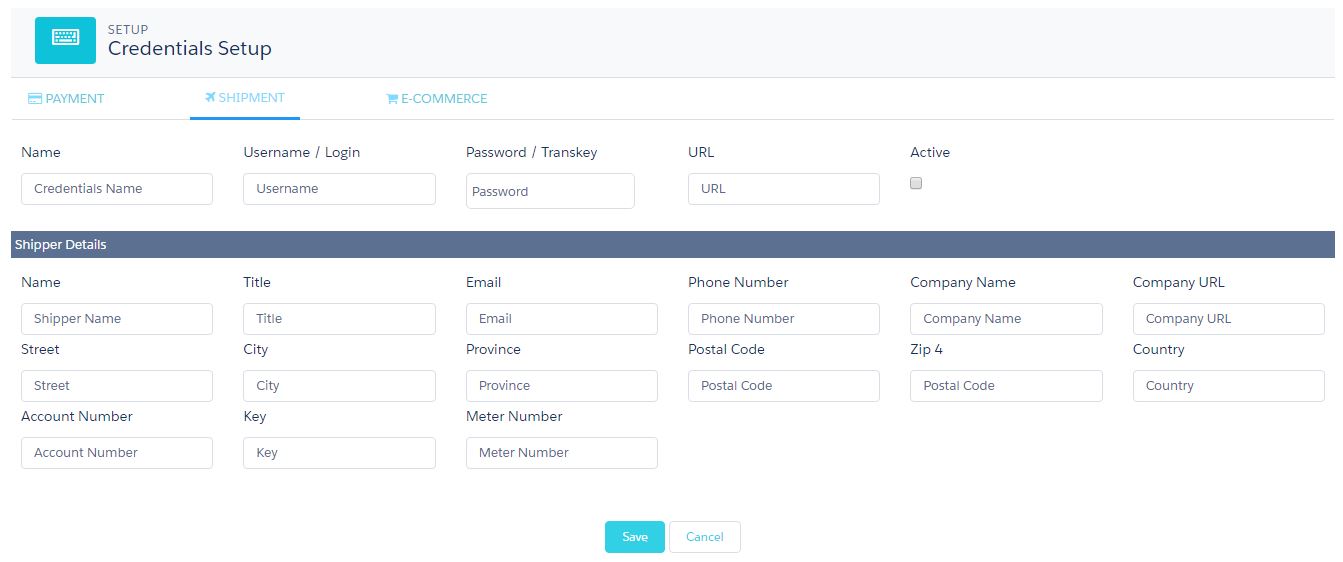
- Fill in the UPS credentials and add the URL to specify the test or live account and make the record active.
- Make sure to use the name as UPS
- Add the Shipper Details and click Save.

- This creates a UPS record as shown above and the password/trans key gets encrypted.
- With this setup, you can use the UPS services for shipment.
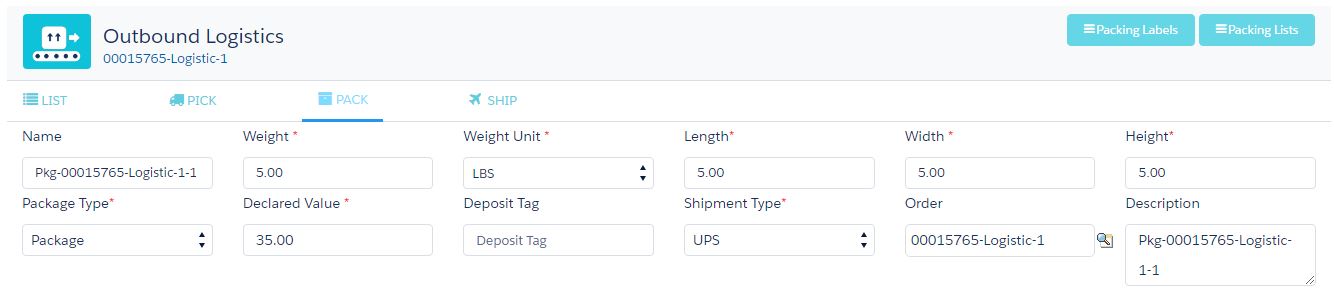
- In the outbound logistics process while doing the Pick Pack Ship of the logistic orders, select the shipment type to be UPS while creating a Package.
Click on “Ship” to land on the UPS services page.
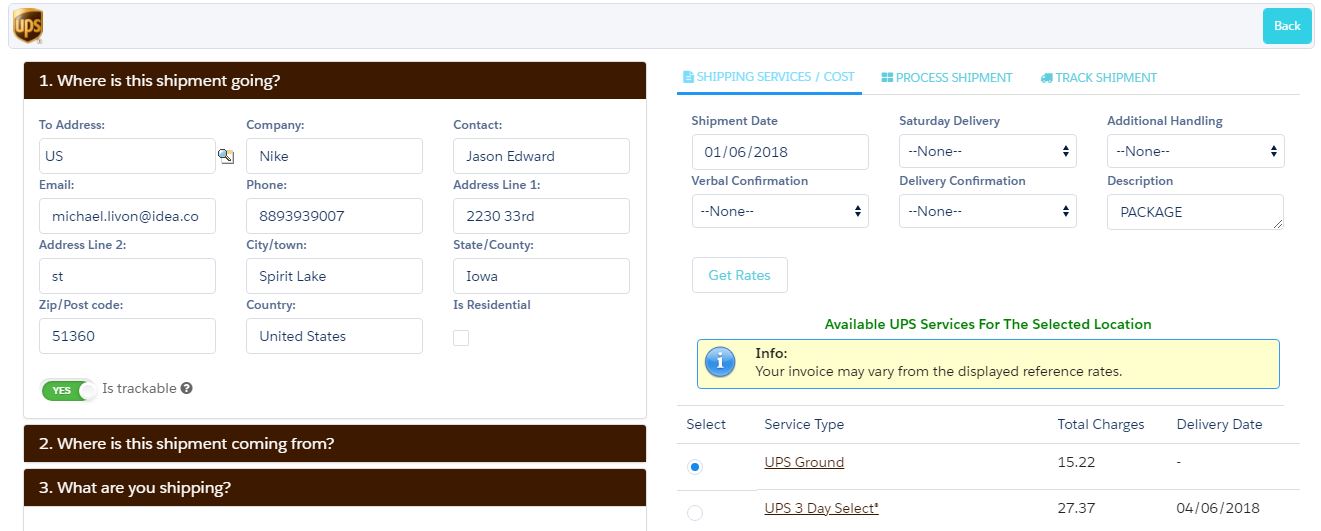
- Click on “Get Rates” and select the suitable service.
- Scroll down the services and click “Initiate Shipment” button
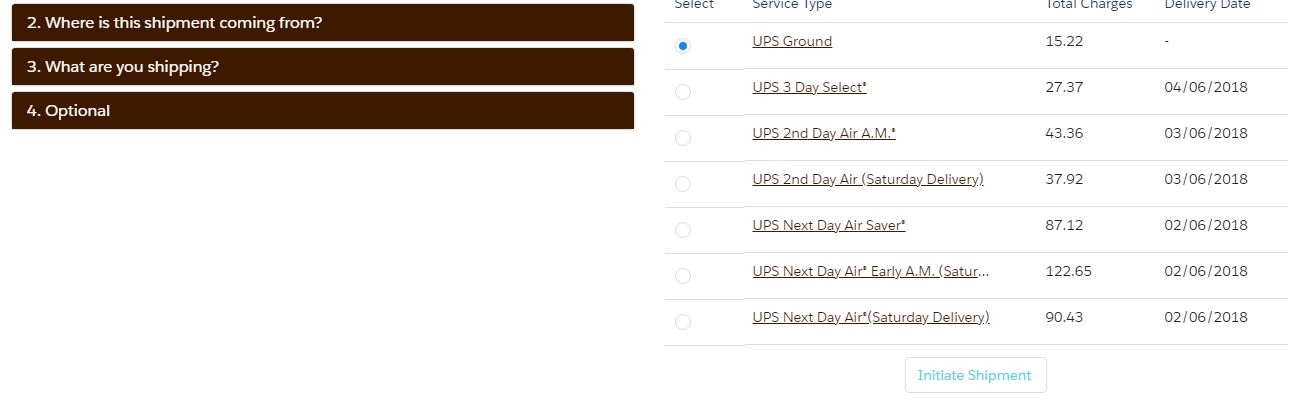
This will successfully ship the package.
- Move to “Process Shipment” where you can see the “Shipment No” and “Shipment Status.”
- Click “View UPS label” to generate the label and “View Invoice” to see the shipping invoice.
- Click on “Cancel Shipment” to delete the shipment.
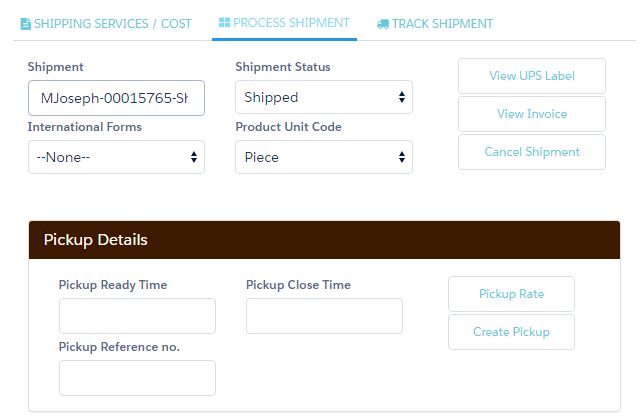
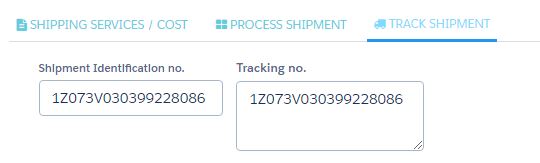
Navigate to the “Track Shipment” tab to track the shipment.