Warehouse
Estimated reading: 2 minutes
367 views
Create a Warehouse Site
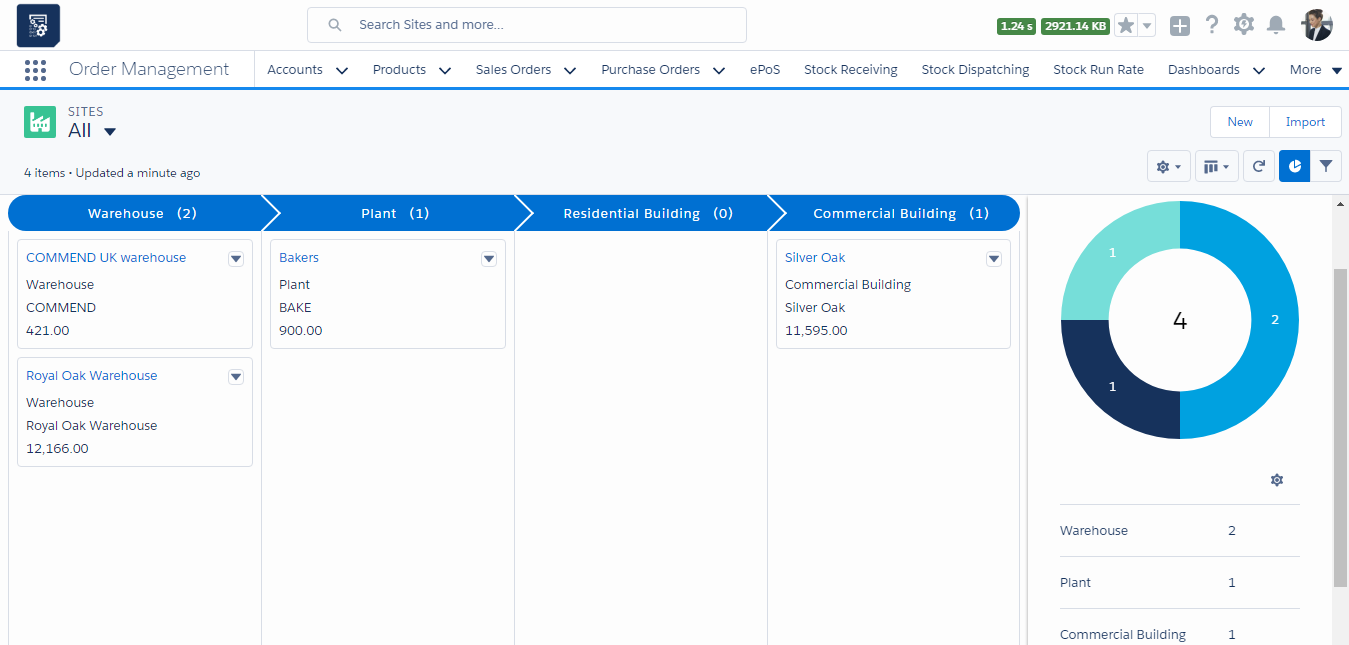
- Navigate to the Order Management app > Sites tab.
- Once in the Sites section, you can track the warehouse sites already filled in and create a new warehouse.

- Click the “New” button to create a new warehouse.
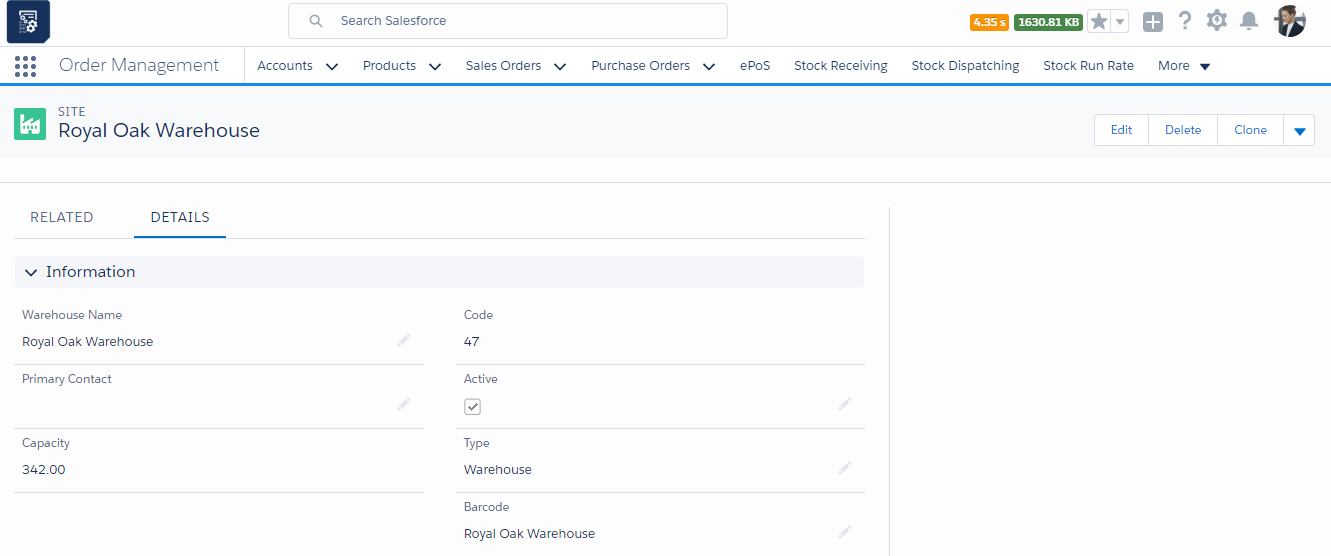
- Enter the name of the warehouse and select the Active checkbox to activate it.
- Enter the Barcode of the warehouse and select the Primary Contact associated with the warehouse.
- Select the type of warehouse, whether a site is of the type Warehouse, Plant or any other type.
- Enter the organisation and business unit of the site and click the “Save” button to create the warehouse site record.

Location
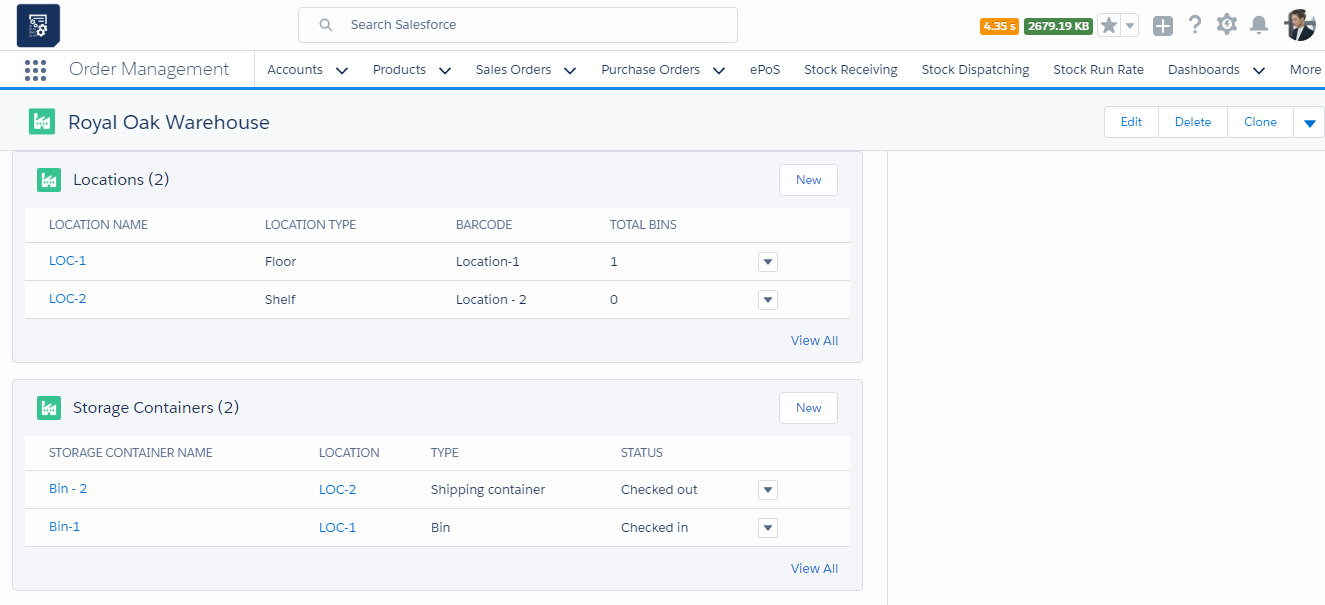
- Navigate to the tab related to the Warehouse site record. Find the list related to Locations.
- Once in the Locations section, you can track the locations already filled in and create a new Location record.

- Click the “New” button to create a Location record
- Enter the Location Name and select the type of location, whether it is a Floor, Bin, Shelf or Cardboard.
- Enter the Floor Number, Shelf Number, Aisle Number, Bay Number or Space Number.
- Enter the Bin capacity, organisation and business unit details. Also, select whether the location holds scrap.
- Select the Active checkbox and click the “Save” button to create the location record.
Storage Containers
- Navigate to the tab related to the Warehouse site record. Find the list related to Storage Containers.
- Once in the Storage Containers section, you can track the storage containers already filled in and create a new Storage Container record.
- Click the “New” button to create a Storage Container record.
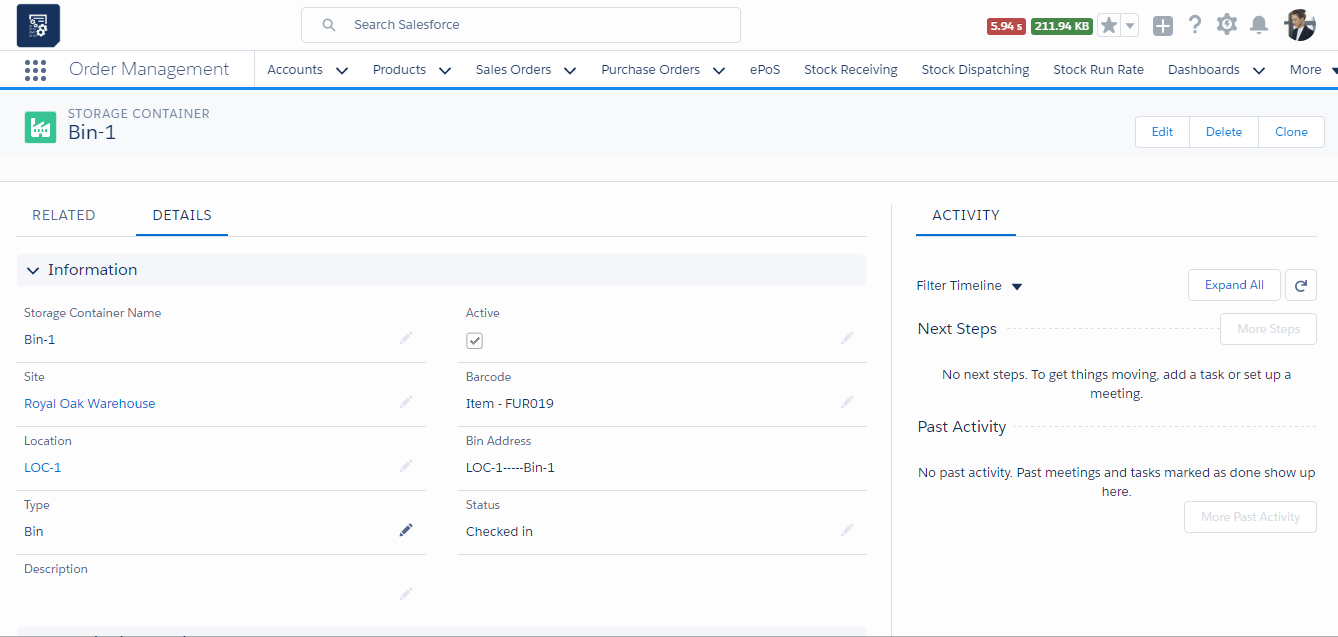
- Enter the Storage Container Name and the Barcode of the container.
- Select the Type of container, whether it is a Bin, Bottle, Bucket or Pallet. Enter the description of the container type in the Description field.
- Select the status of the container and select the Active checkbox,
- Click the “Save” button to create a Storage Container record.


