Purchase Requisition
Purchase Requisition is generated before the purchase order is raised to notify the Purchasing team of the items it needs to order and their quantity. It gives figurative information on the desired goods and services of the organization.
How to Create Purchase Requisition:
John works at a warehouse and finds out that some items in the warehouse has low inventory level and needs reordering from the vendor. So, he requests the purchasing team to create purchase orders for the items to fill the inventory for those items by creating a Purchase Requisition. He follows the steps mentioned below,
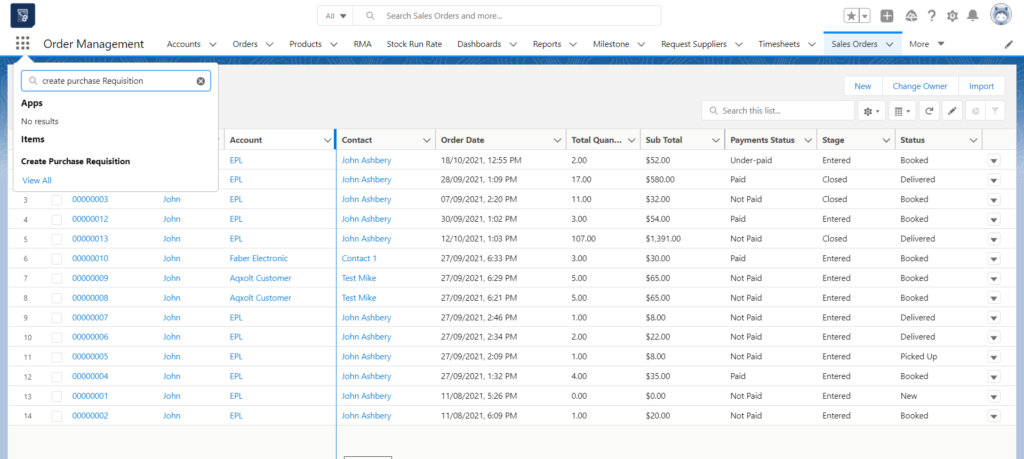
- From the App launcher go to ‘Create Purchase Requisition’ Tab
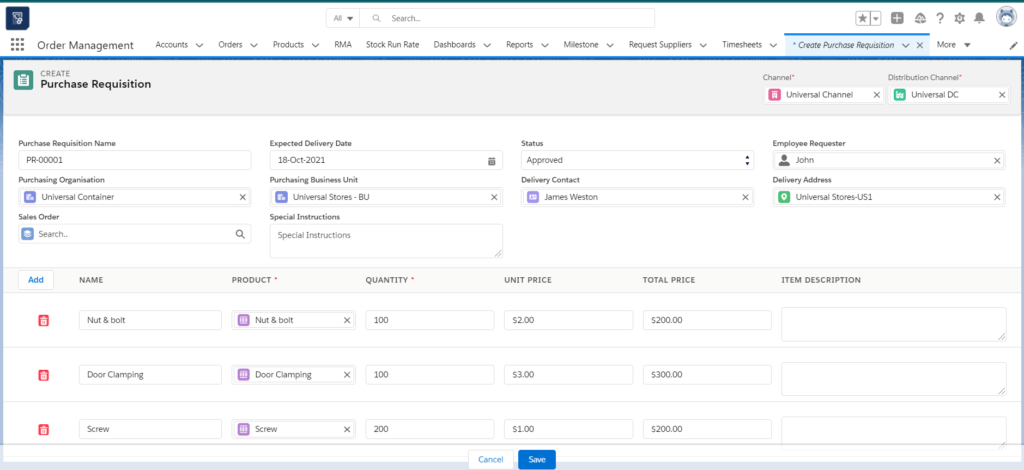
- Purchase Requisition Page opens. Enter the all the details on the page like Purchasing organisation, Expected date, delivery details, Status, Channel, Distribution Channel.
- Click on the ‘Add’ button to add the products, Search the products, enter the quantity required, and unit price. Similarly, add more products using the ‘add’ button again.

- Click ‘Save’ to create the Purchase requisition.
How to Create a Purchase order for purchase requisitions:
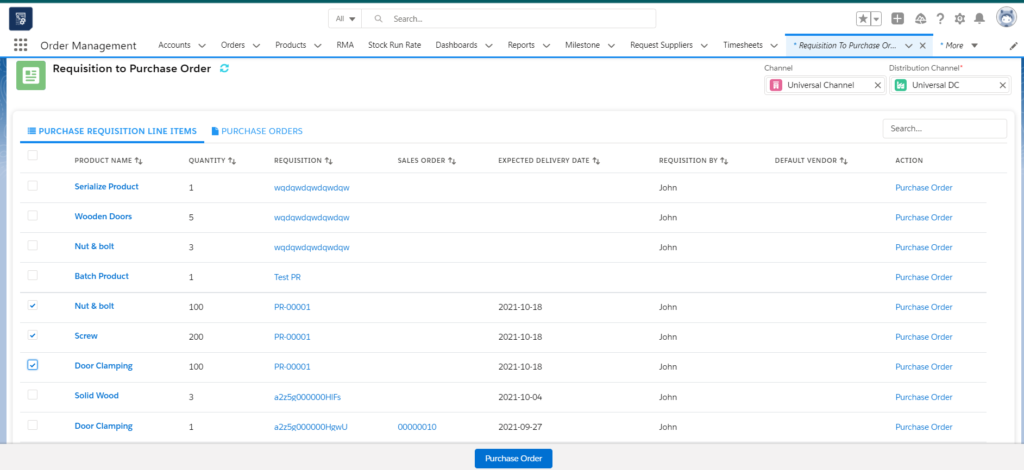
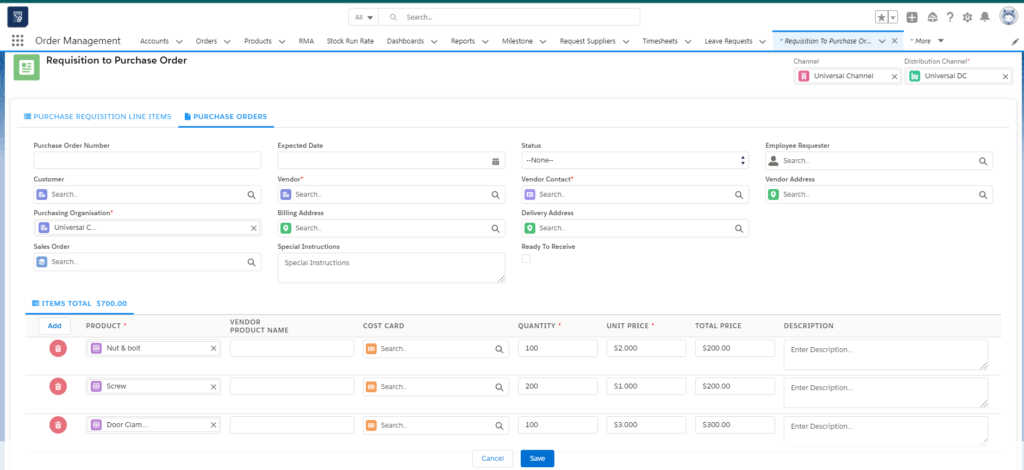
The Purchase orders created by john are listed in the ‘Requisition to purchase order ‘tab and Emily who works at the purchase order department can create purchase orders for the requested items by John. She follows the steps below,
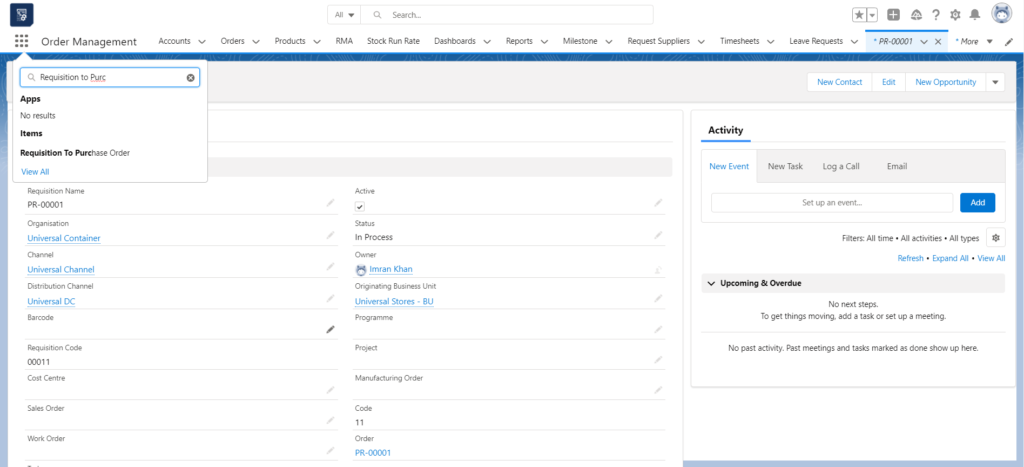
- Search for the ‘Requisition to Purchase order’ Tab from the ‘App launcher’.
- Select the items that need to be added to the purchase order and click the ‘Purchase order’ Button.
- The next screen shows Products selected, Quantities and prices. Enter the vendor details and purchasing details and click ‘save’. The purchase order will be created.
- Now, follow the same procedure to inbound the logistics as mentioned for creating a purchase order.
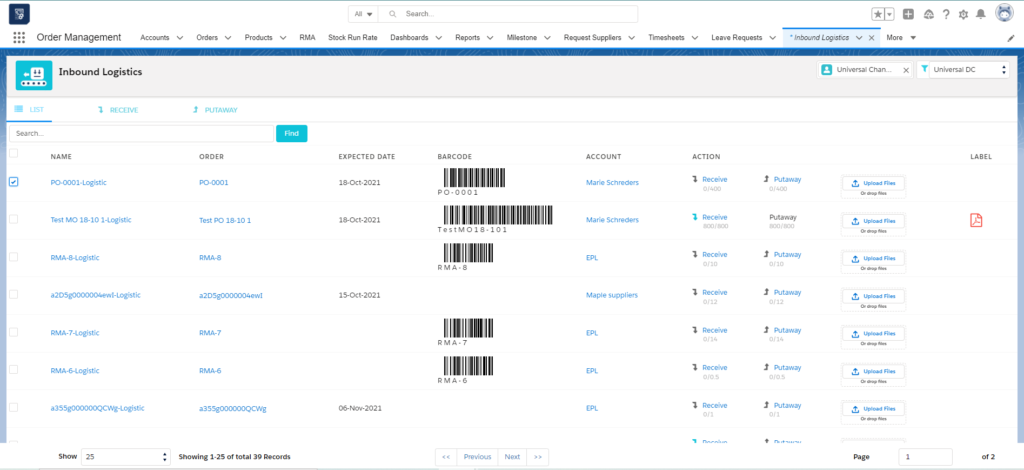
How to Inbound Purchase Order Logistic:
- From the App, launcher go to the ‘Inbound Logistics’ tab
- Select the purchase order logistic and click on the ‘Receive’ tab
- You can see the product name quantity that has to be received.
- Under the ‘Receive’ Box enter the quantity that is being received from the vendor.
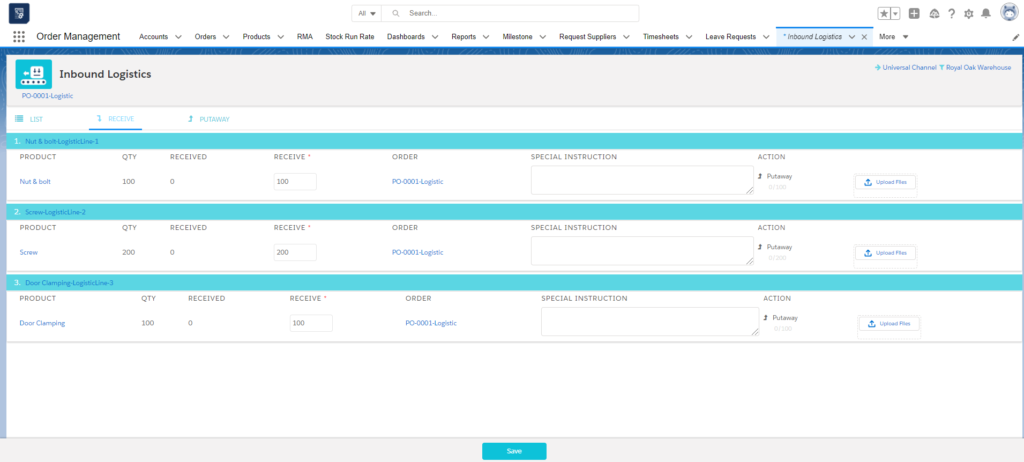
- Enter any instruction in the instruction box.
- Click the ‘save’ button
- Now check the box next to the product received and Click on the ‘Put away’ tab
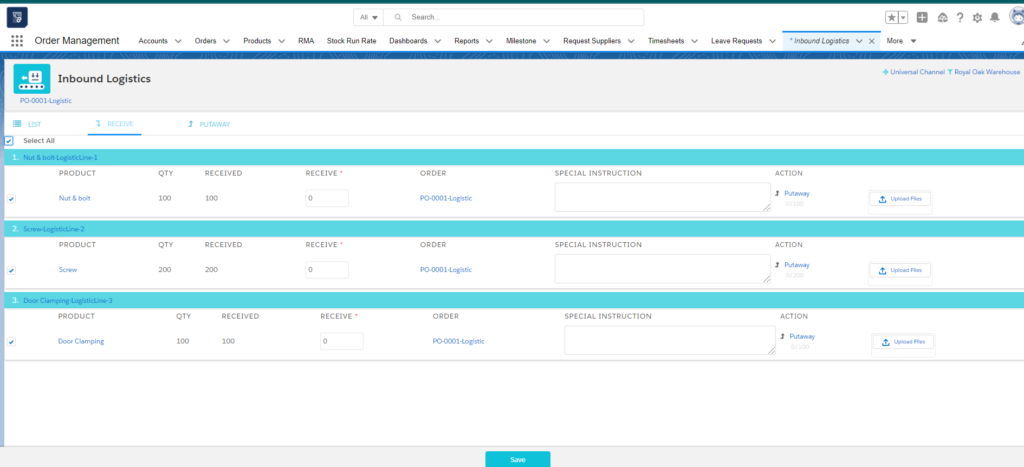
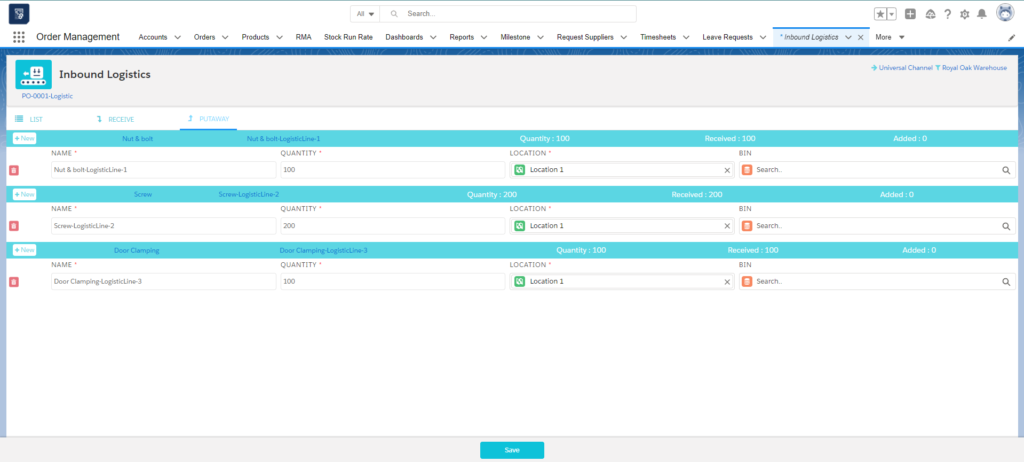
- On the put-away page select the version, location, or bin if required and click the ‘save’ Button.
- Your purchase order is Complete.
Accounts Payable:
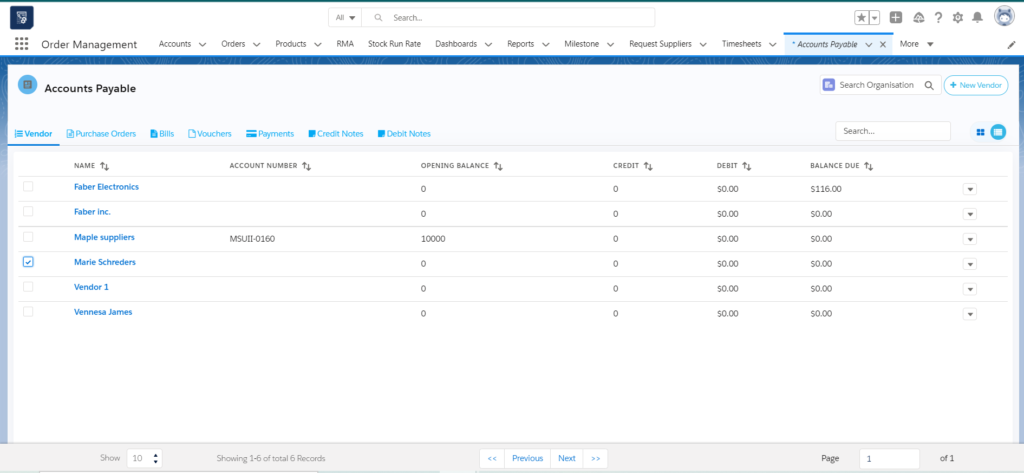
- Go to the ‘Accounts Payable’ tab
- You can see Vendor’s tab where all the vendors will be listed. You select the vendor and select the Purchase order related to that vendor to create a bill.
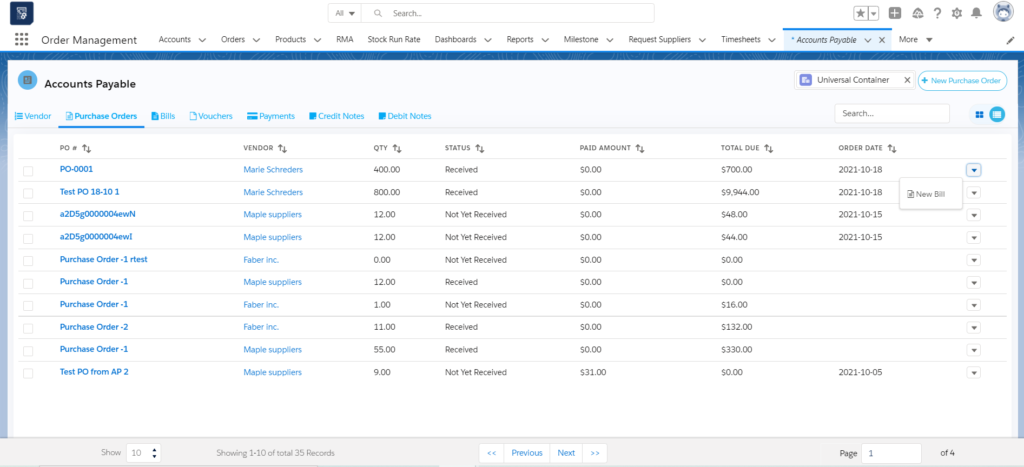
- You can also directly select the Purchase order to create a bill against it from the purchase order tab.
- Select the purchase order to create a bill against it and select the new bill option from the dropdown.
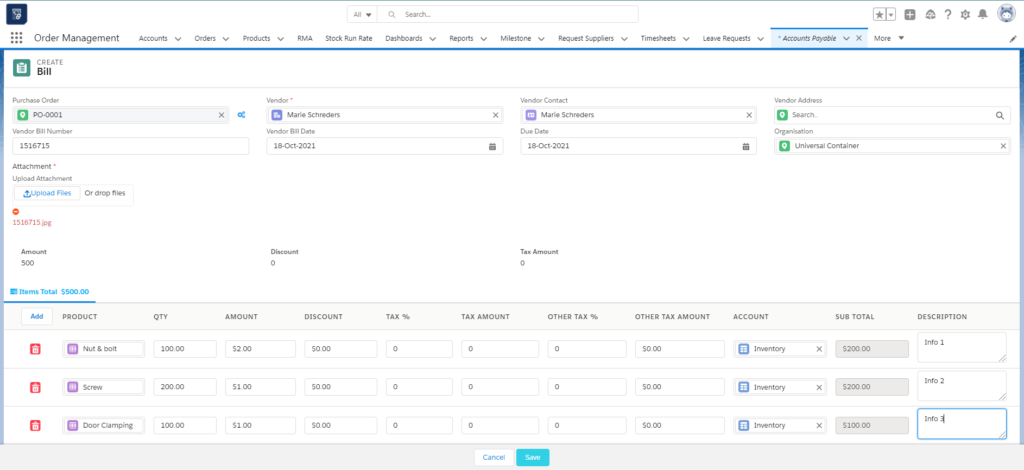
- Create Bill page will appear. Enter the Vendor bill date and Bill number. Also, you can add more products to the same bill by clicking on the ‘Add’ button.
- On the Product line item add taxes and description if required and select the Account to capture the amount paid and click the ‘Save’ button.
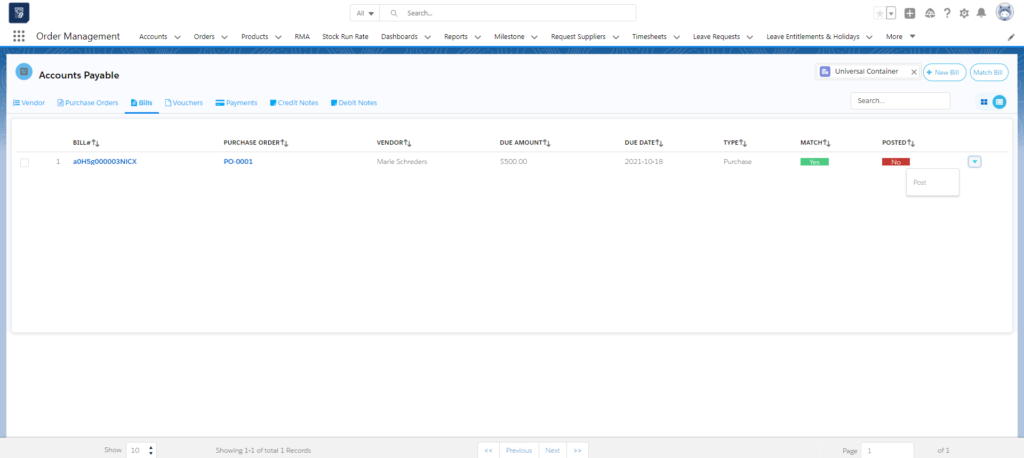
- When Bill is created it will appear on the Bill tab. Now match the bill by selecting the bill and click the ‘match bill’ button on the top right.
- On the match, bill page selects the line item to match and click the ‘save’ button.
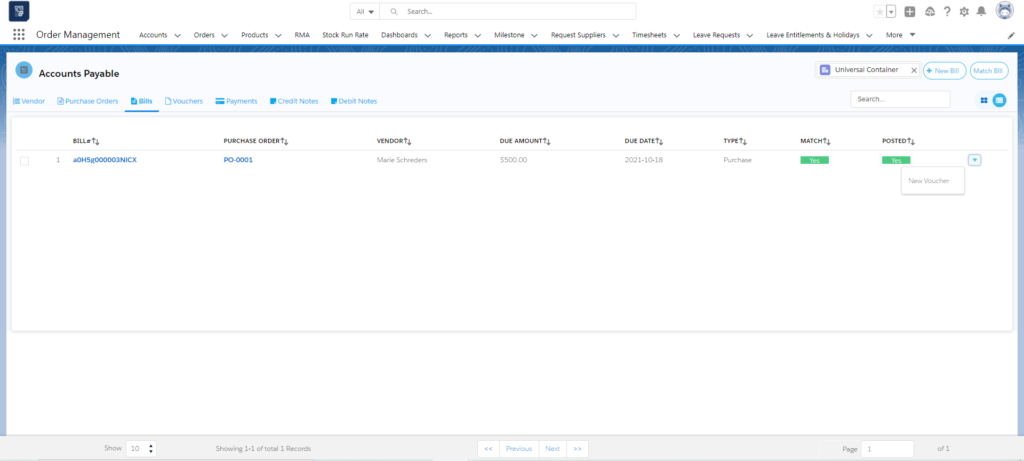
- Now post the bill by selecting the ‘Post’ option from the dropdown against that bill.
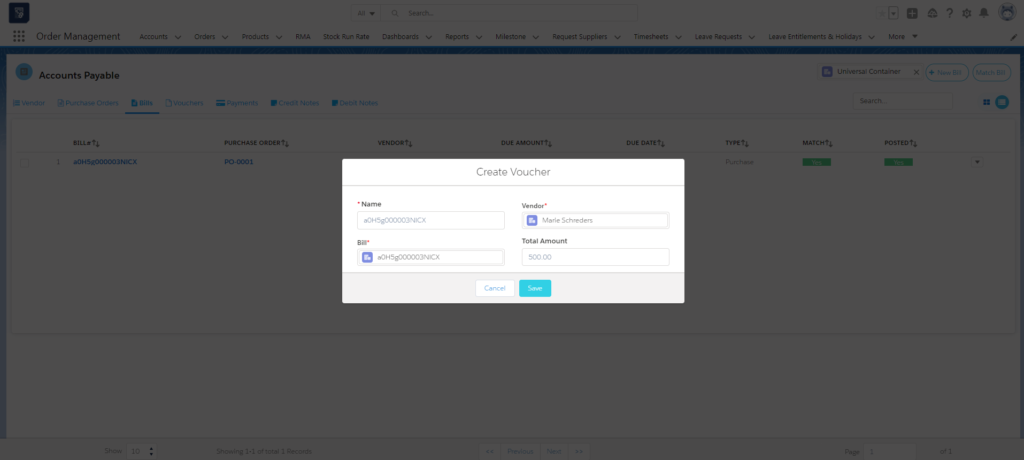
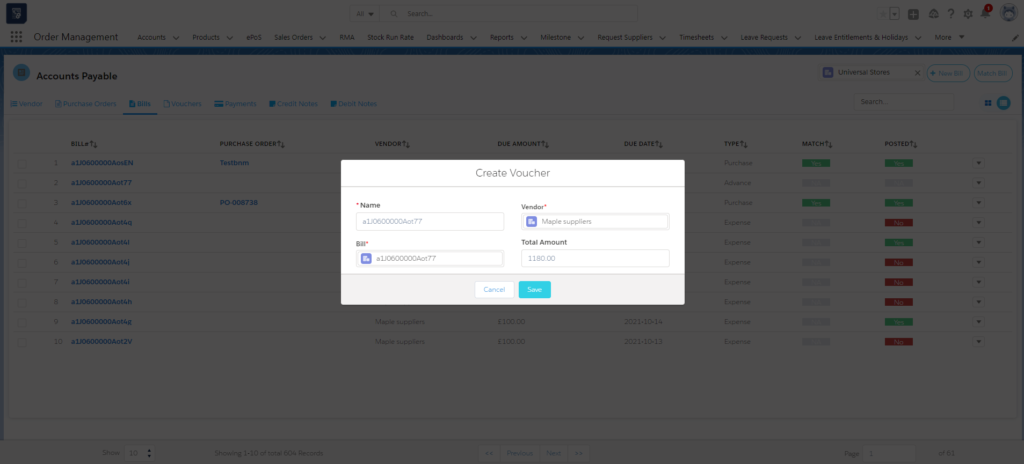
- When it is posted then New voucher option appears. Click the new voucher to create a voucher.
- Click the ‘save’ button to save the voucher.
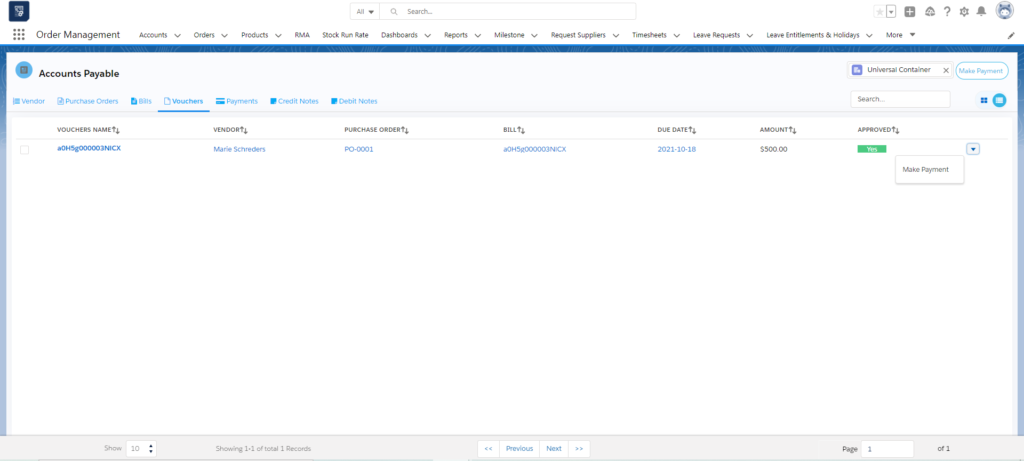
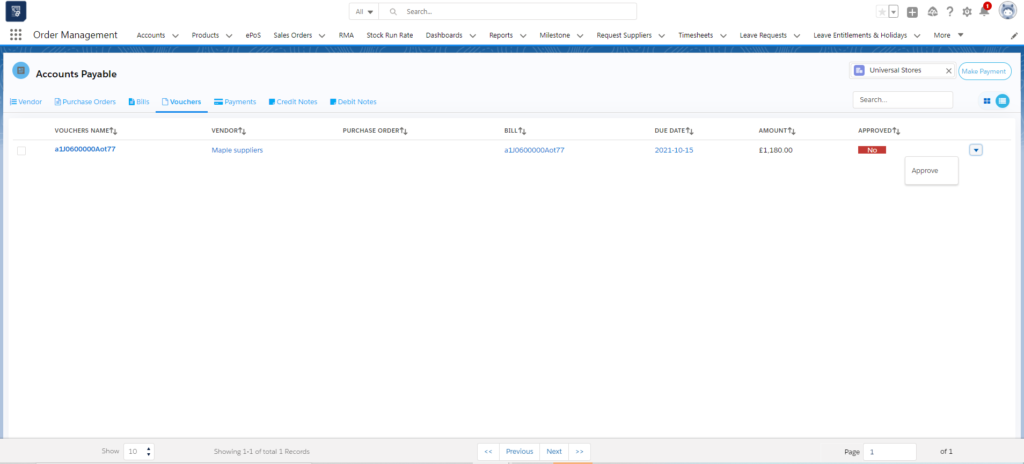
- Now approve the voucher by selecting ‘Approve’ from the dropdown button.
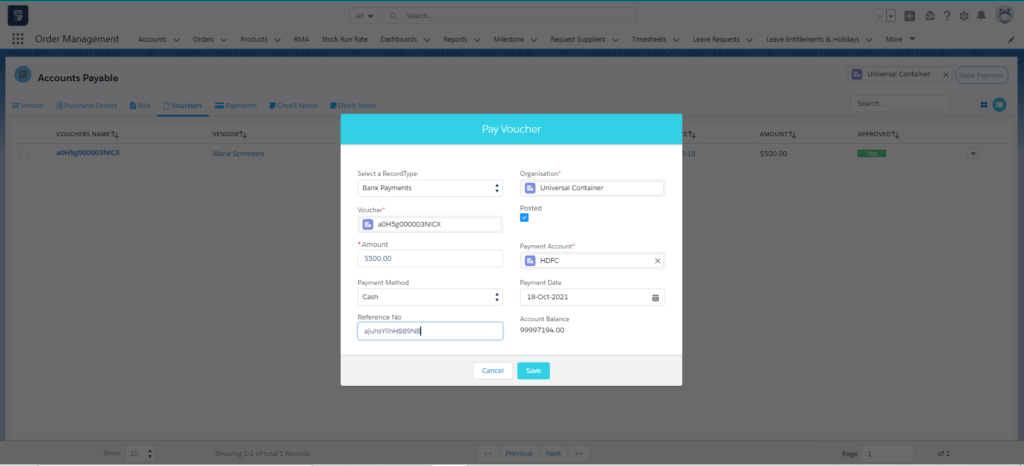
- Click on the ‘Make Payment’ option from the dropdown to make payment for that voucher.
- On the pay voucher pop up. Select payment account, date, reference number and payment method and click ‘Save’. Now your payment is complete.
How to create Advance to Vendor Bill:
- An advance Bill to a vendor bill can be created if you need to make an advance payment to the vendor.
- Go to the ‘Accounts payable’ tab
- Then click on ‘bills’ Section
- On the top right corner, you will see a button called ‘Create Bill’
- When clicking Create Bill. A pop-up comes up. Select the Advance to Vendor option from the pop-up.
- After selecting the ‘Advance to Vendor option’. You will get a create Bill page.
- Enter All the details mentioned on the page and click on the ‘Add’ Button to add products to your bill.
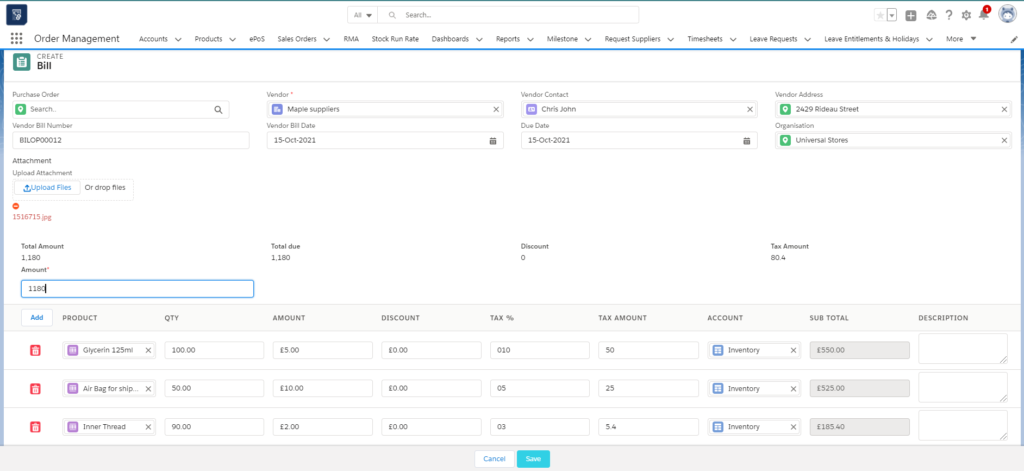
- Select Product, Quantity, Amount and Select ‘Inventory’ Account and Add any Description required.
- You can add more products by clicking on the ‘Add’ button again.
- Click the ‘Save’ Button.
- A Bill will be created and you can view it on the bills tab.
- From the drop-down of that bill select ‘New voucher’
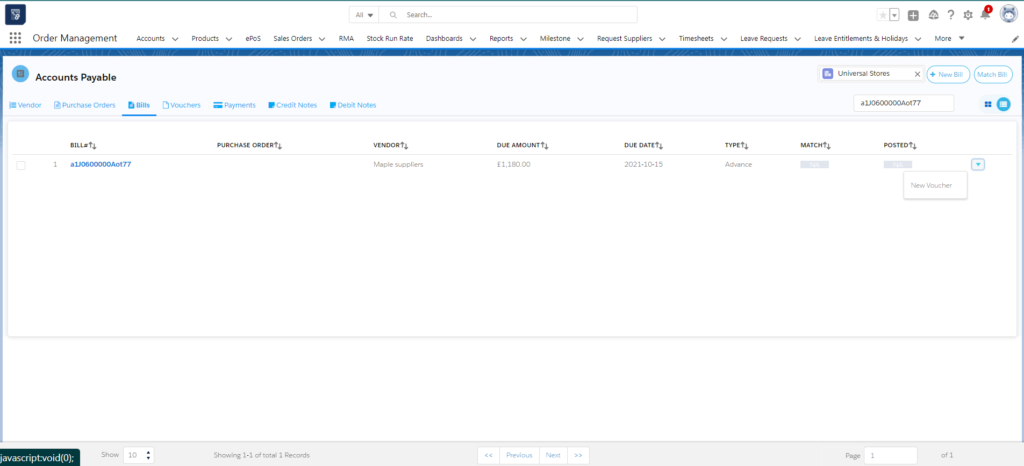
- To Create a voucher against that bill click on the ‘New voucher’ Button
- Click the ‘Save’ button. A voucher will be created.
- Now from the voucher tab select the ‘Approve’ button to Approve the Bill. It will change from Red to green when approved.

- Now from the dropdown select the ‘Make a payment’ Button to pay the voucher created.
- Enter the details like payment account, method, and Reference number if required and click the ‘Save’ Button
- A payment to that voucher will be done.