RMA
A Return Merchandise Authorization (RMA) is part of the process of returning a product to receive a refund, replacement or repair during the product’s warranty period. Returned merchandise requires management after the return and has a second lifecycle after the return.
Creating an RMA
An RMA can be created using one of two methods –
- From the Sales Order tab (record level)
- From RMA tab
- From the Enterprise Point of Sale tab
RMA from Sales Order Tab:
- Select the sales order whose stage is closed to return the purchased product as shown below.
- In the related tab, find the Return Merchandise Authorisation and click the “New” button.

- Enter the RMA code and click the “Save” button to create the RMA record.
- In the related tab, click the “New” button to create RMA line item.
- Enter the organisation details.

- Fill in the RMA number, the sales order line item number, and the quantity to return. Mention the reason for the return.
- Select the Authorise, Is Closed and Ready to Receive checkboxes.
- Click the “Save” button to create an RMA line item record.
RMA through Process Return page:
The RMA must be associated with a sales order and a shipment. This ensures that returns are permitted only for those items that have been shipped. The return process includes the ability to create the shipment flows and tracks those returns in the system.
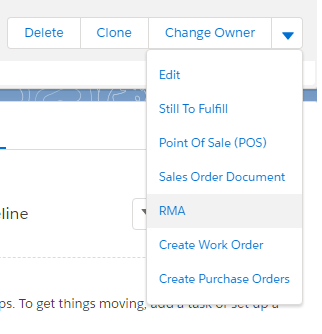
- Select the sales order record to return the purchased products.
- Click the “RMA” button; this will navigate to the RMA page as shown below.
- This will navigate to the RMA page as shown below.
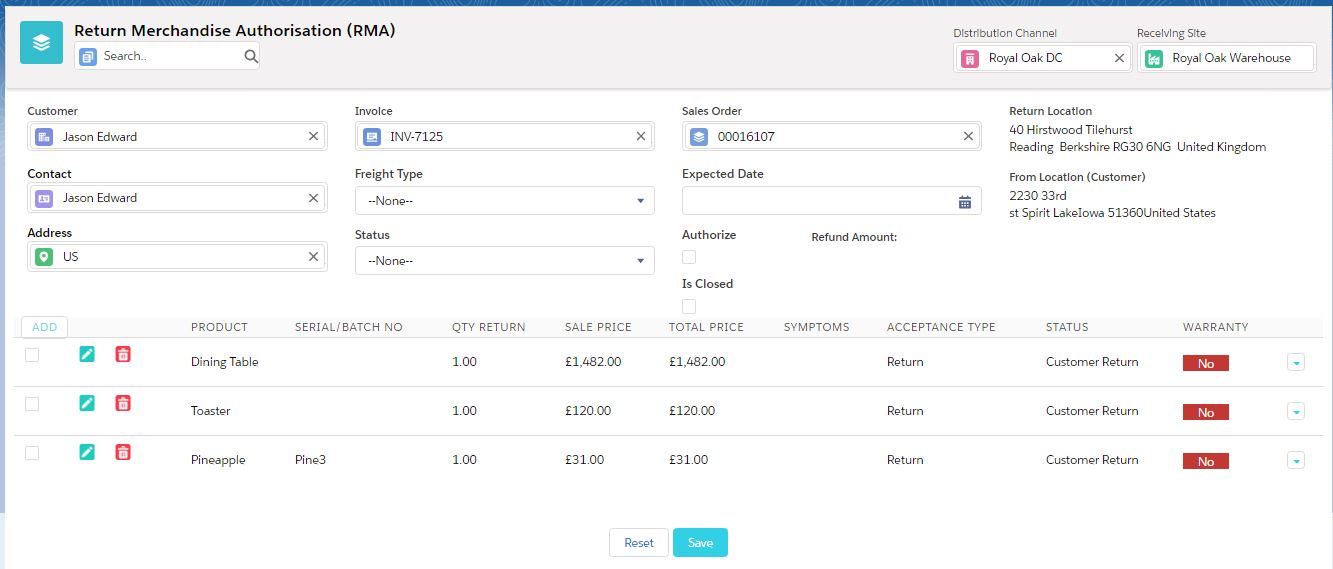
- The system auto-fetches the sales order details and customer details.
- Click the edit icon and enter the desired return quantity and the reason for return.
- Select the return status and click “Save” to create a new return package.
Fields to note:
| Field | Description |
| Added Back to Inventory | A check box that indicates the RMA line item has been returned to inventory for resale |
| Batch/Lot Code | A code assigned to shipment of RMA |
| RMA Line Item Name | Describes the name of the RMA line item |
| Sales Order Line Item | Describes the Original Sales Order Line Item the product for the Customer RMA was purchased |
| Return Merchandise Authorisation | Describes the name of the RMA to which the RMA line item belongs |
| Return Reason | Describes the reason for the item that is returned; essentially helps identify issues or problem with the returned item |
| Return Status | Provides the status of the product being returned |
| Total Deduction | The amount of the product that has been deducted |
| Site Item Inventory Stock | Specifies the total amount of inventory in the site |
| Number of Items In Quality Check | Specifies the total number of returned items in the quality check process |
| Number of Items to Re-sell | Specifies the total number of returned items that are sellable |
| Number of Items Discarded | Specifies the total number of returned items that are discarded |
RMA through Enterprise Point of Sale Tab:
Every RMA is associated with a sales order; this generally includes identifying the order or invoice from the original purchase. The return may involve items that are damaged or simply not wanted. Depending on the situation, the returned item can be re-stocked or discarded. The system allows for a refund of the returned item in the form of either a credit note or loyalty points. The Enterprise Point of Sale tab of ERP Mark 7 helps the sales rep handle the entire sales journey to the return process without having to switch to multiple setups.
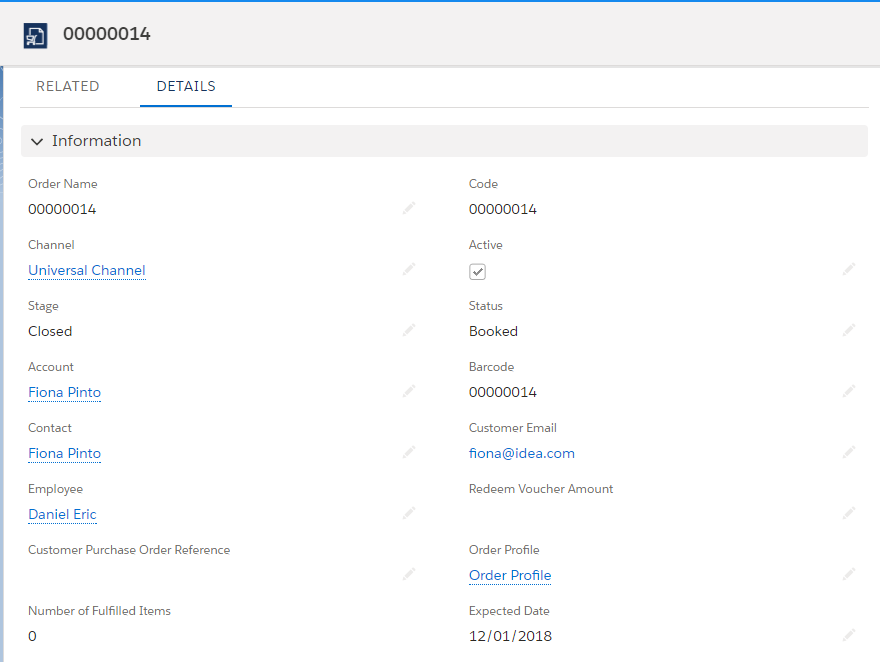
For example, say there was an order from Fiona Pinto, who would like to return an item from sales order number 000014. An RMA is created to complete his return request and a refund record (credit note) is created for the customer.
- Click on the Enterprise Point of Sale tab and fetch the customer and sales order details from the system to initiate the RMA. Refer to the sales order from the Point of Sale Tab section for more details.
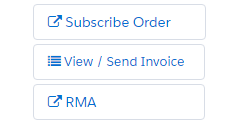
- Click on the “RMA” button; on the right side of the ePoS as shown below.
- The system fetches all the sales order line items.
- Select the sales order line item to return and enter the quantity to return. Specify the reason for the return.
- Select the expected date and status of the RMA, select the authorise checkbox and click the “Save” button to create the RMA line item in the system.