Shipment
Shipping is the key link in the customer’s supply chain, manufacturing, and retail success. Aqxolt ERP provides a complete solution for streamlining the shipping process with an accurate delivery date and time. Aqxolt ERP provides real-time communication between UPS and FedEx.
The shipping management process begins with the following activities.
- Creation of Sales Order
- Creation of Stock Dispatching (Pick, Pack, Ship)
When creating a sales order from the Order console, the shipment cost can be estimated from the delivery section on the Order console.
- Aqxolt ERP supports UPS, FedEx and Internal Shipment.
- Click on the Delivery section.
- Click on UPS or FedEx.
- Based on the ship to address and package size, the system will provide the estimated shipping cost.
Once a sales order is created and ready for shipment, it is available for stock dispatching.
- Click on the Stock Dispatching tab.
- Select the sales order to be shipped.
- Pick all the line items of the order or partial line items.
- Click on Pack to create a package.
- In the package detail section, select the Package Type and Shipment Type.
- During selection of the Package Type Weight, Weight Unit, Length, Width, and Height will be auto-populated.
- Select the shipment type, which could be UPS, FedEx or Shipment.
UPS
Upon selection of the shipment type UPS, the following process continues:
- Enter the Deposit Tag.
- Click the “Save” button to create a Package.
- Click on the ship icon, which will bring you to the UPS shipping page.
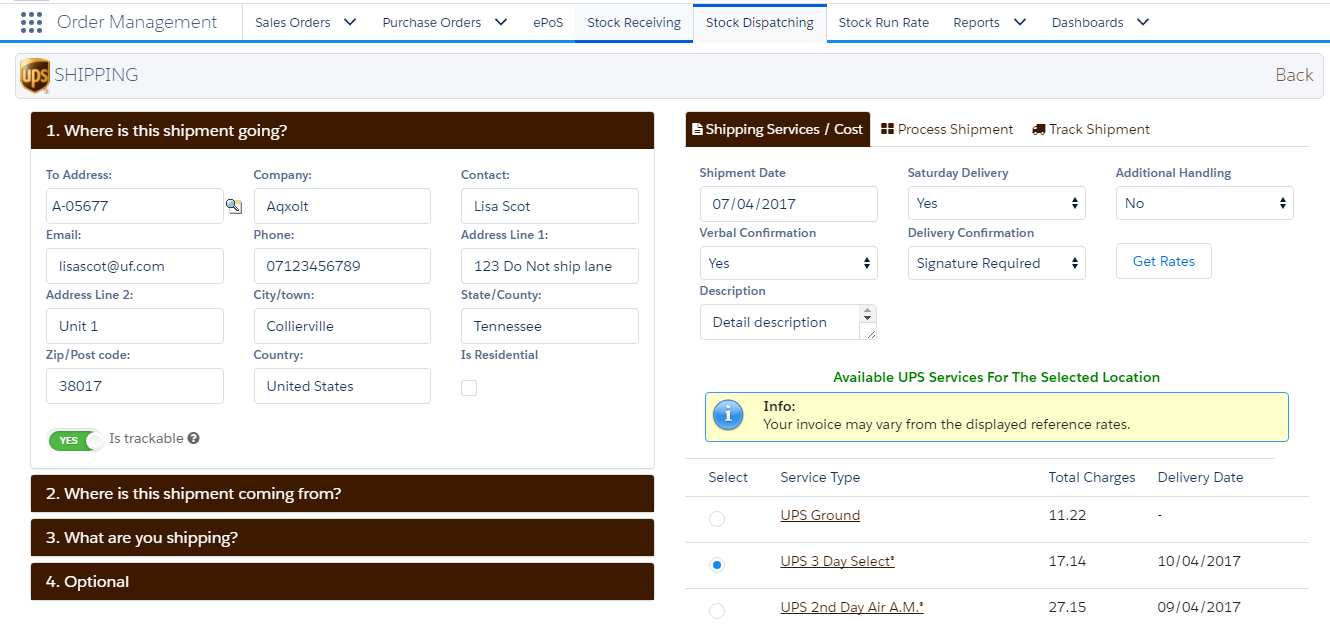
The left side of the shipment page includes shipping details such as where the shipment is going, where it is coming from and the package details.
The right side has 3 sections:
Shipping Services/Cost:
This section populates the Shipping Date and includes other dropdowns to provide details about Weekend delivery, Additional handling, Verbal confirmation, Delivery confirmation and Description.
- Click on the Get Rates button to get the different UPS services to choose from.
- Select a UPS service.
Process Shipment:
This section populates the Shipment name, Shipment status and other details such as International forms and Product Unit Code.
- Click on View UPS Label to generate the UPS label which can be printed and attached to the package.
- Click on View Invoice to view the sales order invoice, which is also printable.
- Clicking on Cancel Shipment will cancel the shipment.
Track Shipment:
Once a shipment is shipped, clicking on the Track Shipment section will generate a tracking number and provide real-time tracking of the package.
FedEx
Upon selection of the shipment type FedEx, the following process continues:
- Enter the Deposit Tag.
- Click Save to create a Package.
- Click on the ship icon, which will take you to the FedEx shipping page.
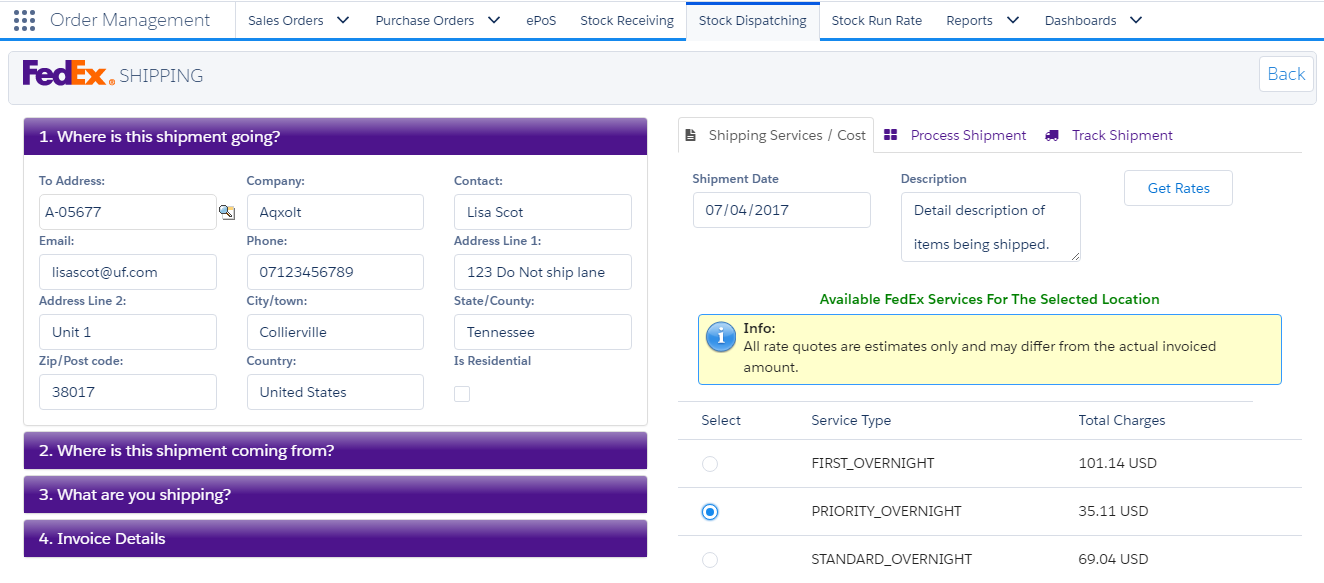
The left side of the shipment page displays the shipping details, such as where the shipment is going, where the shipment is coming from, package details and invoice details.
The tabs on the right side provide the following information:
Shipping Services/Cost:
This section populates the Shipping Date and includes other details, such as Description, Request, and Response.
- Click on the Get Rates button to get the different FedEx services to choose from.
- Select a FedEx service.
Process Shipment:
This section populates the Shipment name, Shipment Status and an Initiate Shipment button.
Click on Initiate Shipment to initiate a shipment.
Track Shipment:
Once a shipment is shipped, clicking on the Track Shipment section will generate a tracking number and provide real-time tracking of the package.
Internal Shipment
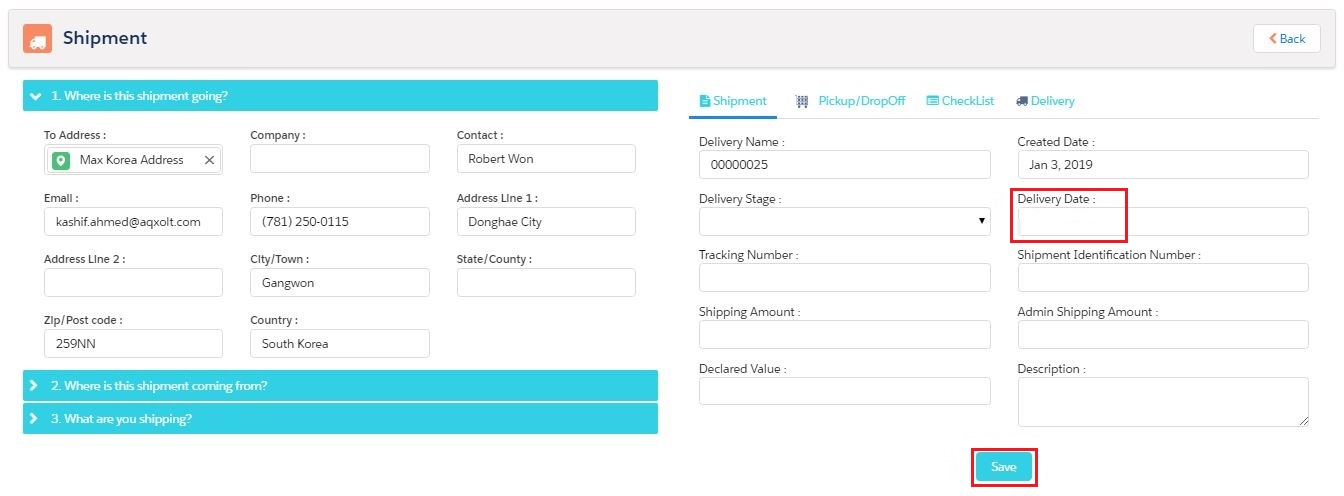
Upon selection of the shipment type Shipment, the following process continues:
- Brings to the Delivery screen where delivery details can be added
- Add Delivery Date and Save, Stage changes to Shipped and Delivery Name becomes Opportunity name.
- This creates a Shipment record which can be seen on the sales order and Logistic order related list.
Delivery Flows:
- Navigate to the Pickup/DropOff tab to create delivery flows.
- Click on New and fill in the name, status and other details if available and Save.
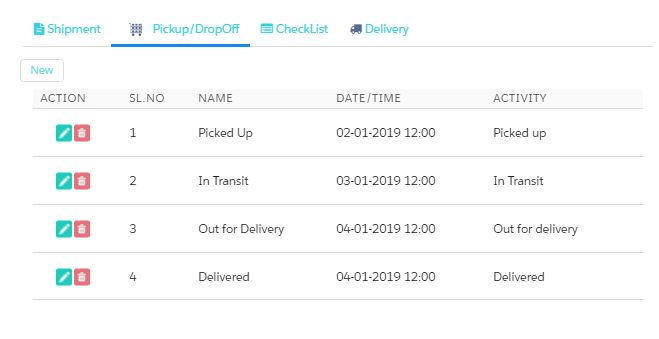
-
- Picked Up and Delivered are the flows created as shown above.
Checklist:
- Navigate to the Checklist tab to verify the no of items delivered against the ordered Quantity.
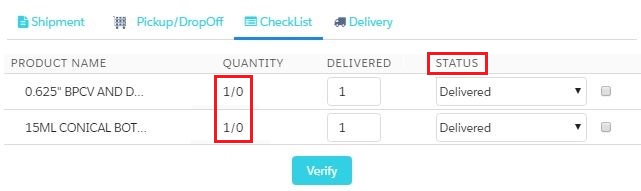
- Select the checkbox and click verify if all the Qty is delivered.
- Verifying the items will make the line items noneditable.
- By default the Delivered is set to ordered qty and status is to Delivered. The delivered Qty can be changed based on the physical delivery Qty and the status will be changed to Item(s) Missing if ordered qty and physical delivery qty does not match.
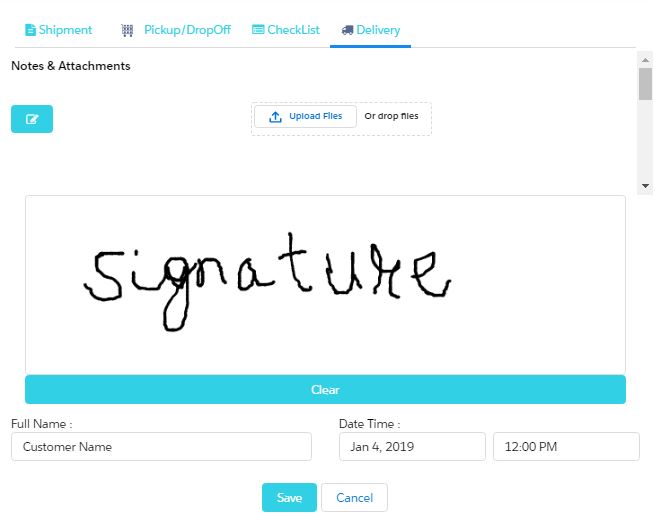
- Delivery Person upon reaching the delivery point navigates to the Delivery tab and captures customer signature, Name, Delivery Date and Time.
- Attachments such as photos or other documents can also be added.