Stock Take
STOCK TAKE – Manage Variances in the Inventory
Stock Takes is the physical verification of the quantities and conditions of items held in an inventory or warehouse. This may be done to provide an audit of existing stock. It is also the source of stock discrepancy information.
Steps: –
- Select the ‘Warehouse Management’ App from the App Launcher. Find the Stock Take tab in the Navigation Bar.
Or
- Find the Stock Take tab from the App Launcher.
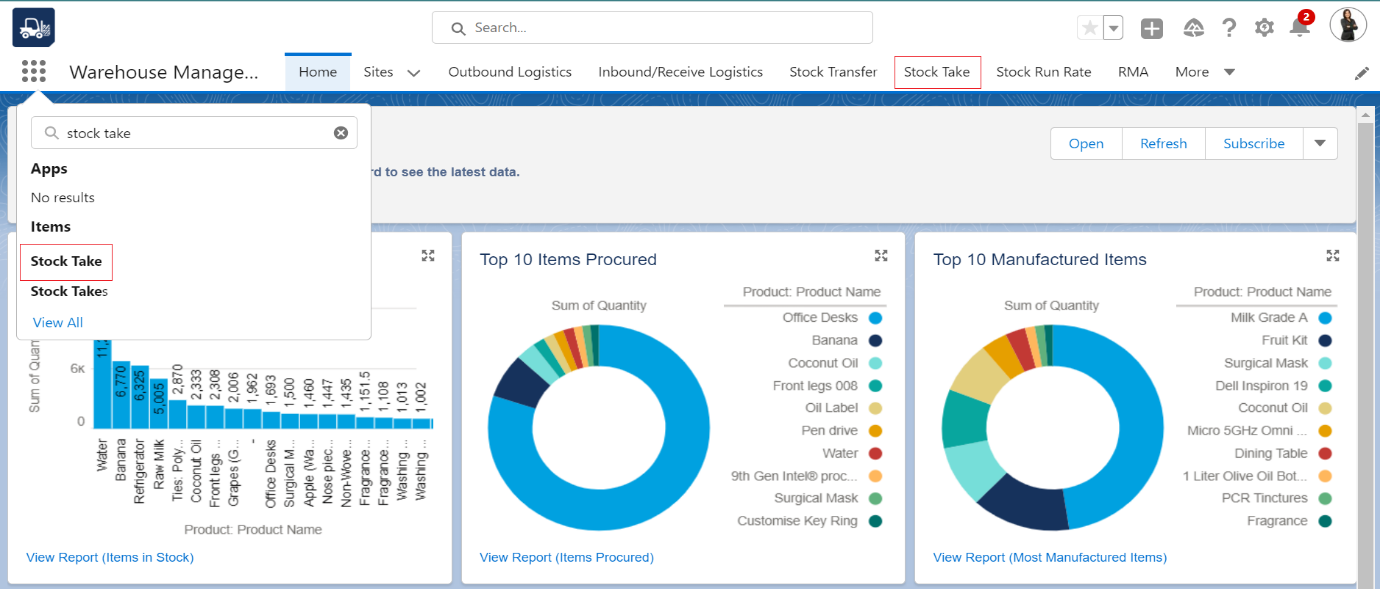 Figure 01 – Stock Take Tab
- After clicking on the Stock Take tab, the system will take the user to the Stock Take home page where the user can see all the created Stock Takes records.
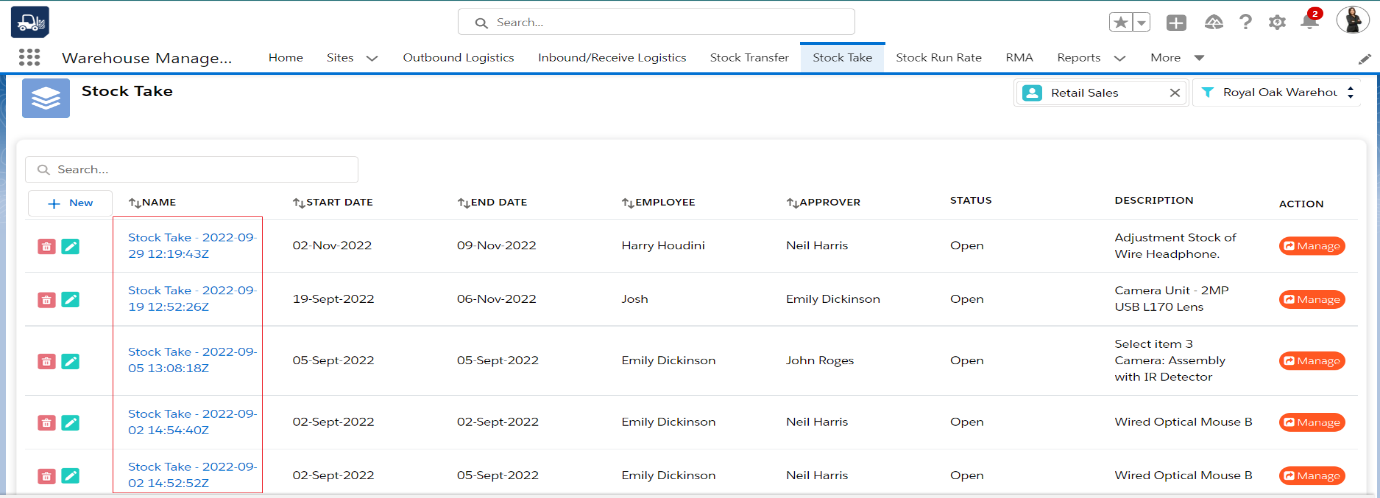 Figure 02 – stock take records
- The user can use the search bar to search any Stock Take record.
OR
The user can use the scanner to find the Stock Take records.
- The User can also filter out the Stock Take records that belong to the different Channels and the Site/Warehouse.
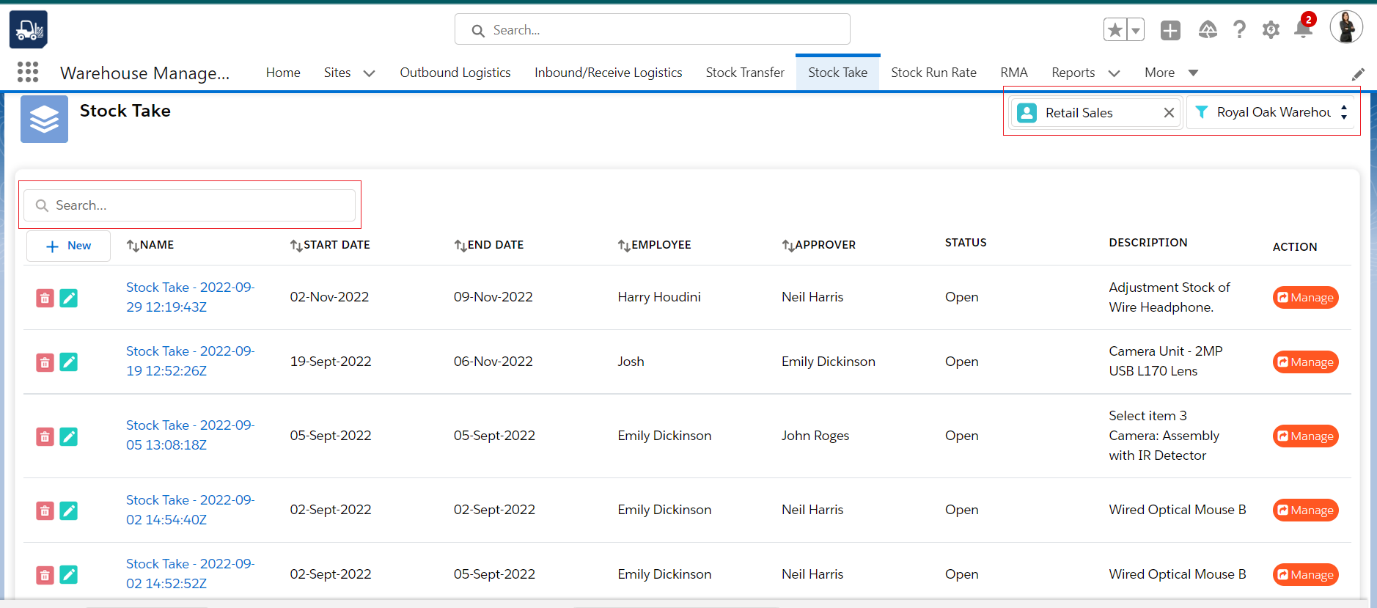 Figure 03 – search/filter stock take records
- The user can update the created Stock Takes by clicking on the ‘Manage’ button or by clicking on the name of ‘Stock Take’.
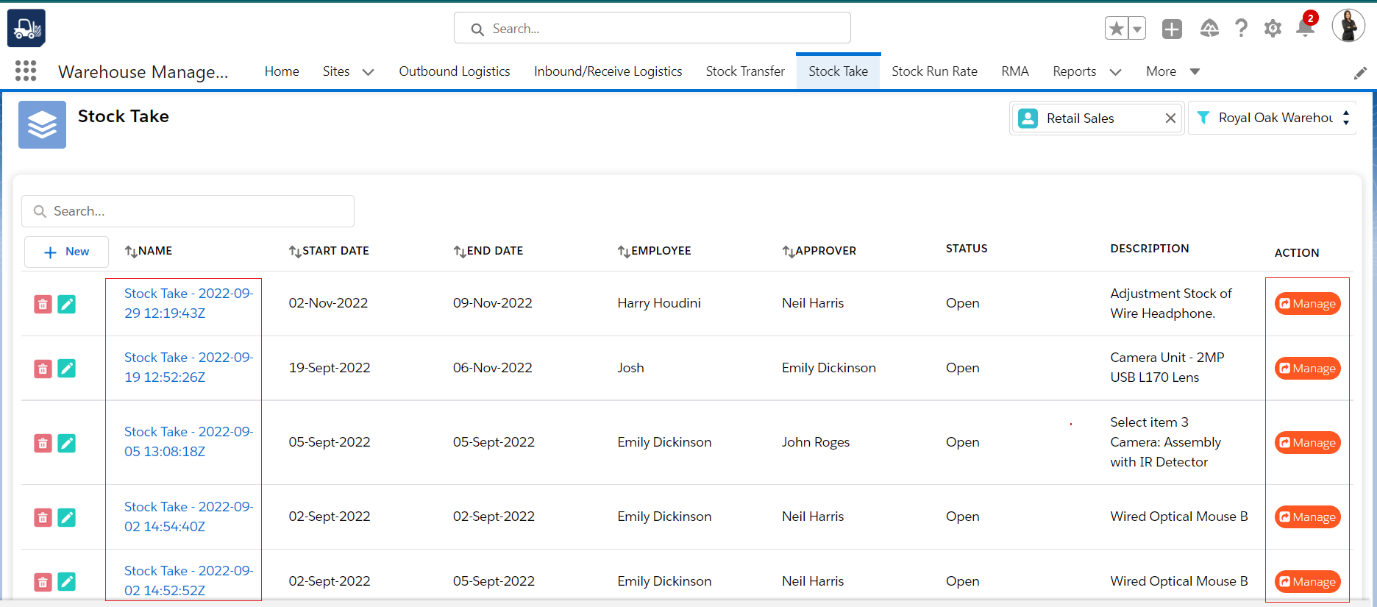 Figure 04 – Manage/Update stock Take record
Note: – User can change the details of the Stock Takes record and can Add, Edit, and Remove the Stock Take Line items using the Manage functionality.
- To create a new stock take record, the user needs to click on the ‘+ New’ button or scan the barcode of the NEW
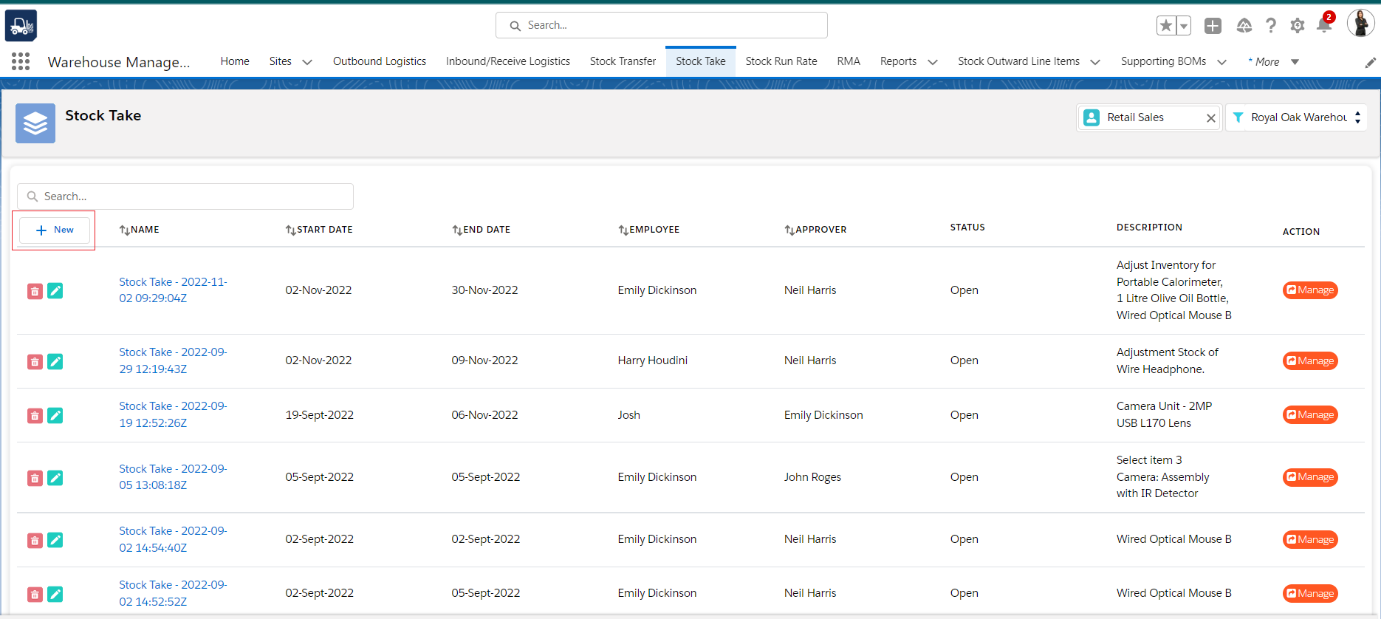 Figure 04.1 – + New button

Figure 04.2 – Barcode of New button
- After clicking on the +New button or scanning the barcode of the NEW button, the system will take the user to the new Stock Take creation page.
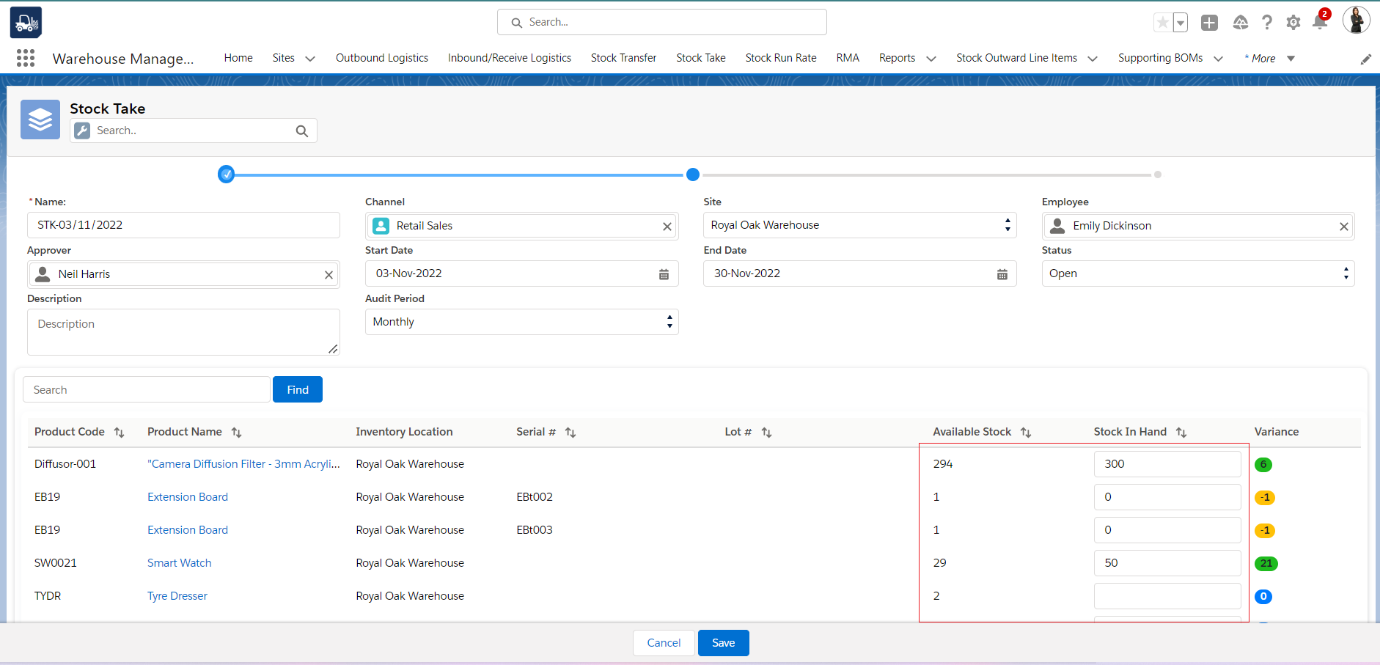 Figure 05 – Enter the variances
- Stock Take details like Name, Channel, Site, Employee, Approver, Start Date and End Date, Status, and Audit Period (Monthly) will be auto-selected.
- If the Users want to change any records, they can manually select/change the records.
- Also, the users can use scanner to scan the barcode of different channels and Sites.
- Once the user selects the records from the detail section, the user needs to enter the ‘Stock In hand’ quantity, to adjust the stock for the required Stock Take Line items and click on the ‘Save’ button to create a new Stock Take record.
Note: –
- To create the Stock Inward Line items or to increase the stock for any product, the user needs to enter more quantity than Available Stock in the Quantity in Hand See in the above screenshot, the user needs to do the same process we have done for Smart Watch and Camera Diffusion Filter – 3mm Acrylic product.
- To create the Stock Outward Line items or to decrease the stock for a product, the user needs to enter less quantity than Available Stock in the Quantity in Hand
See in the above screenshot, the user needs to do the same process we have done Extension Board.
- The user can Scan the Product Code directly or Scan the Batch/Lot Number or Serial Numbers to find the Products in the Line-Item section instead of the search bar.
- If you want to do an Audit for the Stocks, select the Audit Period as ‘Quarterly’ or ’Yearly’, enter the actual quantities in the ‘Stock in Hand’, leave other products as it is and click on Save.
The system will keep/adjust the stocks for only those products whose quantity was entered in the Quantity in Hand field while creating the stock take, and the system will create the outward line-item records for the remaining products and Stock will decrease automatically.
- Once the user clicks on the Save button the system will create the Stock Take record.
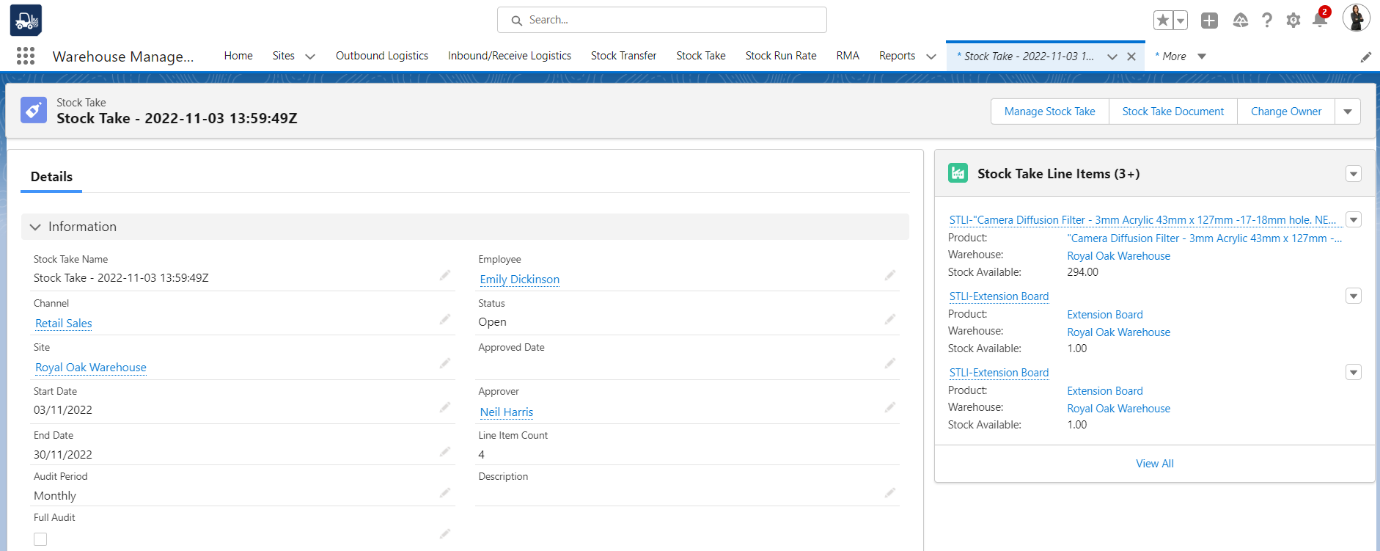 Figure 06 – Created Stock Take record.
Output Summary: Once the ‘Stock Take’ record gets created, based on the variance (entered Stock in Hand quantity) the Stock Inward and the Stock Outward records will be created.

