Customer Accounts, Contacts and Address
A. Customer Account.
A Customer Account is a standardized record in a business system representing an individual or organizational customer. It consolidates essential data to support commercial operations, enabling the creation and management of quotes, orders, invoices, credit notes, and other transactional documents to streamline sales and financial processes.
Accounts can have multiple Contacts and Addresses associated with them.
Steps for creating Customer Account are as follows –
1. Log in to Salesforce.
2. Navigate to the Epos screen using the App Launcher or find the tab in the app navigation menu.
3. From the Epos screen, go to the Accounts section.

4. To create a new customer account, click on the Account button.

5. On the account creation screen, enter all the required fields such as Name, Account Profile, Order Profile, Company, and other optional details.
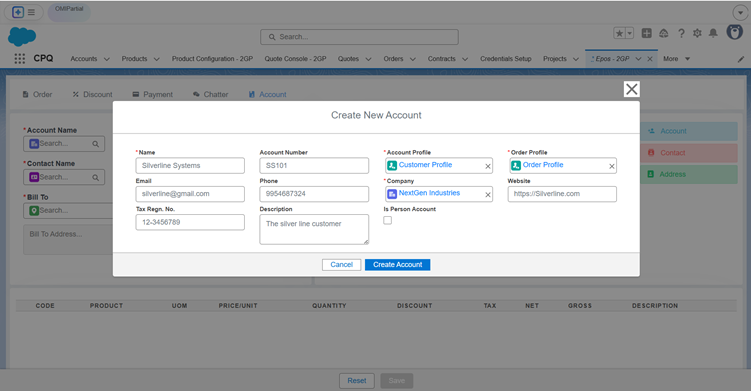
6. Click on the Create Account button.
Note: Customer accounts are used to raise Opportunities, Quotes, Orders/Sales Orders, etc.
Once the account is created, it will be selected in the Account lookup on the Epos screen.
Account Field Description:
- Name: Name of the account
- Account Number: This is an optional field, but you can enter a unique account number for the customer.
- Account Profile: The account profile contains the price book and channel associated with the customer.
- Order Profile: The order profile includes the account profile, channel, and price book associated with the customer.
- Tax Reg No: A unique number given to a business or person by the government to identify them for tax purposes.
- Email: Email address of the customer.
- Phone: Phone number associated with the customer.
- Company: The company to which the customer belongs. It can be the same as an Account name in certain scenarios.
- Is Person Account: The account represents an individual.
- Website: The website of the Customer Company.
B. Contact
Contact is a standard object that represents an individual person associated with an Account. Contacts are used to store and manage information about people within a company/organization. Each contact is linked to an Account, so an Account must be created before creating a contact. Multiple contacts can be associated with a single Account.
Follow the steps below to create a Contact –
1. From the Accounts section, click on the Contact button.
Note: The account you created should be auto populated on the contact screen. If you already have an existing account, select it from the lookup to create a contact for that account.
2. On the contact creation screen, enter all the required fields such as First Name, Last Name. Additional optional details, such as Company, Email, and Phone, can also be included. The Account field will be automatically populated.
3. Check the Is Primary checkbox to designate the contact as the primary one (if applicable).
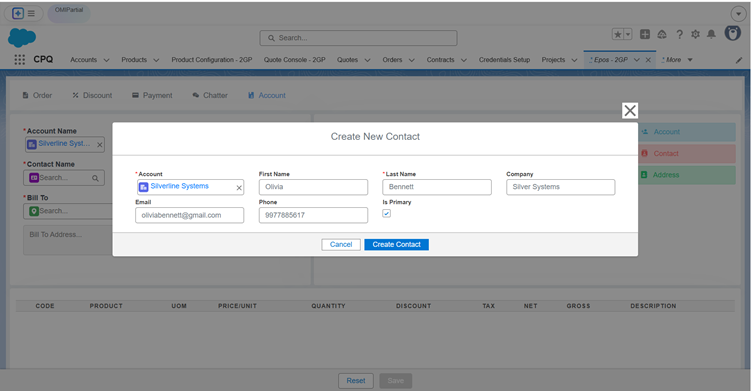
4. Click on the Create Contact button.
Note: There can be multiple contacts of an account, and you can mark one of them as Primary.
The contact will be automatically selected in the Contact Name field on the Epos screen.
Contact Field Description:
- Account: Name of the account for which you want to create a contact.
- First Name: First name of the contact.
- Last Name: Last name of the contact.
- Company: The name of the company the customer is associated with.
- Email: Email address of the contact.
- Phone: Phone number of the contact
- Is Primary: Select the Is Primary checkbox if you want this contact to be the primary contact when creating an order.
C. Address
Address refers to the physical location information associated with various records, such as Accounts. It typically includes details like street address, billing address, shipping address, city, state or province, postal code, and country. This information helps organizations track the geographical locations of their customers or business partners.
Note: In this context, addresses belong only to Accounts.
Follow the steps below to create an address:
1. From the Accounts section, click on the Address button.
Note: The Account and the Contact you created should be auto populated on the address screen. If you already have an existing account contact, select it from the lookup to create an address for that account.
2. On the address creation screen, enter all the required fields such as, Address Line 1, City, Postal Code, Country, State etc. The Account and Contact fields will be automatically populated.
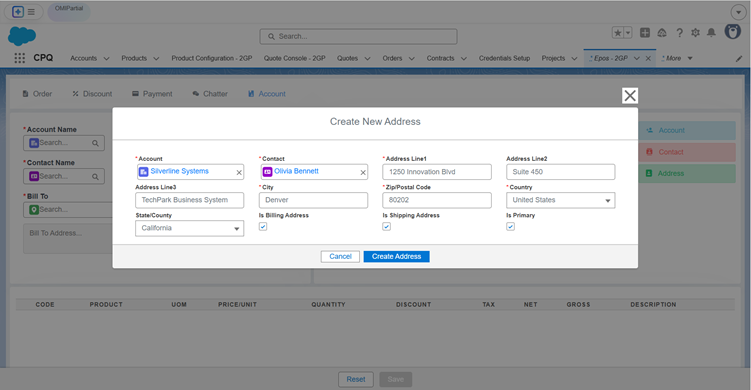
Note: Check the Is Billing Address checkbox to mark the address as a billing address, and check Is Shipping Address to mark it as a shipping address. If the address is marked as both, it will be considered for both billing and shipping purposes.
3. Click on the Create Address button.
The address will be automatically populated in the Bill To and Ship To fields on the EPOS screen based on the selected account and contact information.
Note: After adding the Account, along with its Contact and Address, users can utilize the Add Products feature to complete the order creation process.
Primary Function of Address – The Billing Address is required to apply Tax on the Quotes, Orders, and the Shipping Address is used to calculate Shipping Rates between the company address and the customer address.
Address Field Description
- Account: The account for which you want to create an address.
- Contact: This field will be auto populated when selecting the account.
- Address Line 1: Is the main street address.
- Address Line 2: Adds details like apartment or building info.
- Address Line 3: includes optional extras like landmarks or care-of information.
- Is Billing Address: Indicates that this is the billing address for an order.
- Is Shipping Address: Indicates the shipping address of the customer for the shipment process.
- Postal Code: The postal code of the city.
- Is Primary: Select this checkbox if you want this address to be the primary address when creating an order.
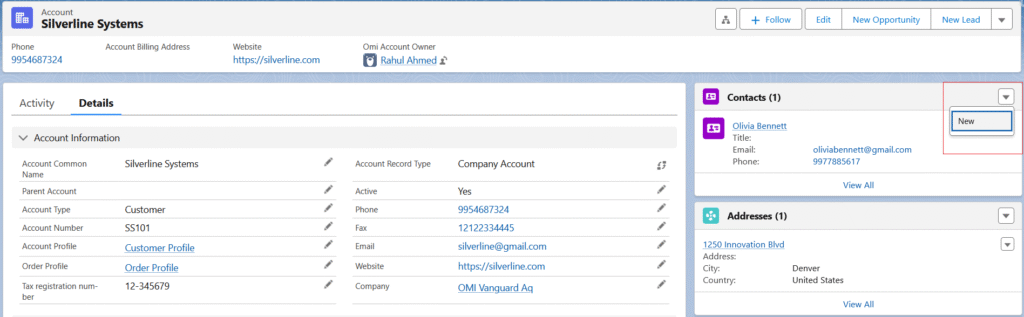
A Customer Account, along with its related Contacts and Address, can also be created at the record level.
Follow these steps to create a Customer Account from the record level:
- From the App Launcher, find and select the Accounts tab.
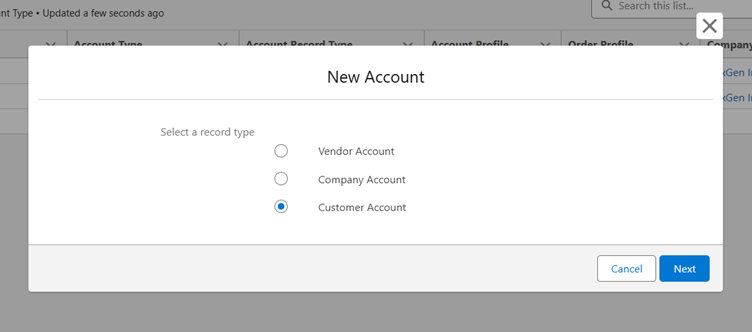
- Click the New button and select the Customer Account record type and click on Next button.
- Enter all the required details and click Save.
- Now, Contacts and Addresses can be created for the customer from the related lists on the customer’s record.