Purchase Order
The purchase order is an electronic document that is sent by the customer to the seller to request for supply of certain goods and services. It is the first official communication from the buyer, containing the details of the specific items required, their quantity, and the prices agreed upon along with other details that may be required for the goods and services.
The purchase orders are used by the seller to prepare the items for shipment. The purchase orders are also important in providing the seller with information about the buyer to track sales records, authorize shipments and plan properly the shipment methods in line with the customer’s needs. This helps a business to grow and reach more customers by simplifying how you make sales. It makes it easier to make purchase orders and also improves the efficiency of the seller’s ability to account for stock and manage sales.
Creating a Purchase Order
In the purchase orders, one is able to view and edit the existing purchase orders, create new ones, and also import a new document from the existing documentation. When creating a new purchase order, the following steps are followed:
- From the App, launcher go to the ‘Create Purchase Order’ Tab.
- Select type of purchase order and click ‘Next’ button.

- Standard purchase order.
- Enter all the details of the Purchase order such as Expected date, status, Employee requester, vendor, vendor contact, Vendor address, Purchasing company, Billing, and delivery address.
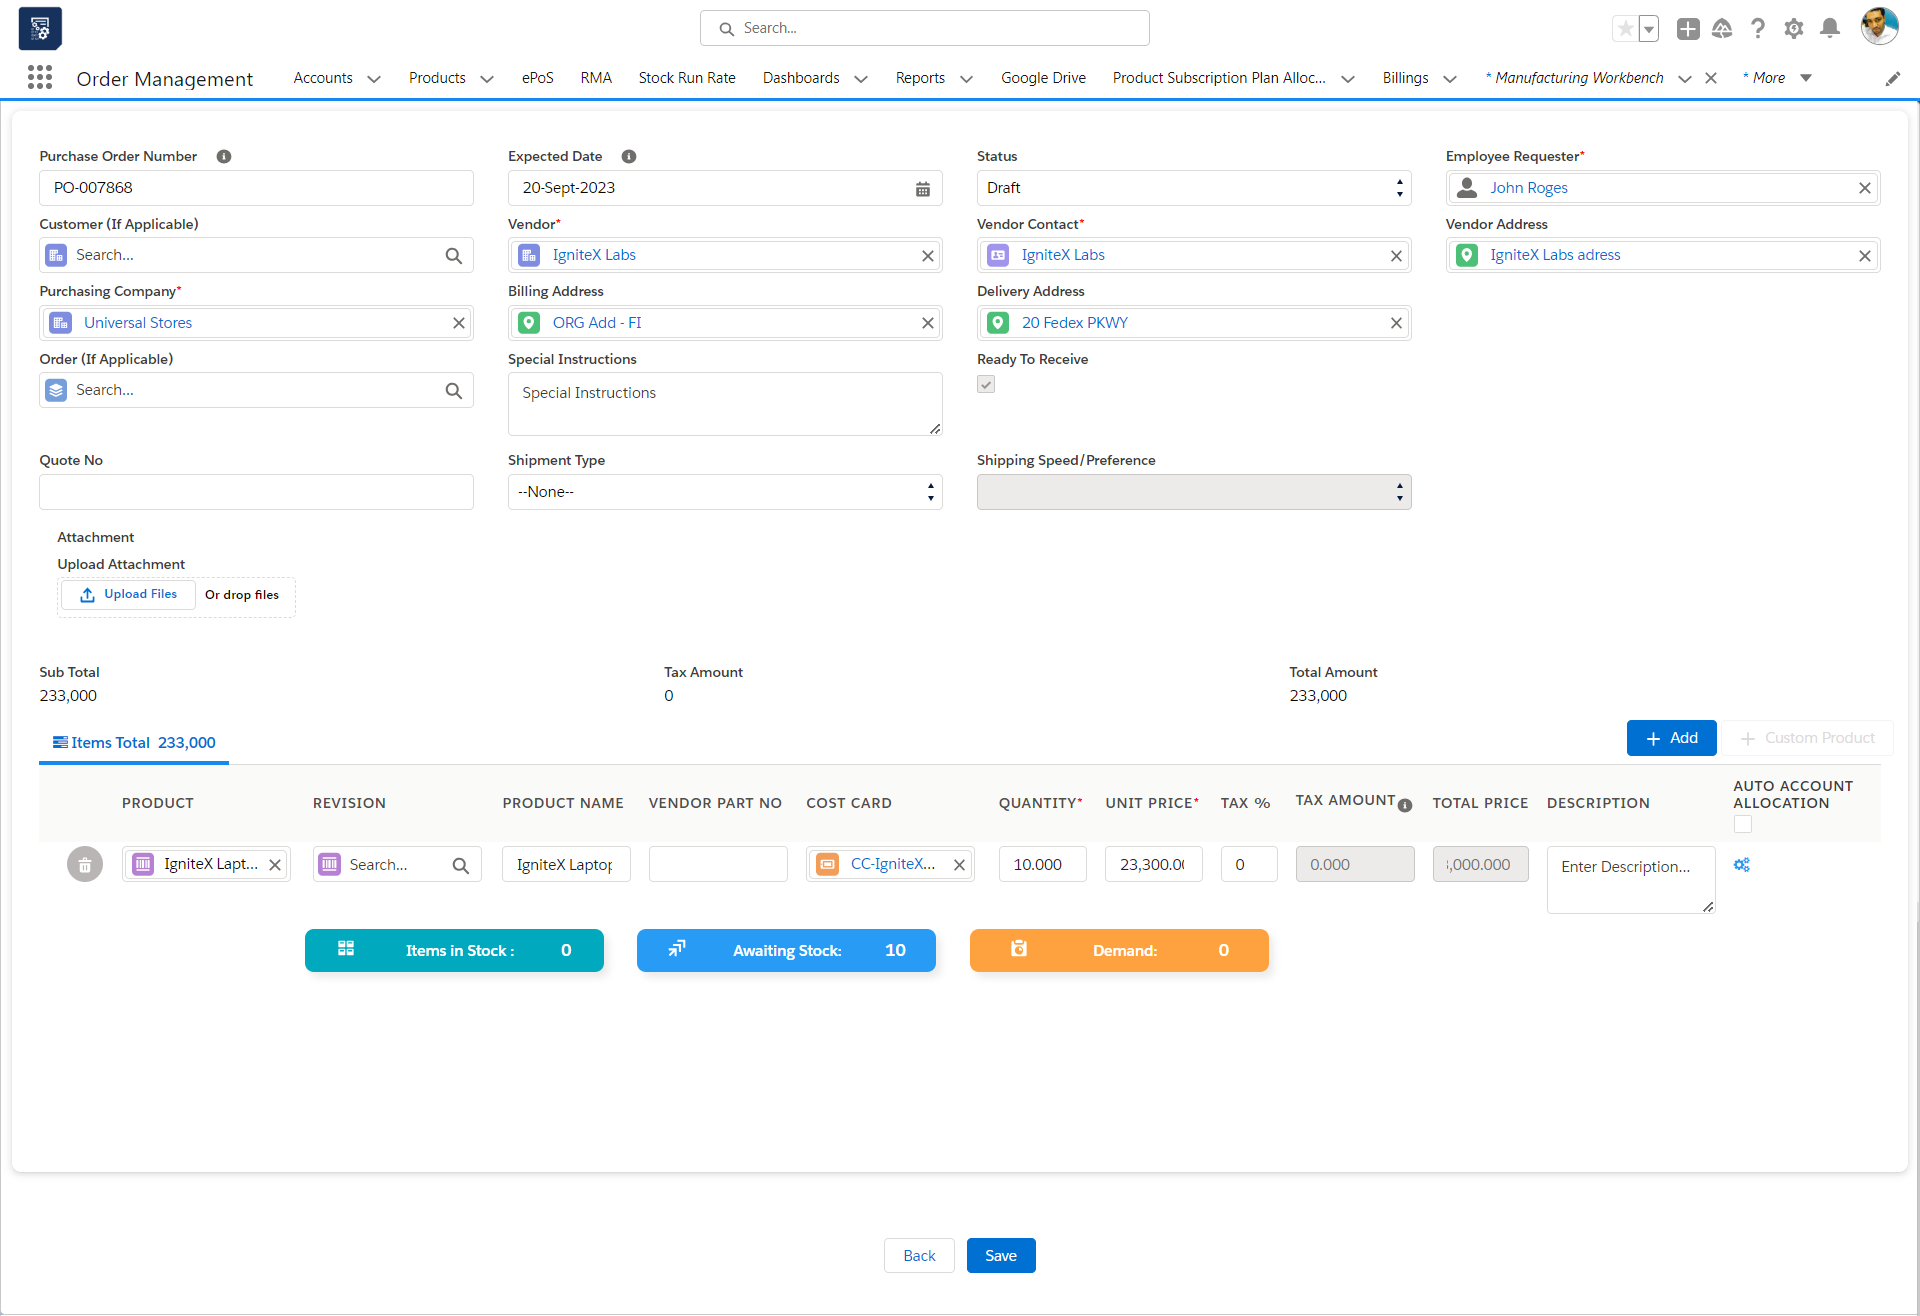
- Check the ‘Ready to Receive’ box to receive the item.
- Now click on the ‘Add Button’ to Add products to your purchase order.
- Select the product from the list of products and enter the name of the product.
- Add ‘quantity’ as the Amount of units that needs to be purchased.
- Add ‘price’ for each unit in the Price box.
- Add any description required in the Description box for the purchase order.
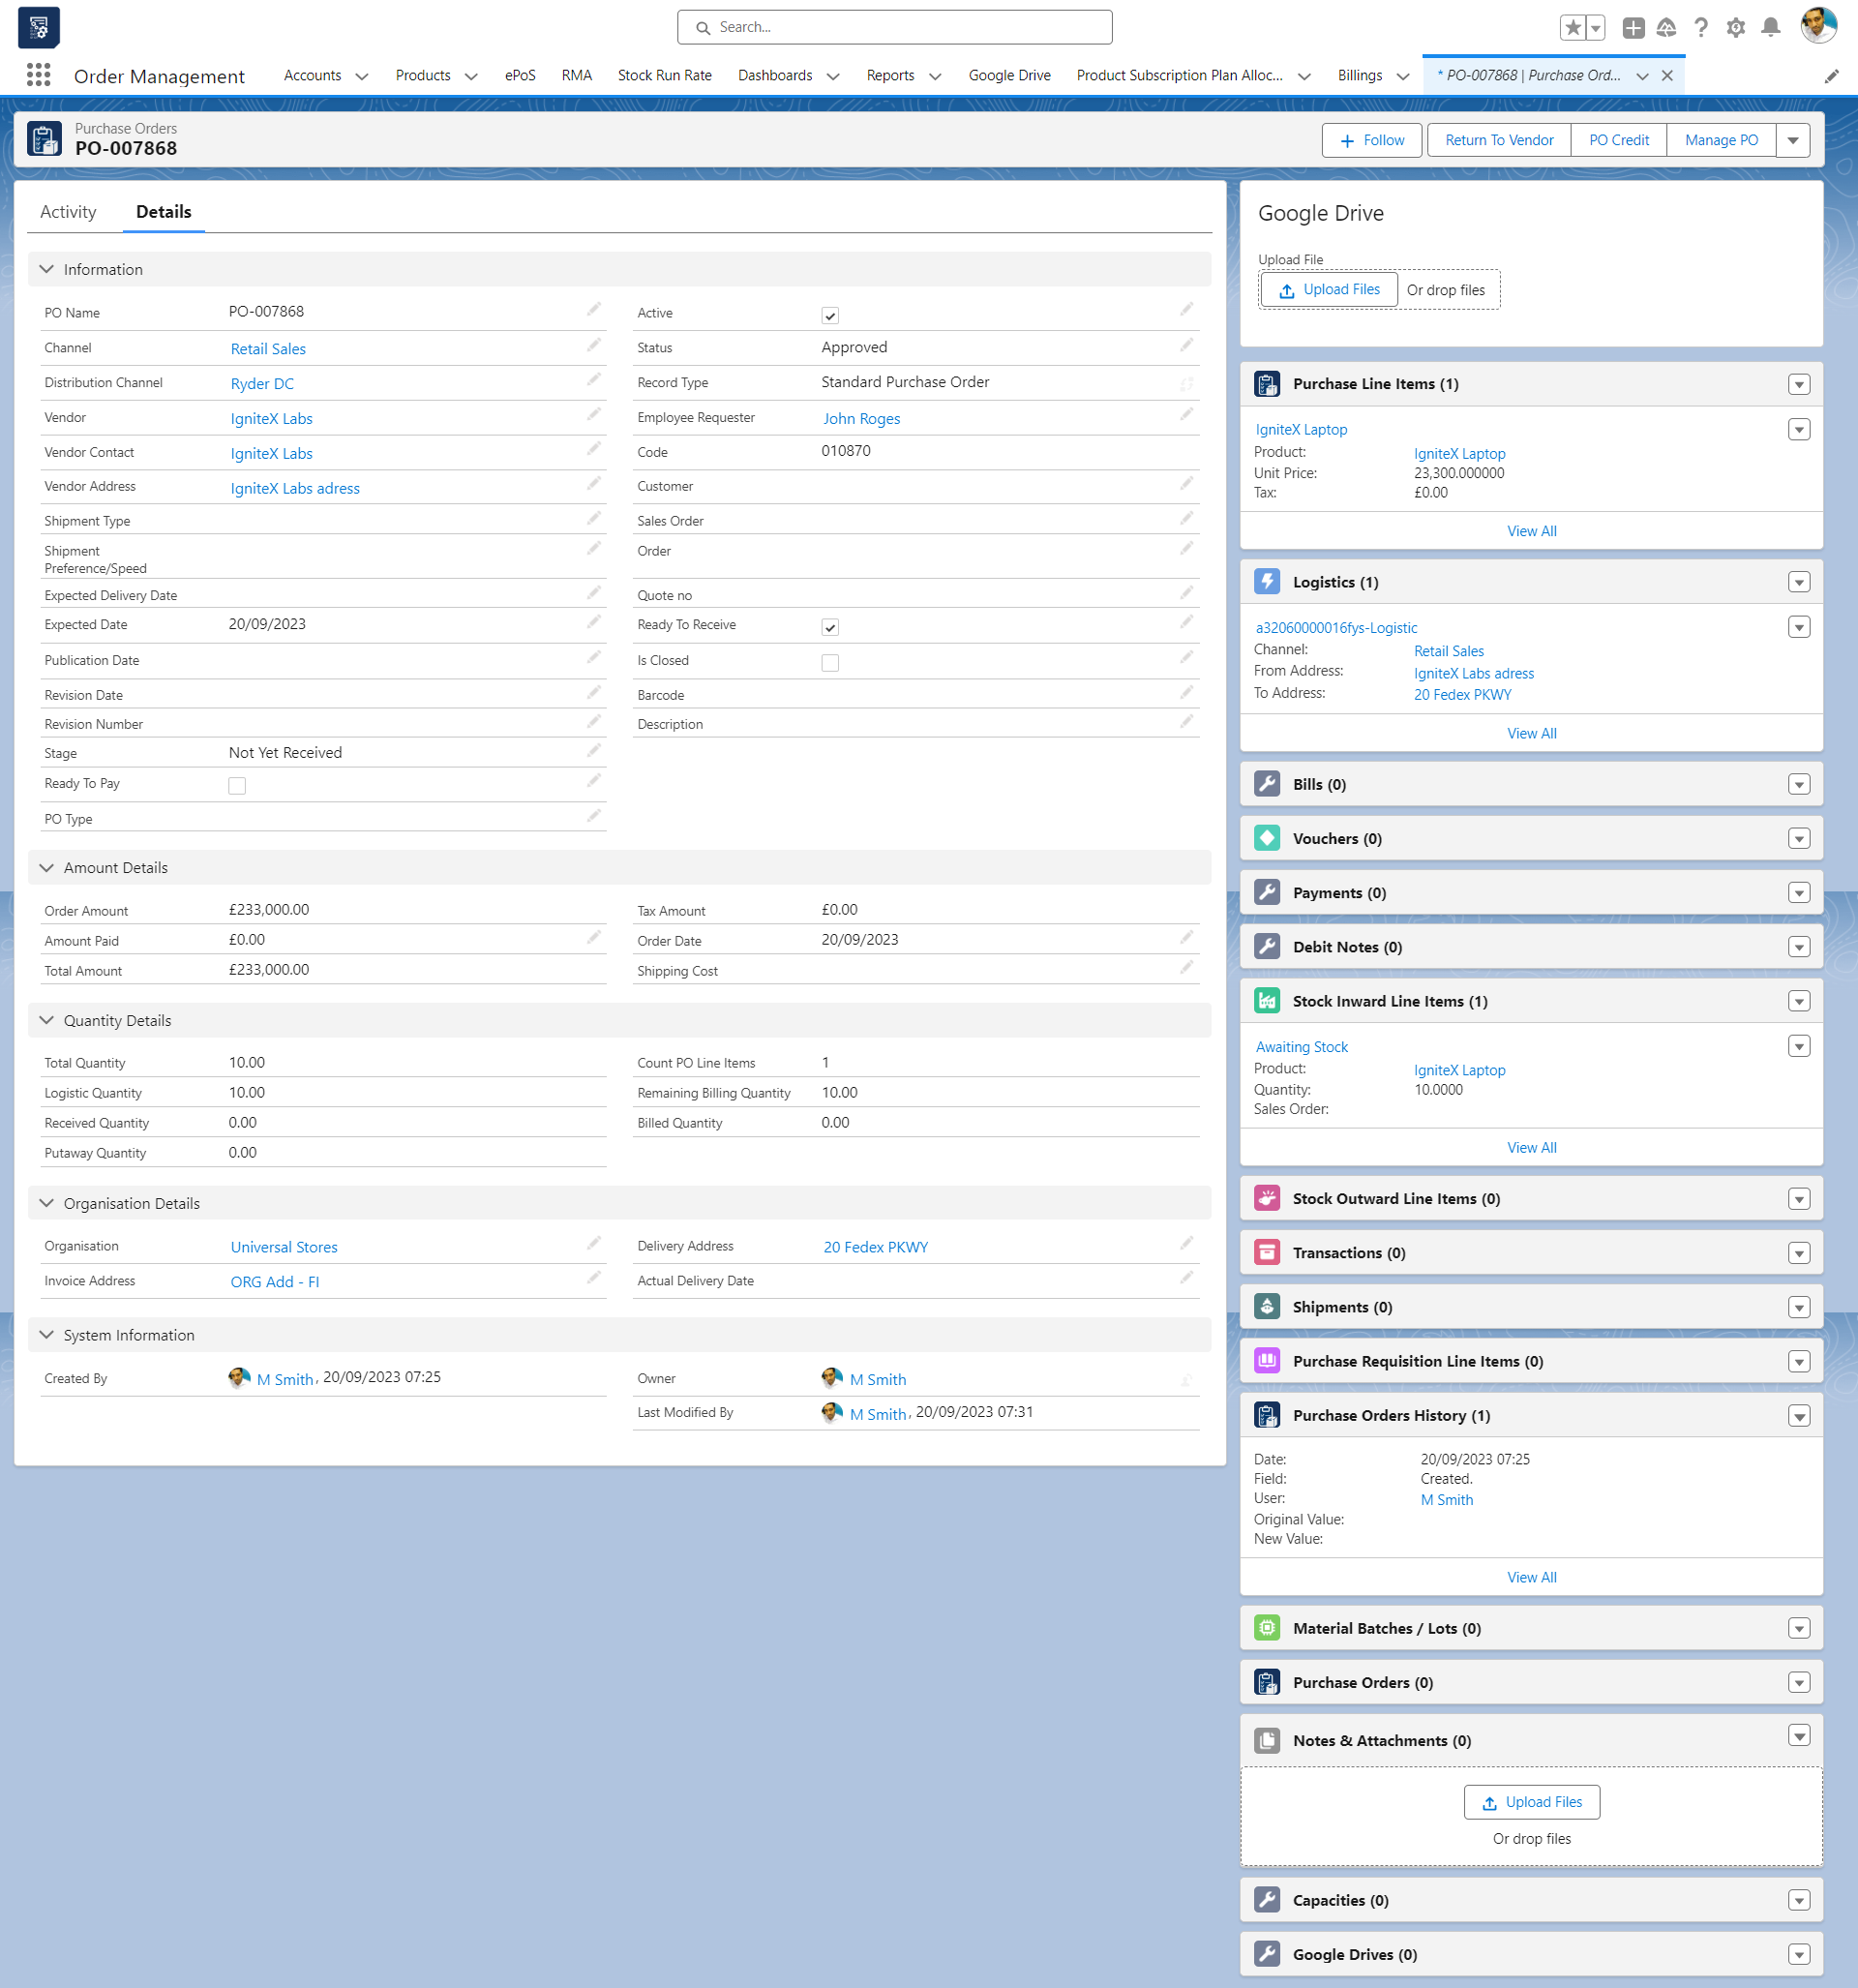
- Click the ‘save’ button.
- The purchase order will be created.
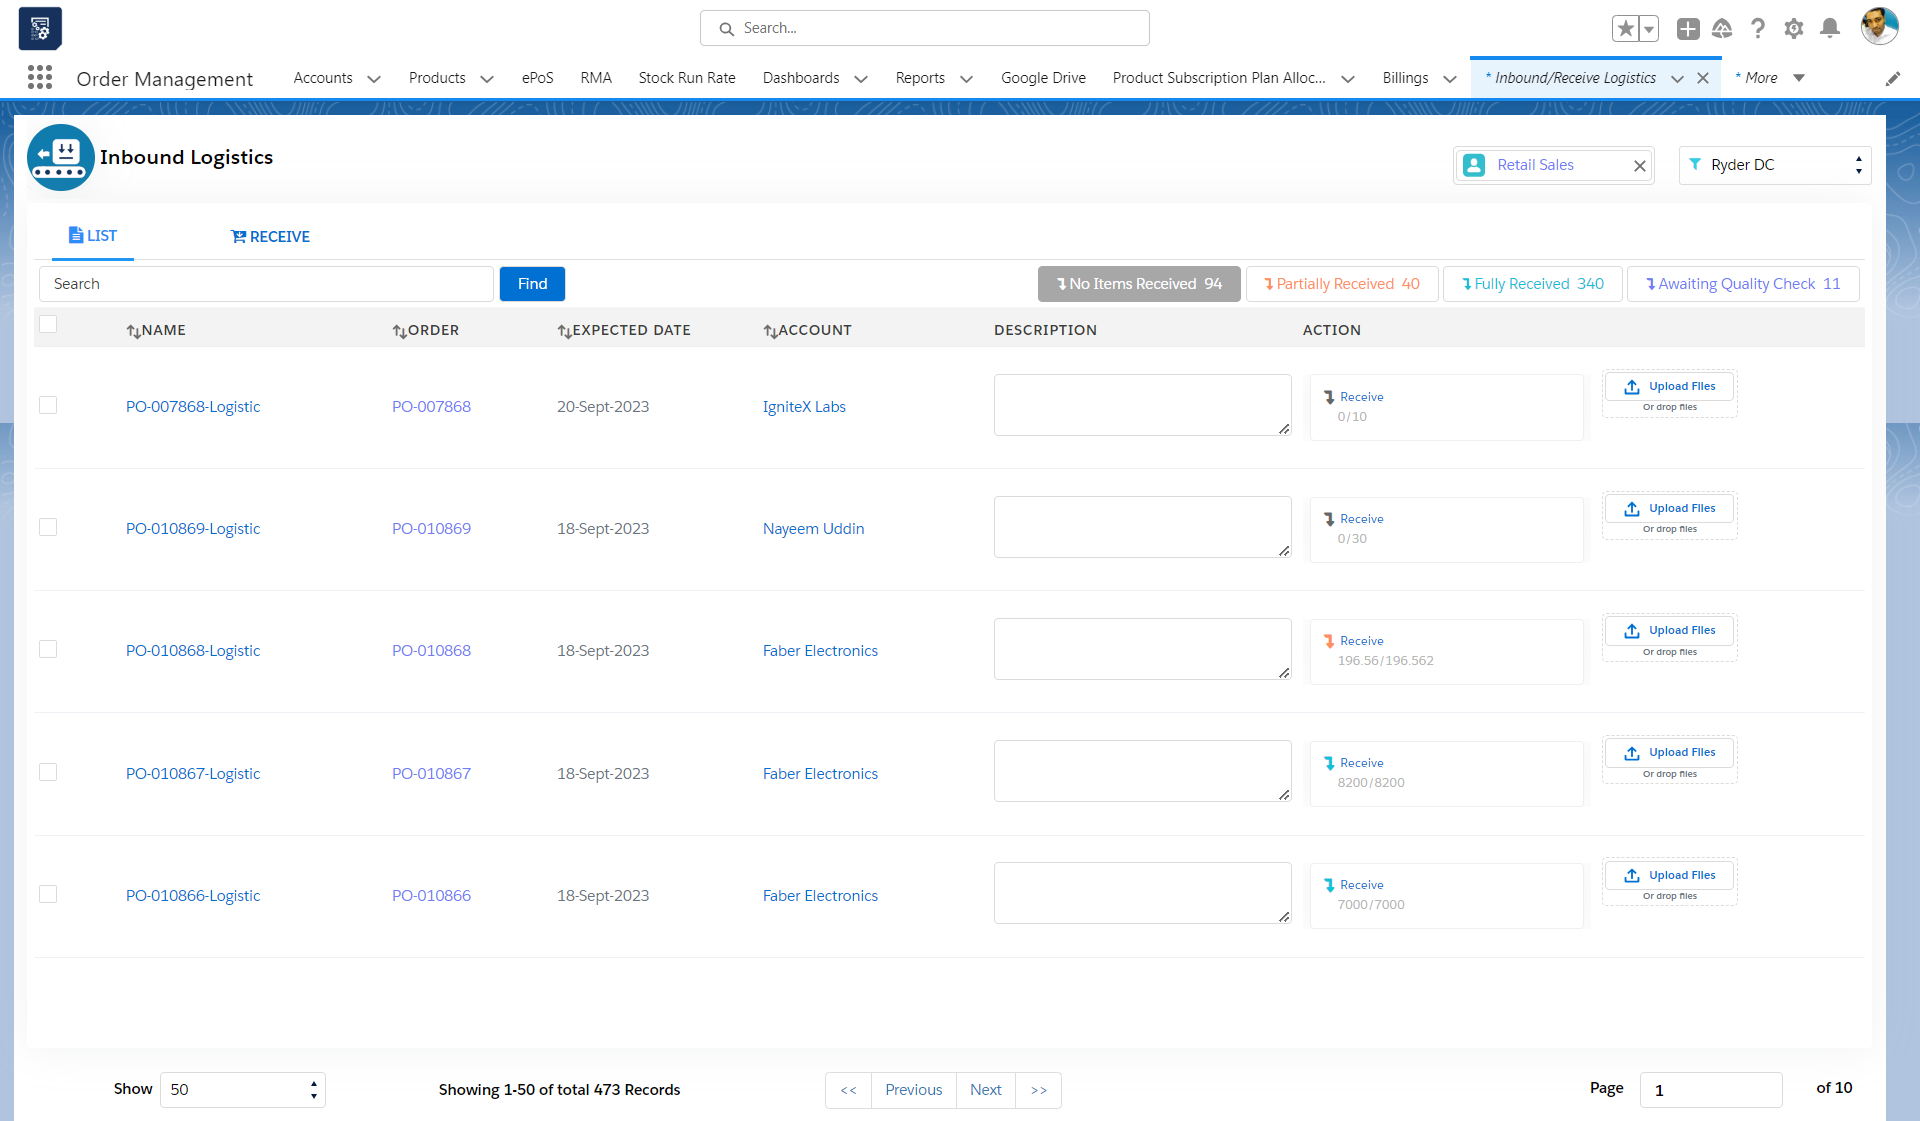
How to Inbound Purchase Order Logistic:
- From the App launcher go to the ‘Inbound Receive/Logistics’ tab
- Select the purchase order logistic and click on the ‘Receive’ tab
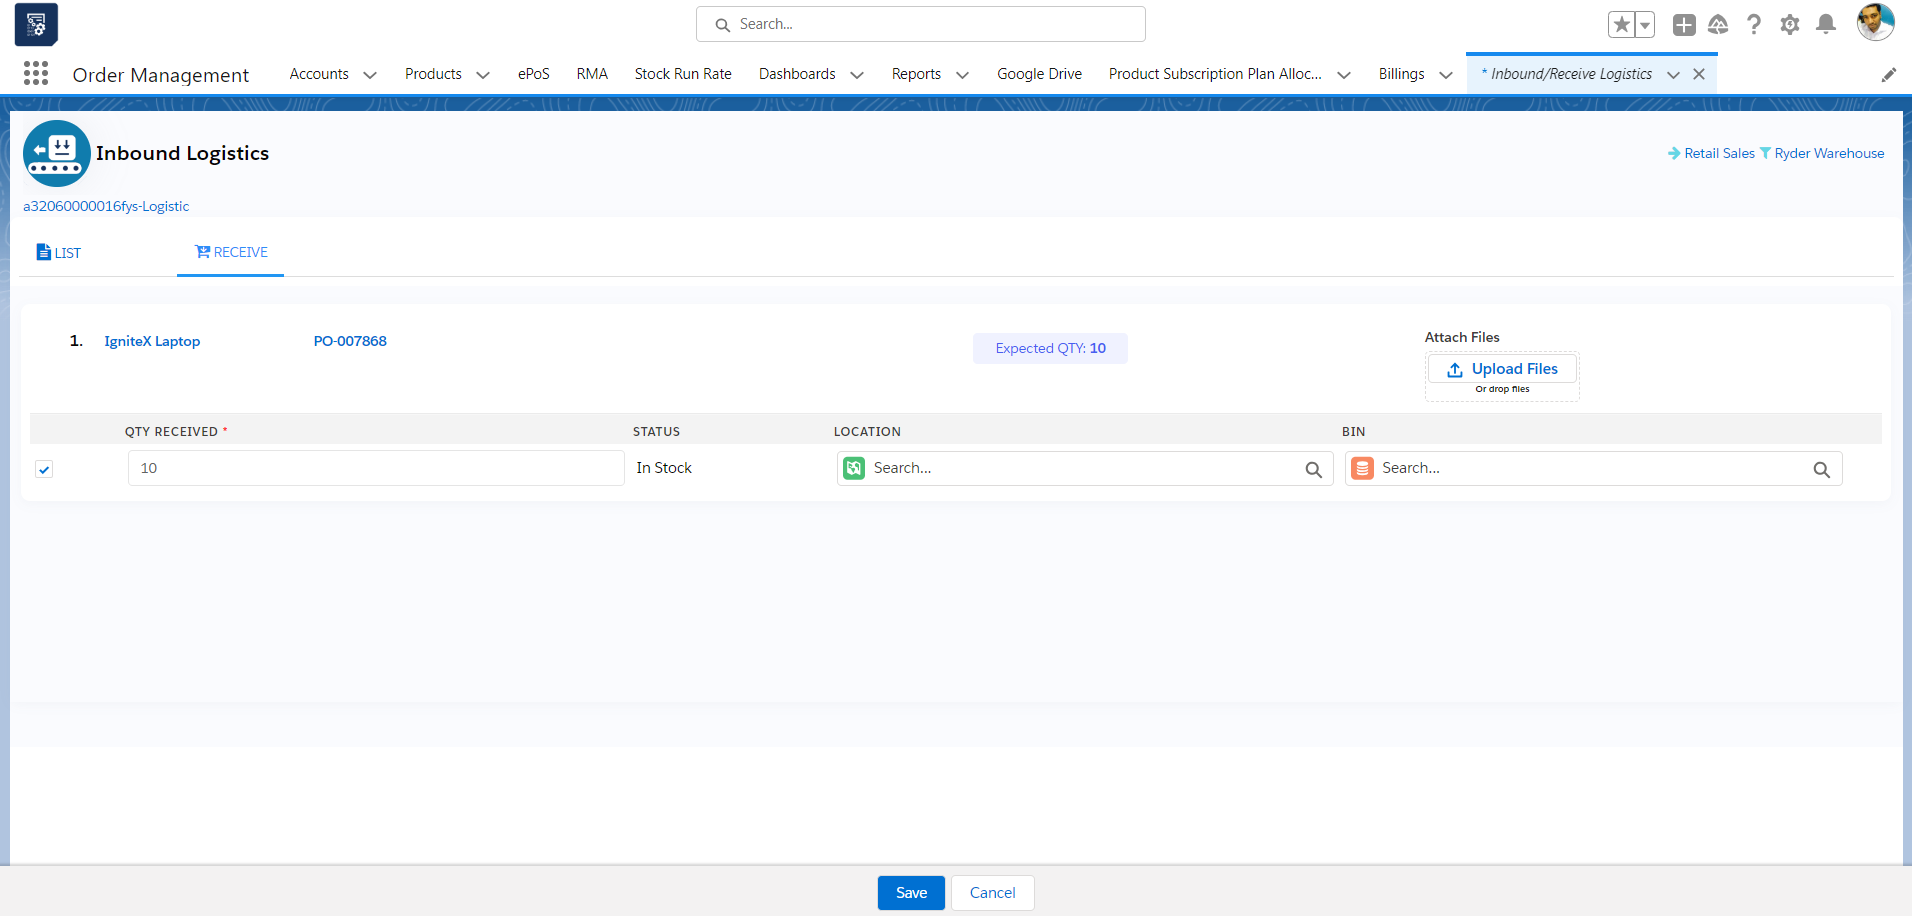
- On the receive page select the version, location, or bin if required and click the ‘save’ Button.
- Your purchase order is Complete.
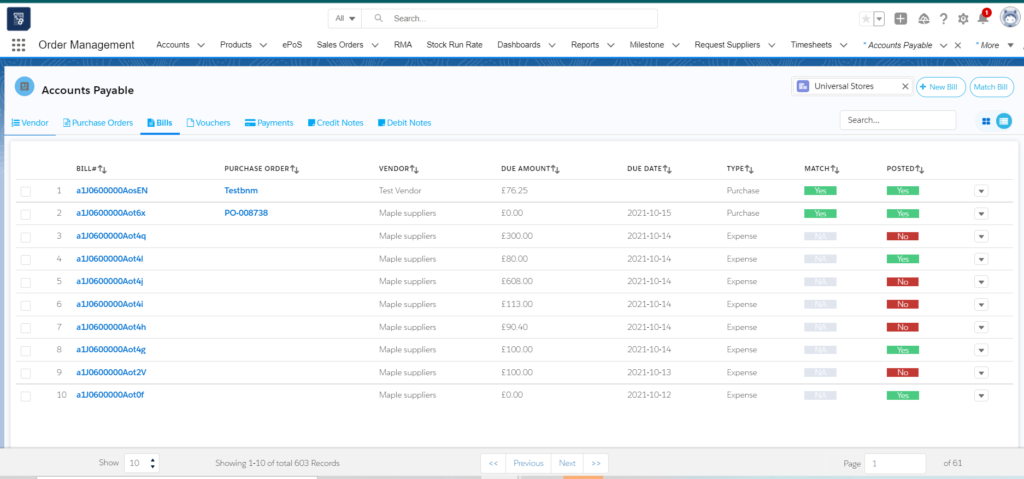
Accounts Payable:
- Go to the ‘Accounts Payable’ tab
- You can see Vendor’s tab where all the vendors will be listed. You select the vendor and select the Purchase order related to that vendor to create a bill.
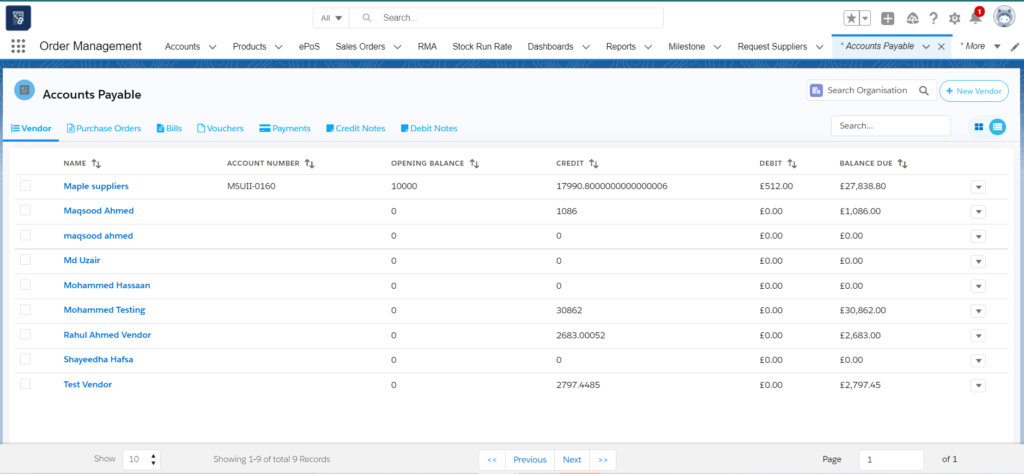
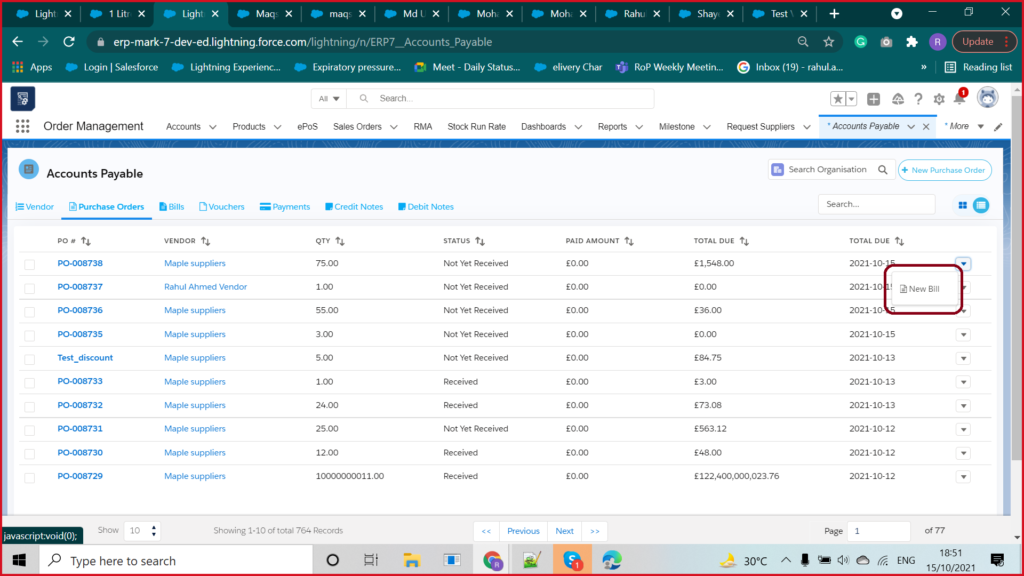
- You can also directly select the Purchase order to create a bill against it from the purchase order tab.
- Select the purchase order to create a bill against it and select the new bill option from the dropdown.
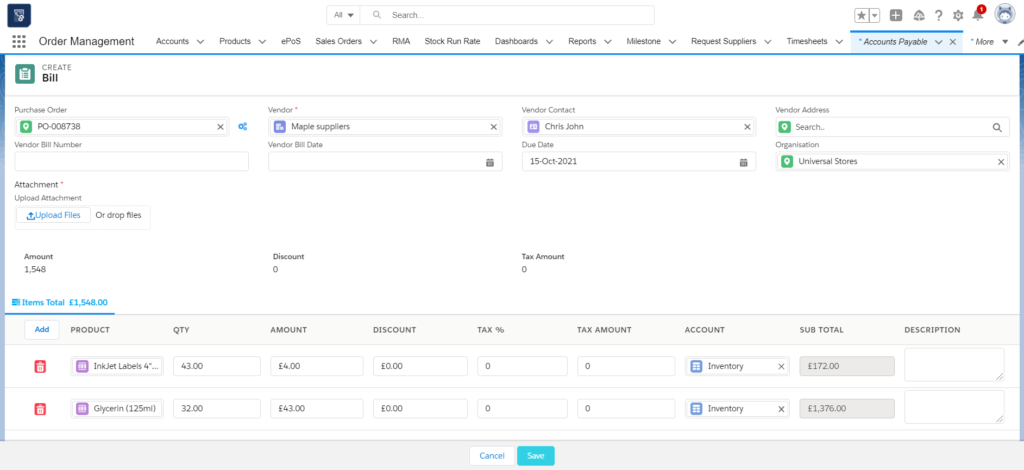
- Create Bill page will appear. Enter the Vendor bill date and Bill number. Also, you can add more products to the same bill by clicking on ‘Add’ button.
- On the Product line item add taxes and description if required and select the Account to capture the amount paid and click ‘Save’ button.
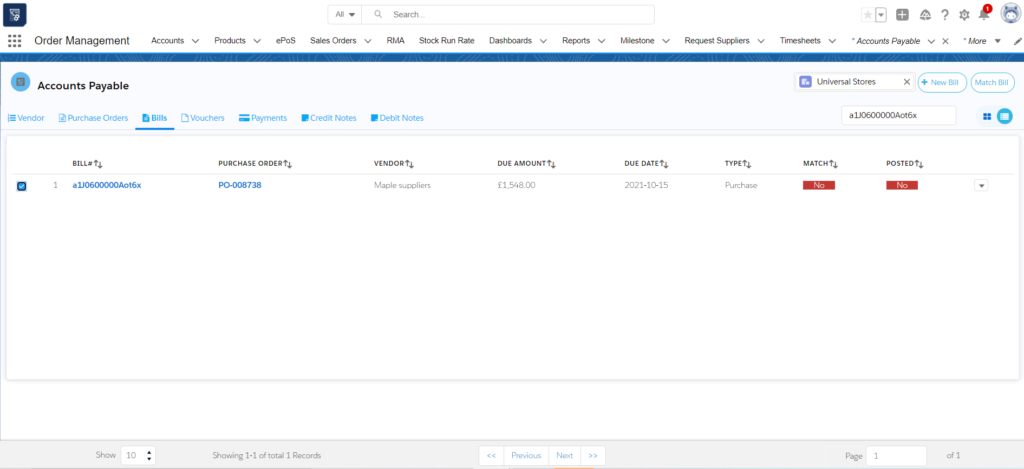
- When Bill is created it will appear on Bill tab. Now match the bill by selecting the bill and click ‘match bill’ button on the top right.
- On the match bill page select the line item to match and click ‘save’ button.
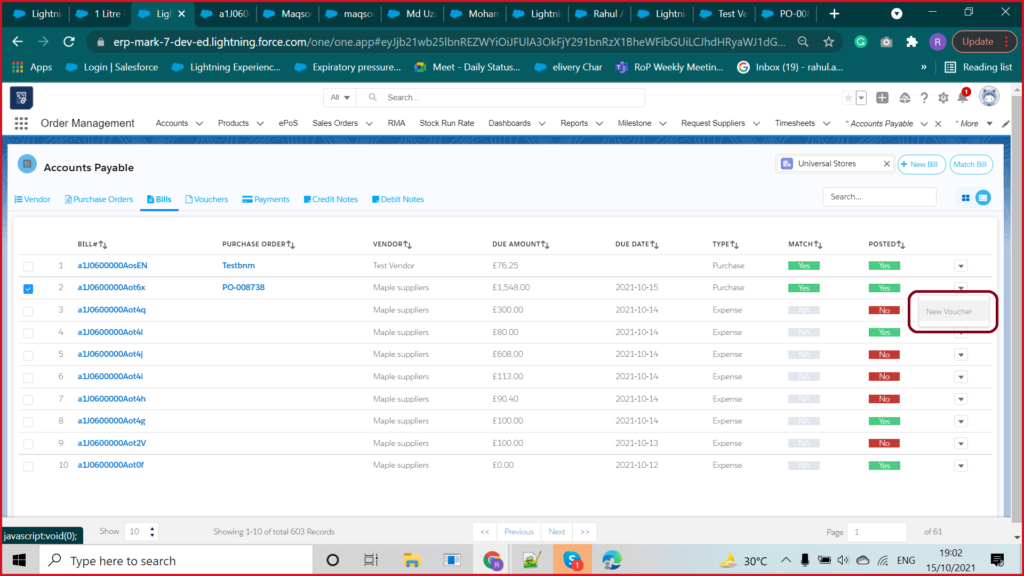
- Now post the bill by selecting ‘Post’ option from the dropdown against that bill.
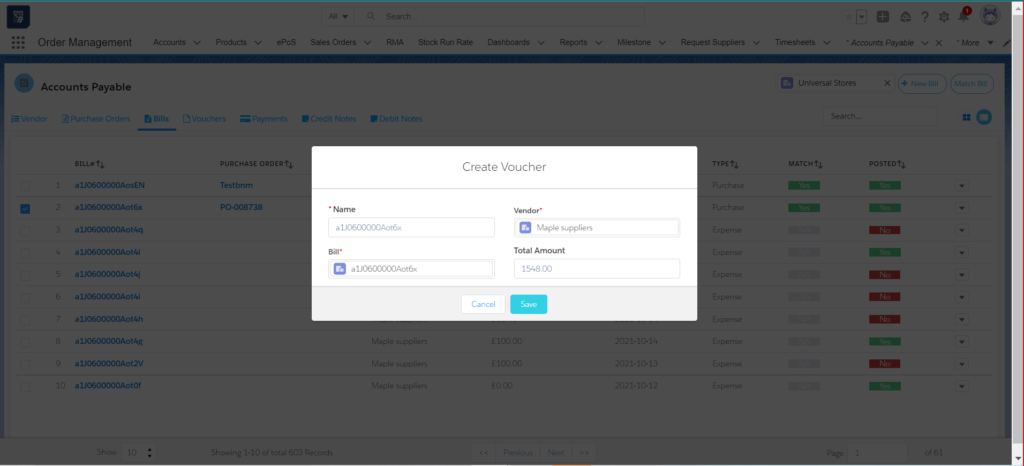
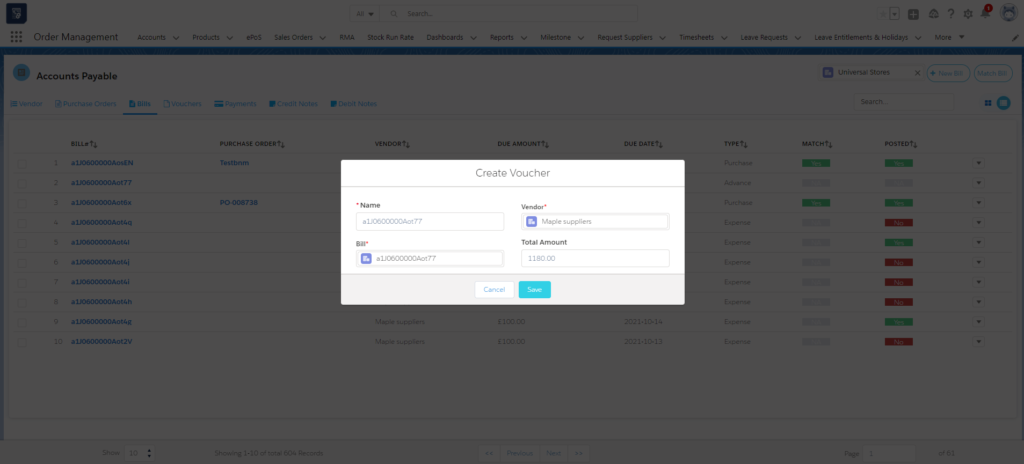
- When it is posted then New voucher option appears. Click the new voucher to create a voucher.
- Click the ‘save’ button to save the voucher.
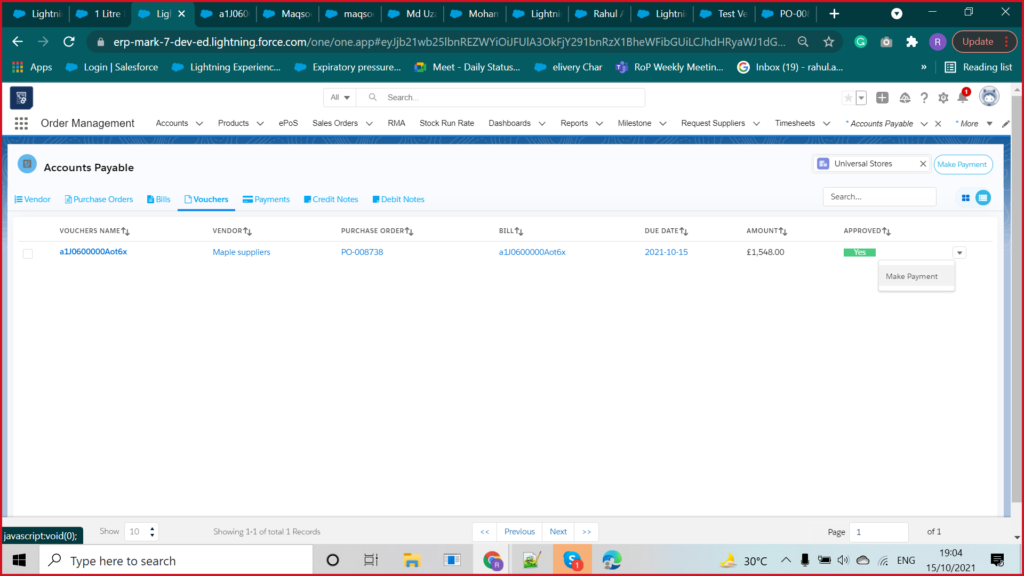
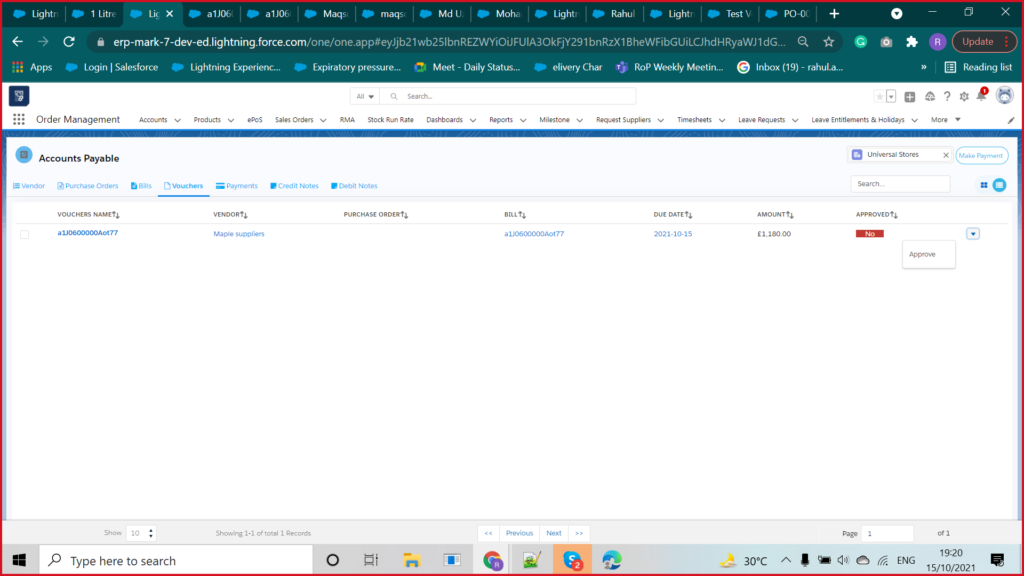
- Now approve the voucher by selecting ‘Approve’ from the dropdown button.
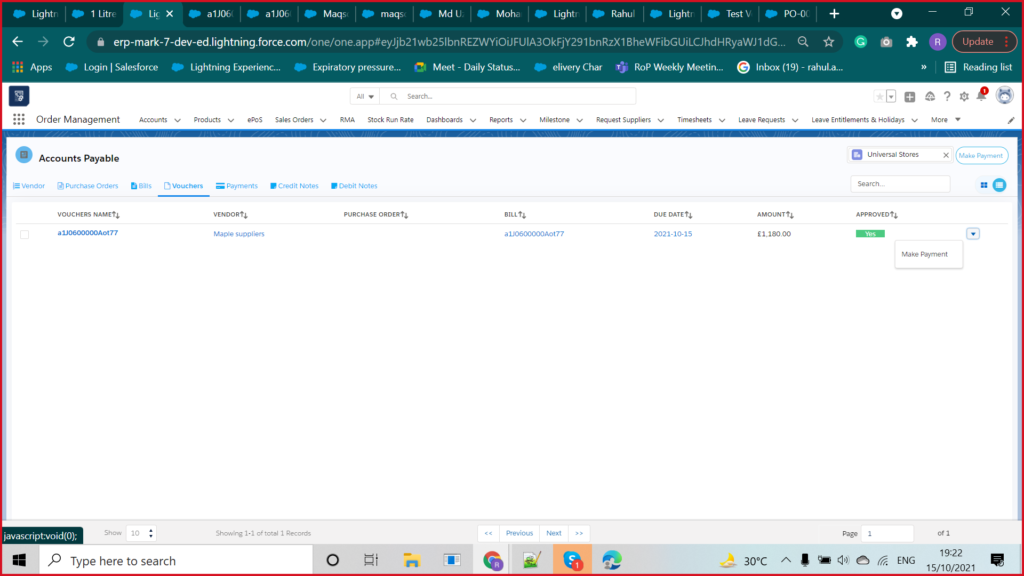
- Click on ‘Make Payment’ option from the dropdown to make payment for that voucher.
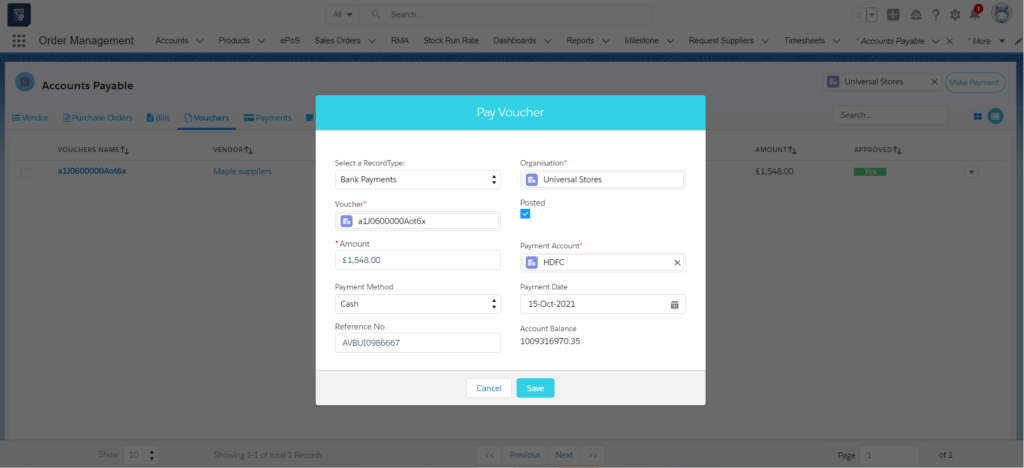
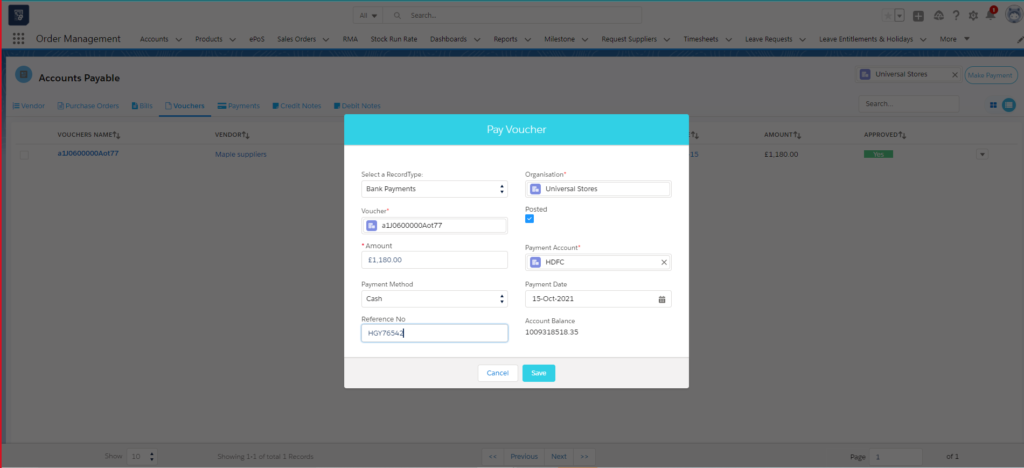
- On the pay, a voucher pop-up. Select payment account, date, reference number, and payment method and click ‘Save’. Now your payment is complete.
How to create Advance to Vendor Bill
- An advance Bill to a vendor bill can be created if you need to make an advance payment to the vendor.
- Go to the ‘Accounts payable’ tab
- Then click on ‘bills’ Section
- On the top right corner, you will see a button called ‘New Bill’
- When clicking Create Bill. A pop-up comes up. Select the Advance to Vendor option from the pop-up.
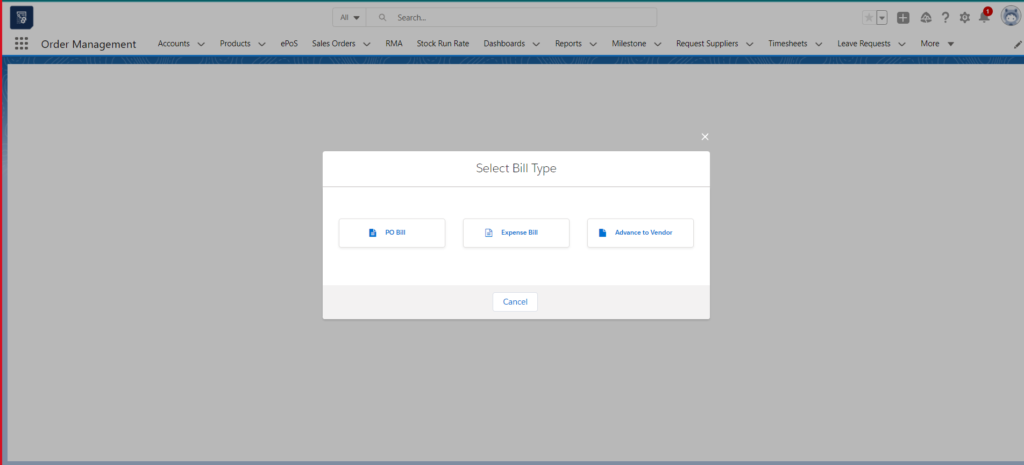
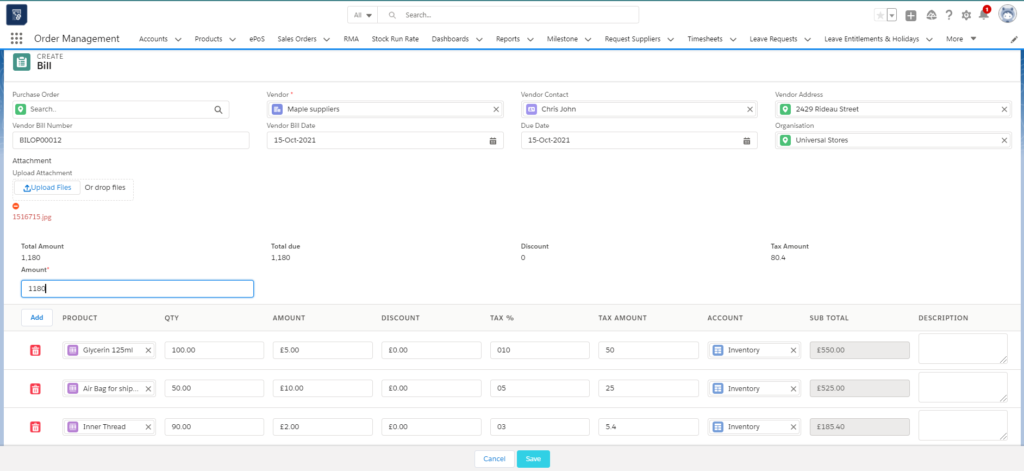
- After selecting the ‘Advance to Vendor option’. You will get a create Bill page.
- Enter All the details mentioned on the page and click on the ‘Add’ Button to add products to your bill.
- Select Product, Quantity, Amount and Select ‘Inventory’ Account and Add any Description required.
- You can add more products by clicking on the ‘Add’ button again.
- Click the ‘Save’ Button.
- A Bill will be created and you can view it on the bills tab.
- From the drop-down of that bill select ‘New voucher’
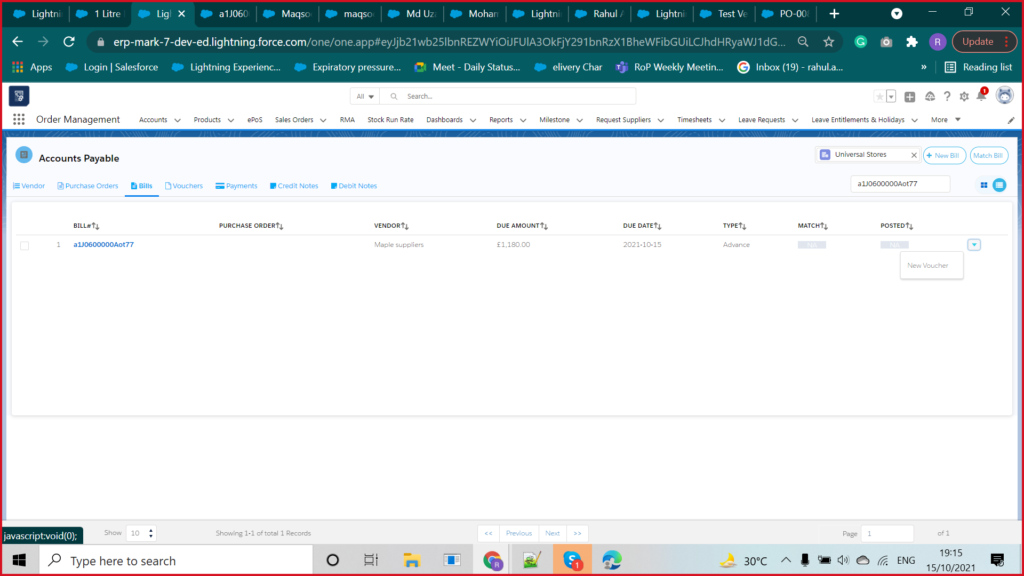
- Clic
 k the ‘Save’ button. A voucher will be created.
 - Now from the voucher tab select the ‘Approve’ button to Approve the Bill. It will change from Red to green when approved.
- Now from the dropdown select the ‘Make a payment’ Button to pay the voucher created.
- Enter the details like payment account, method, and Reference number if required and click the ‘Save’ Button
- A payment to that voucher will be done.