Expense
The ERP system provides an accurate, error-free platform for employees to manage their travel plans and expense claims. In ERP, it records the expense details of employees and those who are assigned for approvals.
The expense claims are specific to the employee and can be submitted for approval to higher authorities. This also helps track the approval status of the specified task.
An Expense claim can be created in two methods –
- From the record level
- From the Expense Tab
From the Record Level
The steps below explain how to create an expense record and move it from Draft status to Submitted.
- Create an expense by navigating to the Employee Management app > Employee tab.
- Select the employee from the list of employees for whom an expense claim must be created.
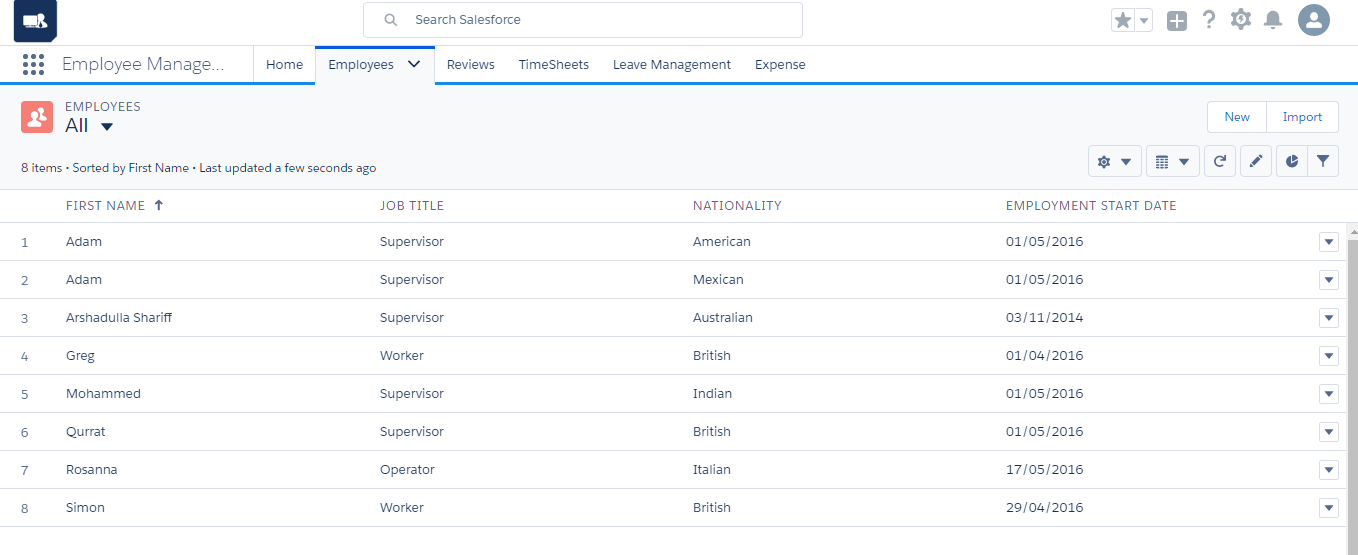
- On the related tab, scroll down and select the expenses related list. Click the “New” button.

- Enter the organisation details, approver details and expense name. Administrators and other employees who act as approvers can see all the expense line items for the week.
- Expenses can be tracked by any of the following statuses. Select the status of the expense.
- Draft
- Approved
- Submitted
- Rejected
- Enter the date of expense creation and the project related to the expense.
- Select the “Active” checkbox and the “Paid” checkbox if the expense claim is paid to the employee.
- Click the “Save” button to create the expense record.
Fields to note:
| Field | Description |
| Employee | Describes the name of the employee whose expense is being created |
| Expense Name | Describes the name of the expense created |
| Approver | Other employees who act as approvers can see all the expense claims that belong to employees under them |
| Project | Describes the name of the project for which the expense is created to monitor the progress |
| Status | Current status of the expense, such as Draft or Submitted; controls which actions can be performed against the expense |
| Date | Describes the date when the expense was created. |
| Paid | If the checkbox is selected, it indicates that the expense claim has been paid to the employee. |
| Approve / Rejected Date | Date by which the expense claim was approved or rejected. |
| Approve / Rejected Reason | Describes the reason for approval or rejection. |
An expense claim can be in different stages, which can be easily understood by the following statuses.
| Transfer Order Status | Action |
| Draft | An expense that is in the “Draft” state can be edited to add or delete time card entries. |
| Approved | When the expense claim is approved by the work agent/higher authority, it is marked “Approved.” |
| Submitted | Once the employee is confident about his entered claims, the expense can be moved to the “Submitted” state for approval. |
| Rejected | When an approver rejects the expense, the expense is available for review and resubmission. |
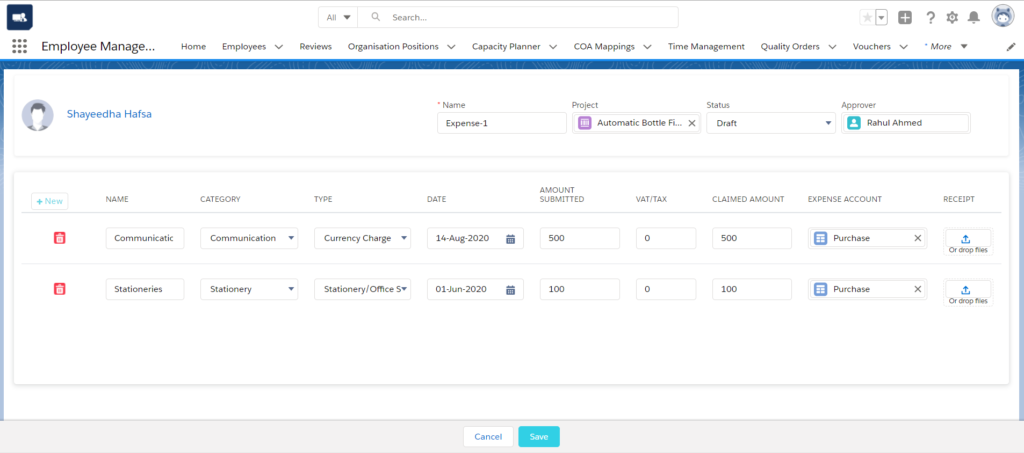
Creating Expense Line Items:
In the expense line item, an employee must specify the exact amount spent on the selected expense type and category. An expense may contain one or more expense line items. Each expense line item can be tracked by its status. 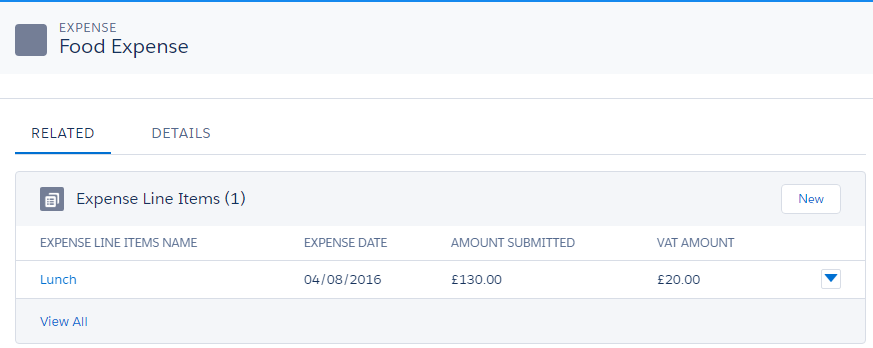
The steps below explain how to create an expense line item.
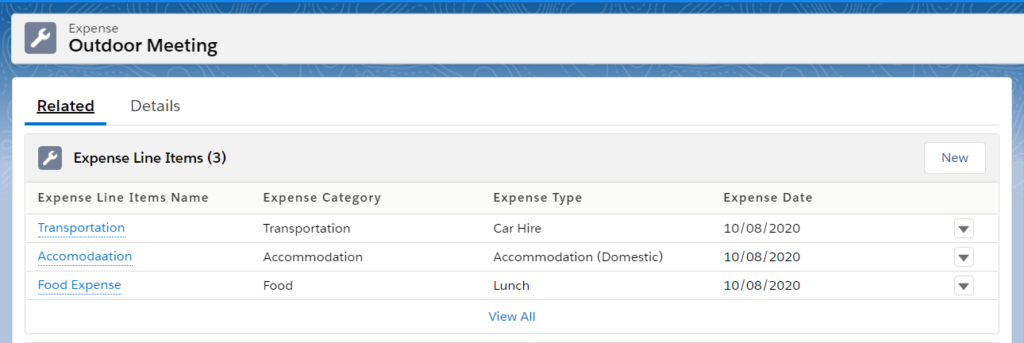
- Every expense claim should be associated with one or more expense line items, which proves the amount claimed by an employee on each project selected. In the related list of expense records, click the “New” button under “Expense Line Items”. After the creation of expense line items, the time sheet is in the Draft stage.
- Fill in the expense line item name, the expense type and the category which describes the purpose of the expense claim created.
- Fill in the expense date.
- Enter the amount and VAT amount of the expenses.
- Select the “Active” checkbox and select “Status”.
- Click the “Save” button to create the expense line item.
Creating Expense Through Expense Tab
Navigate to the Employee management app > Expenses tab.
In the My Expenses tab, you can view the records which are in Draft, Submitted, Approved or Rejected stages by selecting the following sub tabs:
- Draft/Submitted.
- Approved/Rejected.
- Submitted for your Approval.
Draft/Submitted :
- On the Draft/Submitted sub tab, you can view all the Expense records which has draft or submitted status.
- To view the records in list or grid view, click on the list or grid icon.
- To view the Expense associated to a particular Project, click on the Expense record name.
- To edit the Expense record, click on the edit icon and save the record after necessary changes done.
- To delete the Expense record associated to a Project, click on the delete icon and click on OK.

Approved/Rejected:
- On the Approved/Rejected sub tab, you can view all the Expense records which has approved or rejected status.
- To view the records in list or grid view, click on the list or grid icon.
- To view the Expense associated to a particular Project, click on the Expense record name.
- To edit the Expense record, click on the edit icon and save the record after necessary changes done.
- To delete the Expense record associated to a Project, click on the delete icon and click on OK.
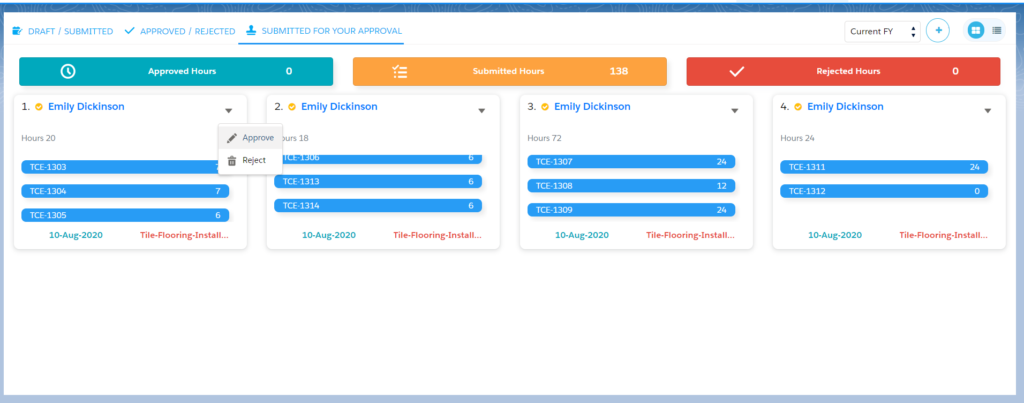
Submitted for your Approval:
- On the Submitted for your Approval sub tab, the Approver can view all the Expense records which are been submitted for approval.
- To view the records in list or grid view, click on the list or grid icon.
- To view the Expense associated to a particular Project, click on the Expense record name.
- To edit the Expense record, click on the edit icon and save the record after necessary changes done.
- To delete the Expense record associated to a Project, click on the delete icon and click on OK.

From this section, the Approver can approve or reject the expenses by clicking Approve or Reject buttons as shown below.
My Expenses tab has two views for viewing the records:
- List View
- Grid View
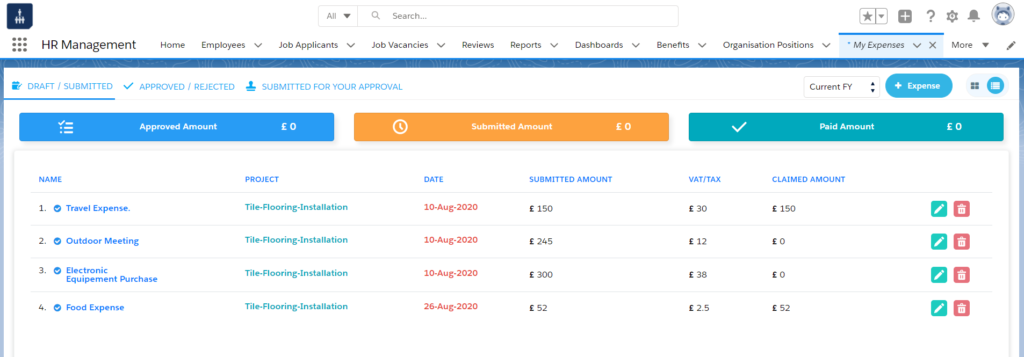
List View:
- On the My Expenses tab, you can view the list of all the Expenses created in list view.
- To filter out the records based on a particular Fiscal year or time period, you can select Current FY, To Date, Previous FY, Next FY, Previous 2 FY and view the list of records.
- To view the records which are draft, submitted, approved, rejected or submitted for your approval move to the respective sub tabs.
- To view the Expense associated to a particular Project, click on the Expense record name.
- To edit the Expense record, click on the edit icon and save the record after necessary changes done.
- To delete the Expense record associated to a Project, click on the delete icon and click on OK.
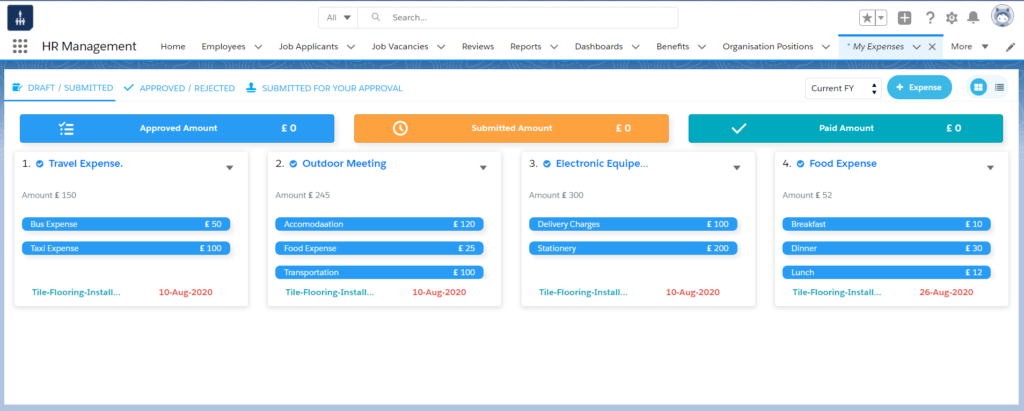
Grid View:
- On the My Expenses tab, you can view the list of all the Expenses created in grid view.
- To filter out the records based on a particular Fiscal year or time period, you can select Current FY, To Date, Previous FY, Next FY, Previous 2 FY and view the list of records.
- To view the records which are draft, submitted, approved, rejected or submitted for your approval move to the respective sub tabs.
- To view the Expense associated to a particular Project, click on the Expense record name.
- To edit the Expense record, click on the edit icon and save the record after necessary changes done.
- To delete the Expense record associated to a Project, click on the delete icon and click on OK.
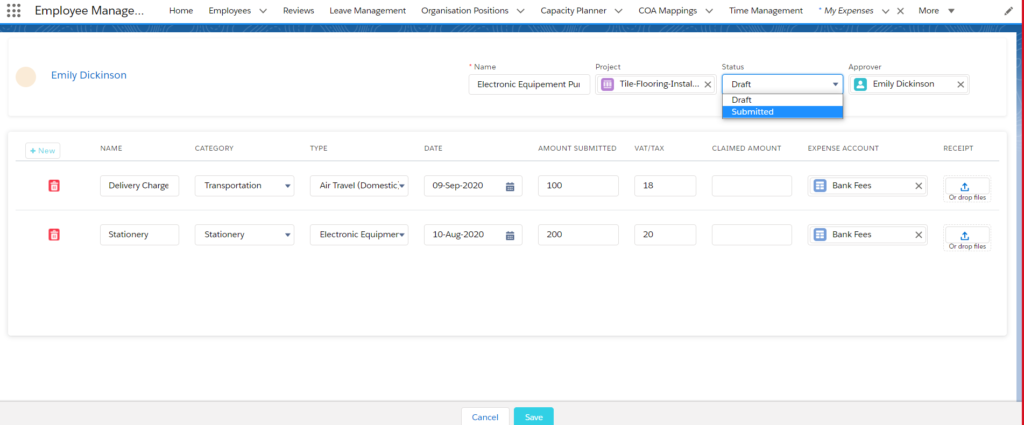
- Click these “+Expense” button to create a new expense for the logged-in user.
- Every expense will be in “Draft” status until the user is ready to submit it to the approver. Select the approver who is authorised to review the expense claims and to decide whether to approve or reject the expense.
- Enter the name and select the project for which the expense is claimed.
- Enter the name of the expense line item; select the expense type and category for which the expense is claimed.
- Enter the date on which the expense was initiated.
- Enter the total amount spent and the VAT amount applied to the expense claims.
- The system allows an employee to add a invoice/receipt for the expense claims.
- To create a new expense line item for the same expense record, click “+New” button.
- Click “Save” to create the expense under “Draft” status.
Viewing, Editing and submitting expense
- Navigate to the Employee management app >My Expenses tab.
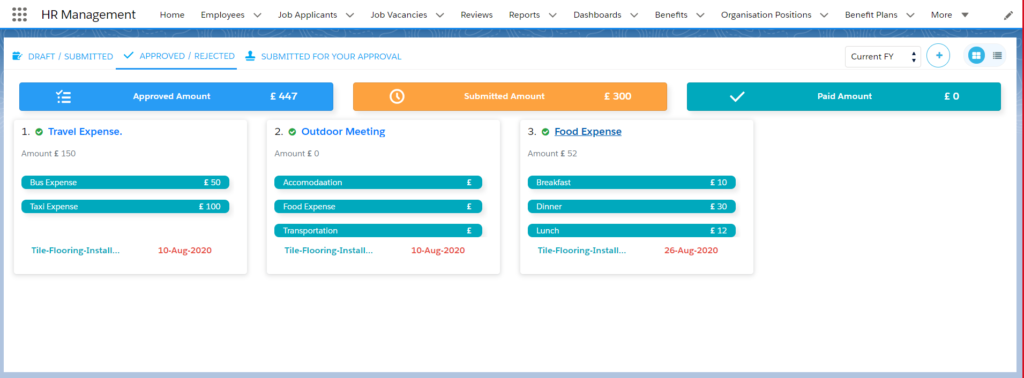
- The system shows total approved expense claims, submitted expense claims and total paid expense claims. The system shows all the expenses that have been submitted, draft and that have been rejected.
- The system provides a filter that lets an employee view the total expense claims based on current and previous fiscal years.
- Under the approved expenses section, an employee can view all his approved expense claims along with the date of approval and the amount claimed.

- To edit the expense, click on the edit icon and edit the details in the Expense record.
- To delete an expense sheet, click the delete icon.
- To submit the expense to an approver, change the status from “Draft” to “Submitted” by editing the Expense record and click the “Save” button.
- If an employee is an approver, he can approve other employee’s records from the Manager’s Approval section.
Note :
- Once the Expense is submitted, you cannot edit or delete them and the expense with draft and rejected can be edited or deleted before submission.
