Inbound Receive
The Inbound/Receive Logistics tab allows users to add the product to the inventory. We need to create a Logistic record for the Purchase Orders whose type should be ‘Inbound’.
1. Creation of Logistics record for a Purchase Order
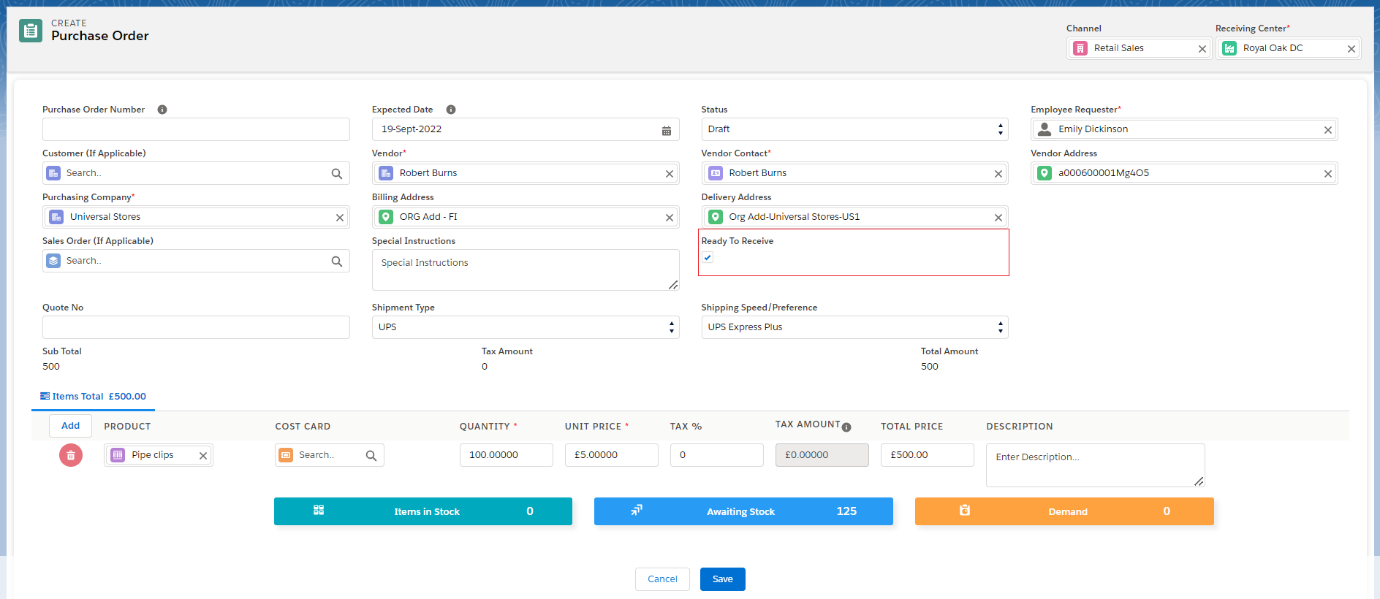
If we check the ‘Ready the Receive’ checkbox while creating the Purchase Orders on the ‘Create Purchase Orders’ page and click on Save, the system will create the Purchase Order and its Logistic record.
Or
If we create a Purchase Order from the Create Purchase Order tab without checking the ‘Ready to Receive’ checkbox, the system will create the Purchase Order, but we need to navigate to the Purchase Order record level and need to check the ‘Ready to Receive’ checkbox manually to create the Logistic record. Follow the below steps to create the Logistic record manually –
- Find the Purchase Orders tab from the App Launcher.
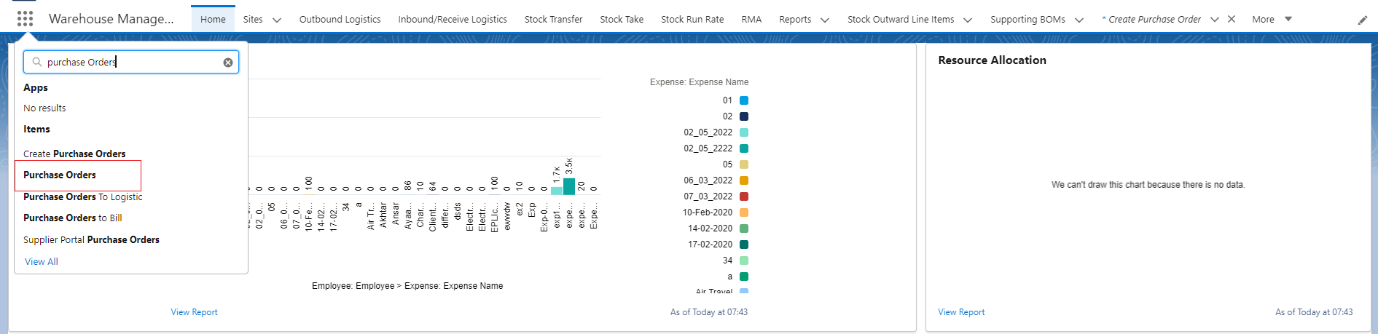
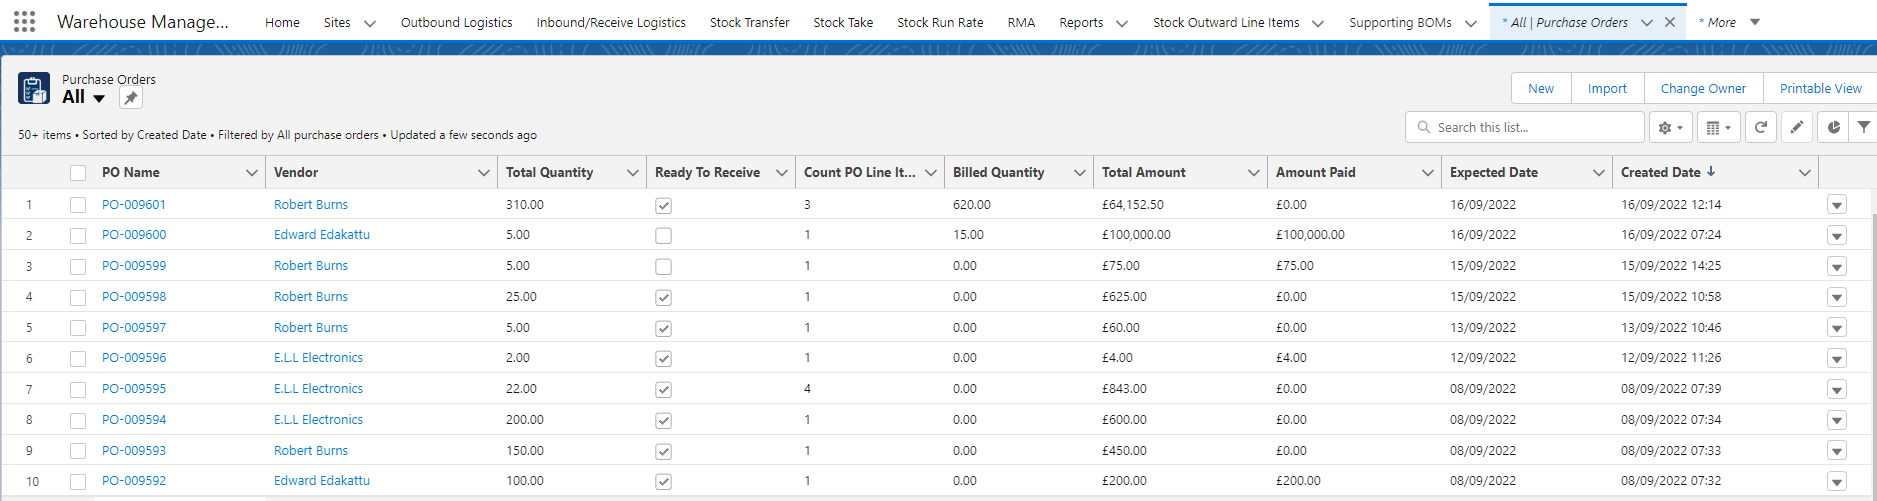
- Once in the Purchase Orders tab, you can view the Purchase Orders information already filled in.
- Find the Purchase Order and open it, check the ‘Ready to Receive’ checkbox, and ‘Save’ the Purchase Order record. The system will create the Logistic record.
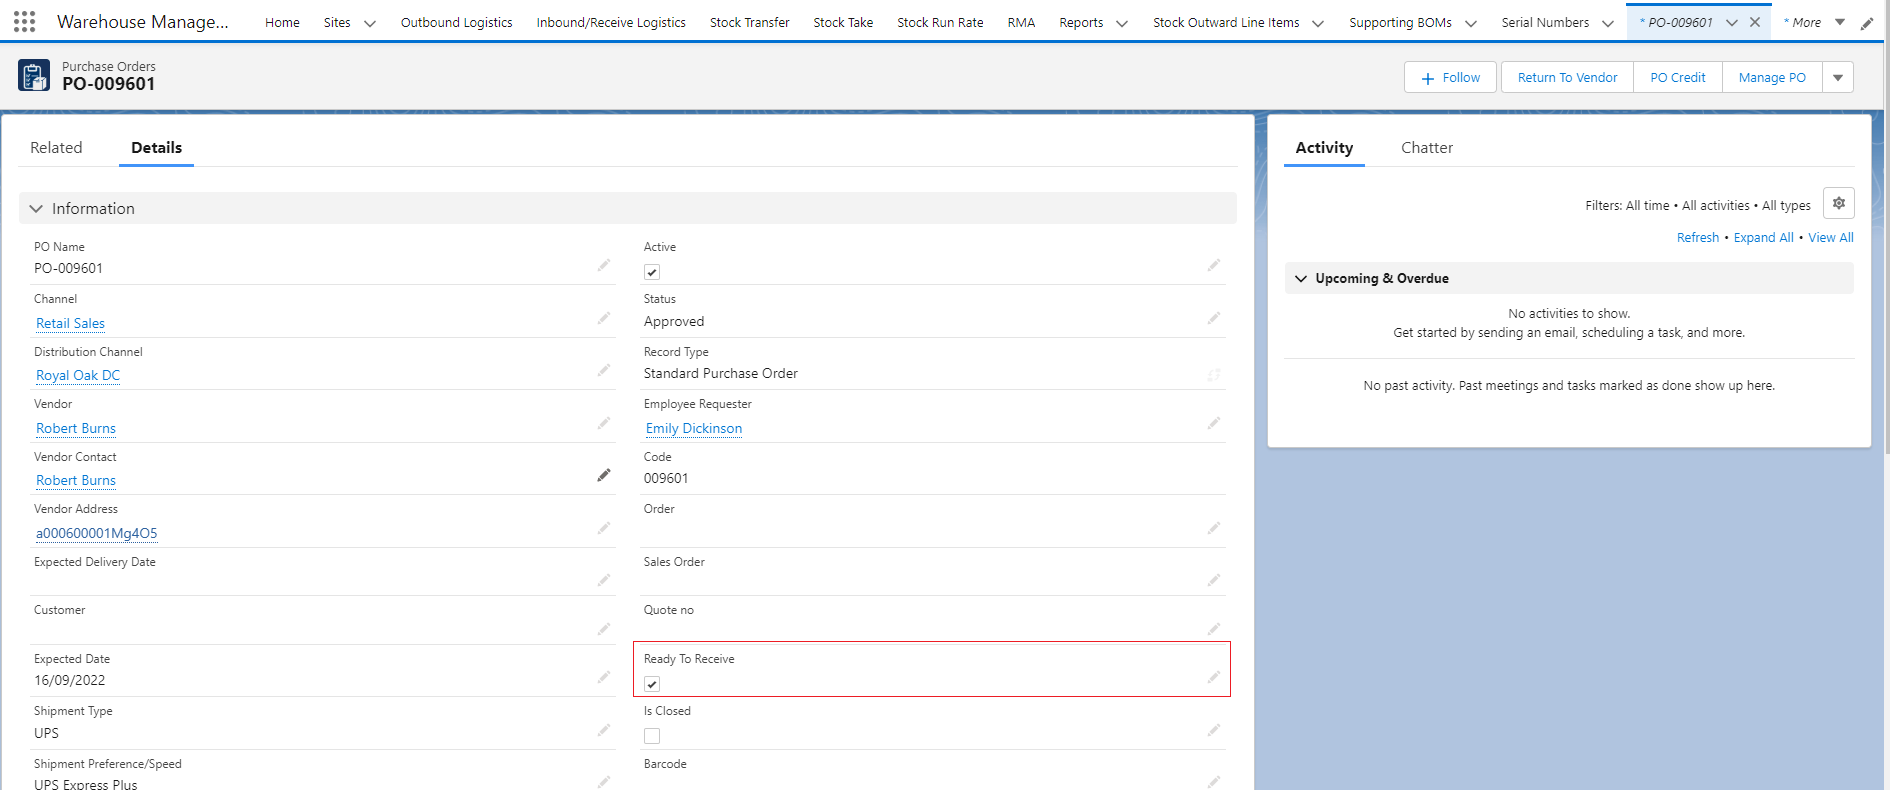
Figure – ‘Ready to Receive’ checkbox
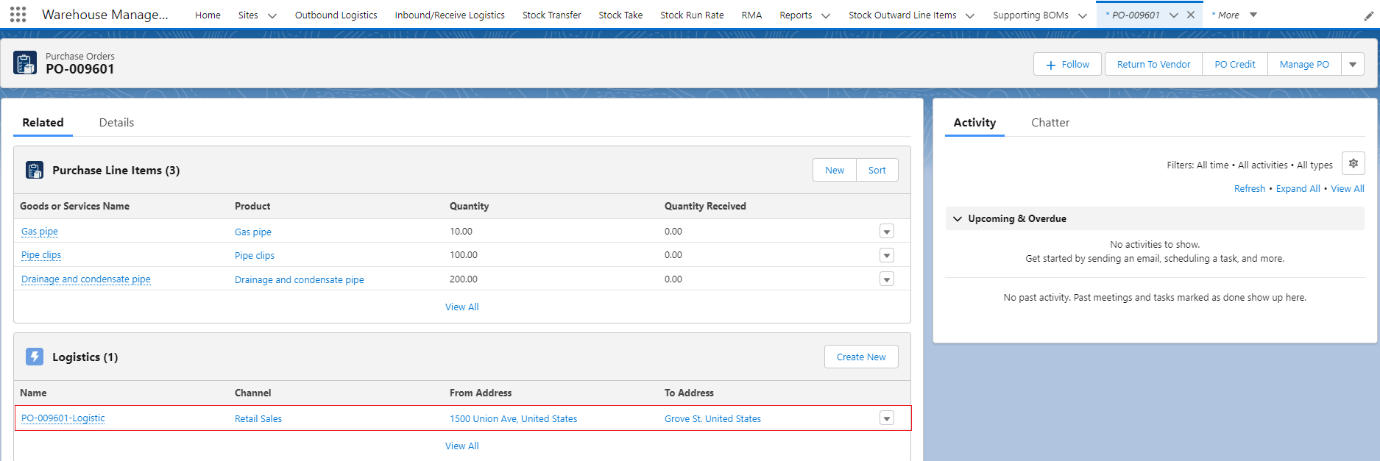
Figure – Logistic record
2. Complete the Inbound/Receive Logistic process to Receive the inventory.
- Select the ‘Warehouse Management’ App from the App Navigation and click on the ‘Inbound/Receive Logistics’ tab.
OR
Find the ‘Inbound/Receive Logistics’ tab directly from App Launcher.
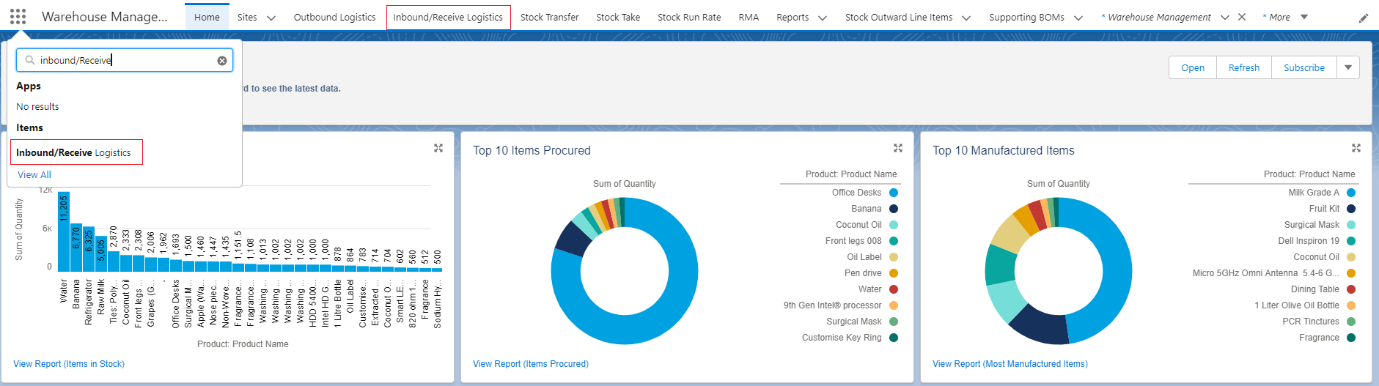
- After clicking on the ‘Inbound/Receive Logistics’ tab, the system will take the users to the ‘Inbound/Receive Logistics’ home page.
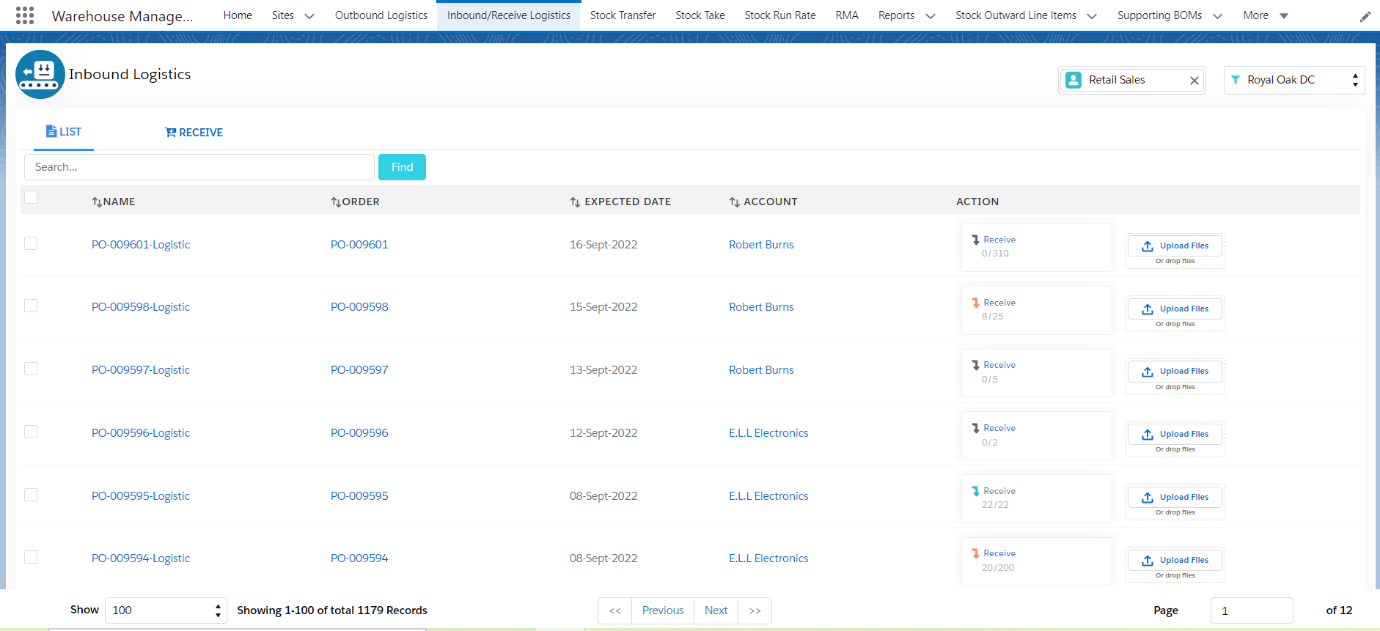
- Select the Channel and Distribution Channel available in the upper right corner, for which the logistic was created.
Users can see all the logistics that are related to the selected channel and Distribution Channel.
- Use the search bar or scan the Purchase Order’s barcode to find the logistic.
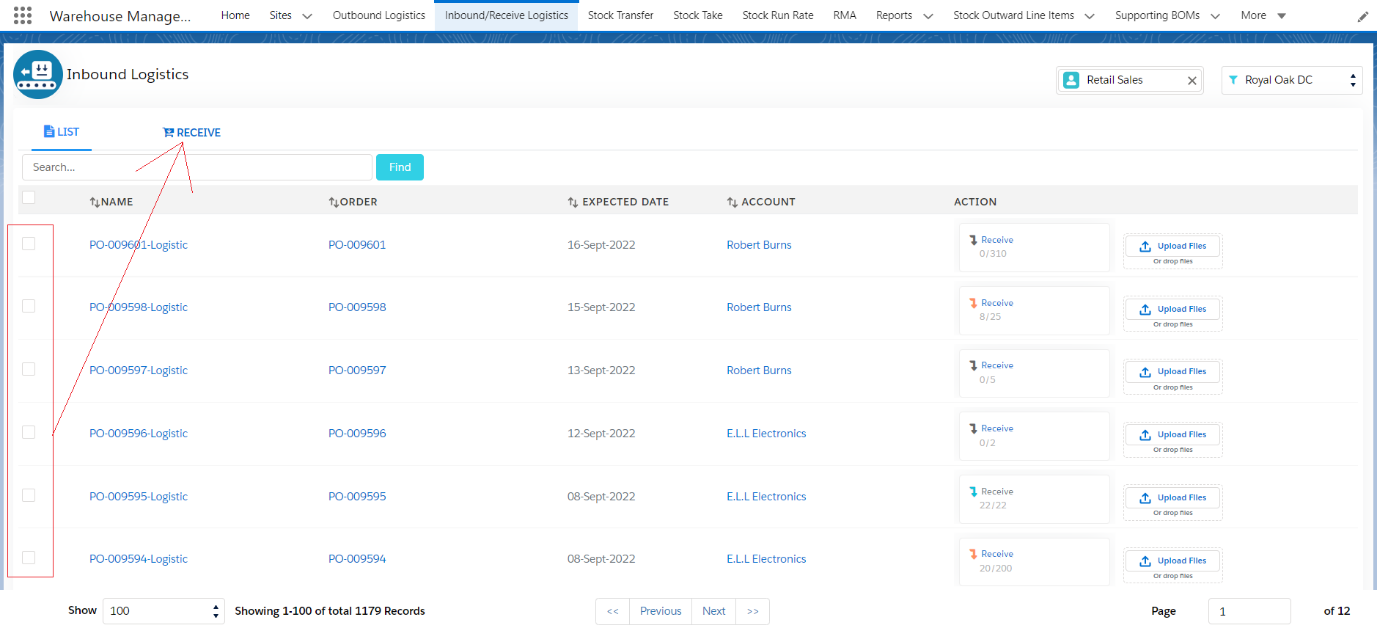
- Once the users found the Logistic, click on the Receive button or scan the barcode of Receive to navigate to the Receive section.
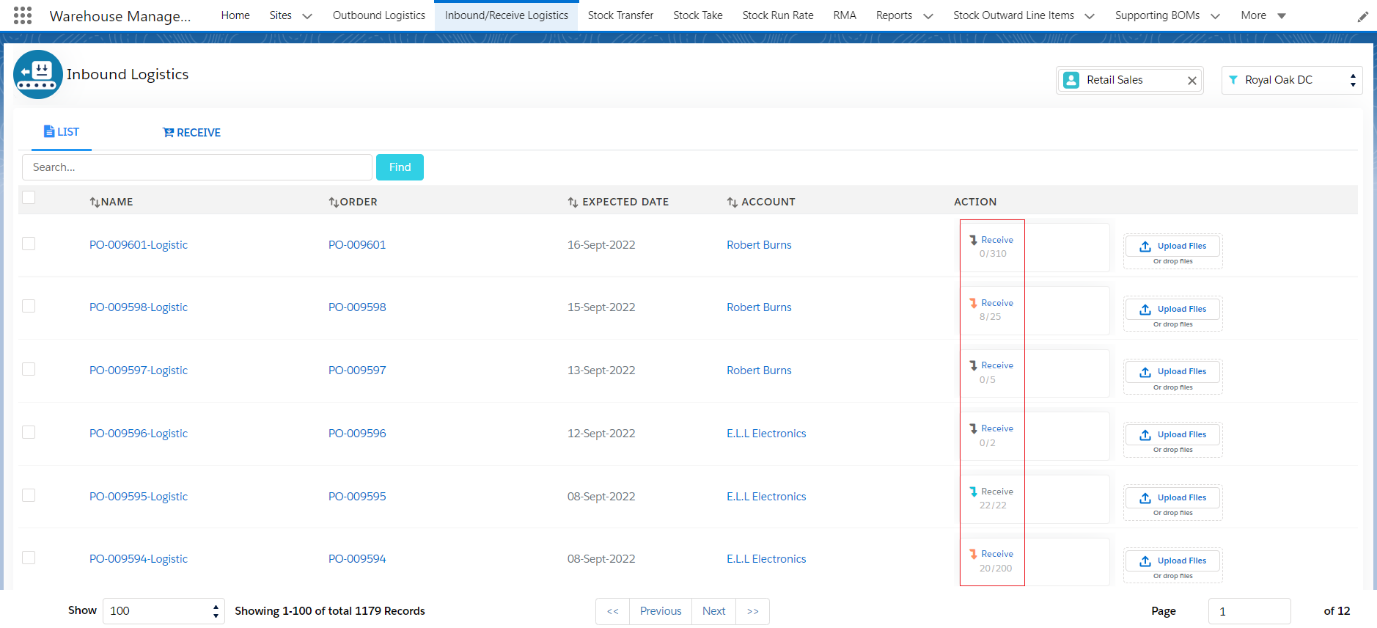
Figure – Click on Receive button to navigate to receive the section
Figure – Scan Receive barcode to navigate to receive the section
Note: –
- Users can select multiple logistics together by selecting/scanning the logistics as shown in the below figure and receive all items at a time.
- Users can attach any document like bills or product details by clicking on the ‘upload files’ icon and selecting the file that users would like to attach.
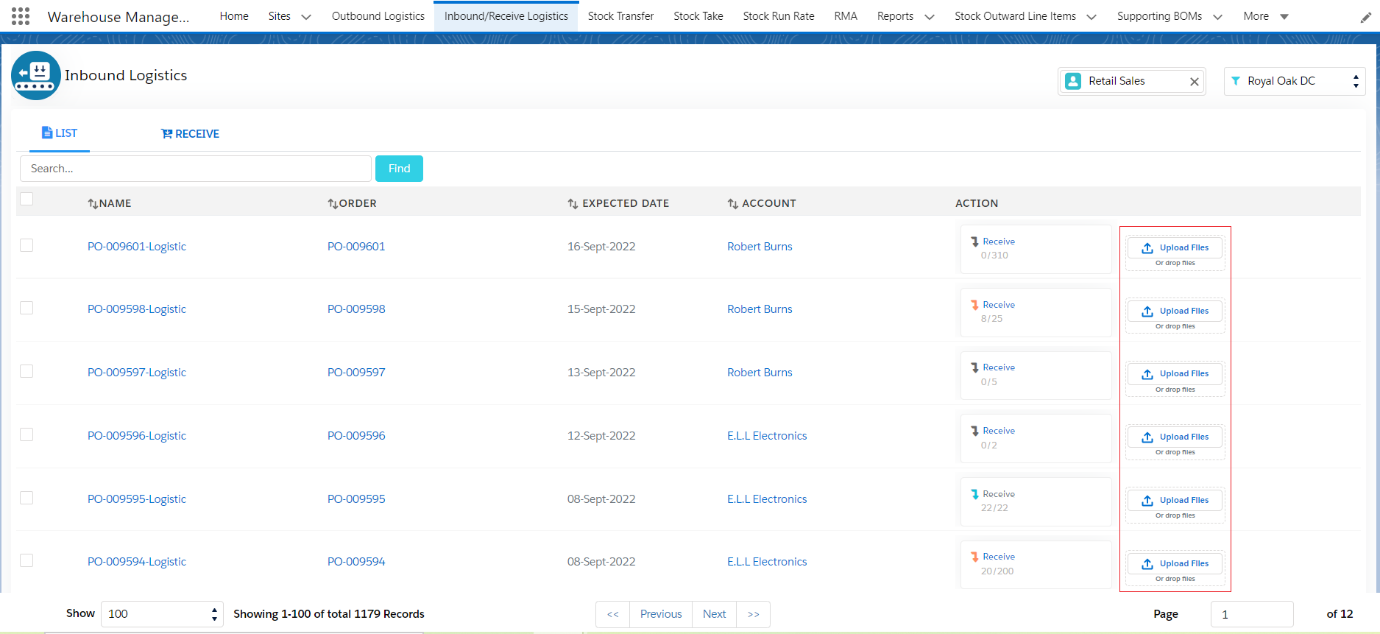
After uploading, users can find this document in the ‘logistic’ record level in the related list section of ‘notes and Attachments’.
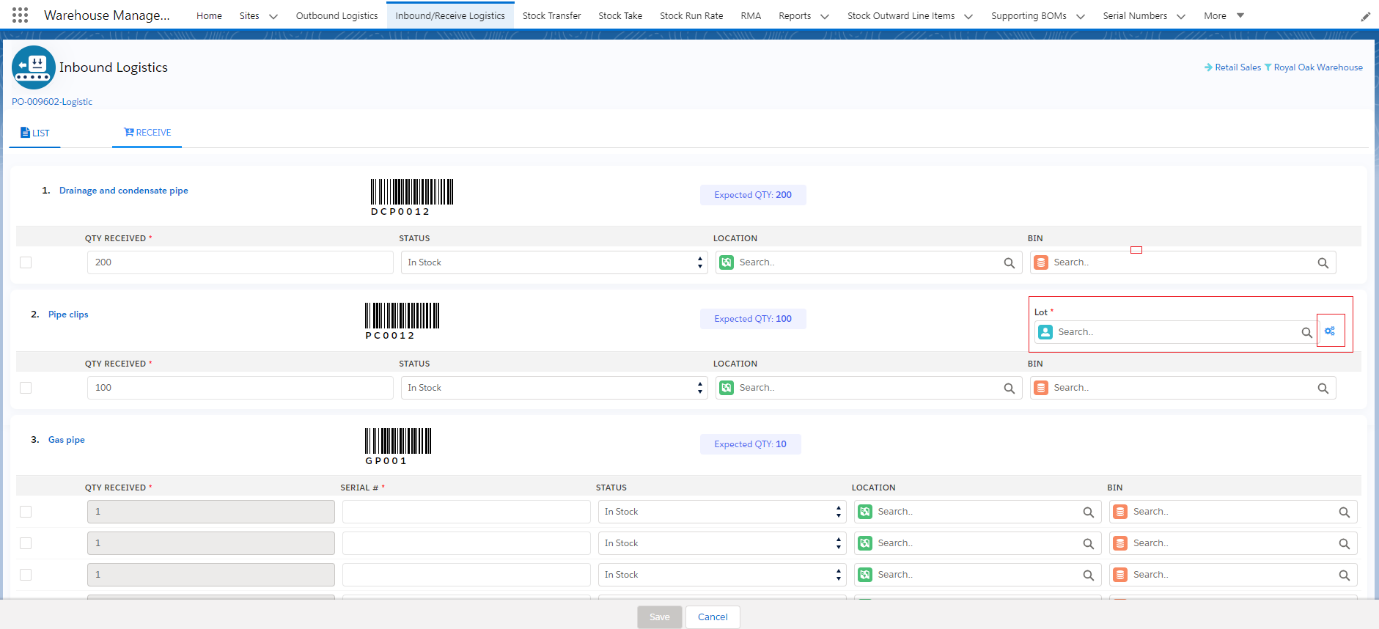
- After navigating to the ‘Receive’ section, users can see all the products associated with the purchase orders.
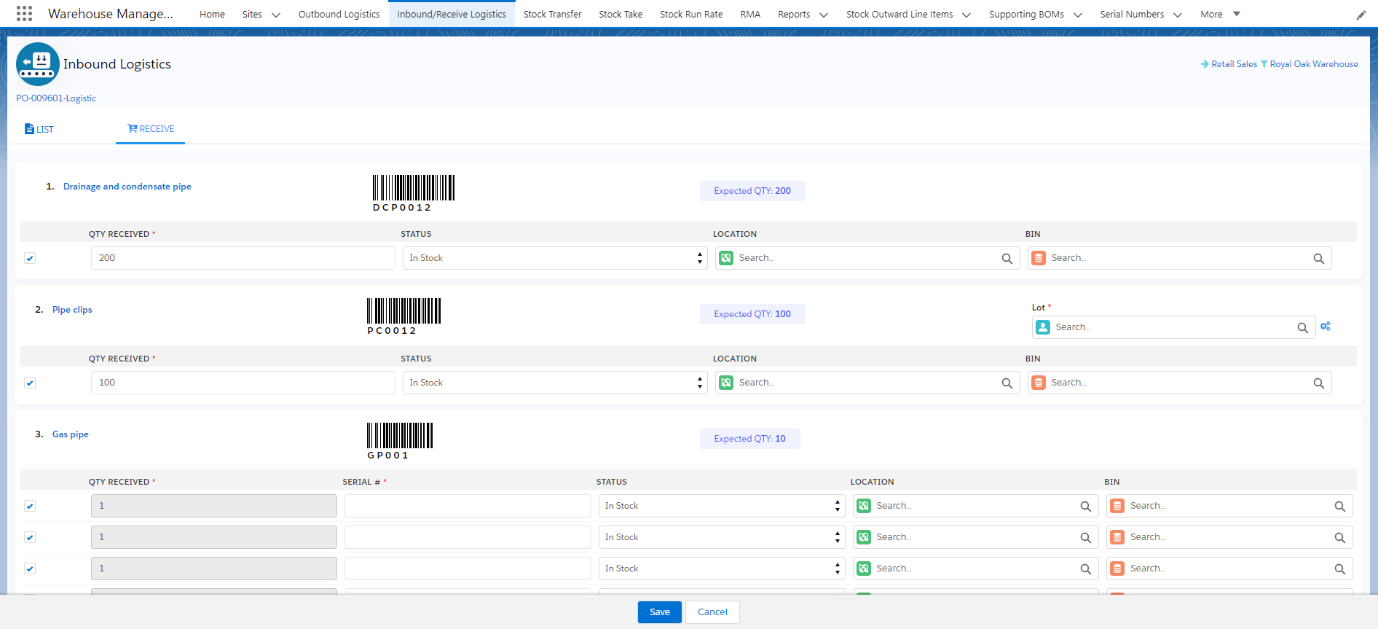
Figure 5: Before Receiving the Products
- Users can see the Normal products at the top, Batch products in the middle, and, Serialized products at the bottom of the page.
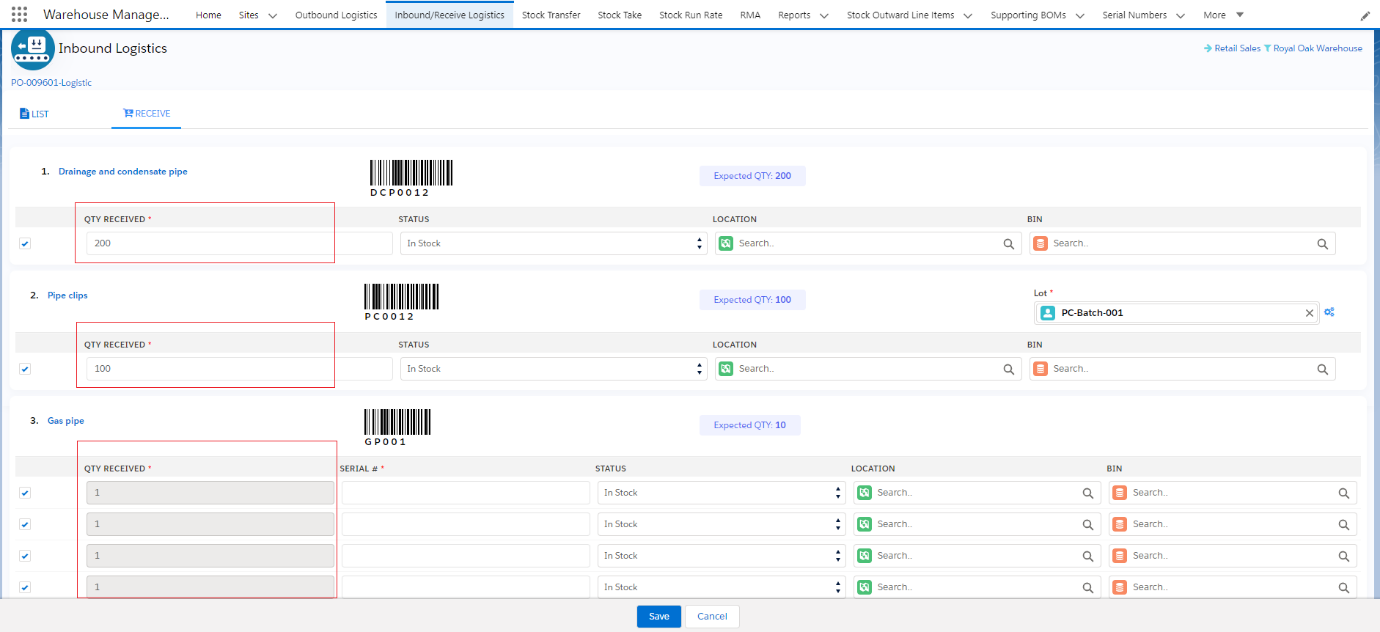
- Check the checkbox or Scan the Barcode of the Product to select the Purchase Order Line items.
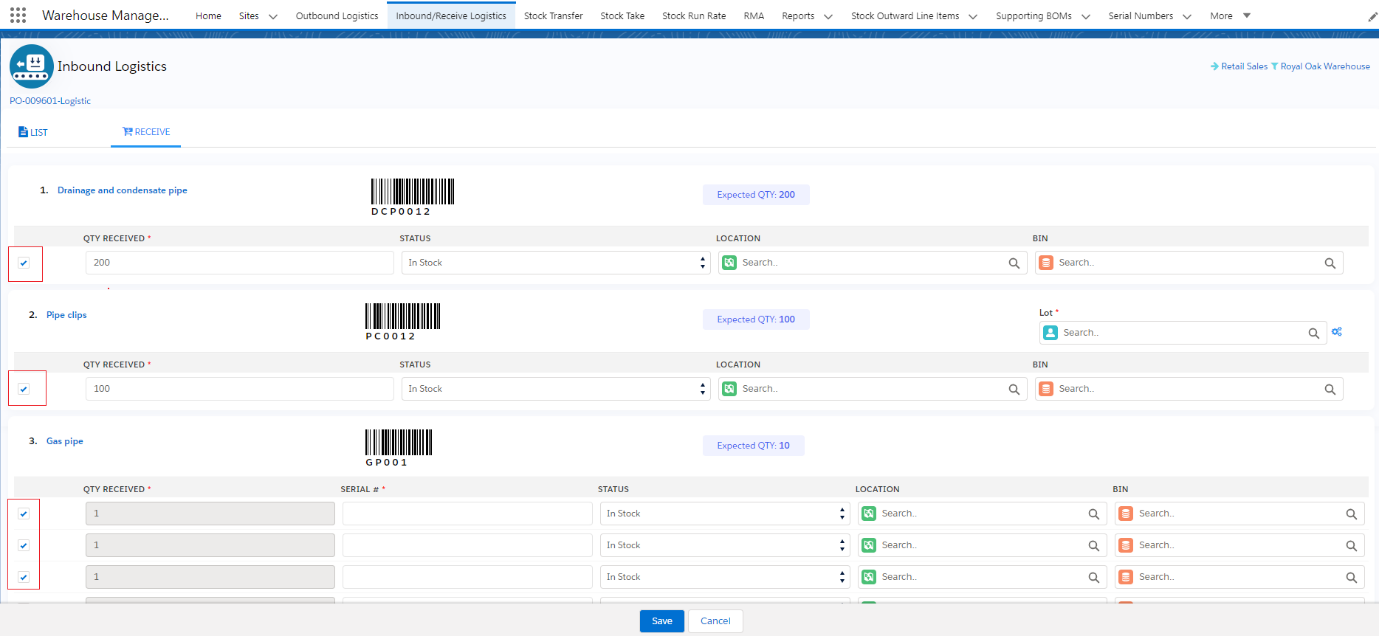
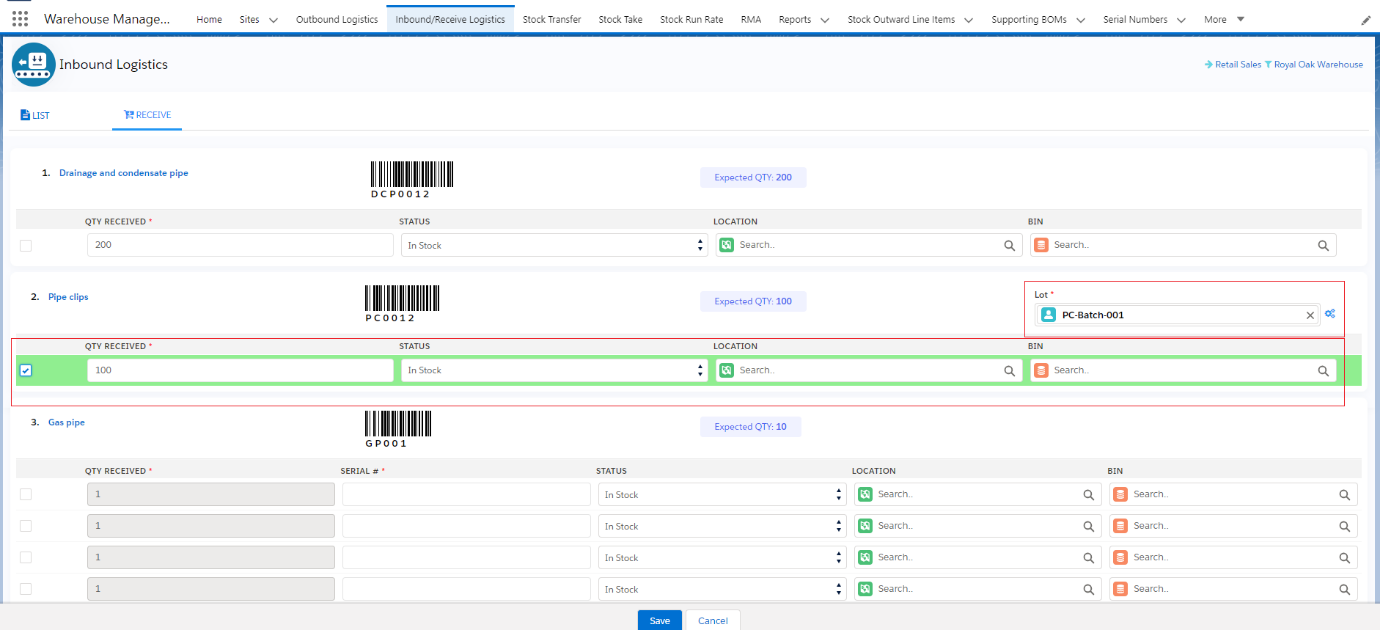
- If the Product is a Lot Tracked product, then you can Create a new Batch or you can Scan or Select the available directly. Click on the Gear icon to create a new Batch from the Receive section.
- If the Product is a serialized product, then you can Select each inventory for that product or Scan the barcode of the Product. If you Scan the barcode of that product, the system will automatically select each inventory record.
- Once you select each inventory for that product, you can enter the Serial numbers directly or scan new Serial Numbers for that product one by one.
- Once you select the line items and select Batch/Serial Numbers, you need to enter the Quantity that you want to receive in the provided Quantity input field. By default, the total quantity will be auto-selected, if you want to receive the quantity partially, you can enter the partial quantity and will be able to receive the items partially.
- Also, the user can Scan or Select the barcode of the Location if it’s stored at a particular location in the selected warehouse.
In the same way, the user can Scan or Select the barcode of the Bin.
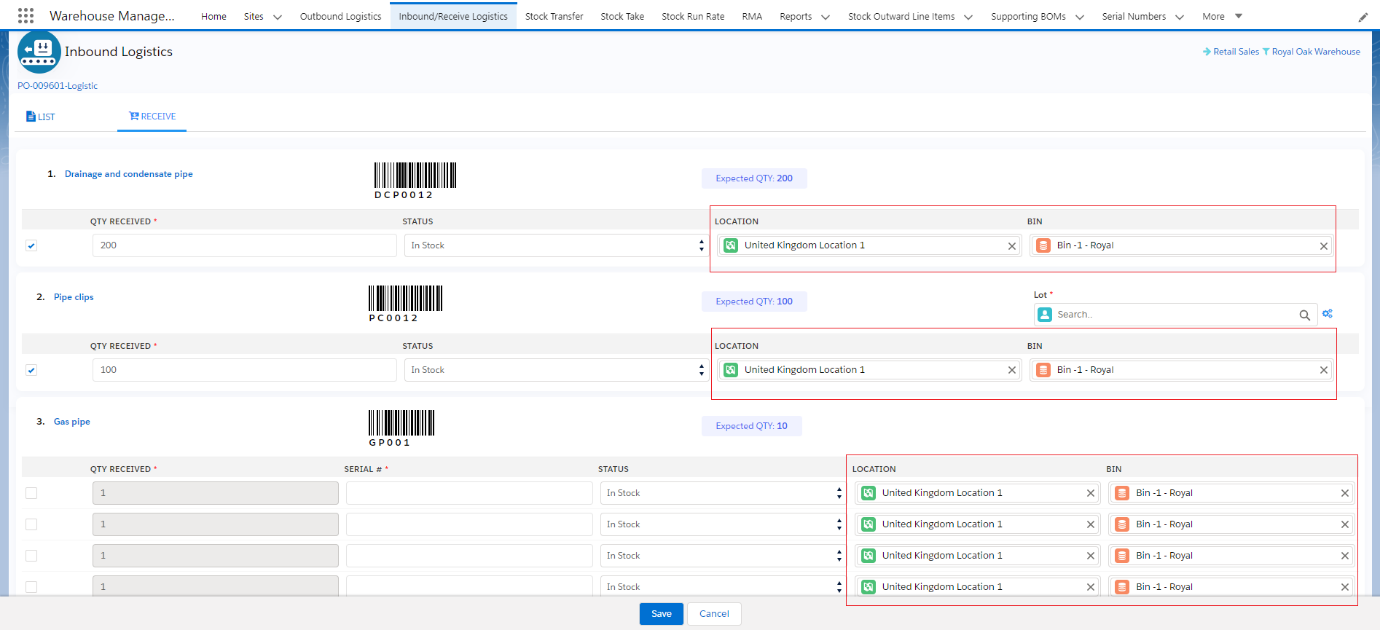
- Once everything is selected, you need to click on the Save button.
- If you are receiving the items partially, the system will display the received items in the below section of the page.
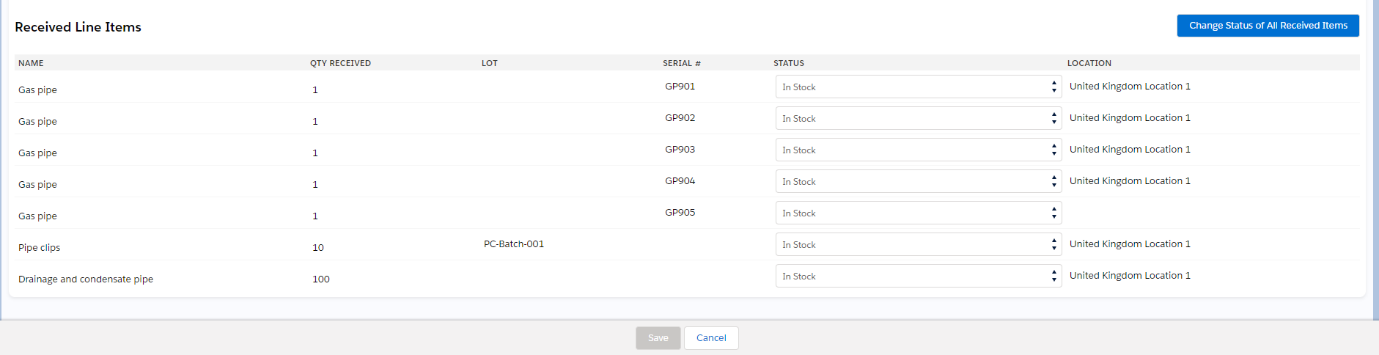
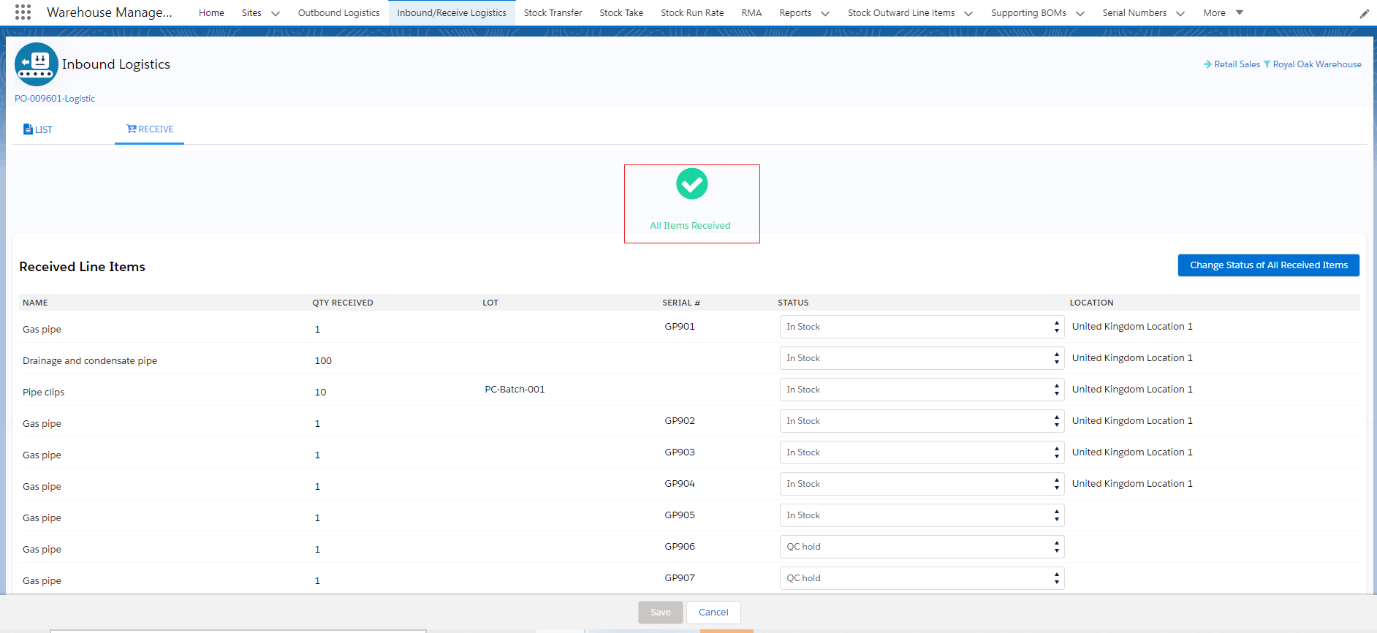
- Once you receive all the items, the system will display a message that All Items Received, and all received items will display at the Received Line Items.
Creating a new Batch/Lot from the ‘Receive’ Section.
Step 1: Click on the gear icon available next to Batch/Lot lookup.
Step 2: It will open the pop-up as shown below.
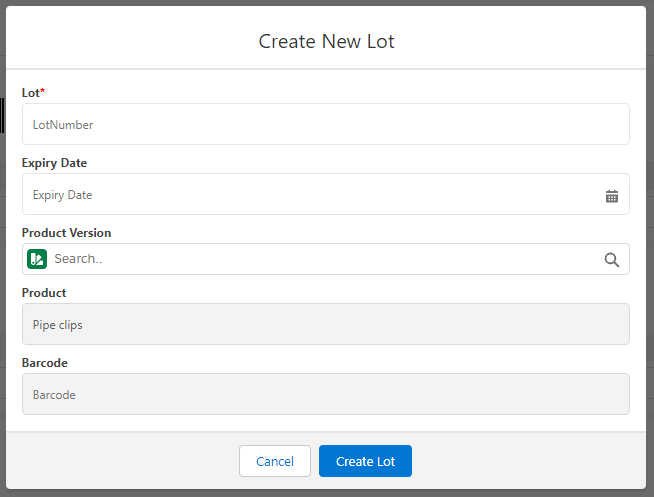
Step 3: Enter the Batch or Lot Number, and Expiry Date, and select Version if you want to associate that Batch to any specific Version.
Step 4: After entering the details click on the ‘Create Lot button, which will create a new Batch or Lot and allocate it to that product for which the inventory will get added.