Time Sheets
One of the most important assets a company has is its human capital. The role of human resources is vital in establishing an efficient and effective workforce. By tracking and analyzing timekeeping and work patterns, among other things, the HR department provides management with valuable information which they can use to plan and enhance working practices.
With the ERP Mark 7 Timesheet feature, a business can track and monitor the activities of employees on an hourly basis for a range of projects. It provides an instant status report on the activity of any individual and allows employers to plan projects efficiently, optimizing the working hours of every employee.
The timesheet is specific to each employee and can be submitted for approval to higher authorities. This helps you track the activity status of the specified task.
Timesheets can be created using one of two methods –
- From the record level
- From the Timesheets tab
From the Record Level
The steps below explain how to create a timesheet and move it from Draft status to Submitted status.
- Create a timesheet by navigating to the Employee management app > Employee tab.
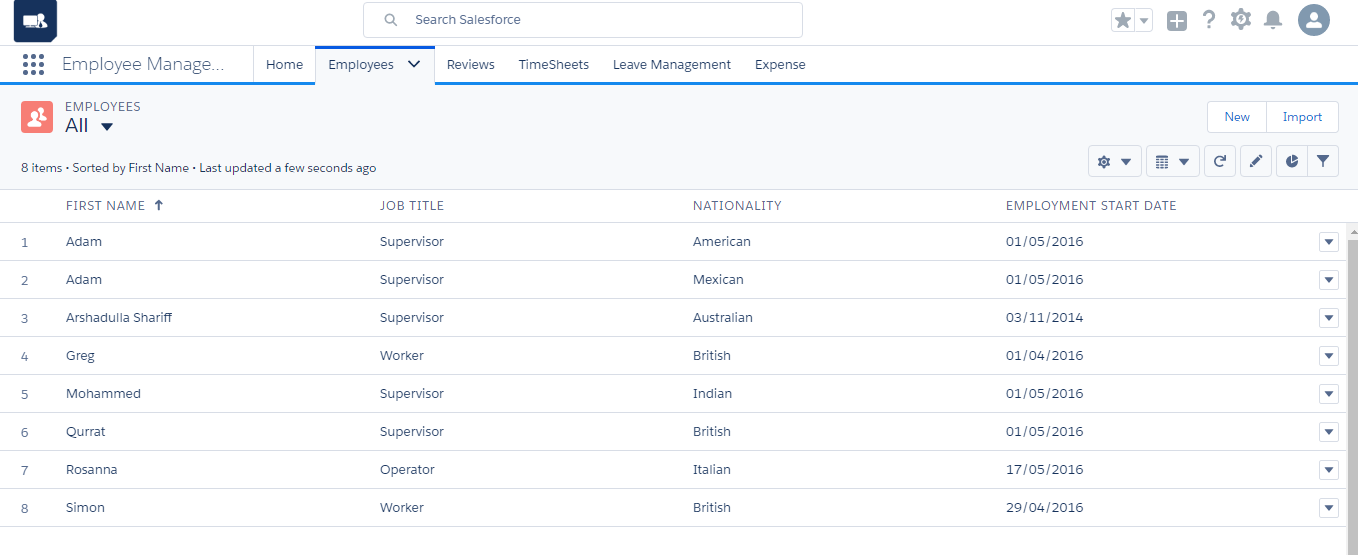
- From the list of employees, select the employee for whom a timesheet must be created.
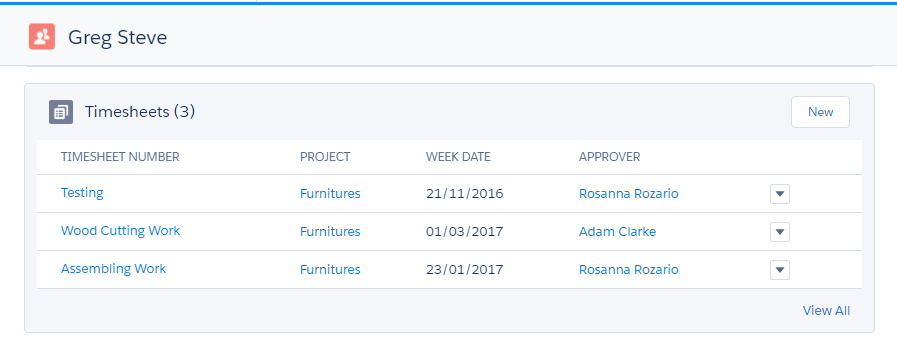
- On the related tab scroll down and select timesheets related list and click ‘New’ button
- Enter the organisation details, approver details and timesheet status details. Administrators and other employees who act as approvers can see all the time cards for the week. Time cards can have any of the following statuses.
- Draft
- Approved
- Submitted
- Rejected
- In the timesheet, enter the start and end dates of the week.
- Click “Save” to create the time sheet record.
| Field | Description |
| Employee | Describes the name of the employee whose timesheet is being created |
| Workforce Requirement Planning | Describe the name of the workforce required for which the timesheet is created to monitor progress |
| Approver | Other employees who act as approvers can see all the weekly time cards for all the employees under them |
| Team Member | Describes the team to which the employee belongs |
| Status | Provides the current status of the timesheet, such as Draft or Submitted; controls which actions can be performed against the timesheet |
| Start Date | Describes the start date of the week |
| End Date | Describes the end date of the week |
| Approve / Rejected Date | Describes the date on which the timesheet was approved or rejected |
| Approve / Rejected Reason | Describes the reason for approval or rejection |
| Week Date | Specifies the week’s date |
A timesheet can be in different stages, which can be easily understood by the following statuses.
| Timesheet Status | Action |
| Draft | A timesheet in the Draft state can be edited to add or delete time card entries. |
| Approved | When the timesheet is approved by the work agent/higher authority, it is marked “Approved.” |
| Submitted | Once the employee is confident about his entries, the timesheet can be moved to the Submitted state when it awaits approval. |
| Rejected | If the approver rejects the timesheet, it becomes available for review and re-submission. |
Creating Time Card Entries
Timecard entries specify the exact time spent to complete each activity of the project throughout the week. A timesheet may contain one or more time card entries. Each time card entry can be tracked by its activity status. The steps below explain how to create a timecard entry.
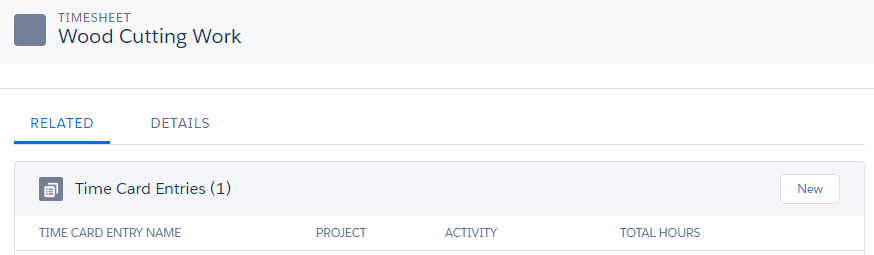
- Every time sheet should be associated with one or more time card entries, which indicates the amount of time an employee spends on each project. In the related list of timesheet records, click the “New” button under “Time Card Entries”. Upon the creation of time card entries, the time sheet is in the Draft stage.
- Fill in the project name, which describes the name of the project for which the time card entry is being created.
- Fill in the weekday dates and hours. Every hour mentioned can be supported by a comment to explain the outcome of the task.
- Select the “Active” checkbox and select the activity status.
- Click the “Save” button to create the time card entry.
Creating Time Sheets Through the Timesheets Tab:
- Navigate to the Employee Management app > Timesheets tab.
- Click on the “Add New Timesheet” button to create a new time sheet for the logged-in user.
- Every time sheet will be in “Draft” status until it is ready to be submitted to the approver. Select the approver who is authorised to review the time card entries and to decision whether to approve or reject the timesheet.
- Enter the time card entry details; select the project for which the time card entries are created.
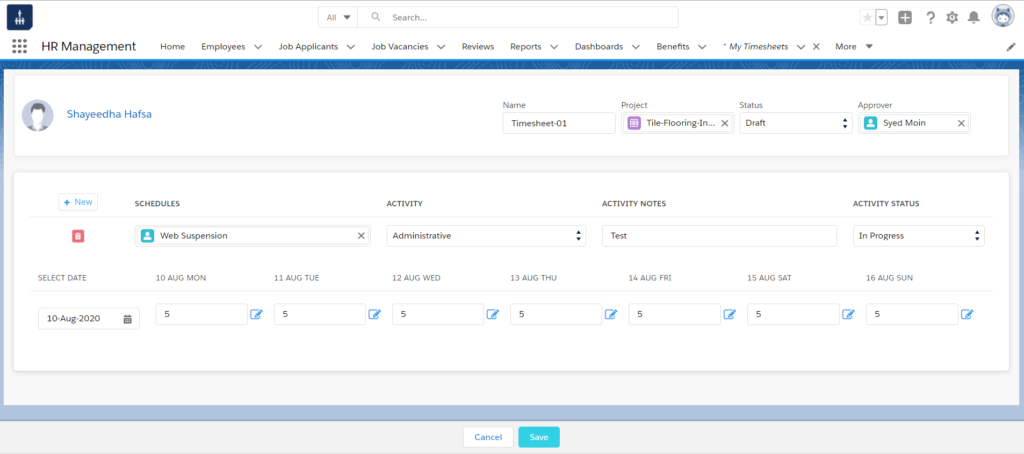
- Enter the activity notes, if any, and the activity status to monitor the completion of the task.
- Enter the number of hours spent on each day of the week for the selected project and activity.
- To create a new time card entry in the same time sheet, click the “Add New +” button.
- Click “Save” to create the time sheet under “Draft” status.
Viewing, Editing, and Submitting the Time Sheet:
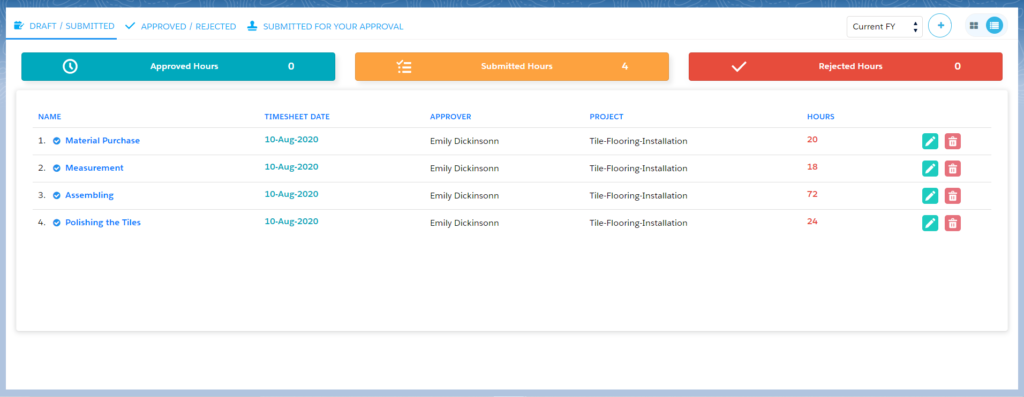
- Navigate to the Employee Management app > Timesheets tab.
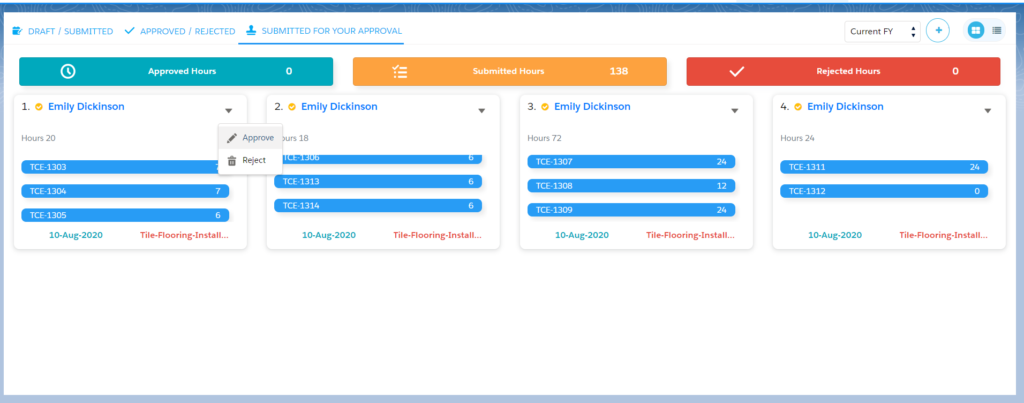
- The system shows the total approved hours, submitted hours and rejected hours. The system shows all the time sheets that have been submitted, that are drafts and that have been rejected.
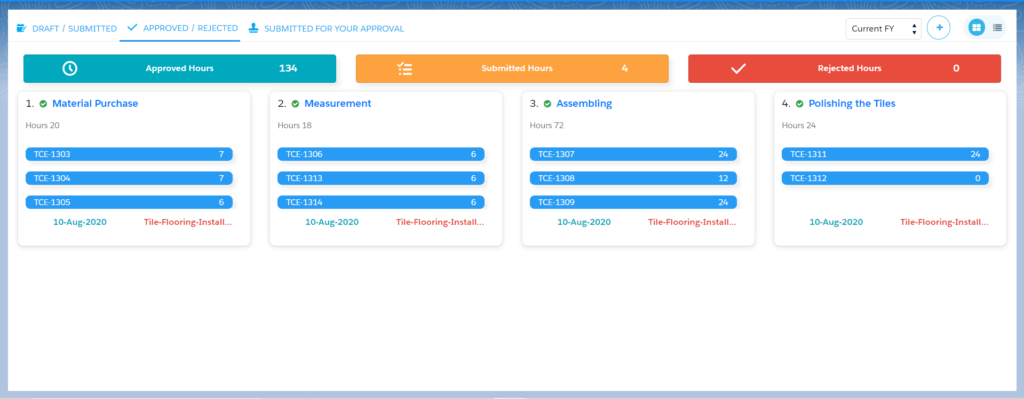
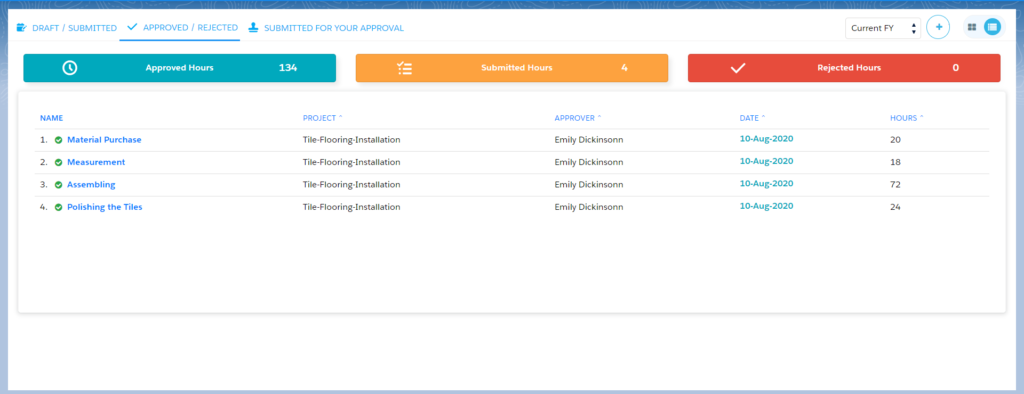
- Under the Approved Time Sheets section, an employee can view all his approved time sheets along with the date of approval and the name of the approver.
- To delete the time sheet, click the dustbin icon under the Action section.
- To edit the timesheet, click on the pencil icon under the Action section.
- To submit the time sheet to an approver, change the status from “Draft” to “Submitted” and click the “Save” button.
- An employee is an approver; he can also approve other employees’ records from the Manager’s Approval section.