Finance Data Setup
A. Custom Settings
- Navigate to Setup and find Custom Settings in the Quick Find box.
- Find the Module custom setting and click the Manage button.
- Click the New button and create a record named Finance. Make sure the Run checkbox is selected; this controls the activation/deactivation of the Finance module.
B. Fiscal Year Setup
- Navigate to Setup and find Fiscal Year in the Quick Find box.
- Select Standard Fiscal Year.
- Select the fiscal year Start Month and choose whether the fiscal year is based on the starting month or the ending month.
- Click the Save button to confirm the changes.
C. Finance General Ledger
The Finance General Ledger is used to track all financial transactions and serves as the primary accounting record for a business. It holds the accounting information needed to prepare the company’s financial statements, including the Balance Sheet and Income Statement, and includes accounts for assets, liabilities, owner’s equity, expenses, and revenue.
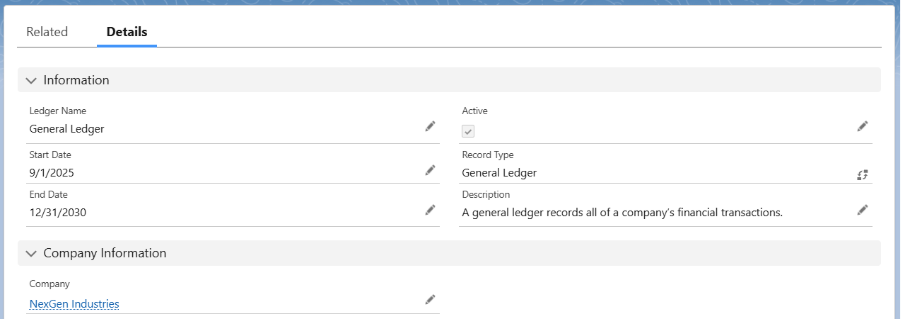
- Navigate to the Finance General Ledger tab using the App Launcher or find the tab in the App Navigation.
- Enter the Name of the general ledger, Start Date, End Date and description if required.
- Select the Company and click the Save button to create a general ledger record.
D. Chart of Accounts
The Chart of Accounts (COA) is a unique record of each type of asset, liability, equity, income/revenue, and expense. An important reason for having a COA in the system is to allow users to quickly assess a company’s financial health and clearly segregate assets, revenue, liabilities, and expenses. It provides a complete listing of each account in the accounting system, and our system offers the flexibility to tailor the company’s COA to best suit its business processes. It is available for recording transactions in the Finance General Ledgers.
- Navigate to the Chart of Account tab using the App Launcher or find the tab in the App Navigation.
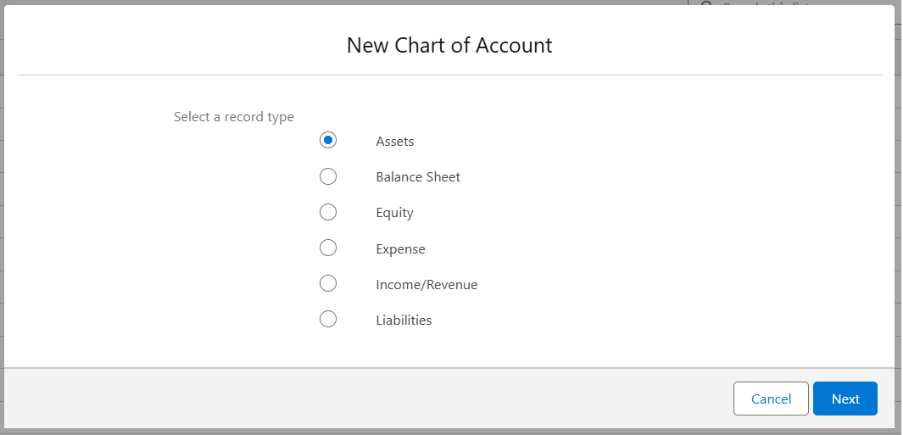
- Click New and select the Record Type for the Chart of Accounts, then click the Next button.
- Enter the Name of the Chart of Accounts and select the Active checkbox.
- Enter the Accounting Period Start Date and End Date
- Select the General Ledger you created and Company from the lookup.
- Click the Save button to create the Chart of Accounts record.
Sample Inventory COA.
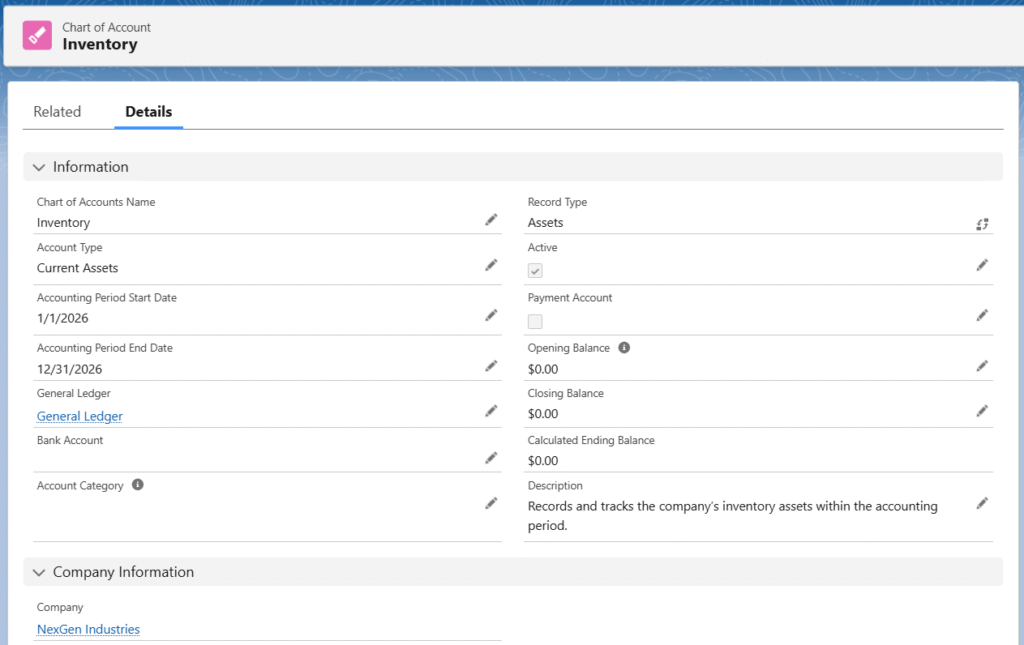
The following basic chart of accounts should be created in the system.
| Chart of Account Name | Record Type |
| Inventory | Assets |
| Checking | Assets |
| Cash | Assets |
| Accounts Receivable | Assets |
| Retained Earnings | Equity |
| Owner’s Equity | Equity |
| Cost of Goods Sold | Expense |
| Rent | Expense |
| Sales | Income/Revenue |
| Sales Return | Income/Revenue |
| Sales Discount | Income/Revenue |
| Sales Tax | Liabilities |
| Accounts Payable | Liabilities |
| Sales Tax Payable | Liabilities |
| Goods Received Not Invoiced | Liabilities |
To start a new business process, create a Stockholders’ Equity or Owner’s Equity COA with an Opening Balance as per the requirement.
Note 1: When creating a new Account (Company) or an existing Account (Company), make sure the field Account Type is set to Company. If the field is not available on the page, add it to the layout. Additionally, on the Account (Company) detail page, the Default checkbox should be checked.
E. Chart of Accounts Mapping
Chart of Accounts mapping allows the processing of balances and supports the ability to correlate a source chart of accounts to a target chart of accounts. The posting functionality in our system enables the Finance General Ledgers to create the relevant finance general ledger entry with the corresponding chart of account information and transactions.
To create the Chart of Accounts mapping, follow these steps:
- Navigate to the COA Mappings tab using the App Launcher or find the tab in the App Navigation.
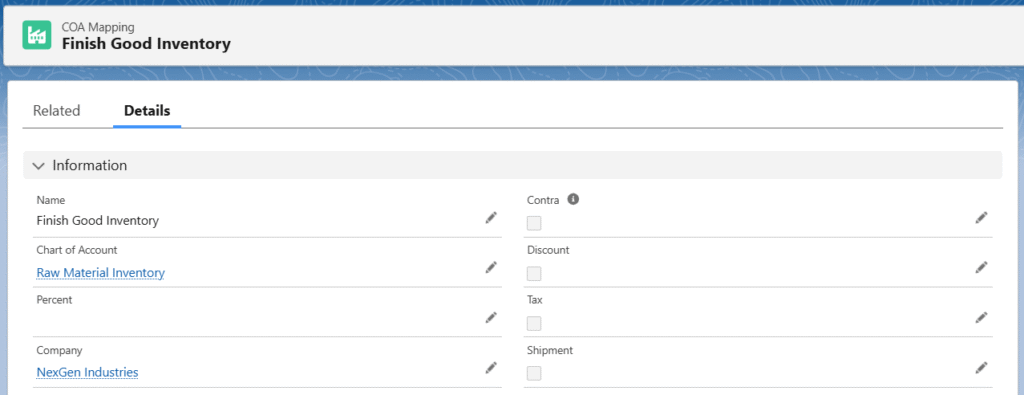
- Click New and enter the name of the COA Mapping.
- Select the related Chart of Accounts from the lookup.
- Select the Tax or Discount checkboxes if the COA Mapping created is for Tax or Discount purposes.
- Click the Save button to create the COA Mapping record.
Sample COA Mapping for Finished Food Inventory
F. Accounting Period
Create the accounting period for the fiscal year, i.e., create the accounting period for all the months of the fiscal period for which the financial statements are prepared. It essentially mirrors the basic twelve-month calendar.
- Navigate to the Accounting Period tab using the App Launcher or find the tab in the App Navigation.
- Select the Company for which the Accounting Period records are created.
- Enter the Start Date and End Date of the fiscal period.

- Click the Create button to create the accounting period records.
