Purchase Requisition
A Purchase Requisition is generated before a purchase order is raised to notify the Purchasing team of the items that need to be ordered and their quantities. It provides detailed information on the desired goods and services for the organization.
For example, John works at a warehouse and notices low inventory levels for some items. He requests the purchasing team to create purchase orders by generating a Purchase Requisition to restock the inventory.
Steps to Create a Purchase Requisition:
- Navigate to the Purchase Requisition tab using the App Launcher or find the tab in the App Navigation menu.
- Click next will auto populate fields such Channel, Distribution Center – Receiving, Purchasing Company, Employee Requester, Expected Delivery Date, and Status.
- Enter delivery details like Delivery Contact and Delivery Address and Special Instructions (Optional).
- Click on the Add button to add products.
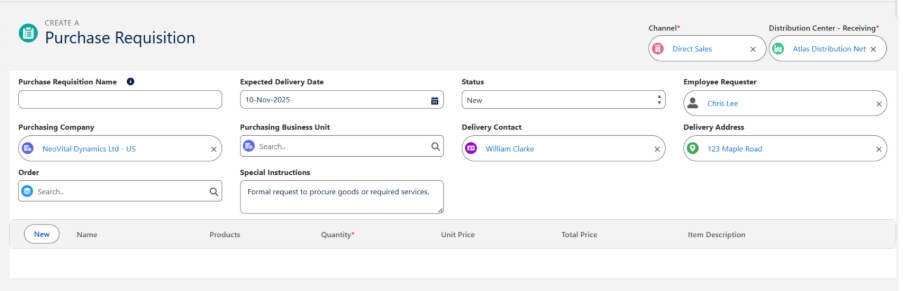
- Search for the Products, enter the required Quantity, and specify the Unit Price. Similarly, add more products by clicking the Add button again.
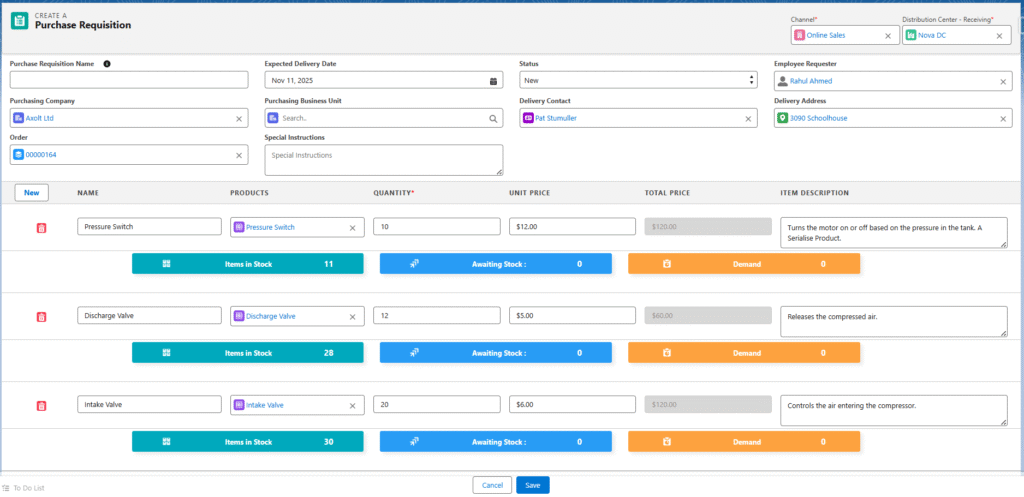
- Click Save to create the Purchase requisition.
How to Create a Purchase order for purchase requisitions:
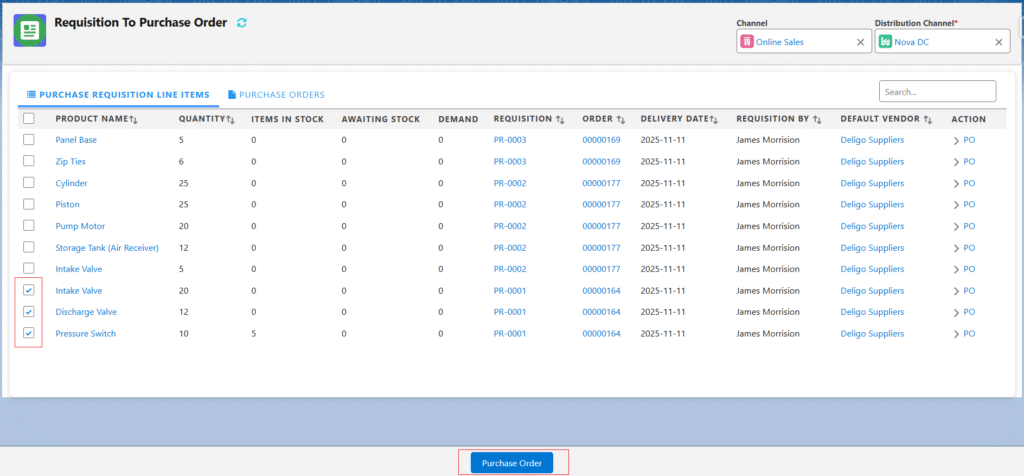
Requisition to Purchase Order
- Navigate to the Requisition to Purchase Order tab using the App Launcher or find the tab in the App Navigation menu.
- In the Home screen, Purchase Requisition Line Items can be sorted by Product Name, Quantity, Requisition, Order, Delivery Date, Requisition By, and Default Vendors using the Sorting functionality.
- Users can also utilize the Search Bar to locate specific Purchase Requisition Line Items. Additionally, line items can be filtered based on Channel and Distribution Channel.
- Select the items that need to be added to the purchase order and click the Purchase Order Button.
- It navigates to the Purchase Order creation screen, showing selected Products, Quantities, and Unit Price. Enter the Vendor and its Contact and Address details. Enter other optional details if applicable.
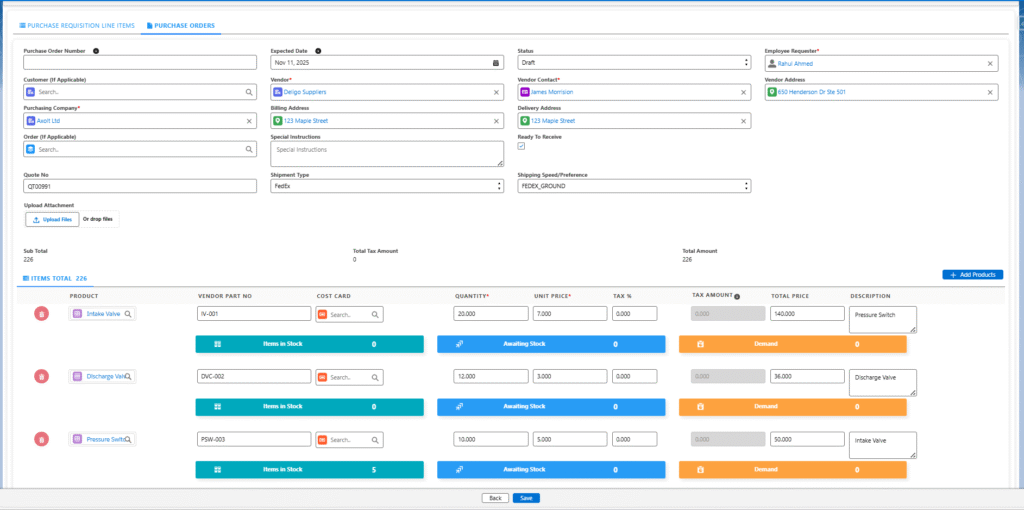
- Click Save to create the Purchase Order.
- Note 1: When a Purchase Requisition is created, its initial status is Draft. Once approved, it appears on the Requisition to Purchase Order screen, where it can be converted into a Purchase Order.
- Note 3: Purchase Requisitions and Purchase Orders can be created for single or multiple line items.
- Note 4: Now, follow the same process to inbound the logistics as mentioned for creating a purchase order.
- Note 5: Once a Purchase Order is created, users can proceed with the Logistics Creation and Bill Creation processes.
