Products and Its Types
Products
Products are configurable items that are manufactured within an organization or purchased from vendors/suppliers and are sellable. Products can be stored in an organization’s site/warehouse or a third-party site/warehouse.
The different types of products we have are:
A. Standard Products.
B. Service Products.
C. Kit Products.
A. Follow the below steps to set up a new Standard Product:
- Navigate to the Products tab using the App Launcher or find the tab in the App Navigation menu.
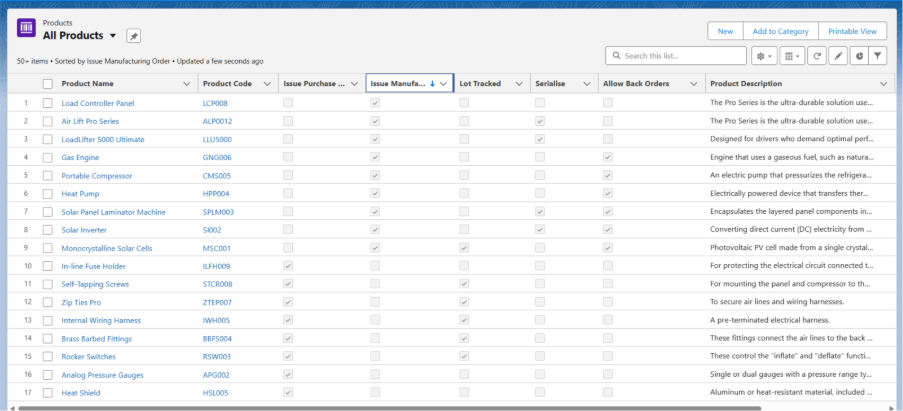
- Recently viewed products will be listed. Click on All to see all the available products in the system.
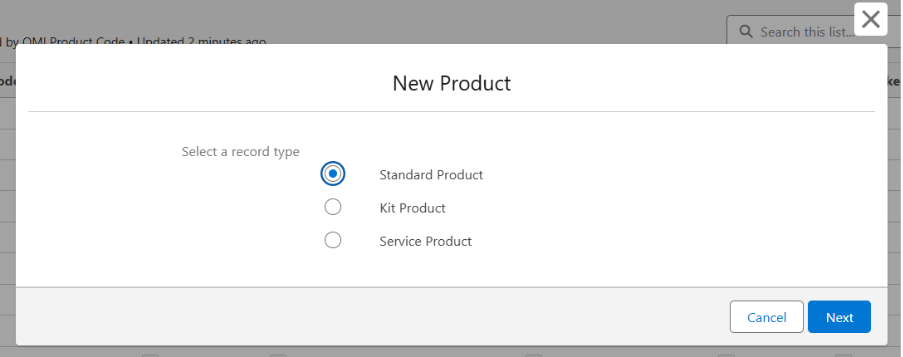
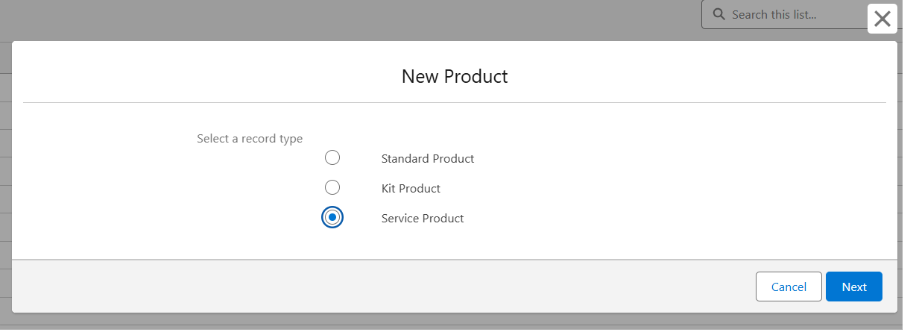
- To create a new product, click the New button and select the Record Type as Standard Product.
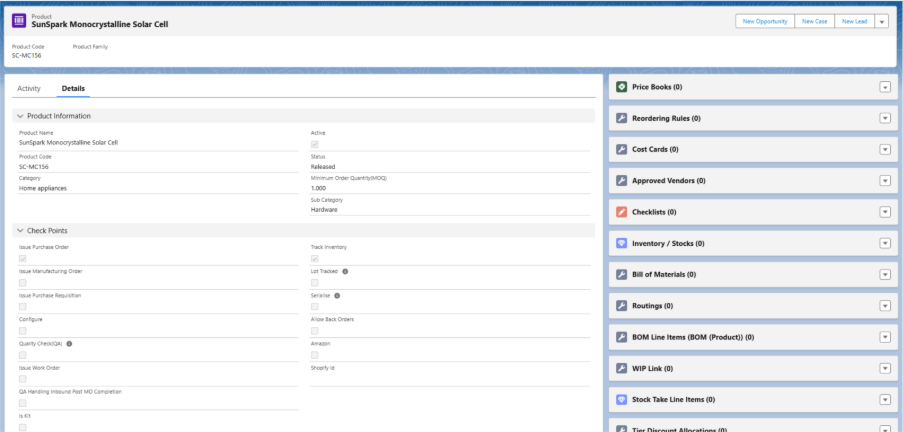
- Enter the Product Name and Product Code.
- Select the Product Family, Category, and Subcategory (if applicable).
- Select the Status as Released and make sure the Active checkbox is checked.
- Select the Track Inventory checkbox for all inventory products.
- Enter the Product Description and Barcode (if applicable).
- Assign the Correct Quantity Unit of measure.
- Check Serialise checkbox (for a serialized product), and Lot Tracked (for a batch product) depending on the product configuration needs.
- Check the Issue Purchase Order checkbox if the Product is Purchasable, Check Issue Manufacturing Order if product is manufacturable.
- Click on Save to create the standard product record.
Field Description of Product Record:
- Product Name: Name of the Product.
- Product Code: Unique code used to identify the product.
- Active: Indicates whether the product is currently active in the system and available for use.
- Status: Shows the current status of the product, here the status will always be Released.
- Is Purchase Order: Is Purchase Order checkbox is checked if the product can be purchased through a purchase order.
- Is Manufacturing Order: Is Manufacturing Order checkbox is checked if the product is produced through a manufacturing process.
- Track Inventory: Track Inventory checkbox should always be checked for all products except for KIT products.
- Lot Tracked: Lot Tracked checkbox should be checked if it is a batch product and has lot numbers associated with each.
- Note 1: The batch numbers for a product are generated through the Inbound or Manufacturing process.
- Serialise: Serialized checkbox should be checked if it is a serialized product and each unit of the product has a unique serial number.
- Note 2: The serial numbers for a product are generated through the Inbound or Manufacturing process.
- Issue Work Order: Issue Work Order checkbox should be checked if a Product is Serviceable.
- Allow Back Orders: Allows customers to create a and Quote Sales Orde even when the product is out of stock.
- Is Kit: Is Kit checkbox should be checked if it is a kit product made up of multiple components.
- Quality Check: Requires a quality check during the Inbound receive process.
- Is Subscribe: Indicates if the product is available for subscription.
- Purchase from Approved Vendor: Allowed to purchase the product from approved suppliers only.
- Issue Purchase Requisition: Initiates a request to purchase required Products.
- Configure: Allows customization of product specifications or features.
- QA Handling Inbound Post MO Completion: Manages quality assurance processes after manufacturing order completion.
- Alternate Quantity UOM: Specifies an alternative unit of measure for the product quantity. Used for MO UoM conversion Process.
- Available stocks: Displays the quantity of product currently in inventory.
- Awaiting stock: Shows the quantity of product expected but not yet received or manufactured in inventory.
- Reserved stock: Indicates the quantity of stock allocated for specific orders, Mos or other purposes.
- Estimated manufacturing cost: Provides the estimated price for manufacturing the particular product as this amount will be used for accounting ‘Cost Of Goods’ sold.
- Default BOM: References the standard bill of materials for the product.
- Default Routing: Specifies the default manufacturing process flow for the product.
- Picture: Stores an image representing the product.
- Preview Image: Displays a thumbnail or smaller version of the product image.
- Barcode: Contains the product’s unique barcode identifier, this is particularly used for Scanning Purposes.
- Revenue Account: The account used to record income from product sales.
- Expense Account: The account used to record expenses related to products.
- Inventory Account: The account used to track the value of product inventory.
Adding Related Records to Products
Adding Price Book for a Product:
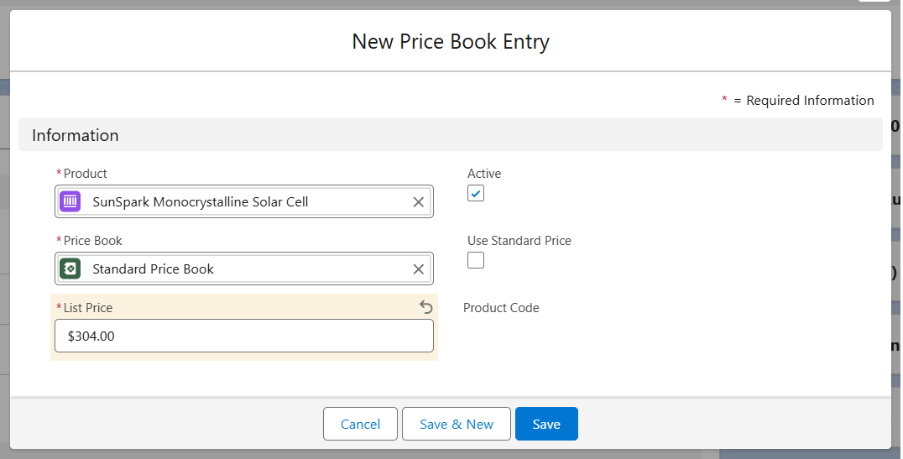
- Navigate to the Product record level.
- From the related list of the product, find and select Price Book.
- Click on the dropdown and select Add Standard Price Book.
- The Product and standard Price Book look-up will be auto populated.
- Enter the List Price.
- Click on Save.
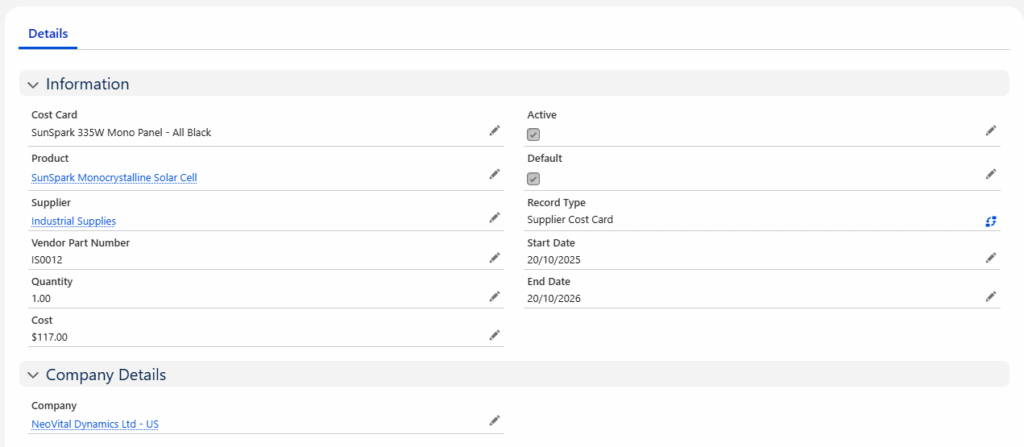
Adding Cost Cards to Products
- Navigate to the Related list of the product and select the Cost Card object.
- Click New and Select the Record Type as Supplier Cost Card.
- Product Name will be auto populated.
- Enter the Cost Card Name, Select the Vendor/Supplier, Enter Vendor Part Number (If applicable), Quantity, Cost.
- Check the Active checkbox, check Default (If applicable), select Start Date and End Date.
- Select the Company and click Save.
- This creates a Cost Card record that can be used when creating a Purchase Order or even in Manufacturing Order to calculate the Raw Material Costs.
Adding Tier Discount Allocation to Products
Click on the below link to create a Tier Discount Allocation for a Product.
Create Tier Discount Allocation.
Adding Approved Vendor to Products
- Navigate to the Related list of the product and select the Approved Vendor object.
- Click New and enter Approved Vendor Name, the Product look-up will be auto populated.
- Select the status as Approved, Type as Primary and select the Vendor/Supplier from whom you want to purchase. Enter Lead Time Days (If Applicable)
- Click on Save.
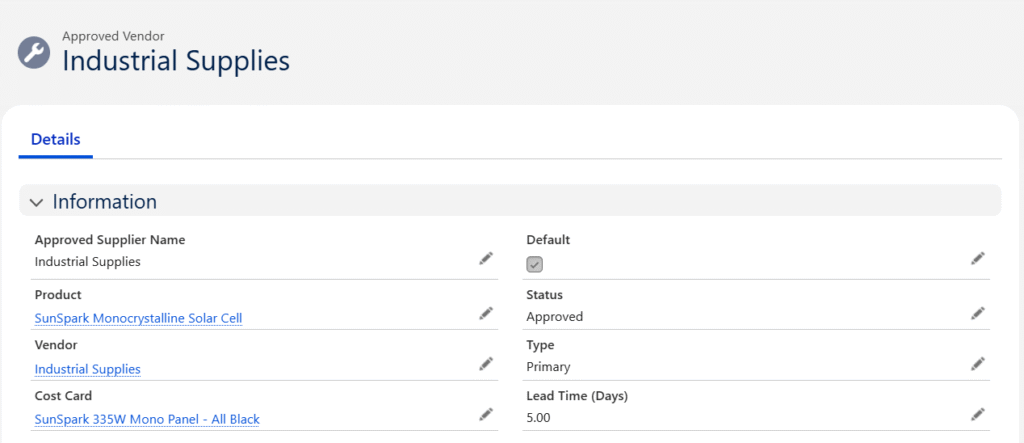
Note 3: If a product is marked as Purchase from Approved Vendor and an Approved Vendor is specified, the system will restrict purchasing that product from any other Vendors.
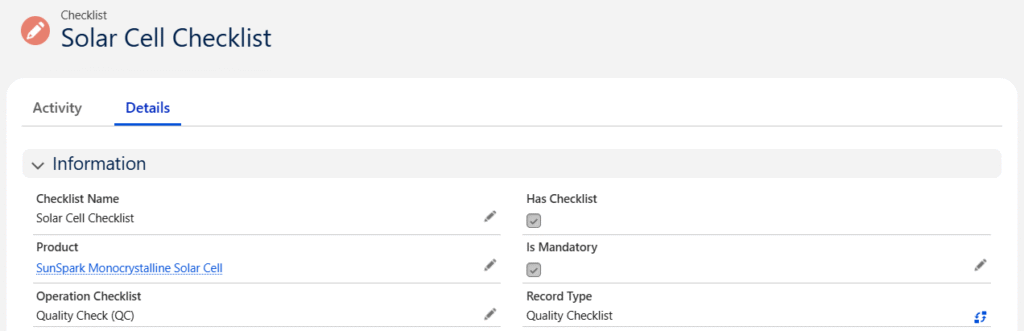
Adding Checklists to Products
- Navigate to the Related list of the product and select the Checklist object.
- Click New and select Quality Checklist as a Record Type and click Next.
- Enter the Name and check the Is Mandatory Checkbox.
- Select the Operation Checklist as Quality Check (QC).
- Click on Save.
Inventory / Stocks
- Product Inventory can be increased by raising a Purchase Order or Manufacturing the product.
- A Stock Take can be performed to adjust inventory levels upward or downward.
- Existing Stock can be transferred between Warehouses or Locations using Stock Transfer.
- A Transfer Order can be raised for stock transfers requiring shipment (e.g., via FedEx or UPS).
- Inventory will be reduced after Stock Allocation on the MO side.
- Inventory can be reduced by creating an RTV PO.
- Inventory can be added back to the Warehouse by creating an RMA.
B. Follow the below steps to set up a new Service Product
- Navigate to the Products tab using the App Launcher or find the tab in the App Navigation menu.
- Recently viewed products will be listed. Click on All to see all the available products in the system.
- To create a new product, click the New button and select the Record Type as Service Product.
- Enter the Product Name and Product Code.
- Select the Product Family, Category, and Sub-Category.
- Select the Status as Released and ensure the Active checkbox is checked.
- Select the Issue Work Order checkbox.
- Save the record to create the service product.
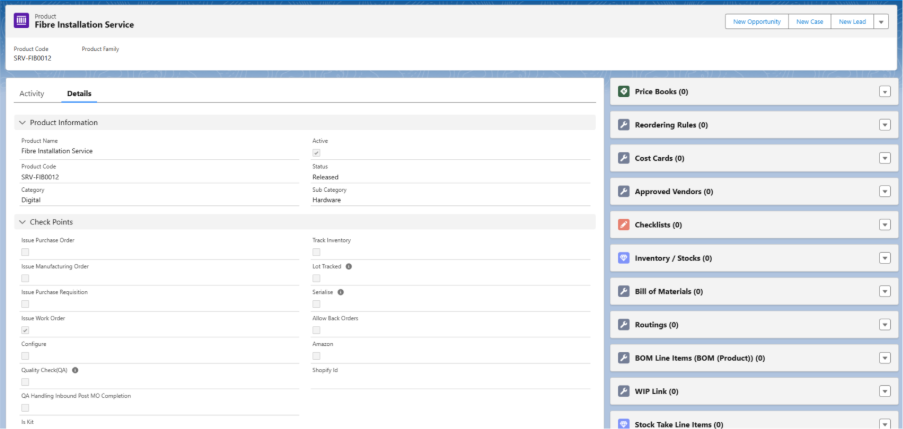
- Upon Saving; a Service Product, a Bill of Material (Version) will be automatically created for that product. (This is handled through a custom setting.)
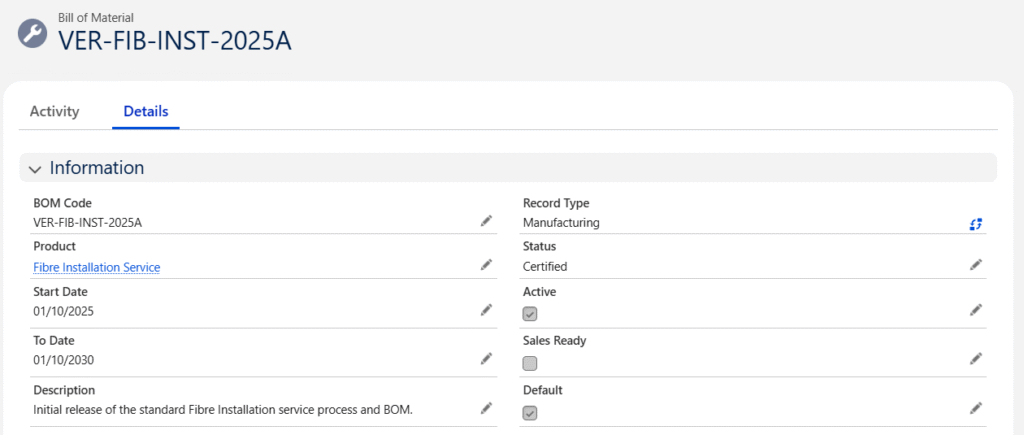
Create Bill of Materials (Version) against Product
- On the Product Related List, search for Bill of Materials (Version) and click on New.
- Clicking on New will display a pop-up, select the Manufacturing Record Type.
- Product will be auto populated, enter the BOM Code and set the Status as Certified.
- Check the Active checkbox, and Default checkbox if you want that Bill of Material to be the default Bill of Material of the product.
- Select the Start Date and End Date.
- Enter the Description (Optional).
- Click on Save.
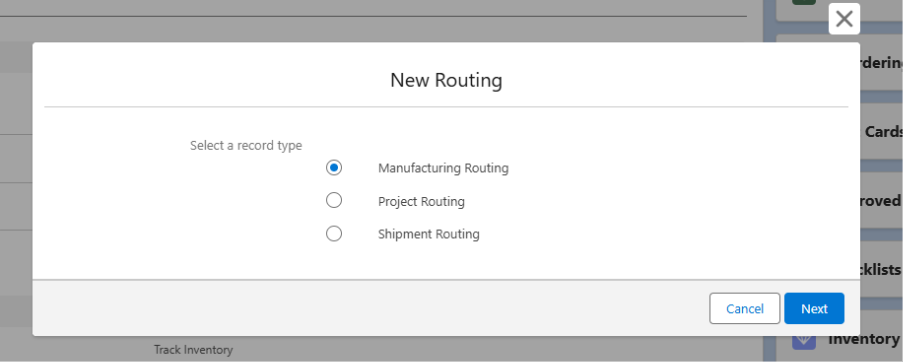
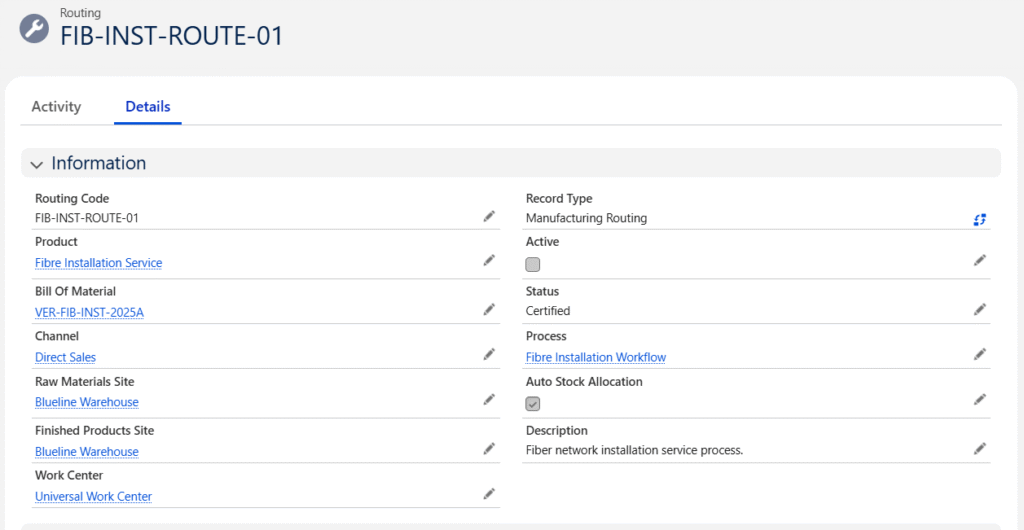
Create Routing against Product.
- On the Product Related List, search for Routing and click on New.
- Clicking on New will display a pop-up, select the Manufacturing Routing Record Type.
- Enter the Routing Name and set the Status as Certified. Product Name will be auto populated.
- Select the Previously created Bill of Material, select the Channel and Process. (Follow the below mentioned steps to create a new Process.)
- Select Raw Material Site, Finished Product Site, Work Centre.
- Check the Auto Stock Allocation checkbox.
- Click on Save.
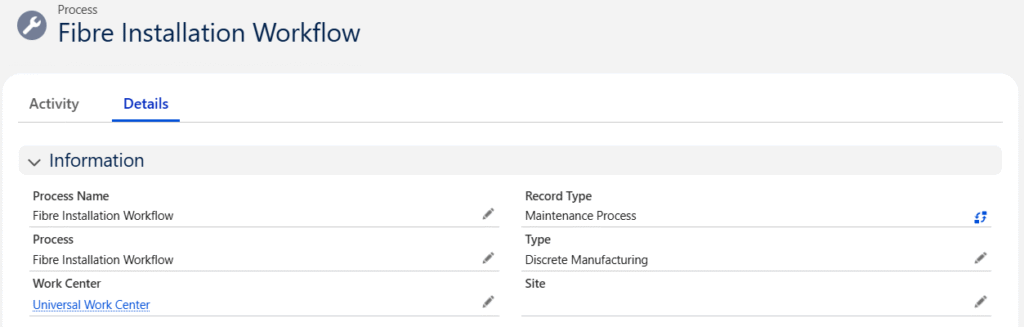
Create Process for the Product
- During Routing creation, click on Process lookup field and click on the + New Process button.

- + New Process will display a pop-up, select the Maintenance Process Record Type.
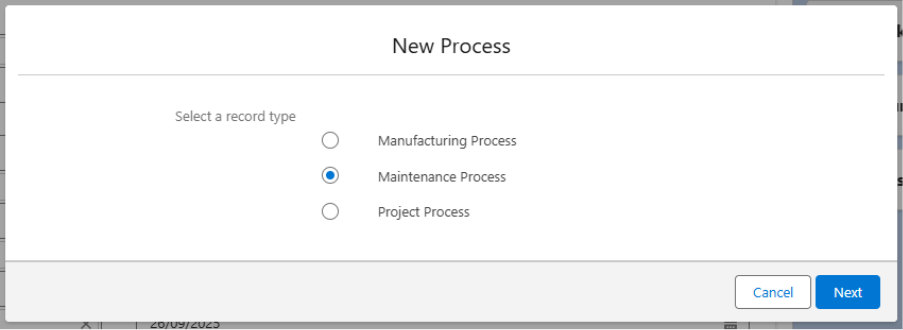
- Enter the Process Name.
- Select the Work Centre and Type from the lookup (Optional)
- Click on Save.
Create Process Cycles Against process
- After creating the process, go to the Process Related List, search for Process Cycles, and click on New.
- Enter the Process Cycle Name; the Process field will be auto populated.
- Select the same Work Centre you selected for the process. (Optional)
- Enter Previous Process Cycle and Next Process Cycle if available. (Optional)
- Click on Save.
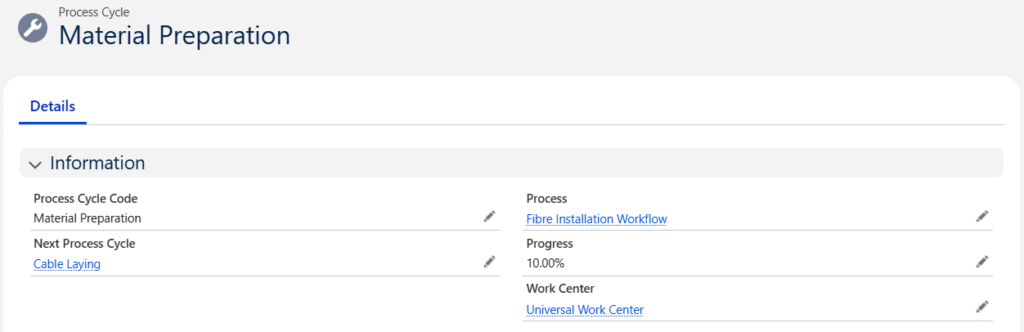
Note: Follow the same steps to create different Process Cycles.
Create Operation for Process Cycles
- On the Process Cycle Related List, search for Operations and click on New.
- Enter the Operation Name, select the Work Centre and Routing.
- The Process Cycle will be auto populated.
- Fill other optional information if needed.
- Click on Save.
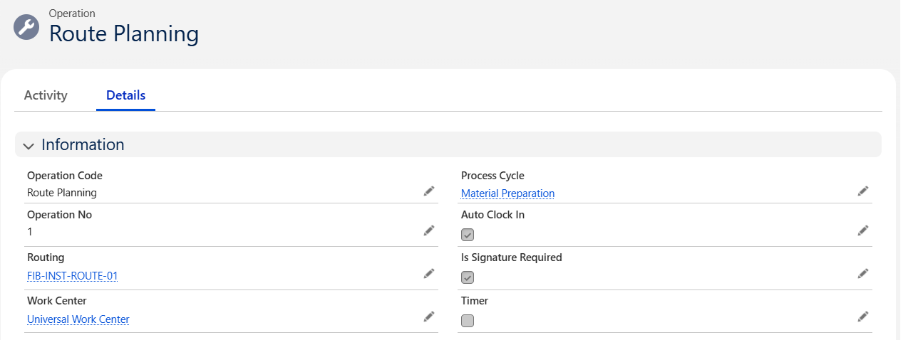
Note 4: Follow the same steps to create different Operations.
Note 5: The Work Centre should be the same in both the Process and the Operation.
C. Follow the below steps to set up a new Kit Product:
