Return Merchandise Authorisation (RMA)
A Return Merchandise Authorization (RMA) is the process of returning a product to receive a refund, replacement, or repair during the product’s warranty period.
Creating RMA
You can create an RMA from the RMA screen.
The RMA ensures that returns are permitted only for items that have been shipped. The return process also includes the ability to create shipment flows and track those returns in the system.
- Navigate to the RMA screen using the App Launcher or find the tab in the App Navigation menu.
- This will navigate to the RMA page as shown below.
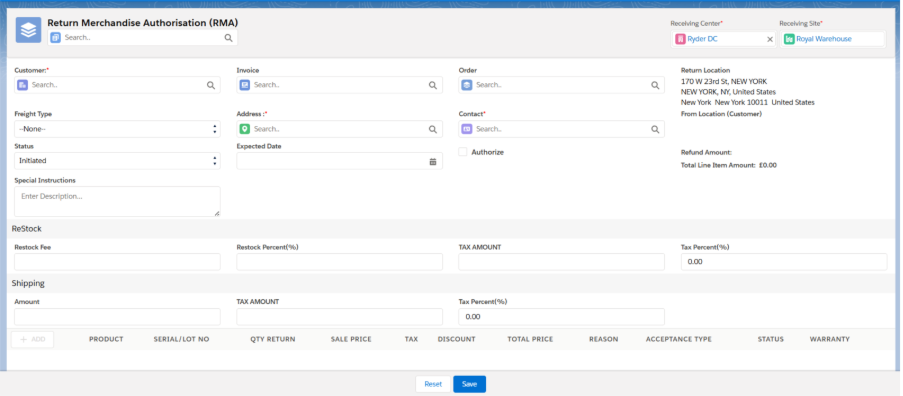
- Select the Customer from the look-up and select the Order from the Order look-up for which you want to create RMA.
Note 1: By selecting the particular customer, only the orders associated with that customer will be available in the look-up.
Also, the order will only be available in the look-up if the order is Picked, Packed, and Shipped, and the Order is Closed.
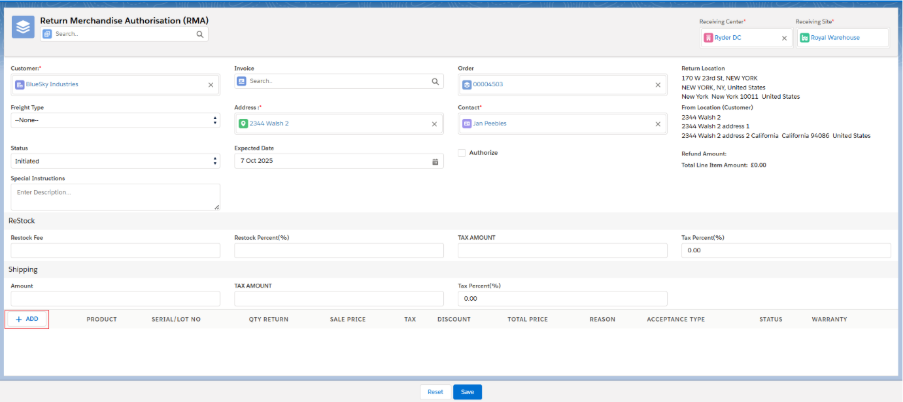
- Selecting the order from the look-up, other details will also be populated such as Address, Contact, Invoice along with Line-Item details.
- Click on Add button to add the line Items.
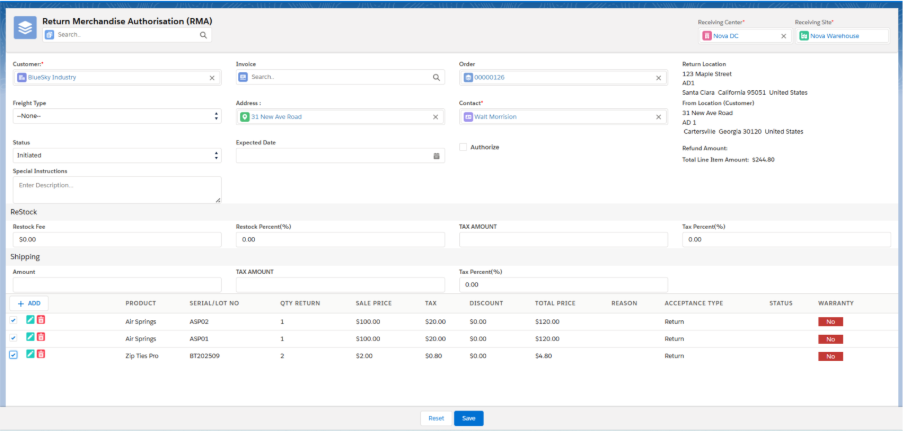
- The line item associated with that order will be displayed; select the Order Product you want to return.
- Enter the desired Return Quantity and Reason for Return.

- Once the return quantity and reason for return is entered, select the line item and click on Add button to add the line item to RMA.
Note 2: RMA can also be created for Batch and Serialized products. If it is a Batch Product, the Batch Number associated with that Order Product will be populated in the RMA line item. If it is a Serialized Product, the Serial Number associated with that Order Product will be populated in the RMA line item.
- Click on Save to create a new return package.
Note 2: If the Authorise checkbox is checked, the Ready to Receive will be auto-checked and logistics will be created automatically (Type: Inbound). Then, simply receive the returned line items from Inbound Logistics.
Note 4: Logistic (Type Inbound) can also be created by initiating the Return Shipments if any shipment like FedEx, UPS, etc. is needed. Once the Return Shipment is delivered to the destination Address, users can then proceed with Inbound Logistic to add items back to Warehouse.
Follow the below steps to create a package and desired shipment from Return Shipment screen.
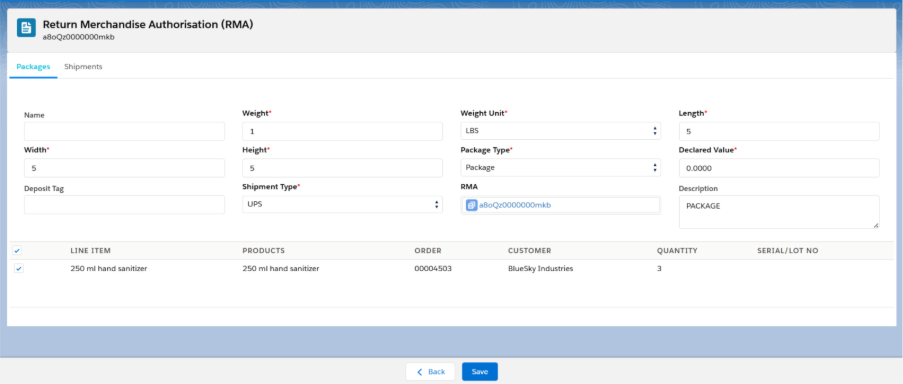
- Once the RMA is created, hover on the RMA Document, and click on Return Shipment button, this will navigate to Package creation page.
- Select the Package Type and Shipment Type and click on Save.
Note 5: Any of the shipment type can be selected, such as UPS, FedEx, Internal Shipment, etc.
- Then go the shipment screen, TO Address, From Address and all the required details will be populated along with the Package Details.
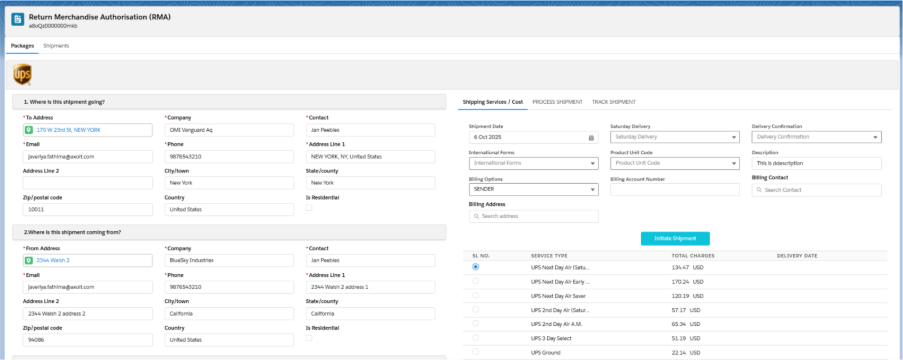
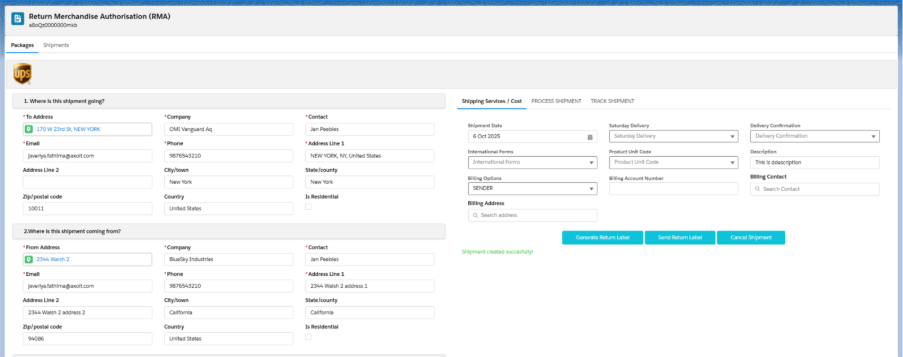
- Click Get Rates, select one of the available Services Type, and click Initiate Shipment button.
- The Shipment will be created successfully.
- Then go to the RMA record and check the Ready to Receive checkbox. Once checked, the Logistic (Type Inbound) is created, and the items can be received back into Warehouse.
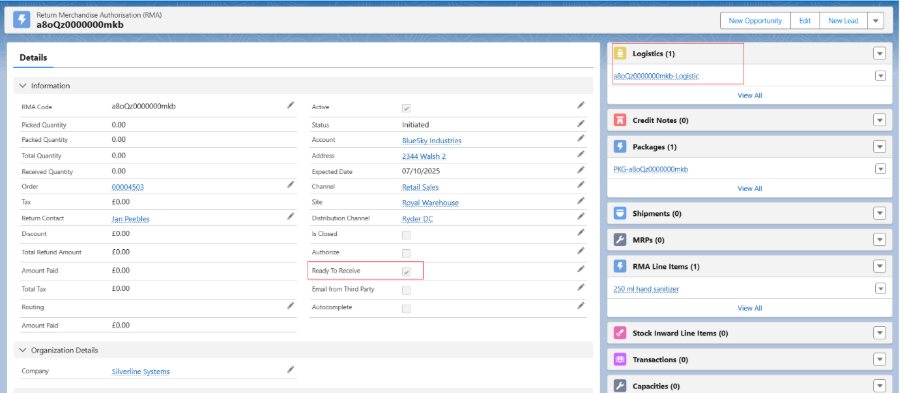
Note 6: Once the Authorise checkbox is checked, it automatically creates the Logistic, or you can create the logistic by doing a Return Shipment and checking the Ready to Receive checkbox to receive the items back into Warehouse.
Note 7: If Authorized is checked, users are not allowed to create Return Shipments as the logistic will already be created.
Either method can be followed to create the logistics. Once created, the items can be received from the Inbound Logistic screen.
Click on the link below to know the complete process of Inbound Logistic.
