MO Product Configuration
The MO Product Configuration screen greatly simplifies setup for administrators by eliminating the time-consuming manual creation of a manufacturable product and all its related records — End Product, Bill of Materials (BOM), BOM Line Items, Routings, and WIP products.
With just a few clicks and minutes, users can create, update, or clone complete product structures that would otherwise take hours of manual effort. This ensures nothing is missed during configuration, preventing delays or errors that could block the manufacturing process later.
Steps to create a manufacturing product –
- Navigate to the MO Product Configuration tab using the App Launcher or find the tab in the App Navigation menu.
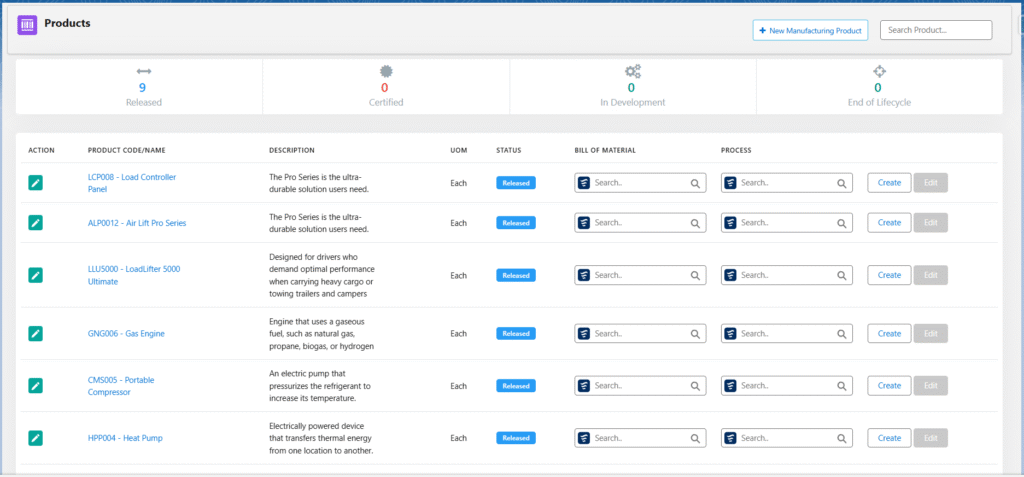
- You can search for an existing manufacturable product using the search bar or create one by clicking on + New Manufacturing Product.
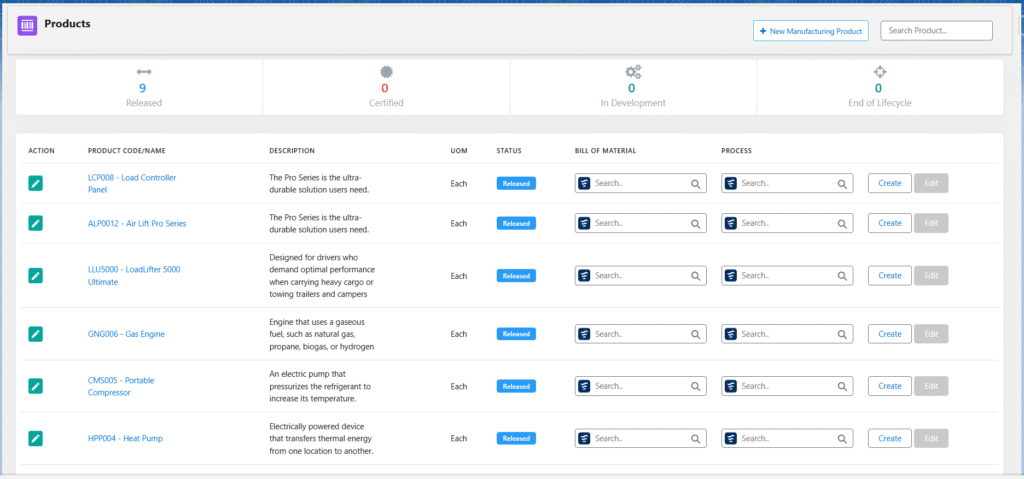
- Click on the + New Manufacturing Product button to create a new manufacturable product.
- Enter the Product Name, Product Code, and set the Status as Released.
- Select the Active checkbox to make the product active, and select Issue Manufacturing Order, Track Inventory, and Allow Back Orders (if applicable).
- Note 1: Select the Lot Tracked checkbox if the product is a batch product, and the Serialise checkbox if the product is a serialized product.
- Select the Quantity Unit of Measure for the product and enter the Product Description.
- Click Save to create the manufacturing product.
- To update or modify an existing manufacturable product, simply click the Edit icon on the left-hand side of the screen.
Manufacturable Product Fields – Quick Description
| Field Name | Descriptions |
| Product Name | The name of the product |
| Product Code | A unique identifier assigned to the product |
| Product Description | Detailed description of the product |
| Active | Indicates whether the product is currently active and available for use |
| Status | Defines the product’s lifecycle stage (e.g., Draft, Active, Discontinued, Released) |
| Track Inventory | Specifies whether stock levels for this product are tracked in inventory |
| Issue Manufacturing Order | Determines if manufacturing orders can be created for this product |
| Serialized | When enabled, each unit of the product receives a unique serial number |
| Lot Tracked: | When enabled, inventory is tracked using unique Batch/Lot numbers |
| Quantity Unit of Measure | The default unit for measuring product quantities (e.g., Each, Kg, Liter) |
Steps to Create Bill of Materials (BOM) and Routing –
- After creating the product or locating it via the search bar on the MO Product Home screen, click the Create button at the end of the product row to instantly open the dedicated Version and Routing creation screen.
- Note 2: After creating a new MO product, a pop-up will appear asking if you want to proceed with creating a Version and Routing for the product. Click Yes to instantly open the Version and Routing creation screen.

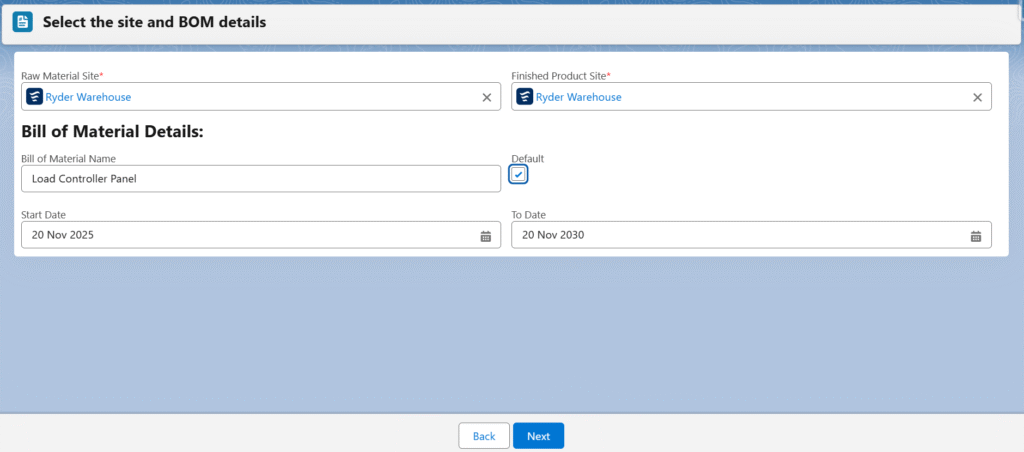
- After clicking on the create button, system takes users to the Routing and version Creation screen.

- On this screen, selecting the Raw Material Site and Finished Product Site will create the Routing and Process for the product.
- In the Bill of Material Details section, the Bill of Material Name will be auto populated. Select the Default checkbox if you want to make the version the default. The Start Date and End Date will also be populated with a five-year interval between them.
- Click Next, and it will take you to the Process Cycle Creation screen.
- Note 3: Routing, process, and version records will be created in the backend after clicking on the Next button.
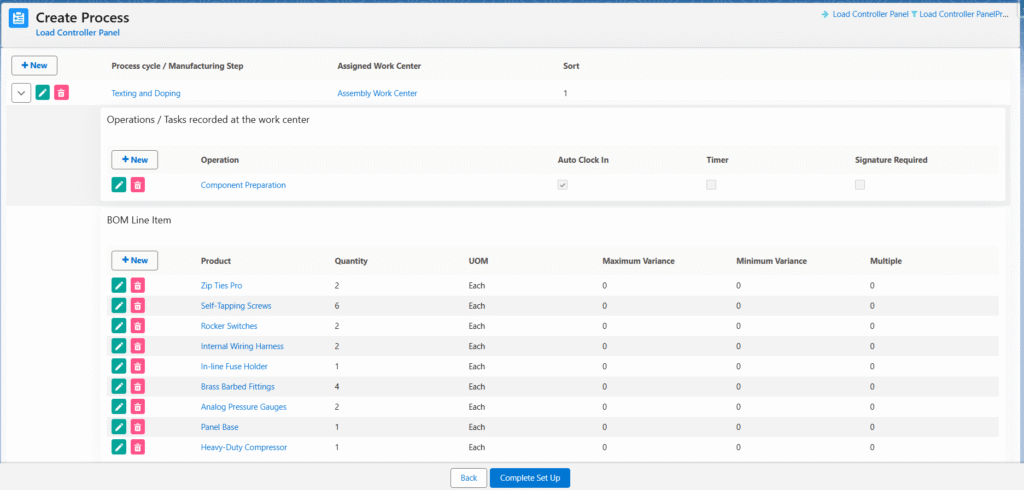
Creating Process Cycles for a Product – Process Cycles are automatically converted into Work Orders once the Manufacturing Order is scheduled.
- Click the + New button to create a new process cycle
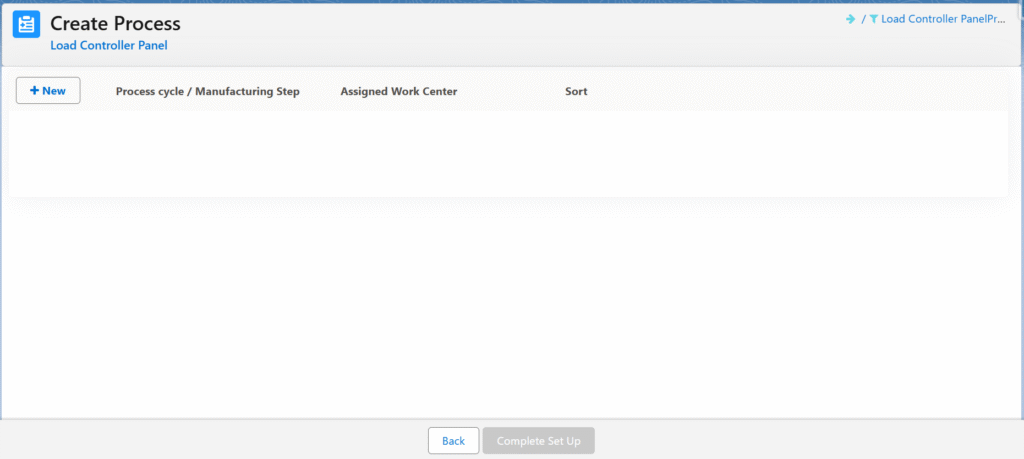
- Enter the Name and select the Work Centre.
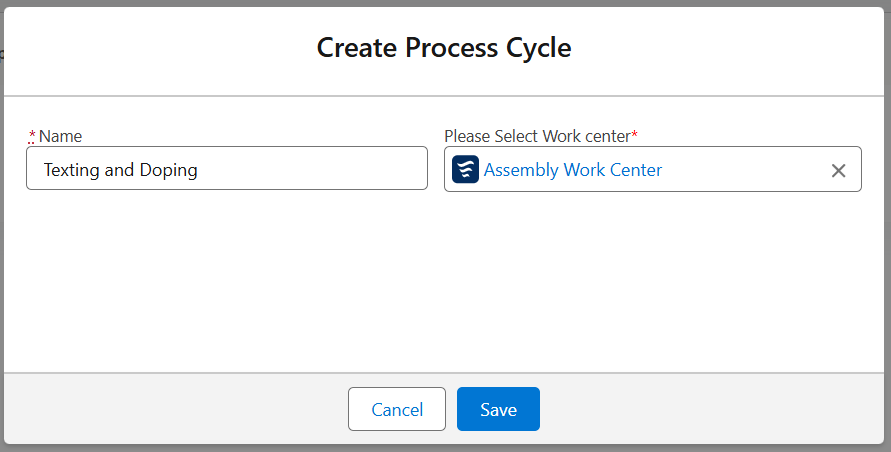
- Click Save.
- Note 4: Follow the same steps to add more Process Cycles for product.
Under the Process Cycles, Operations, BOM line items, Work in Progress (WIPs), Team Members, Checklists, and Design / Drawing Document need to be created.

Creating Operation for Process Cycles –
- Click the + New button to create an operation for a process cycle.
- Note 5: There should be at least one operation associated with a process cycle.
- The process cycle will be auto populated and enter the Name of the operation.
- Select the Auto Clock In, Signature Required, or Timer checkbox based on your requirement.
- Click Save to create the operation.
- Note 6: Follow the same steps to add more operations for process cycles.

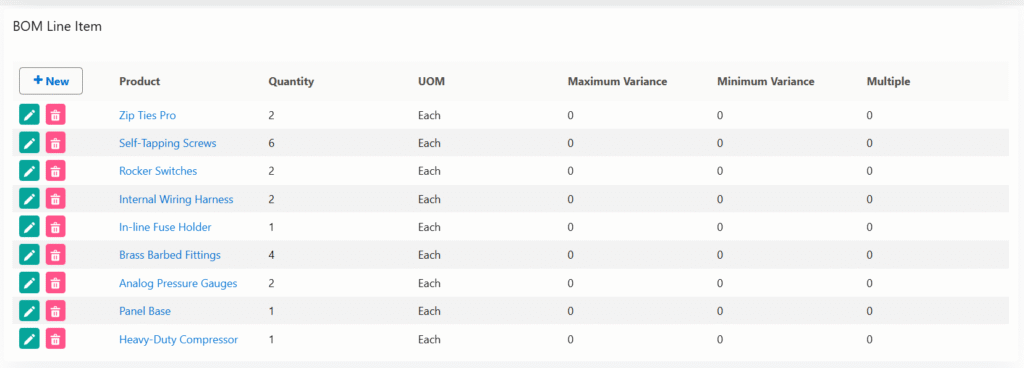
Creating BOM Line Item for Process Cycles –
- Click the + New button to add a BOM line item for a process cycle.
- Clicking + New will navigate to the Add Products screen to add the BOM line item.
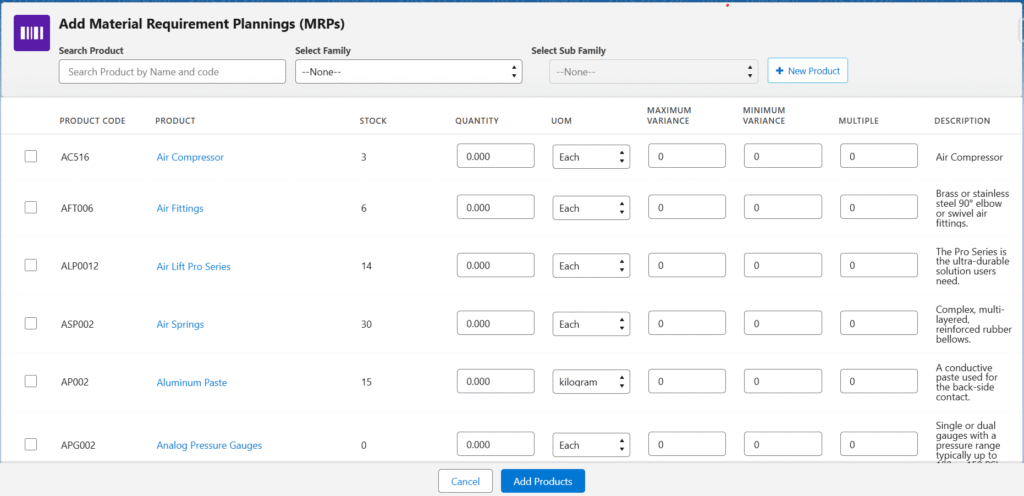
- Select the Product and enter the Quantity, the Unit of Measurement will be auto populated, enter Maximum Variance and Minimum Variance, and enter multiples (if applicable).
- Click on Add Products.
- Note 7: Follow the same steps to add more BOM line items for process cycles.
Creating Adding Work in Progress (WIP) for Process Cycles –
- To add Work in Progress (WIP), click the + New button, which will navigate to the Add Products screen.
- Set the Quantity to 1, UOM (Unit of Measure) will be auto populated.
- Click on Add products button.

Creating Team Member for the Process Cycles –
- Click the + New button to add a Team Member for a process cycle.
- Enter resource Name and Select Resource Group and Employee.
- Enter Start Date and End Date.
- Click Save.
Creating Checklist for the Process Cycles –
- Click the + New button to add a checklist for a process cycle.
- Select the Operation From the lookup.
- Enter the instructions (if applicable) and select the Required checkbox to make the checklist mandatory.
- Select the Operation Checklist from the lookup. After selecting the Operation Checklist, the Checklist Name will be auto populated.
- Click Save.

Creating Design / Drawing Document for the Process Cycles –
- To add the Design / Drawing Document, click the + New button from the Design/Drawing Document section.
- Enter the Name, select the Operation from the lookup, and upload the attachment.

Click Complete Set Up to create a manufacturable product and its related records.