Accounts Receivable
Accounts Receivable refers to the outstanding amount a company is entitled to receive from its customers for products sold or services rendered on credit. It represents a legal obligation for the customer to pay and is recorded as a current asset on the company’s balance sheet.
- Navigate to the Accounts Payable tab using the App Launcher or find the tab in the app navigation menu.
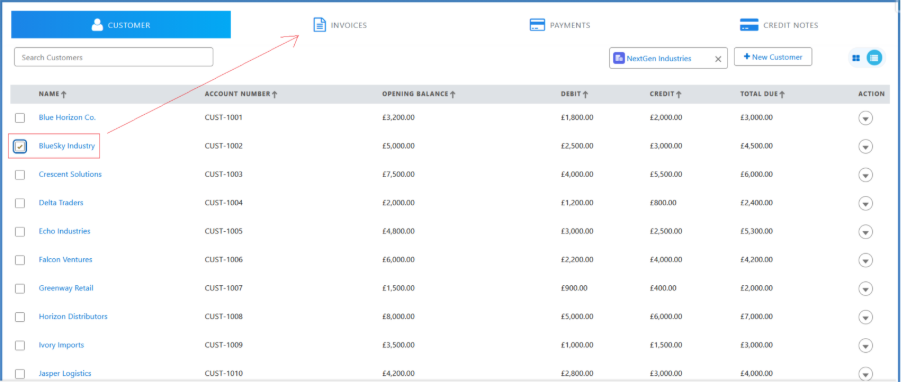
Customer Tab
- The Customer tab displays a list of all Customers.
- Customers can be filtered based on selected Companies, and a new customer can be created by clicking the + New Customer button.
- Customers can be Searched by customer name and account number.
- Customers can be sorted using Sort functionality.
- A new Credit Note and Invoice can be created, and also, the customer’s Account Statement can be viewed by clicking the drop-down list next to the customer.
- Selecting Customer and clicking on Invoice tab, will display list of Invoices related to customer.
Invoices Tab
- Under the Invoices tab, users can Search for Invoices by Invoice Number, Order Number, or Customer.
- Invoices can be filtered based on the selected Companies.
- Invoices can be sorted using Sort functionality.
- Invoice can also be filtered by selecting options such as Overdue Invoice or All Invoice from the Invoice Due drop-down.
- An invoice can also be created directly from the Invoice tab by clicking the + New Invoice button in the top-right corner of the screen.
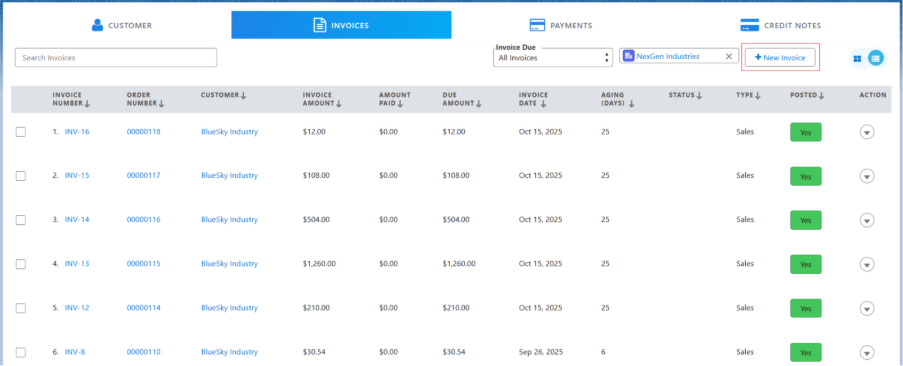
Note 1: In Accounts Receivable; invoices can be created from Customer and Invoice section.
Refer to the link below for information about invoices and their types.
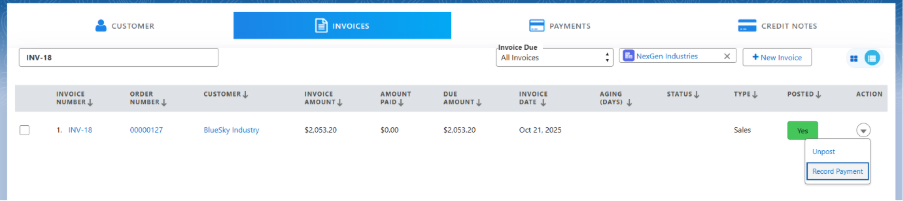
- Select the created invoice. Click the dropdown next to the invoice and select Post/Un-Post.

- Posting the invoice creates the Transaction and Ledger Entries at the record level.
- Un-posting the invoice will delete the related Transactions and Ledger Entries.
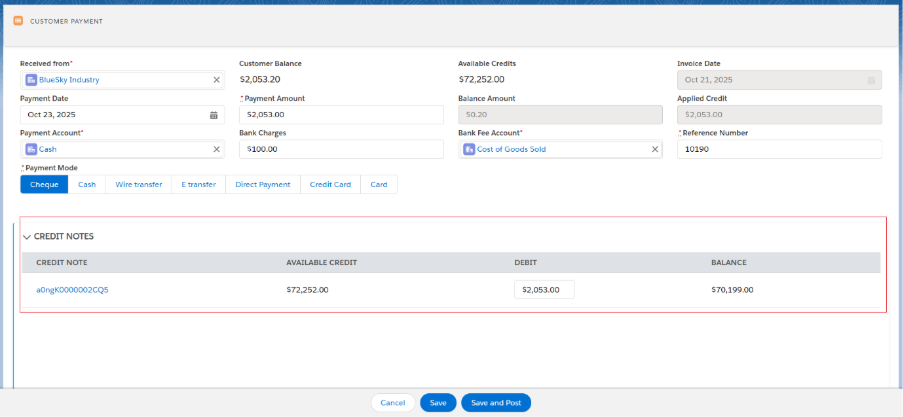
- Once the invoice is posted, click the drop-down and click on the Record Payments option.
- The Received From (Customer), Customer Balance along with other details will be auto populated.
- Enter the Payment Amount, select the Payment Account, enter the Reference Number, and Bank Charges (if applicable). (The Bank Fees Account needs to be selected if Bank Charges are added.)
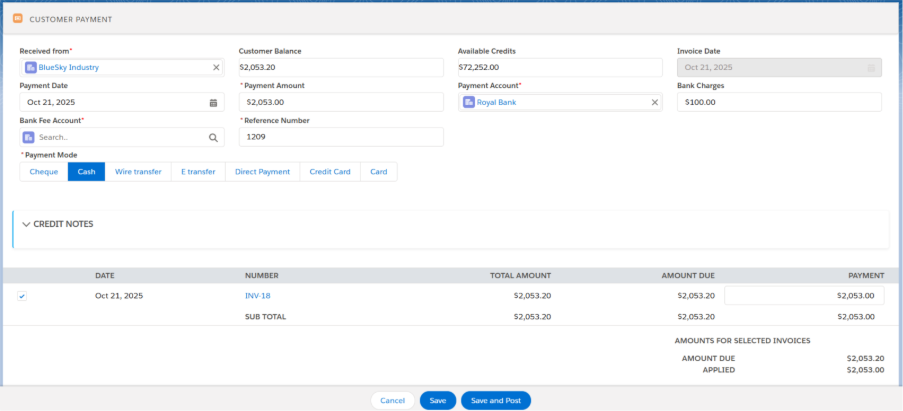
- Select the Payment Mode (Cheque, Cash, Wire Transfer, E-Transfer, Direct Payment, Credit Card, Card(any)), then click Save or Save and Post.
- Clicking Save records the payment, but it will need to be Posted manually.
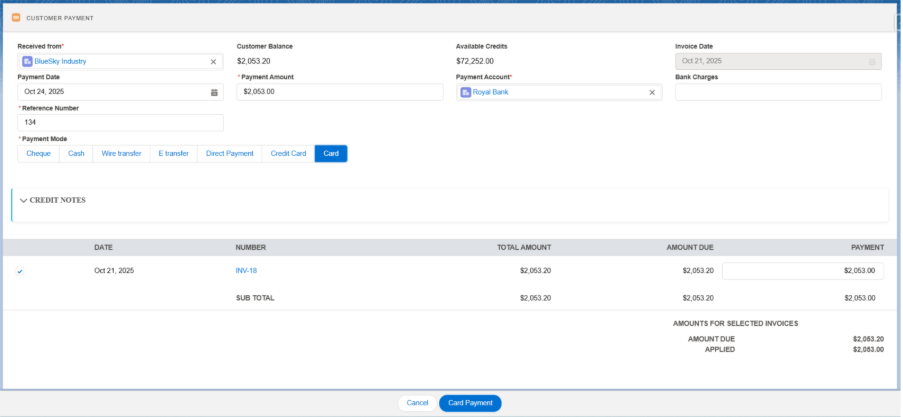
Payment Can be done using the Card(Debit, Credit etc..) as well.
Payment Using Cards:
- The Received From (Customer), Customer Balance along with other details will be auto populated after navigating Record Payment screen.
- Enter the Payment Amount, select the Payment Account, enter the Reference Number, and Bank Charges (if applicable). (The Bank Fees Account needs to be selected if Bank Charges are added.)
- Select Card Payment Modes Click on Card Payment button available at the bottom of the page.
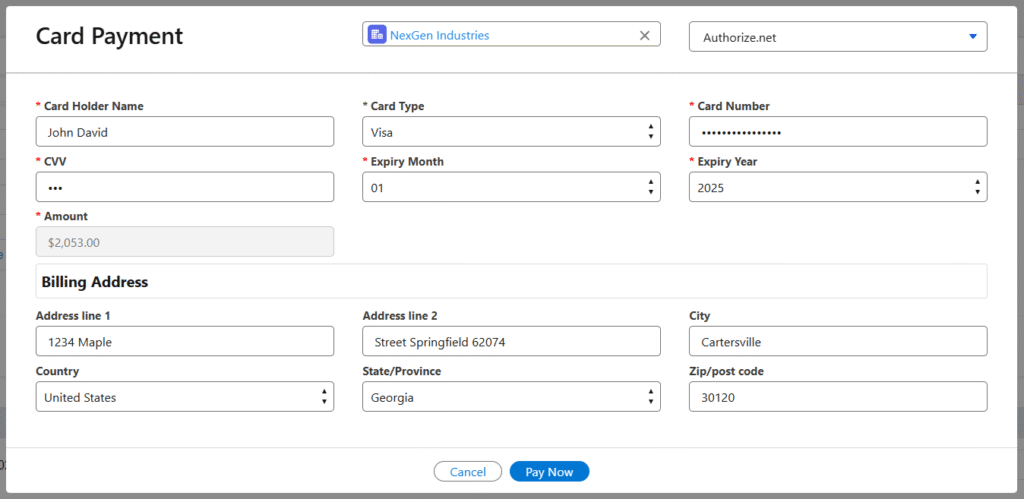
- In the Card payment screen, Select the Payment Gateway (Authorize.Net, Stripe). Enter Card Holder Name, select Card Type, Card Number, CVV, Expiry Month, Expiry Year. Billing Address details will be populated.
Authorize.Net
Stripe
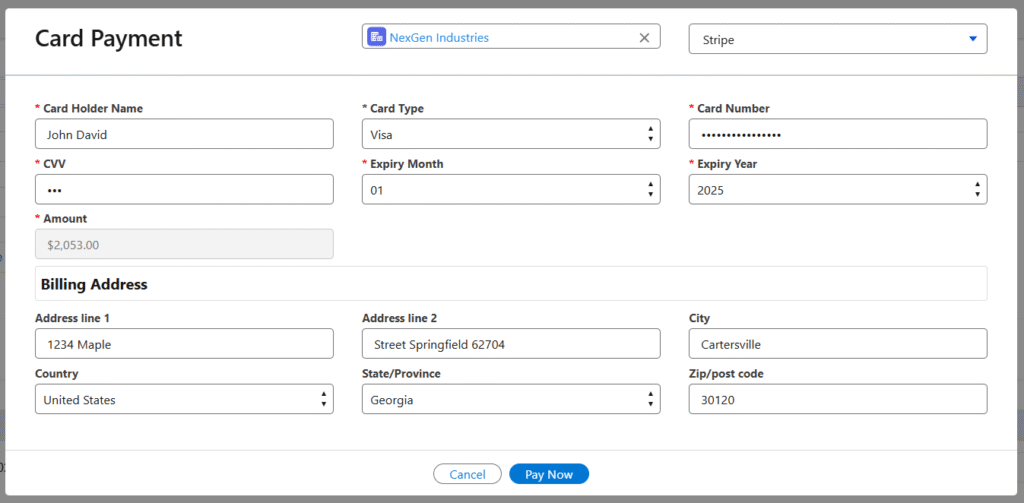
- Click on Pay Now, your card payment is complete. Users can find the Transaction ID at the Payment record level.
Payments Tab
- The Payments tab displays a list of all payments.
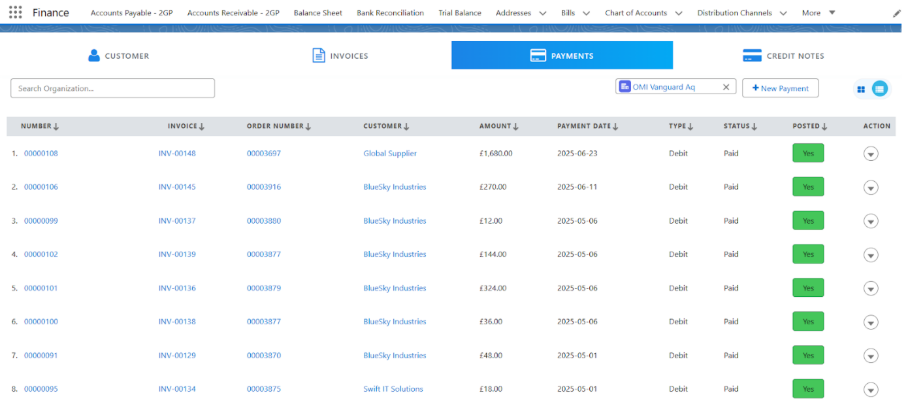
- Under the Payments tab, users can search for payments by Payment Number, Invoice Number, Order Number, or Customer.
- Payments can be filtered based on the selected organization.
- Payments can be sorted using Sort functionality.
- Payments can be created directly from the Payments tab by clicking the + New Payment button, or from the Invoices tab by clicking the drop-down next to the invoice, as mentioned above.
- Once the payment is created but not Posted. Click the drop-down next to the payment and click on Post.
- Posting the payment creates the Transaction and Ledger Entries related to the payment.
- Un-posting the payment deletes the associated Transactions and Ledger Entries.
Credit Notes Tab
- The Credit Notes tab displays a list of all credit notes.
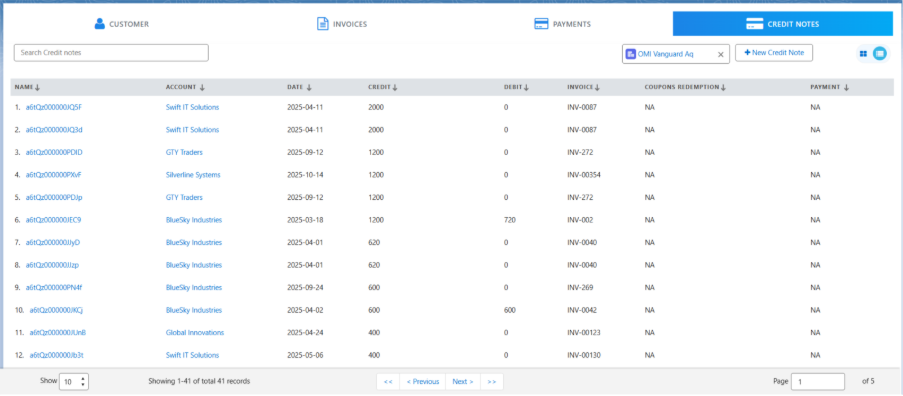
- Under the Credit Notes tab, users can search for a credit note by its name.
- Credit Notes can be filtered based on the selected organization.
Note 1: Credit Notes can be created directly from the Credit Notes tab by clicking the + New Credit Note button, or from the Customer tab by clicking the drop-down next to the Customer, as mentioned above.
Follow the steps to create a new credit note:
- Navigate to the Credit Notes tab and click on + New Credit Note button.

- Select the Invoice from the look-up and other details such as Order, Customer and Order Line Items will be auto populated.
- Enter the Reference Number and upload the attachment.
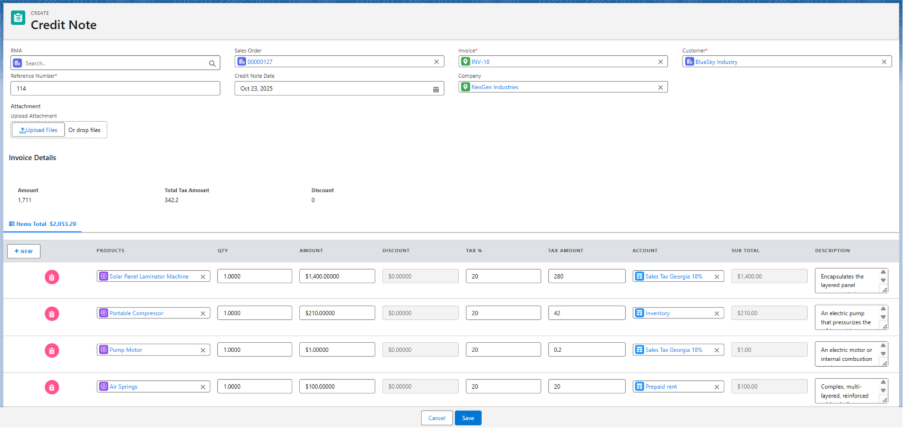
- Click on Save.
Note 2: A credit note is issued to adjust or refund an Invoice when goods are returned, overcharged, or services are cancelled. It can later be applied toward payments for new invoices.