Calendar For Appointment
Want an easy, visual way to track upcoming or ongoing Appointments? Create a calendar from a standard or custom object: Choose a date field that represents data you want to track, and the calendar displays data in that field as calendar items. You can hide or show calendars, and you can edit and delete them.
Create an Object Calendar for Appointments
Here’s how to create a calendar based on a standard or custom object
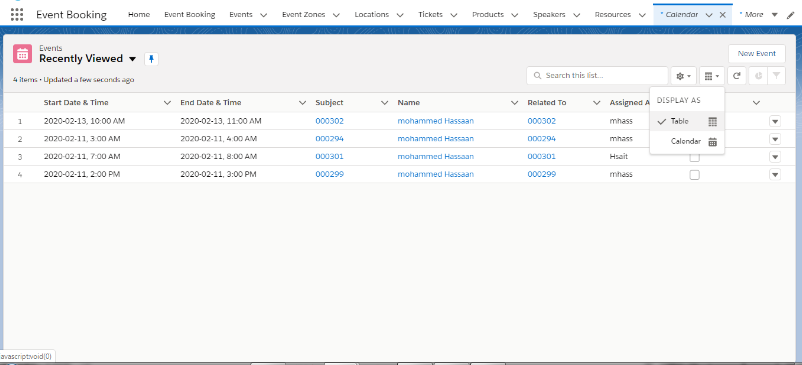
- Navigate to the calendar tab.
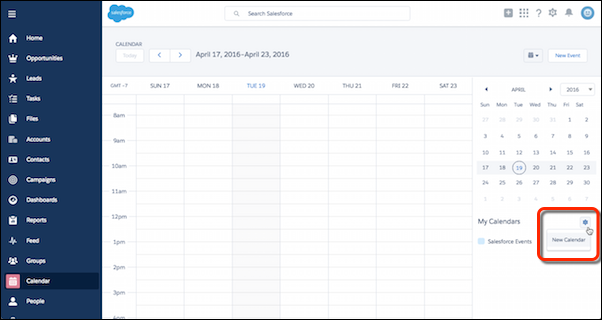
- Start creating a calendar by selecting the New calendar option as shown in the screen below:
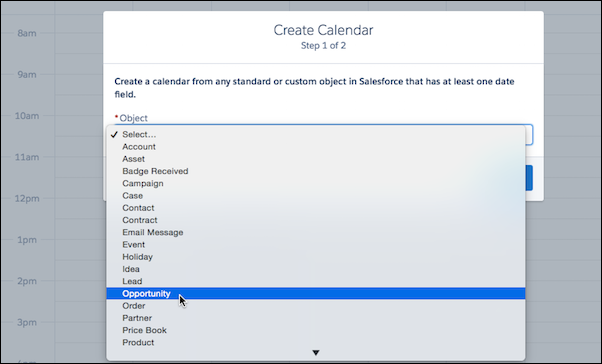
- Choose an object to base the calendar on.
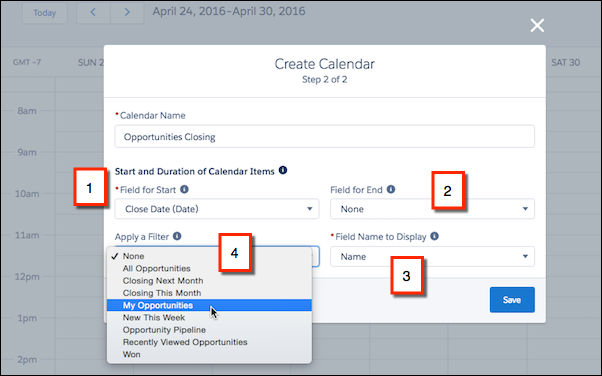
- Select fields that determine what the calendar displays (1, 2, 3).
- If you want, filter the calendar items by selecting a list view (4).
The calendar displays items differently depending on the date fields you select.
- (Date) Fields
-

The names of some date fields include (Date). If you select a (Date) field, the calendar displays items across the top (as all-day items).
- (Date/Time) Fields
-

The names of other date fields include (Date/Time). If you select a (Date/Time) field in Field for Start, the calendar displays items in time slots. If you also select a field in Field for End (it’s optional) and the items’ duration exceeds 24 hours, the calendar displays the items across the top (as all-day items).
- Selecting Start and End Fields
-

Field for End is optional. If you use it, you must select the same type of field as you do in Field for Start. For example, if you select a (Date) field in one, you can’t select a (Date/Time) field in the other. If you select fields that generate dates in the wrong order (end before start), It displays an error message when you save the calendar.
The colour of each calendar is the colour of the object it’s based on. (If a custom object has a theme, the theme determines the colour of the calendar.) You can hide or show individual calendars.
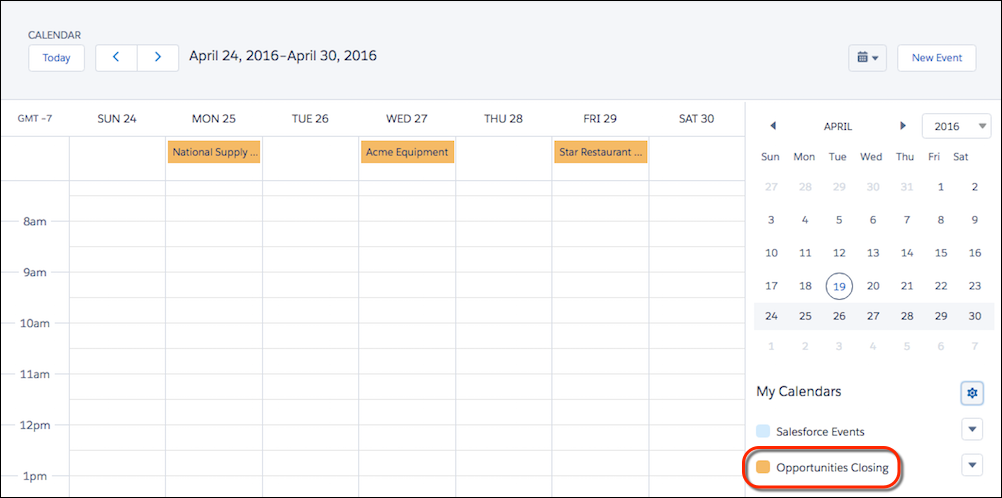
Calendar for Appointment booking flow
Calendar views display your own calendar and coworkers’ calendars along with list views of open tasks. On the Home tab, the Calendar section shows upcoming Appointments, a date picker for the month, and links to other calendar and activity views. You can share your calendar with coworkers and print calendars and task lists.
Where to Select or Switch Views
You access calendar views in the following locations.
- The Calendar section at the bottom of the Home tab. (If your Home tab doesn’t display the Calendar section, ask your admin to customize your home page layout.)
- The Calendar shortcut in the sidebar that opens your last used calendar view. (If your admin has enabled the shortcut.)
- The detail page for an event or a task
- An activities list view
When you hover your mouse over an event that you have permission to access, an overlay displays event details and actions that you can perform. Your admin configures the content of the overlays.
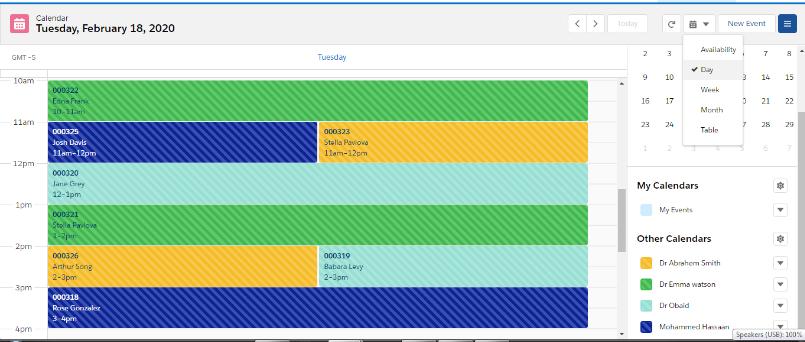
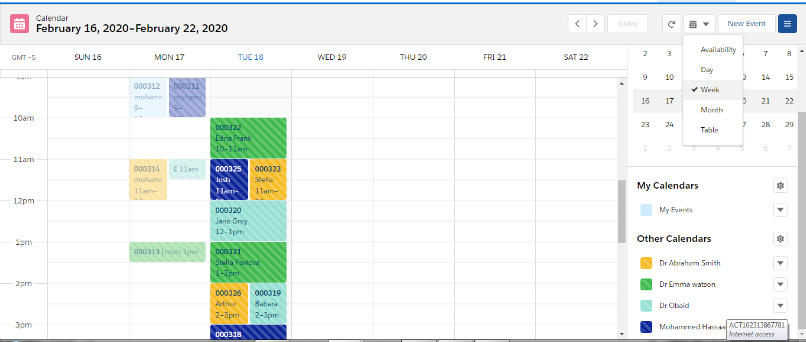
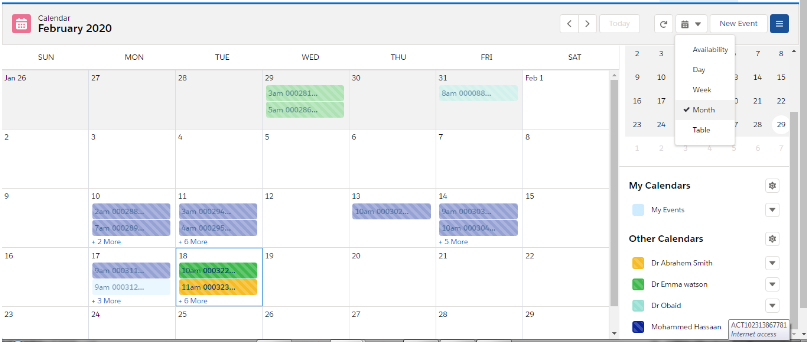
Day, Week, Month, and Activity Views
Calendar views display events as follows:
-
A day at a time:
 or Today
 -
A date that you choose using

-
A week at a time:
 or This Week
 - In a week view, with or without weekends
-
A month at a time:
 or This Month
 - On a day that you choose: Click in the week or month view
-
In a list of activities (events and tasks):

Inside any calendar view, you can switch views by clicking the icon for a different view. In a week or month view, click a date to see that day’s view.
Single-User View
 )
)displays up to 1,000 events in one month in any of the following:
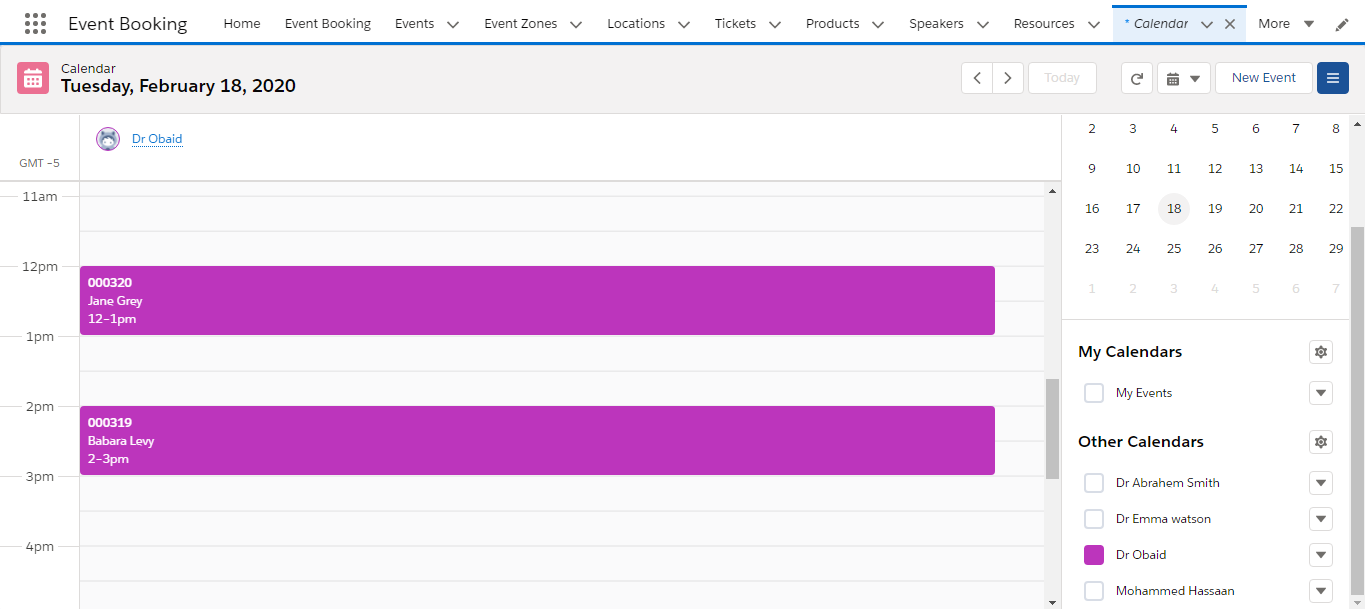
- Your own calendar
- The calendar of another user (not available in Personal Edition)
- A public calendar
- A resource calendar
Click Change to switch users or calendars. Click Share My Calendar to allow other users to view your calendar. To reset your view to your own calendar, click Back to My Calendar.
 )
)displays several users’ calendars and activities together. Choose an existing list view of users from the View drop-down list or click Create New View.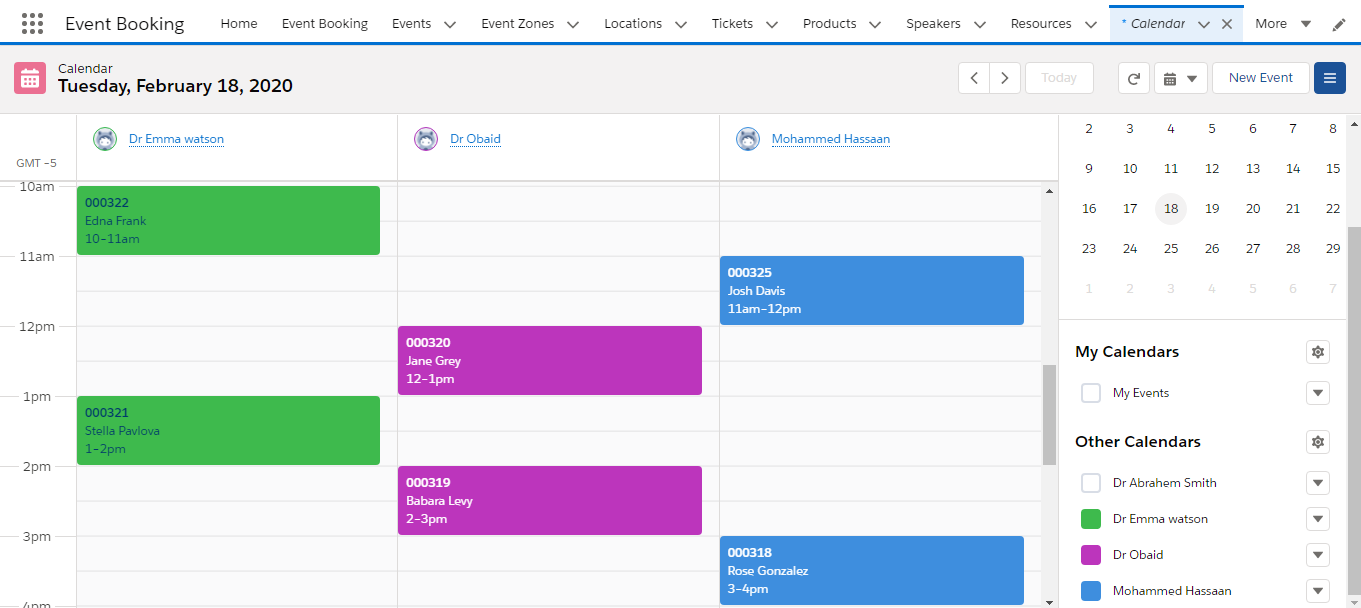
The view shows each person’s availability. A legend in the view shows busy and out-of-office time. If an event is set to show the time as free, then multi-user views don’t display it.
The multi-user calendar works differently in the partner portal. For example, partners can view events only on the calendars of people in their own company and their channel manager.
Share Your Calendar
Give coworkers access to view or add events to your My Events calendar.
Admins can set organization-wide calendar sharing levels to control how much access coworkers have to each others’ calendars. Admins can’t give coworkers access to event details.
Give coworkers more access to your calendar by changing your calendar sharing options.
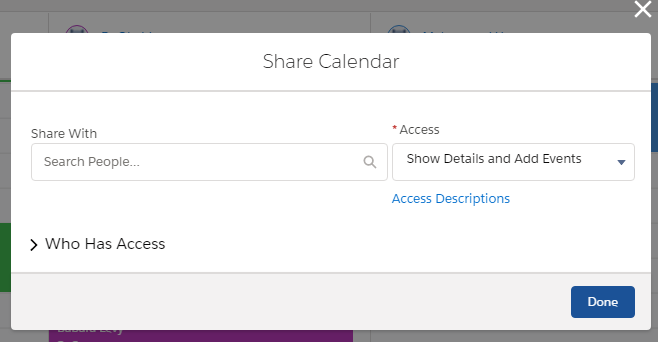
- From the Calendar tab, click calendar options next to your My Events calendar.
- Search and select the name of the coworker who you want to share your calendar with.
- Select the level of access that you want your coworker to have to your calendar.
- Hide Details
- Coworkers can see whether given times are available but can’t see any other information about the nature of the Appointment in your calendar.
- Hide Details and Add Appointment
- Coworkers can see whether given times are available but can’t see details of events. They can insert an Appointment in your calendar.
- Show Details
- Coworkers can see detailed information about Appointments in your calendar.
- Show Details and Add Appointment
- Coworkers can see detailed information about Appointments in your calendar, and they can insert Appointments in your calendar.
- Click Who Has Access to see who has access to your calendar, and at what level.
- Click Done.
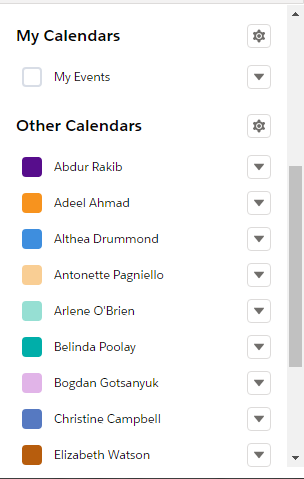
Coworkers can see your calendar by adding it to their Other Calendars list.
View Coworkers’ Calendars.
When coworkers share them My Events calendar with you, then you can view it in Lightning Experience. Add several calendars to your calendar view at one time with user list calendars.
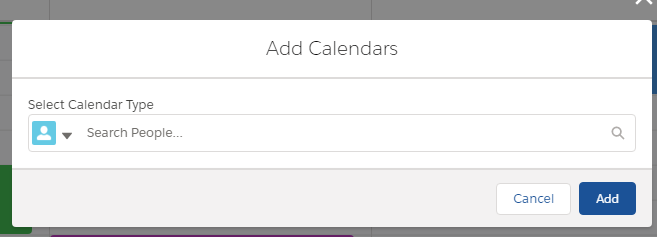
- From the Calendar page, click calendar options next to Other Calendars.
- Select Add Calendars.
- Select People or User Lists.
- Search for and select the name of the coworker or user list you want to add to your calendar view.
- Click Add.
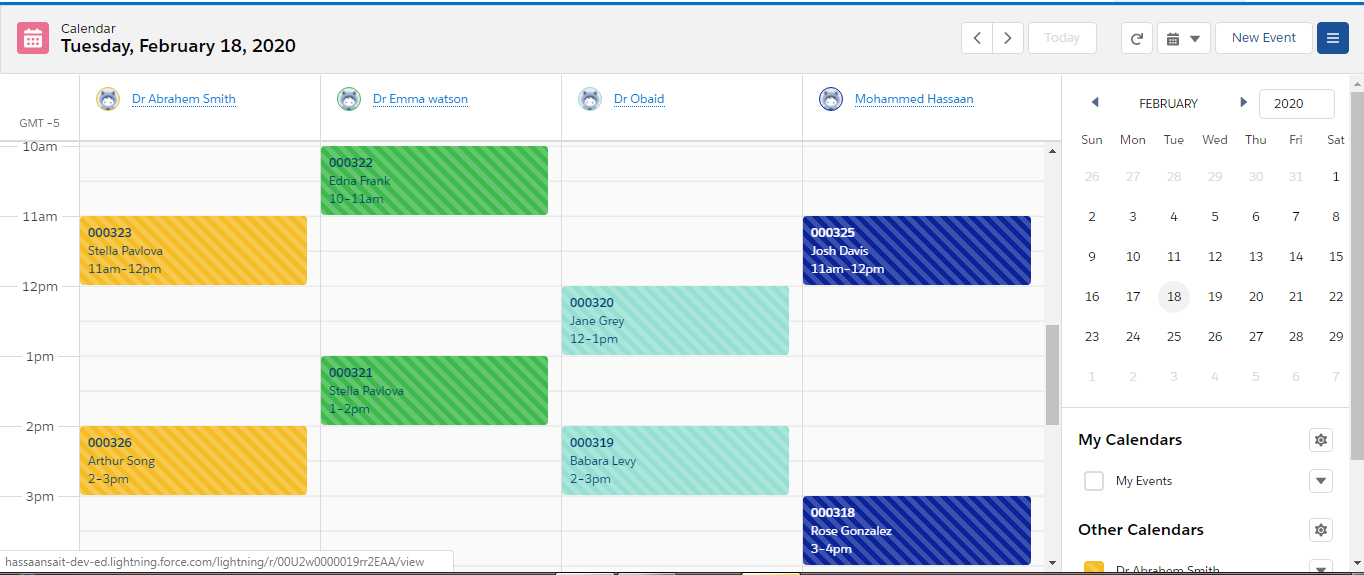
After you add a shared calendar or user list, you see their events overlaid on your calendar view.
Use the availability view to compare different calendars side by side.



 ,
,  , Today, This Week, or This Month.
 .
.