Appointment Booking
With Appointment Booking, you can carry your entire business in your pocket. Manage to schedule, Cancel, and Reschedule your appointments, etc. via this New Appointment Booking flow. Add appointments to your calendar even when you’re out for lunch.
Receive instant notifications via email when an appointment is booked, rescheduled, or canceled. Customers also receive automated appointment alerts so that they stay on top of their bookings without having to dial in.
Appointment Booking
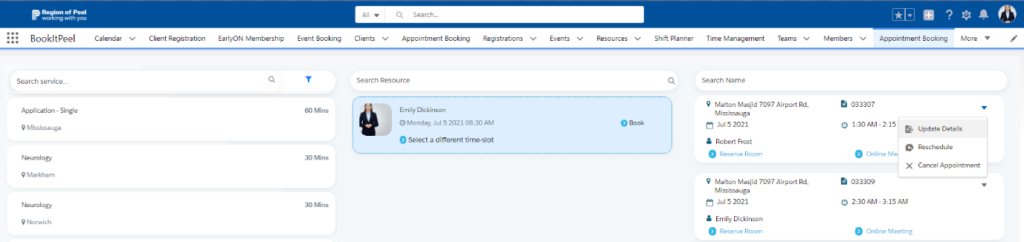
- Navigate to the App Launcher and click the Appointments tab, here we can view the Resources and their services and Book an appointment. The page appears as shown below.
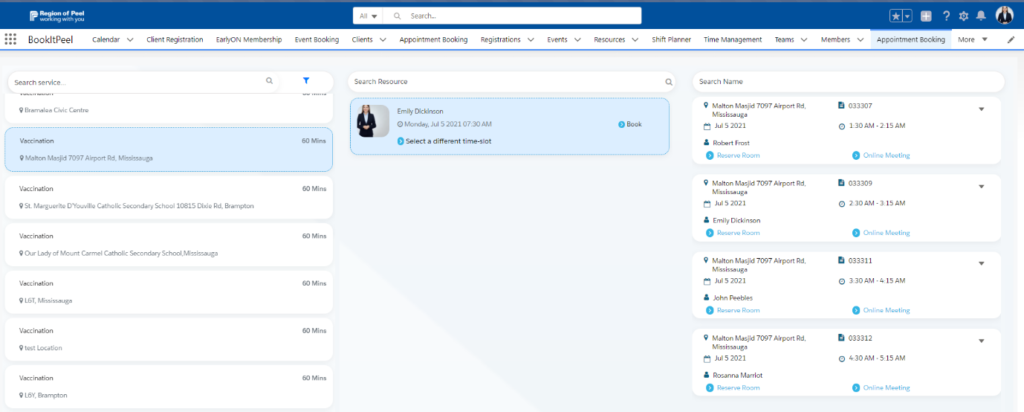
- The system provides the search bar to find the services, Resources, and Time slots.
- Select any services according to the location you wish to book an appointment.
- You can filter out services and locations using the filter icon on the search bar.
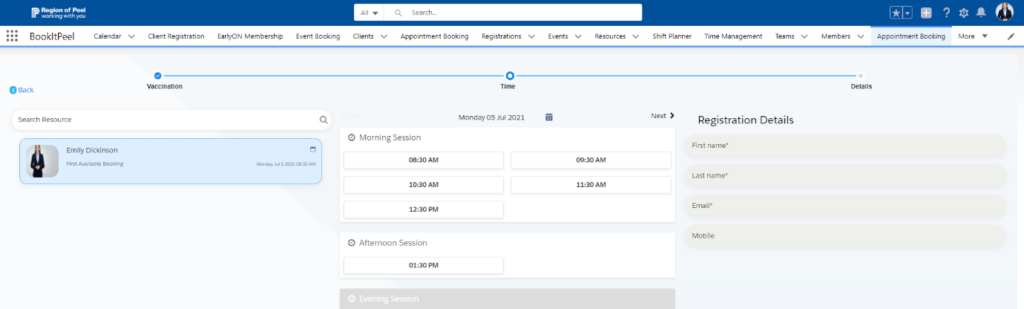
- Then select the Resource you wish to book an appointment with and select one or more sessions from the available time slots.
- Book Button will book the appointment with the first available time slot.
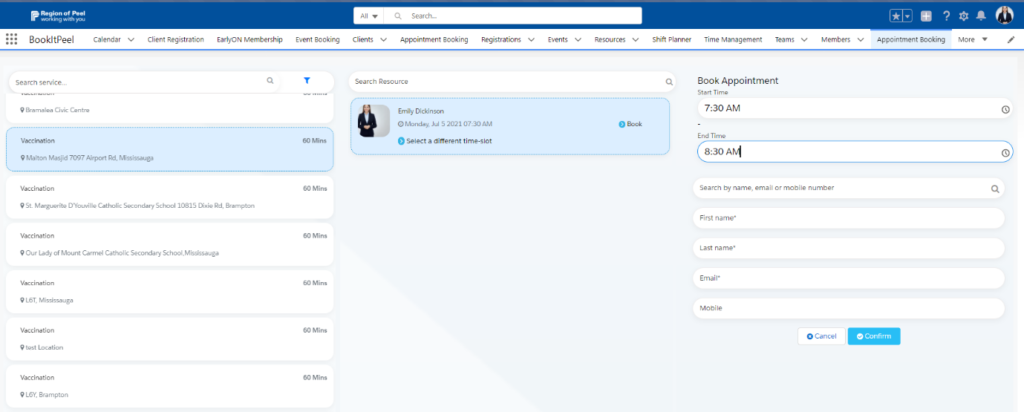
- Also, If you wish to select a different time slot, click on the Select a different time slot button.
- The page will navigate to the available time slot page view, below the screenshot.
- If you wish to reserve a room for the Appointment, then click on the Book Room button.
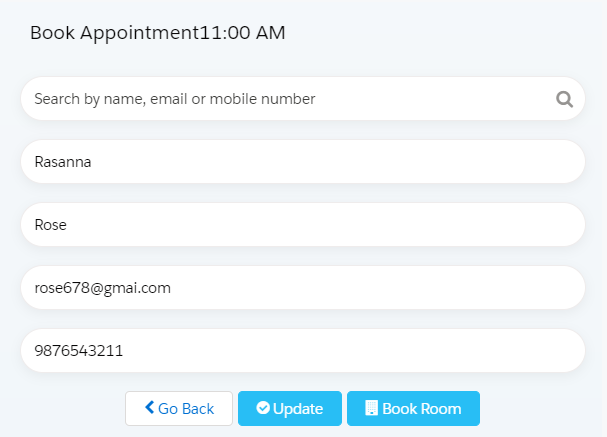
- On selecting the available resource and the time slots and for the reserve room option, Select the available rooms from the below screen.
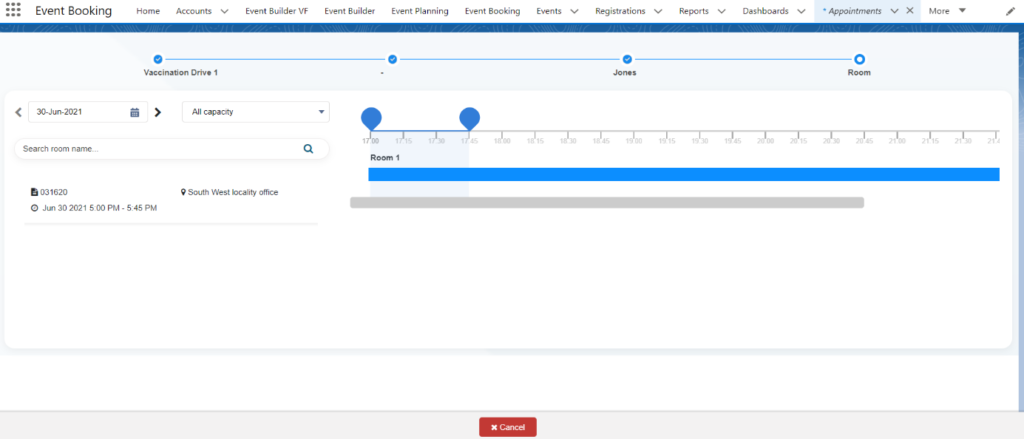
- The above page consists of information about the room, location, available capacity, and date. Search by date to check the availability of the room for reservation.
- Select the room from the options then, fill in the details and click on the Book Appointment button.
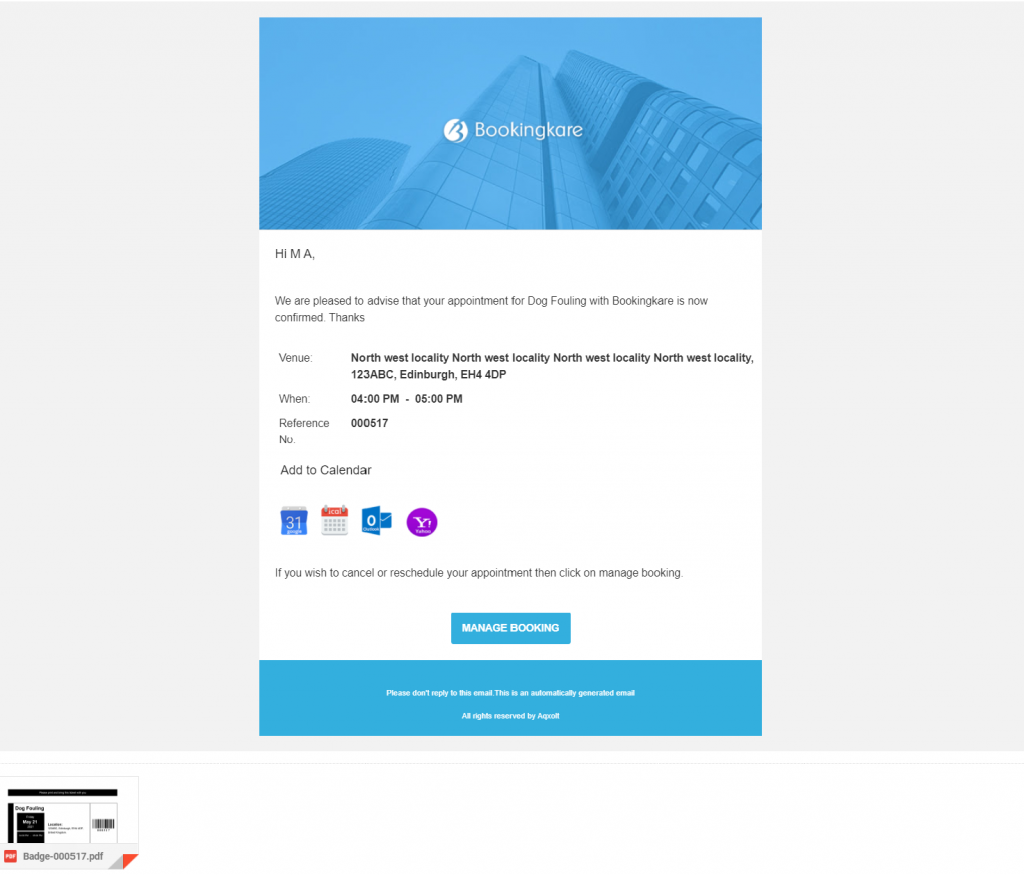
- When the appointment is booked you will receive a confirmation email with the appointment details.
- If you wish to book an online meeting with the resource, then select the online meeting button on the time slots.
- When selecting the option for an Online meeting, you will see the page below.
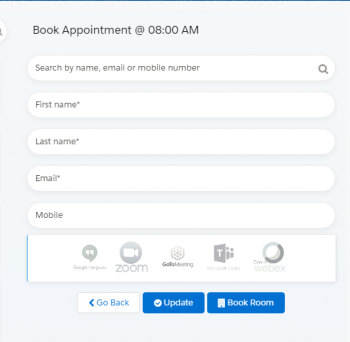
- Register for the meeting by filling up the details. Search by name, email, or mobile number to fill in the details or type manually.
- After filling in all the details, select the meeting option through which you want to have your online meeting scheduled. Then click on the ‘Update’ button.
- If you wish to update the details, Reschedule or Cancel the Appointments from the Appointment Booking page then click on the dropdown button from the Registration Section.
- On selecting the Dropdown Button all options will appear on the screen.
- The Update Details page will look like the below screenshot.
- The Reschedule page will look like the below screenshot.
- The Cancel appointment page will look like the below screenshot
Email Notification
Different ways to navigate to the New Appointment booking page
# Client record Page
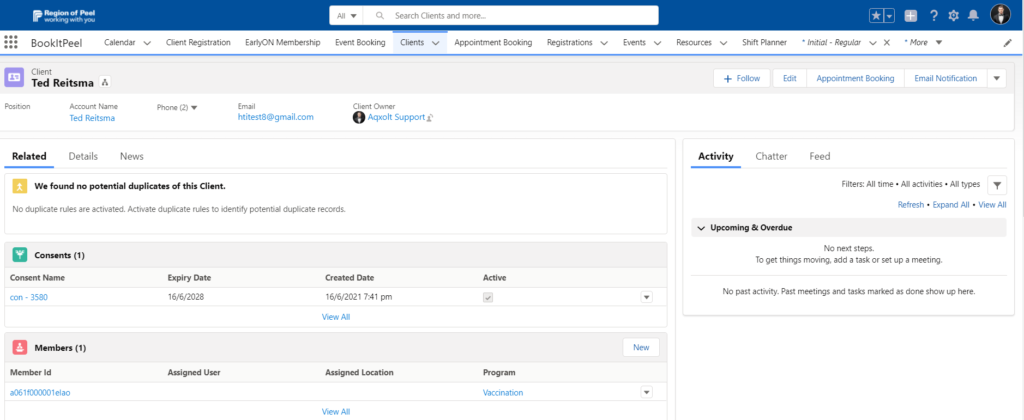
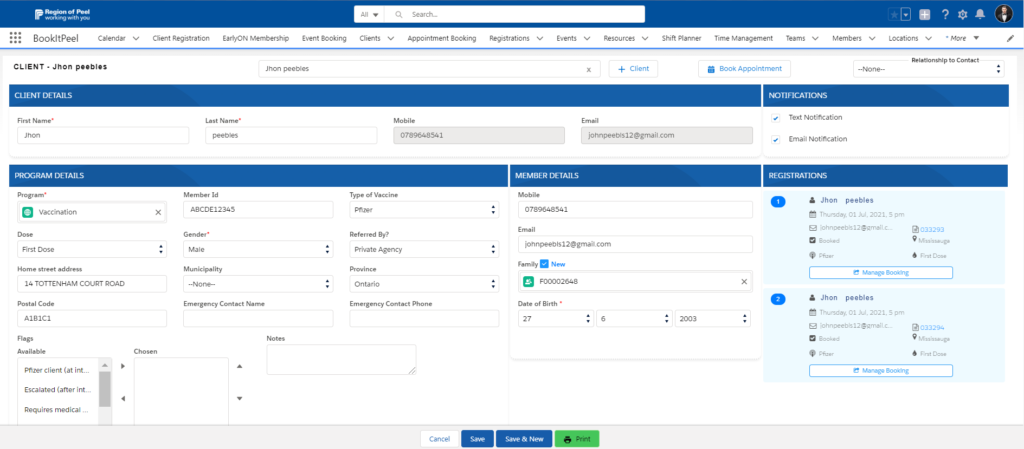
Navigate to the Client records from the Client tab, once the record page opens, you will be able to see the new Appointment Booking button.
# Member Record page
Navigate to the Member page from the Client record or from the Member tab, once the record page opens, you will be able to see the new Appointment Booking button on the Member page.

# Client Registration Page
Navigate to the Client Registration page by using the Client Registration tab, once you create any new record or select the existing records from the search bar, you will be able to see the Book Appointment button, which allows you to navigate to the new Appointment Booking page.
#ShiftPlanner page
The system also allows navigating to the new Appointment Booking page from the Shift Planner.
Navigate to Shift Planner, click on the available time slots from the Shift planner home page, the new Appointment Booking button will appears on the Popup page.

Client Registration
The Client Registration page allows creating new clients and their family members by signing the Consent. Also, allows to navigate to the Consultant Booking page and allows you to see all the booked appointments.
- Navigate to the App Launcher and find and click on the Client Registration page. You will be able to navigate to the below page.
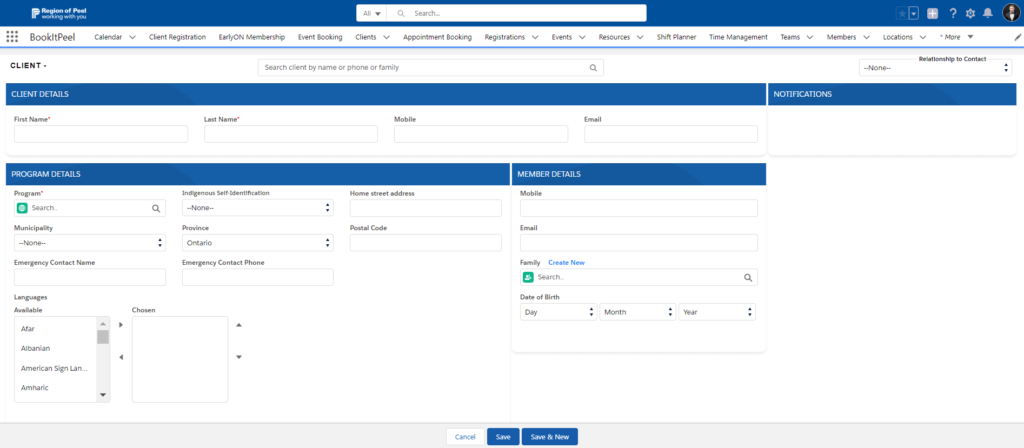
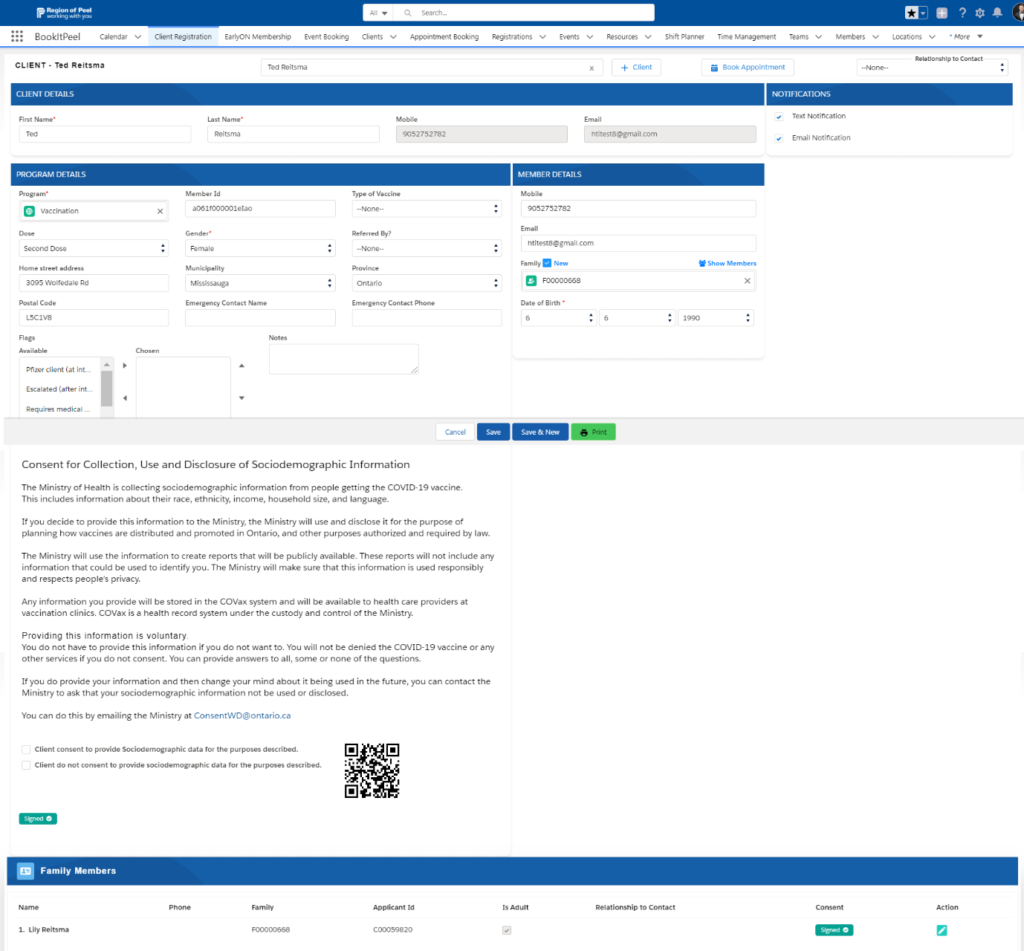
- The system allows updating the existing records or creating new clients by entering the required information and signing the consent form.
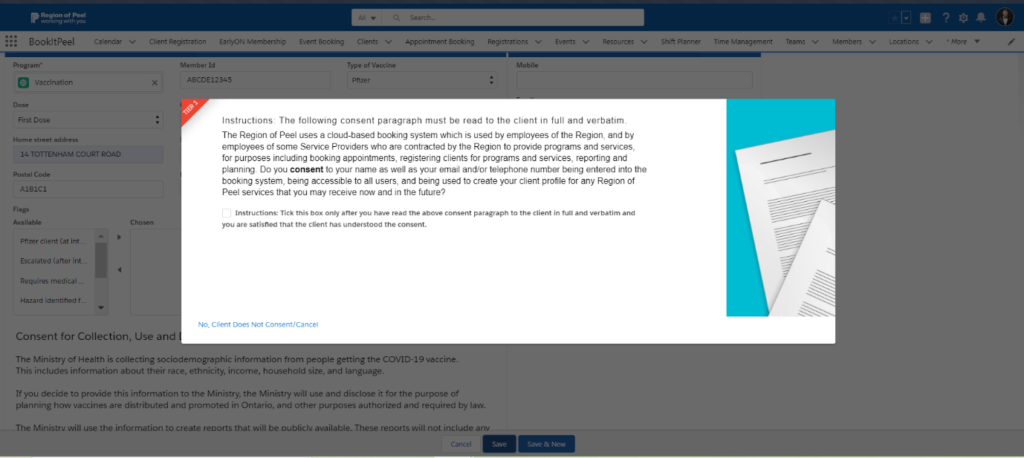
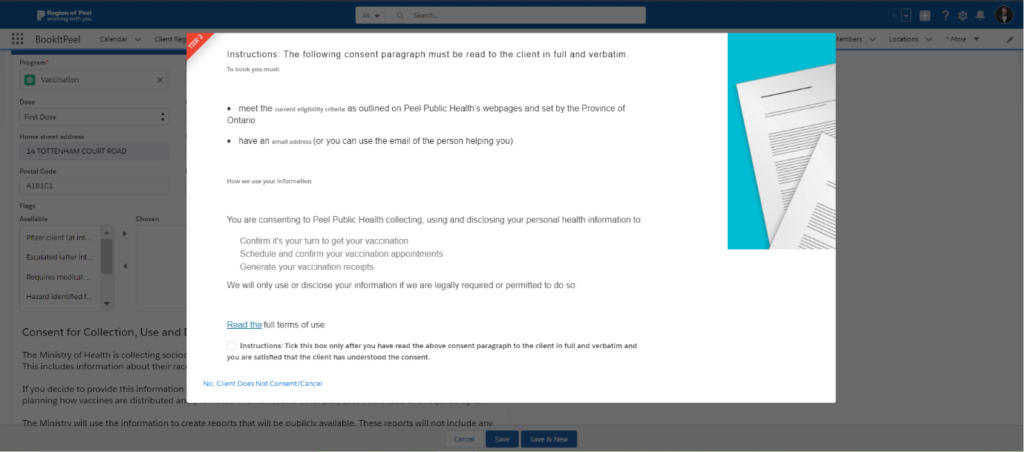
- After entering all the required information and clicking on the ‘Save’ or ‘Save & New’, below consent modals will pop up, and the system will allow signing the tier 1 and tier 2 consents. After signing these two consents Clients and Its Member record will get created.
Tier 1 Consent
Tier 2 Consent
- While booking an appointment after expiring the consents, the system will ask to re-sign the consents while booking the appointments.
- Also, the system gives an option to sign or update the sociodemographic information consent.
- The system also allows updating the Consent from the Client Registration page if the consent gets expired.
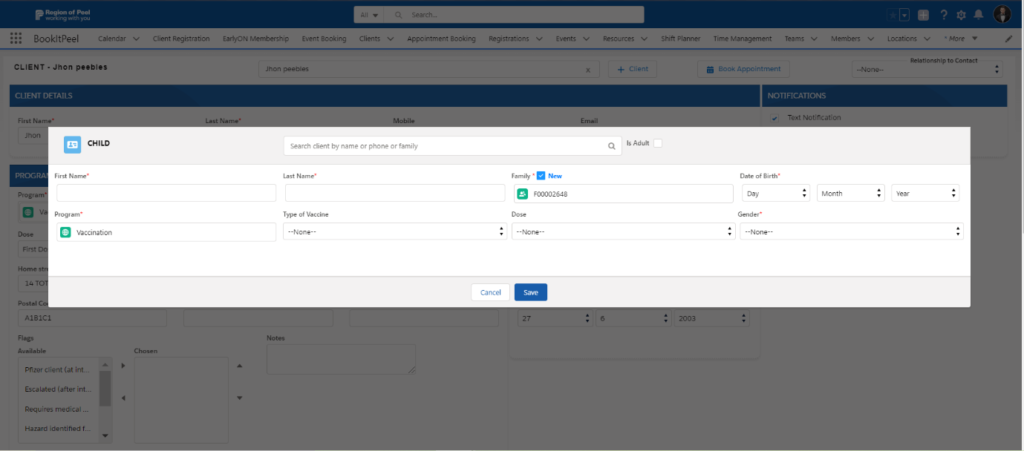
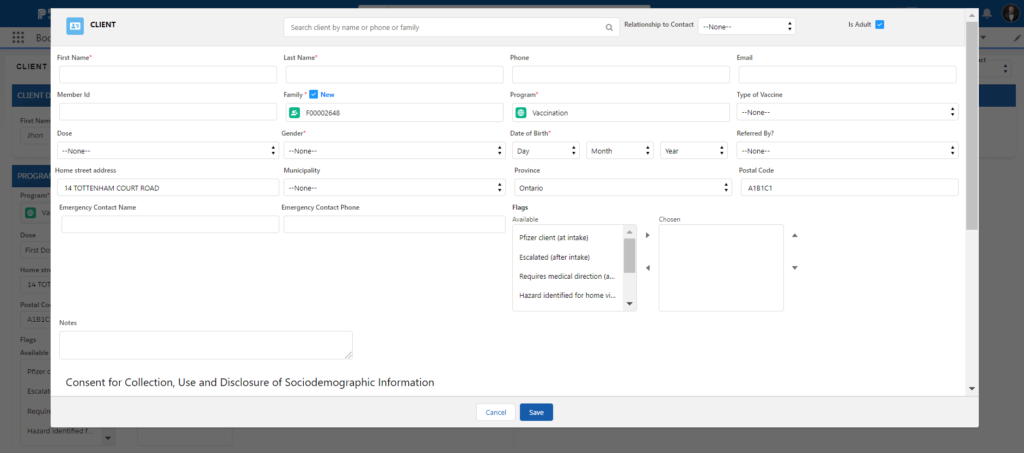
Once the Client and the Member record get created by selecting or creating the family, the ‘Client’ button will appear on the Client registration home page and the system allows adding the caregivers/family members. Once you click on the Client button, the below pages will pop up and will allow you to create child or adult family members.
Child
Adult
Also, the system gives an option to navigate to the Consultant booking page by clicking on the Book Appointments button. If clients book any appointments, those appointments will be also listed on the client record page as shown below.
The users are allowed to Update, Reschedule and Cancel the appointments by clicking on the Manage Booking page.
SHIFT PLANNER to Manage The resources
As a superuser, you can manage all the users under your organization, as a supervisor you can manage only your team member’s availability, time off, and break times, and as a normal user you can manage only your availability, and time off and break-times easily with the BookingKare shift planner application.
You can manage the time by following these steps:
- Navigate to the time shift planner you will be presented with the screen below.
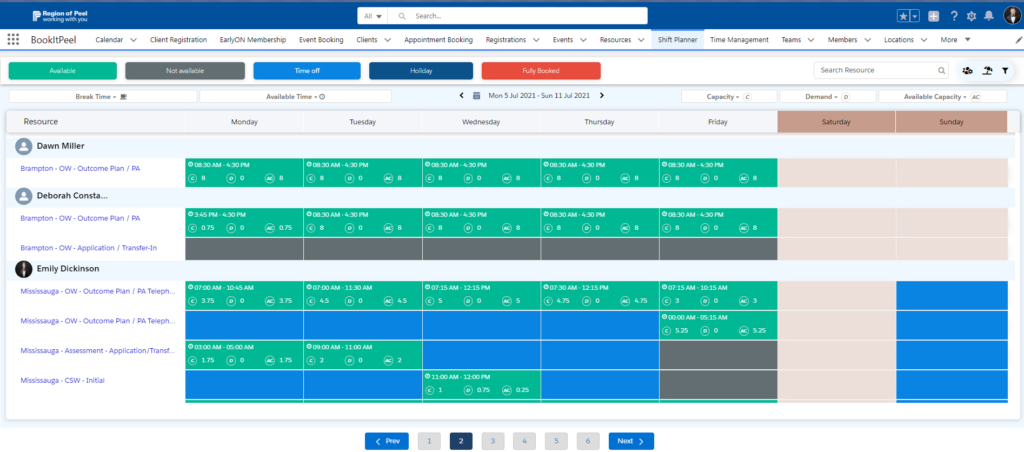
- You can view all the resources and their available timings, capacity, demands, and Available Capacity.
- When you create a new resource, capacity will be created automatically, and after creating an appointment for your capacity, demand will be created against that capacity.
- You can also change/manage the availability of the resources using the manage button by clicking on the time slots.
- Also, can manage the resource start break time and end break time by clicking on the available time.
- You can also click on the next and previous buttons to see other resources.
- You can also manage Time Offs for all the users from the Shift Planner by clicking on the Time Off icon in the upper right corner. Once you click on the icon below screen will appear.
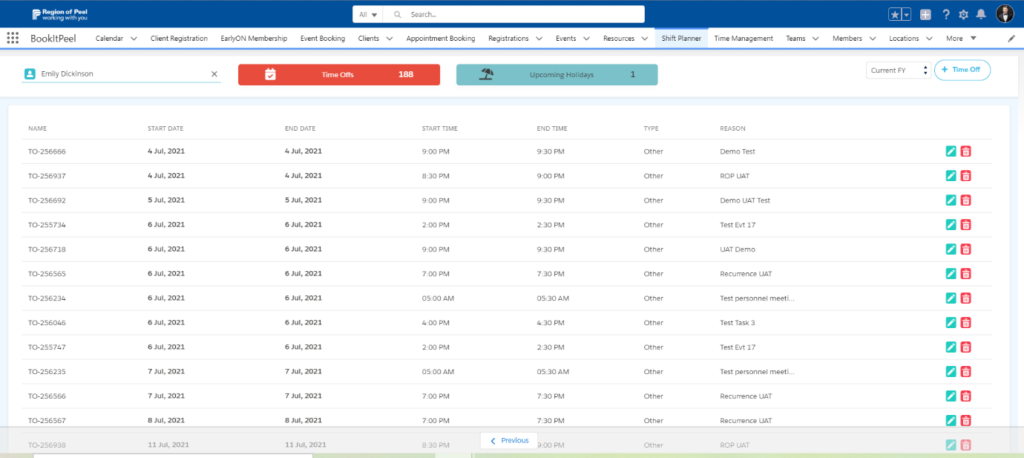
- Shift planner will allow you to Create, Update or Delete any Time offs from this page.
- To manage your Resources, click on the manage icon on the top right corner of the screen you will be navigated to the screen below.
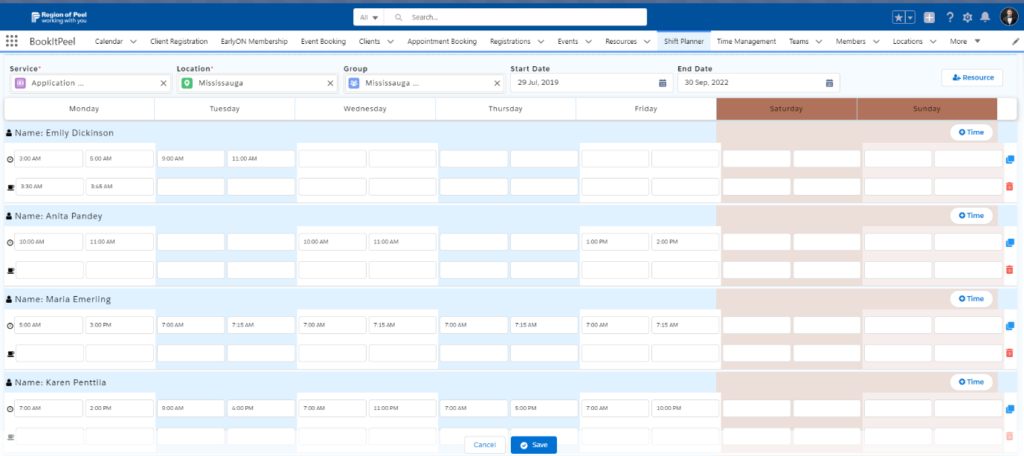
- You can add/edit/delete the start time and end time, start break time, and end break time of the resource.
- You can add new resources in the Shift Planner by clicking on the add ‘Resource’ button on the screen.
- You can also create a new group by clicking on the Add group button on the top right corner of the screen.
- Click on the Save button to save your changes.
