Transfer Order
The transfer order contains all the information required to execute the physical transfer of materials into the warehouse and out of the warehouse.
The ERP Mark 7 application enables users to create transfer orders for moving assets, inventory and employees between company stockrooms/sites, warehouses, and departments, respectively.
Transfer Order line items allow for the transfer of multiple Items on one transfer order. Transfer orders can be created for:
Inventory Stocks
Steps to create a Transfer Order for Stocks –
Create transfer orders through a Transfer Order Tab
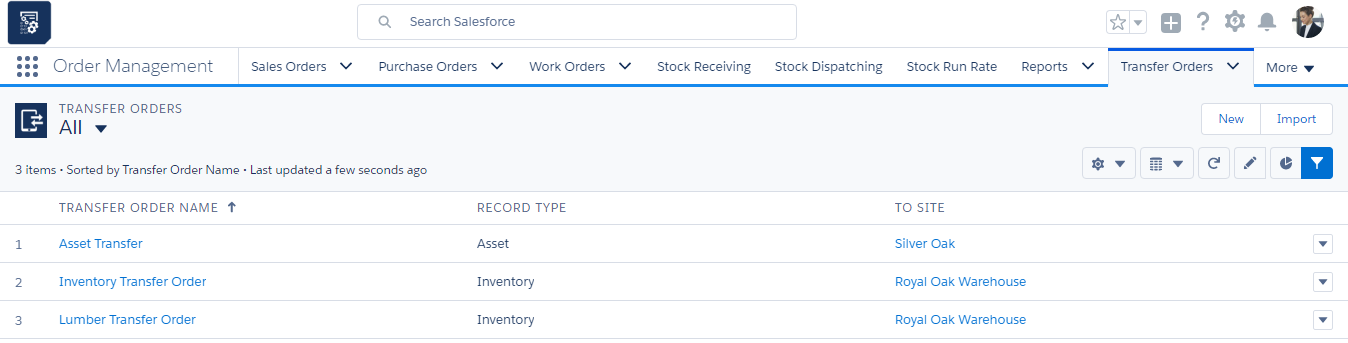
- Create a transfer order by navigating to the Order Management app > Transfer Orders tab> New.
- Once on the Transfer Orders section, you can track the transfer orders already created and create new ones. The Transfer Order should be created in Requested Status.
- To create a new transfer order, click on the “New” button and choose the transfer order record type
- Inventory
- Enter the From Channel, Site, Distribution Channel and Address. “From” fields are considered from where the Inventory is requested.
- Enter the To Channel, Site, Distribution Channel and Address.
“To” fields are considered to where the Inventory is sent.
- Select the Active checkbox to make the record active.
- Enter the Requested and Expected Date.
- Save the record.
Fields to note:
| Field | Description |
| Transfer Order Name | Describes the name of the transfer order. |
| From Channel | The Channel from where the assets/stocks will be shipped. |
| From Distribution Channel | The Distribution Channel from where the assets/stocks will be shipped. |
| From Site | The site from where the assets/stocks will be shipped. |
| From Address | Location from where the assets/stock will be shipped. |
| To Channel | The Channel to where the assets/stocks will be shipped. |
| To Distribution Channel | The Distribution Channel to where the assets/stocks will be shipped. |
| To Site | The site to where the assets/stocks will be shipped. |
| To Address | Address to where the assets/stock will be shipped. |
| Requested date | Describes the date on which the transfer order was requested. |
| Status | Current status of the transfer order, such as Draft or Requested. |
| Delivery by date | It gives the Date by which the shipment will be delivered to To Site. |
| Ship Date | It gives the Date of Order shipped from the From site. |
| Expected Date | Describes the date by which the items are expected to be received. |
| Ready To Pick Pack | Make this checkbox true when Outbound Logistic is to be created. |
| Ready To Receive | Make this checkbox true when Inbound Logistic is to be created. |
Creating Transfer Orders Line Items
Transfer order line items specify the exact Items included in a transfer order. A transfer order may contain more than one transfer order line item. Every line item contains an Asset/Product to transfer and the quantity to transfer.
The steps below explain how to create transfer order line items.
- After creating a transfer order, click on the related tab and find the transfer order line items section. Click the “New” button to create a new transfer order line item.
- Every transfer order line item is identified by its name; enter the name of the transfer order line item.
- Enter an Item to transfer.
- Enter the quantity requested.
- Click the “Save” button to create a transfer order line item.
| Field | Description |
| TO Line Item Name | Name used to identify the transfer order line item. |
| Transfer Order | Read-only field that describes the transfer order to which the transfer order line item belongs. |
| Quantity requested | Number of products requested by the transfer order line to be moved. For example, 12 chairs are requested to be transferred. |
| Product | The Product of Interest to be Transfered. |
Transfer Orders Through an Outbound Logistics Tab
This scenario describes the Pick Pack Ship process by which transfer orders can be managed. The transfer order Items can be shipped/dispatched using the Pick Pack Ship process.
To make Transfer Order logistics available in Outbound Logistics tab the Transfer Order should be marked as Ready To Pick Pack.
- Click on the Outbound Logistics tab and find the Logistic Orders that are ready to be Picked, Packed and Shipped as shown below.

- From the list of available logistic orders, select the transfer order of interest. Click on “Pick” at the top of the page or below the Action button.
- Select the logistic line items and click the “Pick” button.

- Click the “Pack” tab and enter the package details, select the package list items and click the “Save” button.

- Follow the Pick Pack and Ship process to transfer the stocks from one site to another.
Transfer Orders Through an Inbound Logistics Tab
This scenario describes the putaway process by which transfer orders can be managed. The transfer order logistics can be assigned to particular sites using the putaway option.
Transfer Orders logistics are available in Inbound Logistics when the Transfer Order is marked as Ready To Receive.
- Click on the Inbound Logistics tab and find the Logistic Orders that are ready to be received as shown below.

- From the list of available transfer orders, select the transfer orders of interest and click on “Receive” at the top of the page or the button that is next to the logistic order. Click the “Save” button to complete the receiving process.

- Select the received transfer order line items and click the “Putaway” button, enter the location and storage bin to be assigned to the inventory product and click the “Save” button.

- Following the putaway process, creating stock inward line items and filling in the other details, such as name, quantity and warehouse, as well as saving the record, will transfer the stocks to the assigned warehouse.
