


 Because the word “asset” has a different meaning in the world of finance and accounting, the phrase “asset tracking” is used to indicate the monitoring of physical asset movement and condition, not the change in the monetary value of an intangible financial asset.
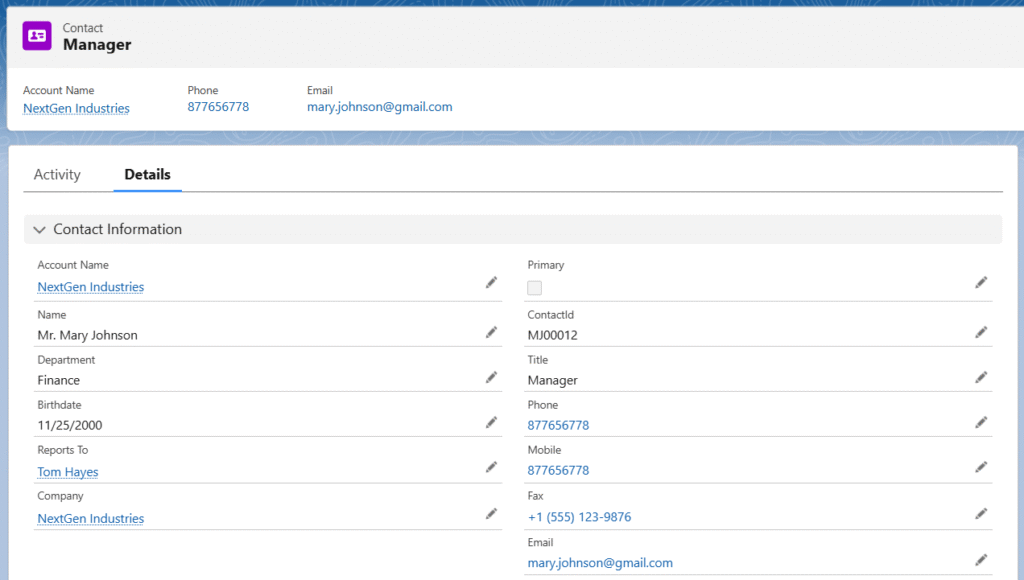
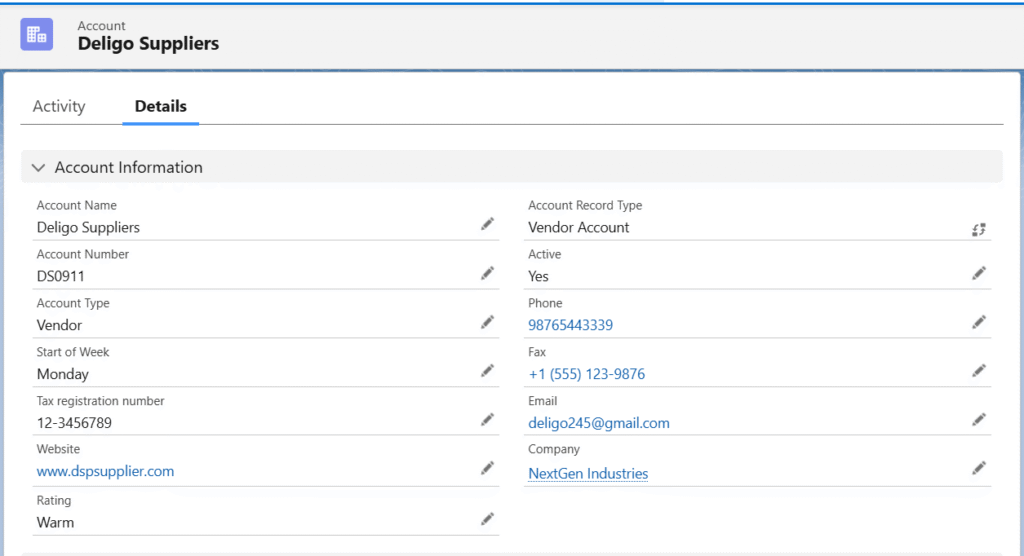
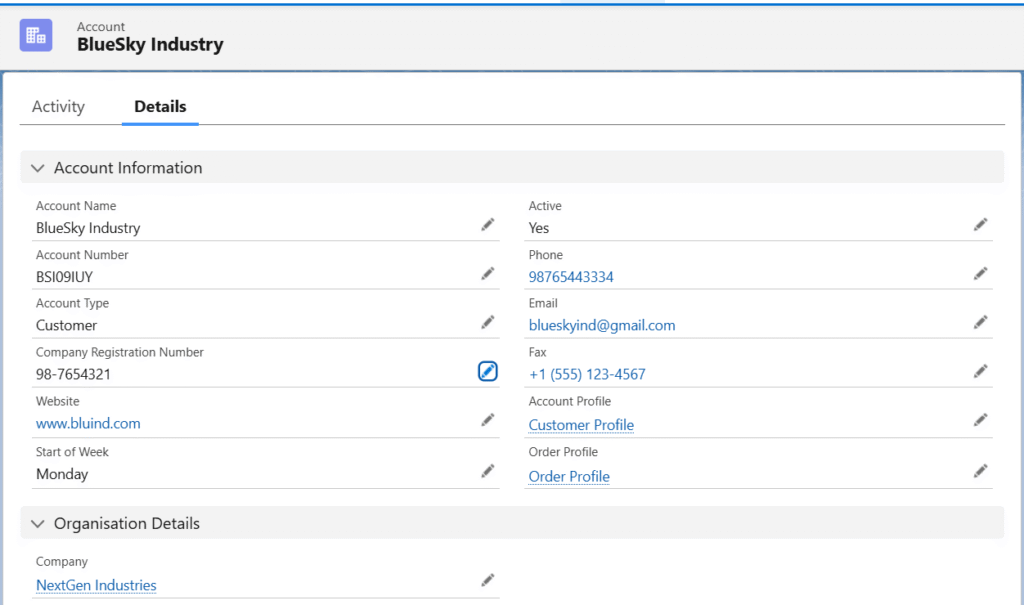
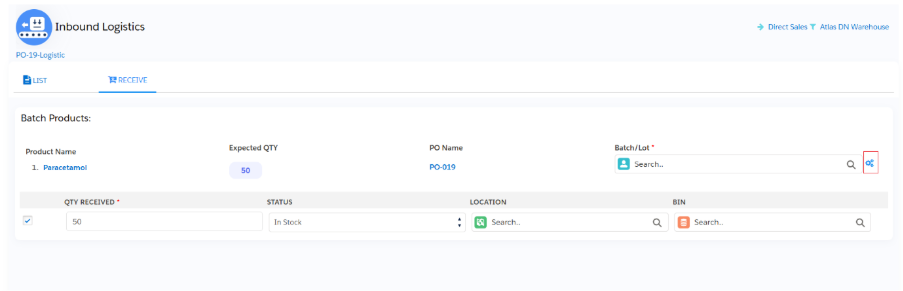
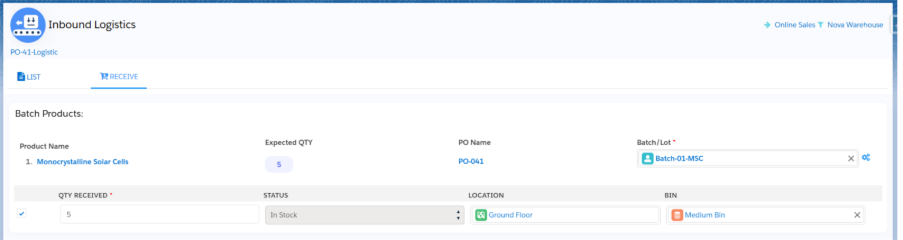
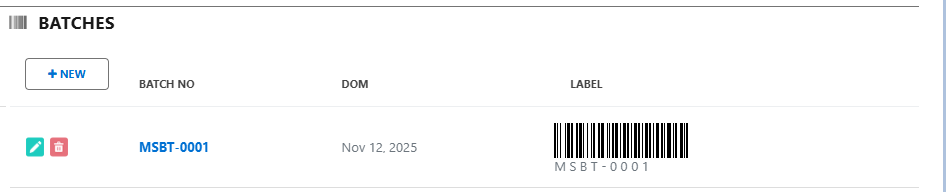
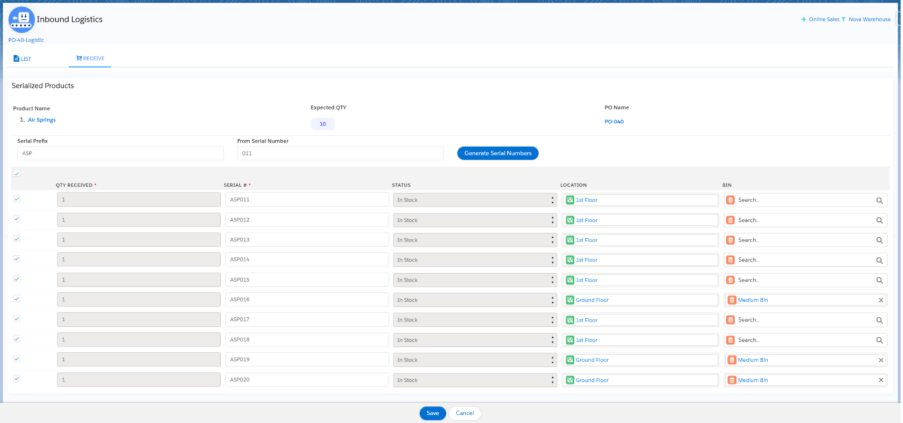
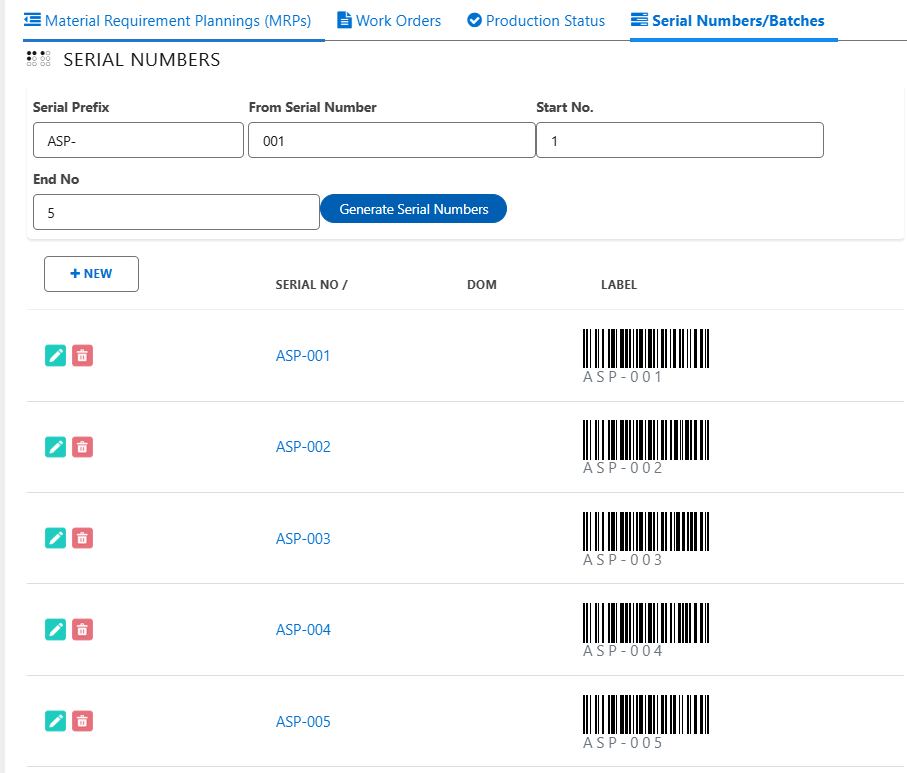
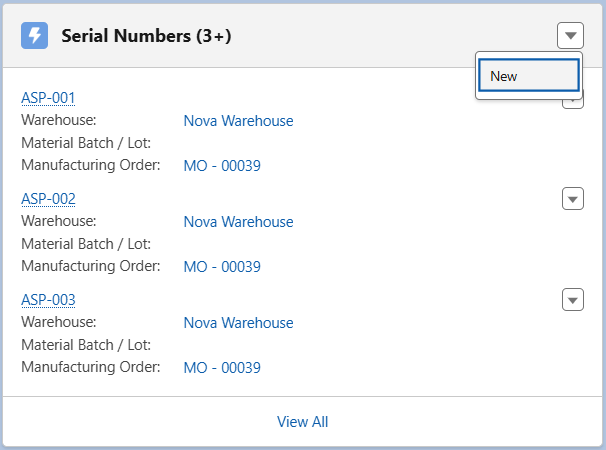
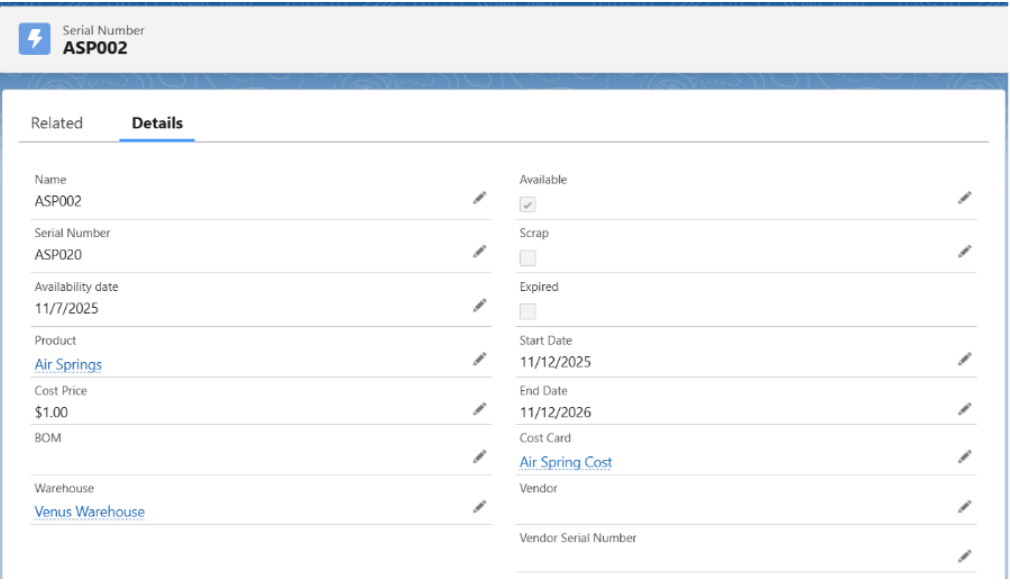
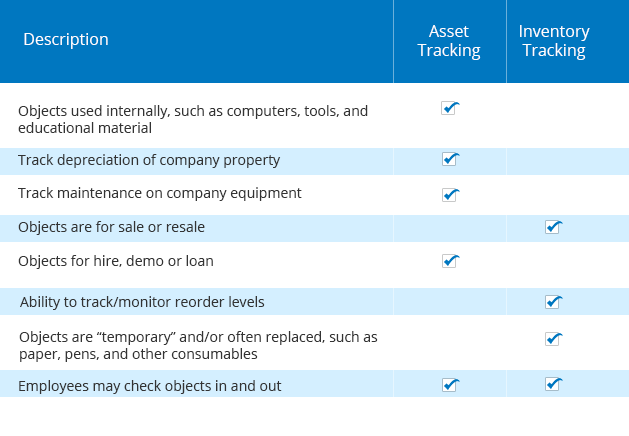
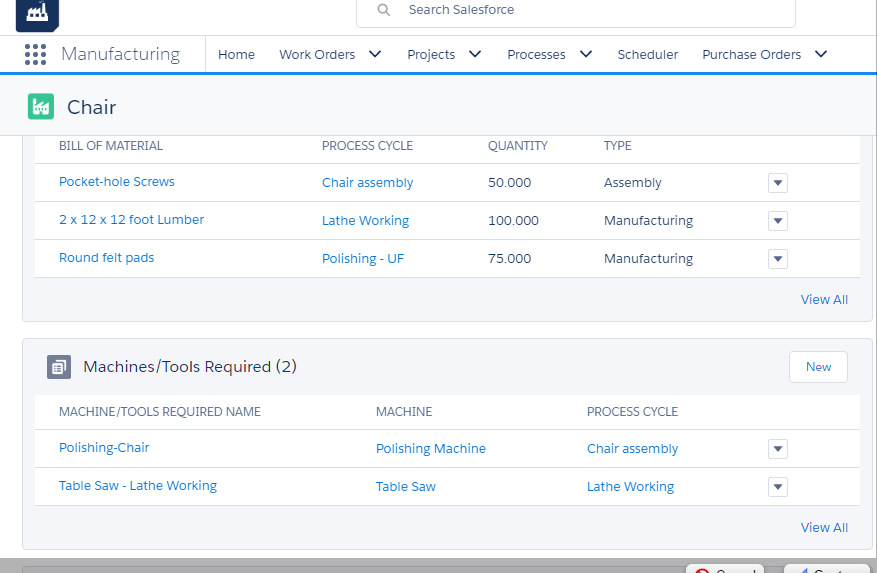
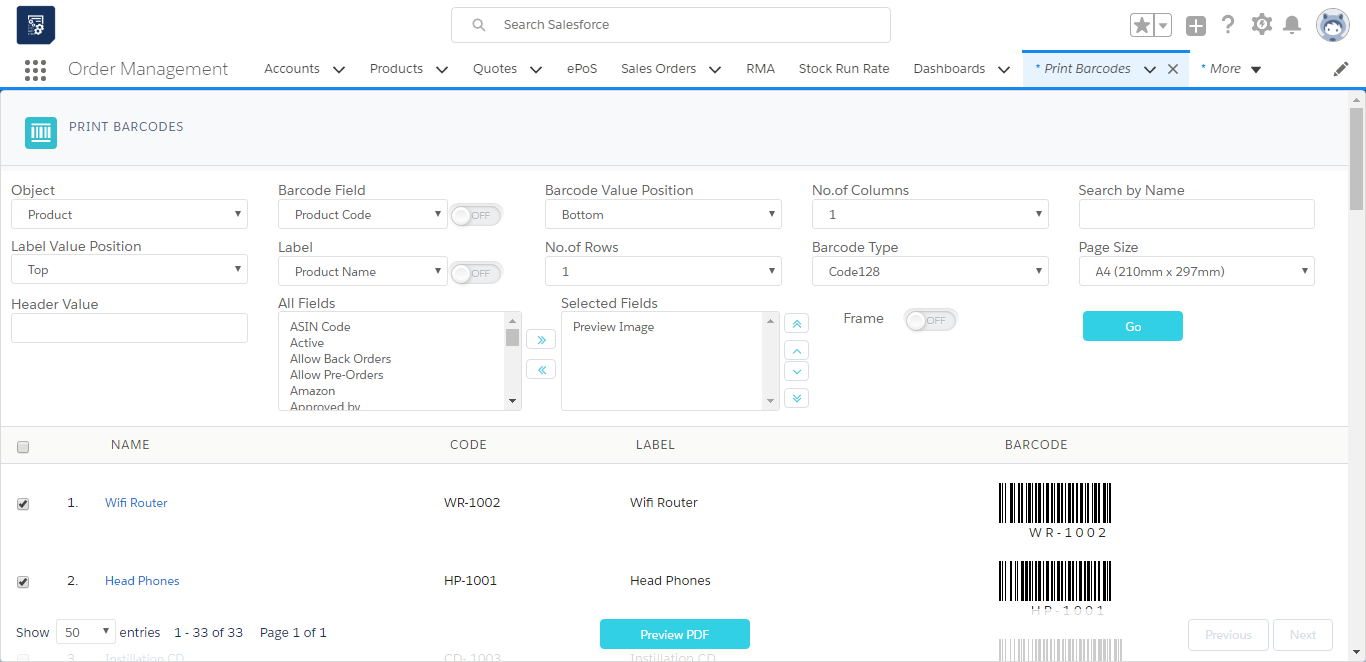
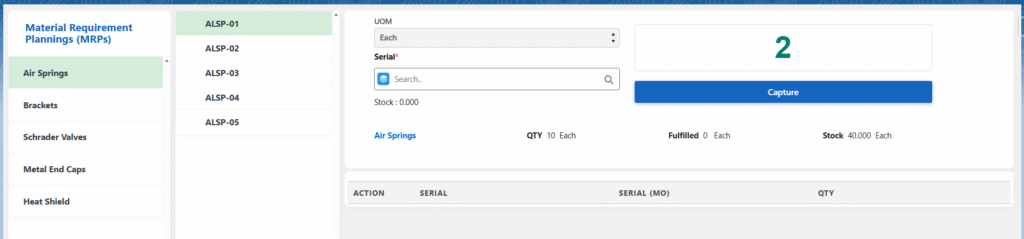
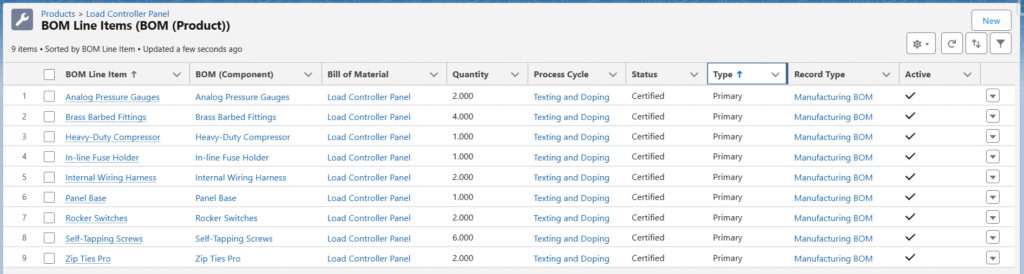
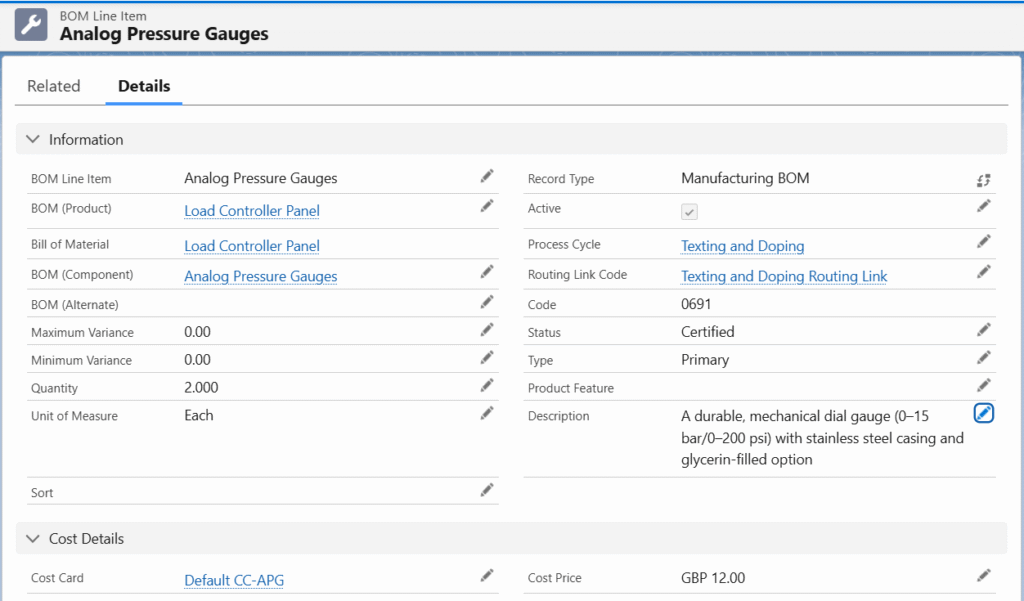
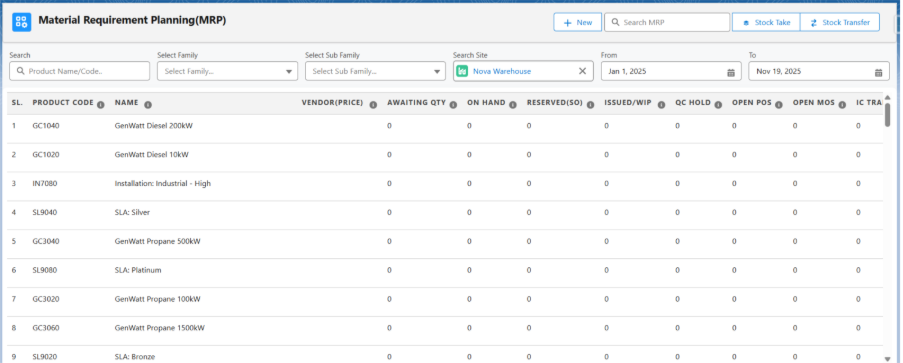
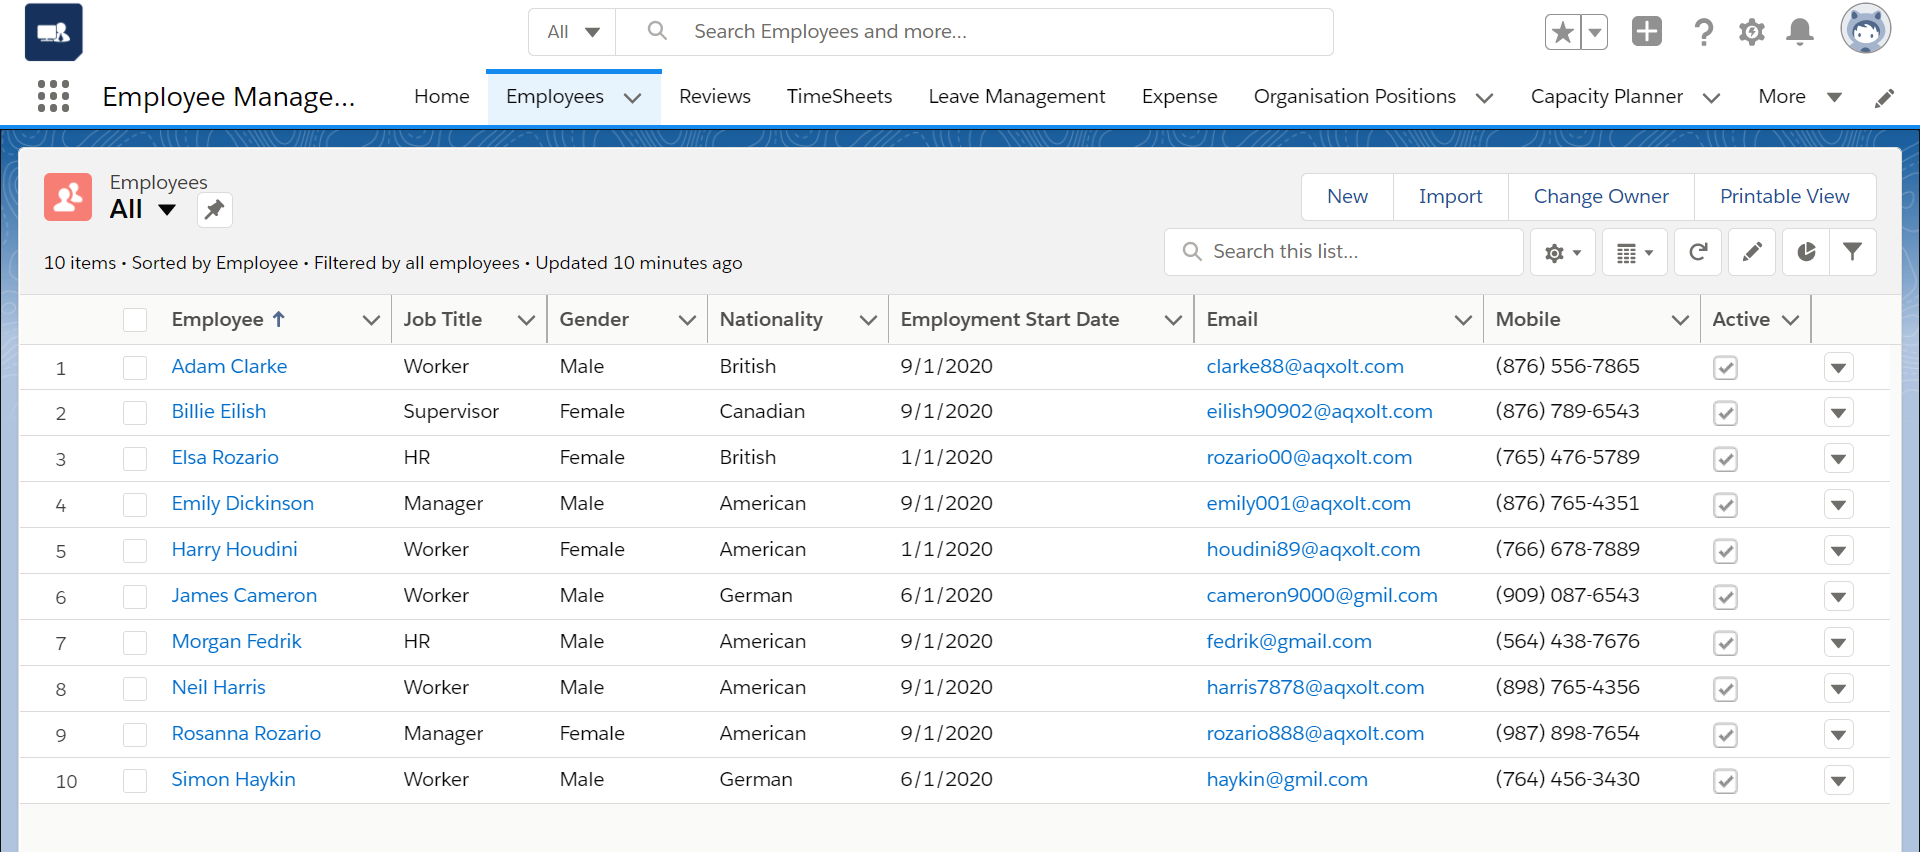
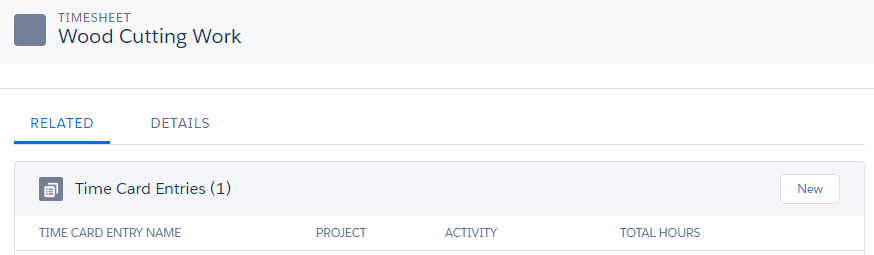
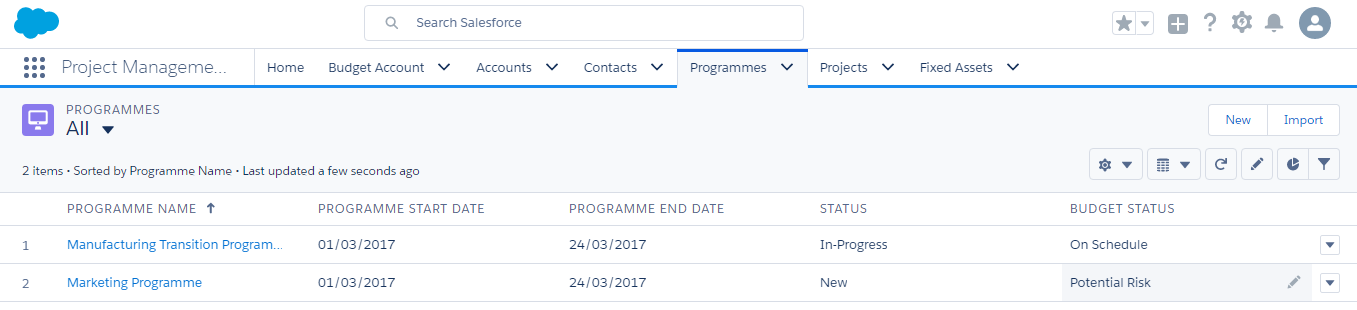
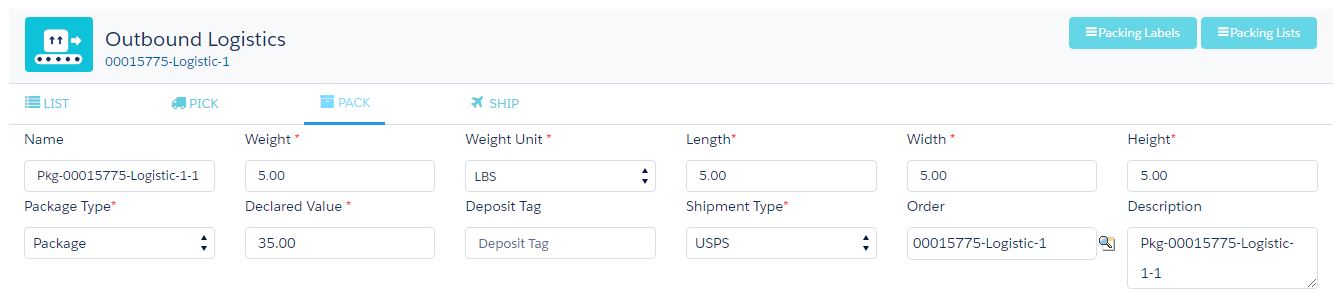
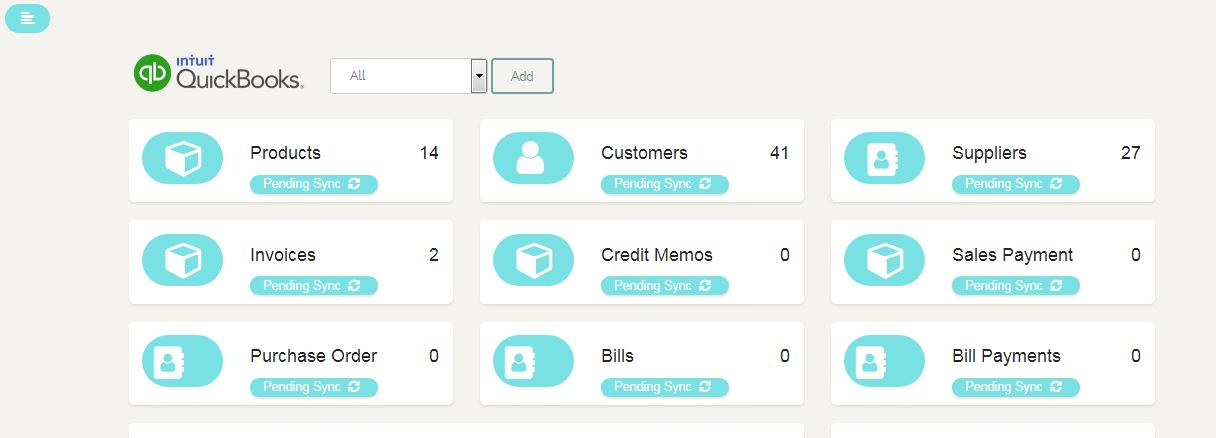
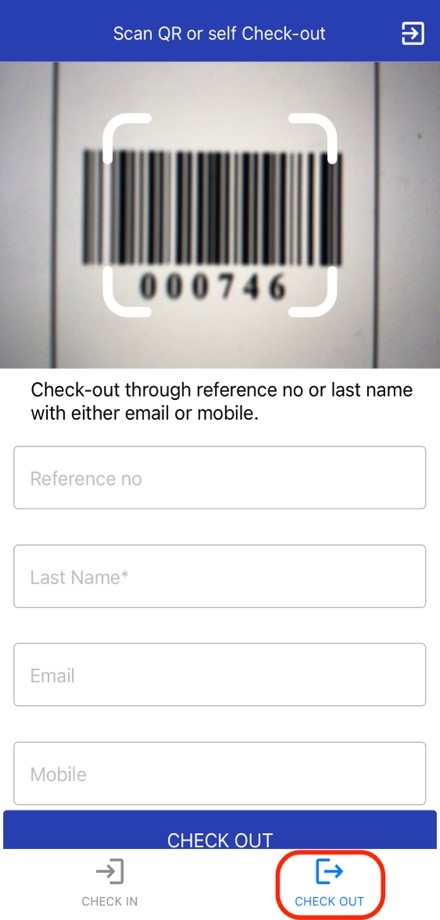
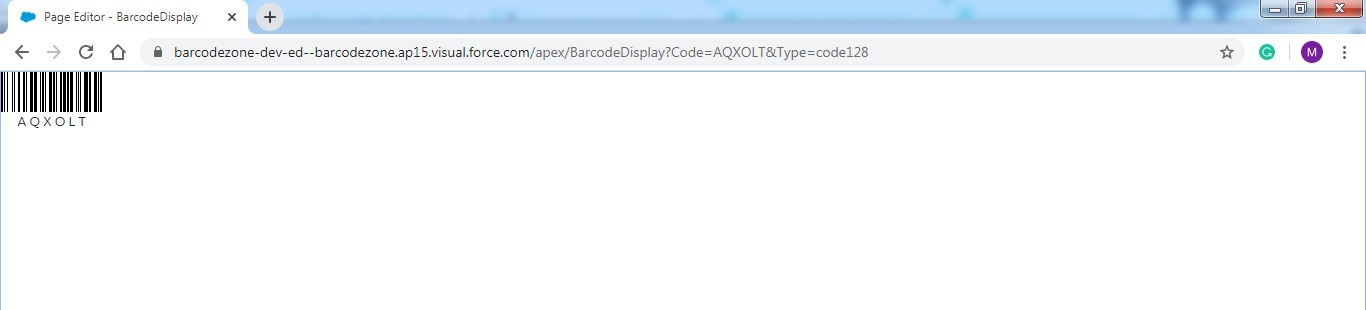
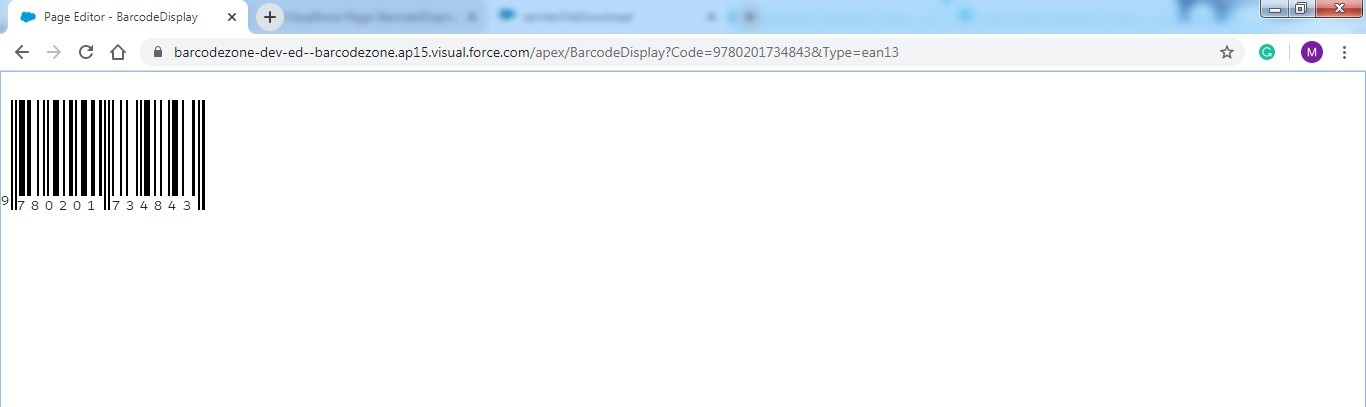
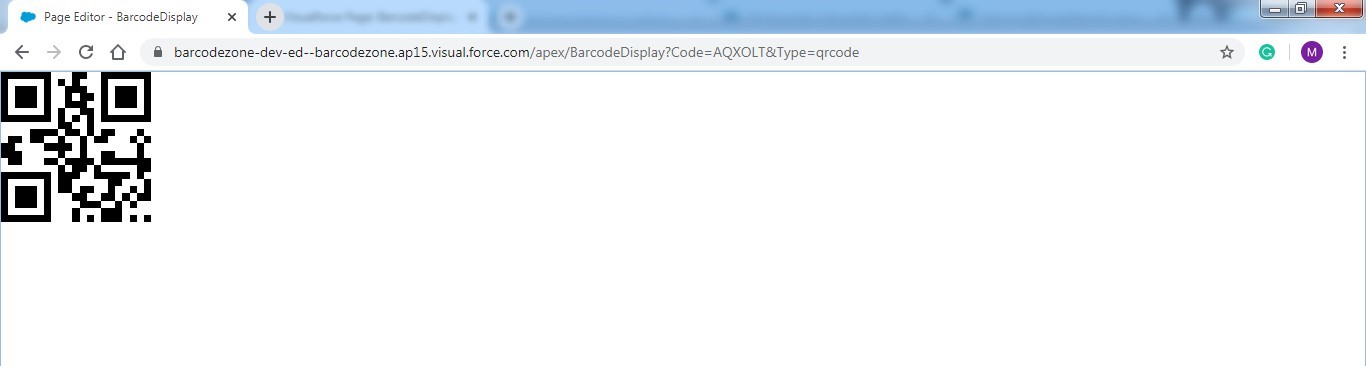
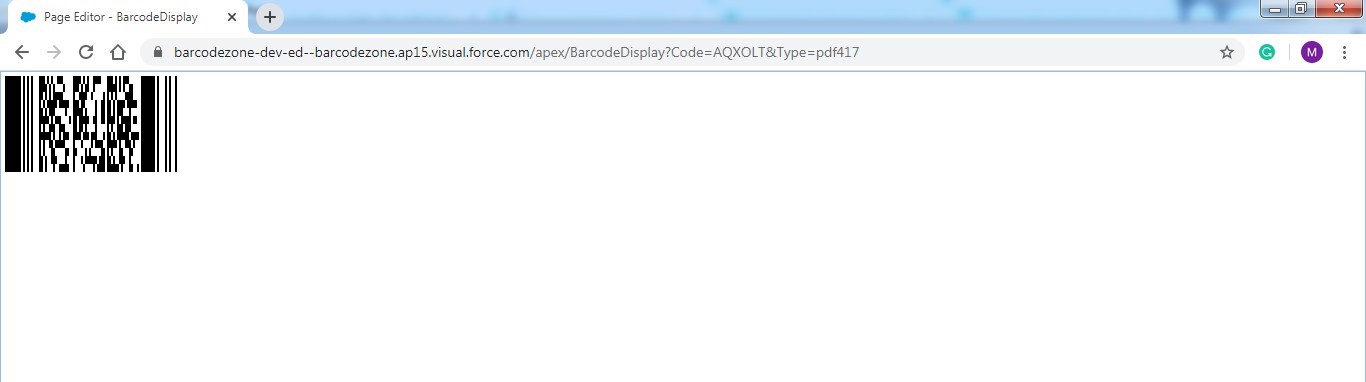
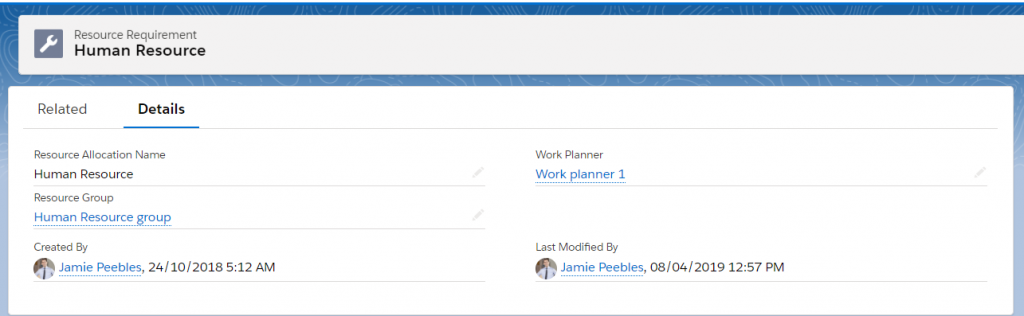
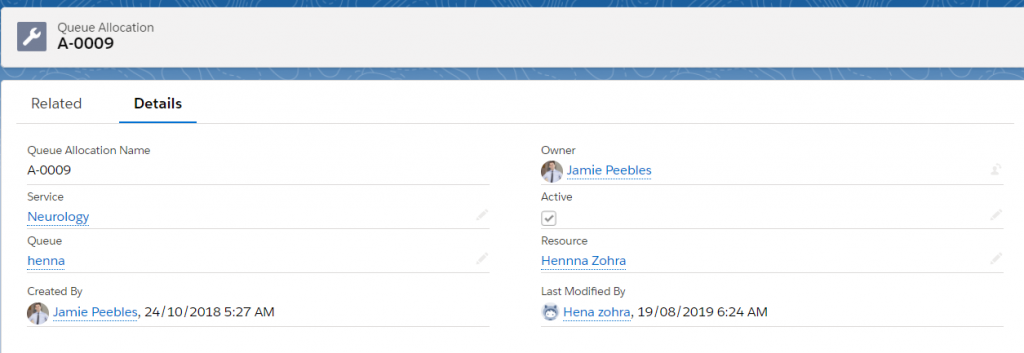
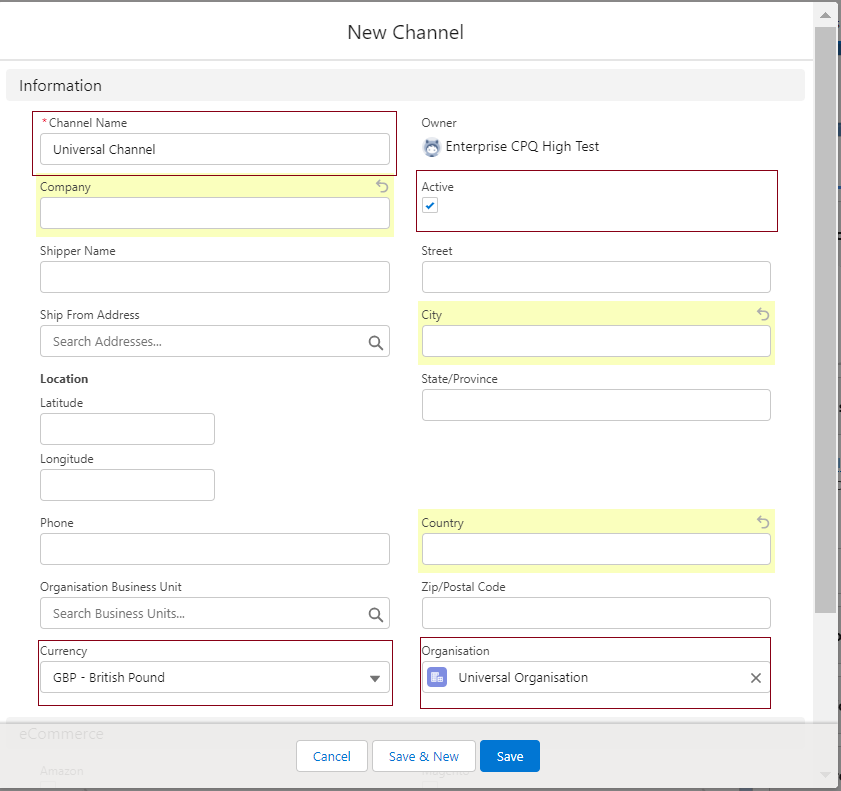
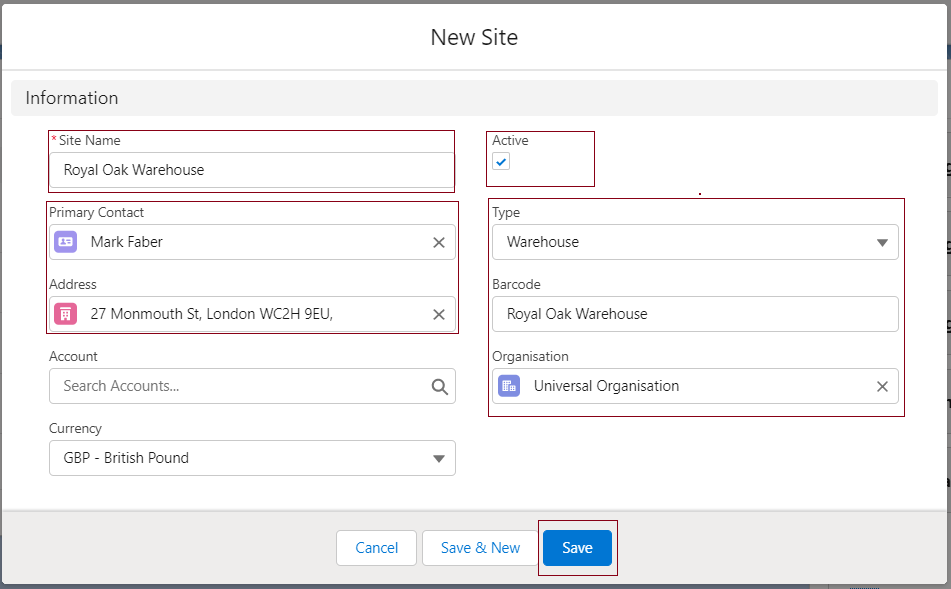
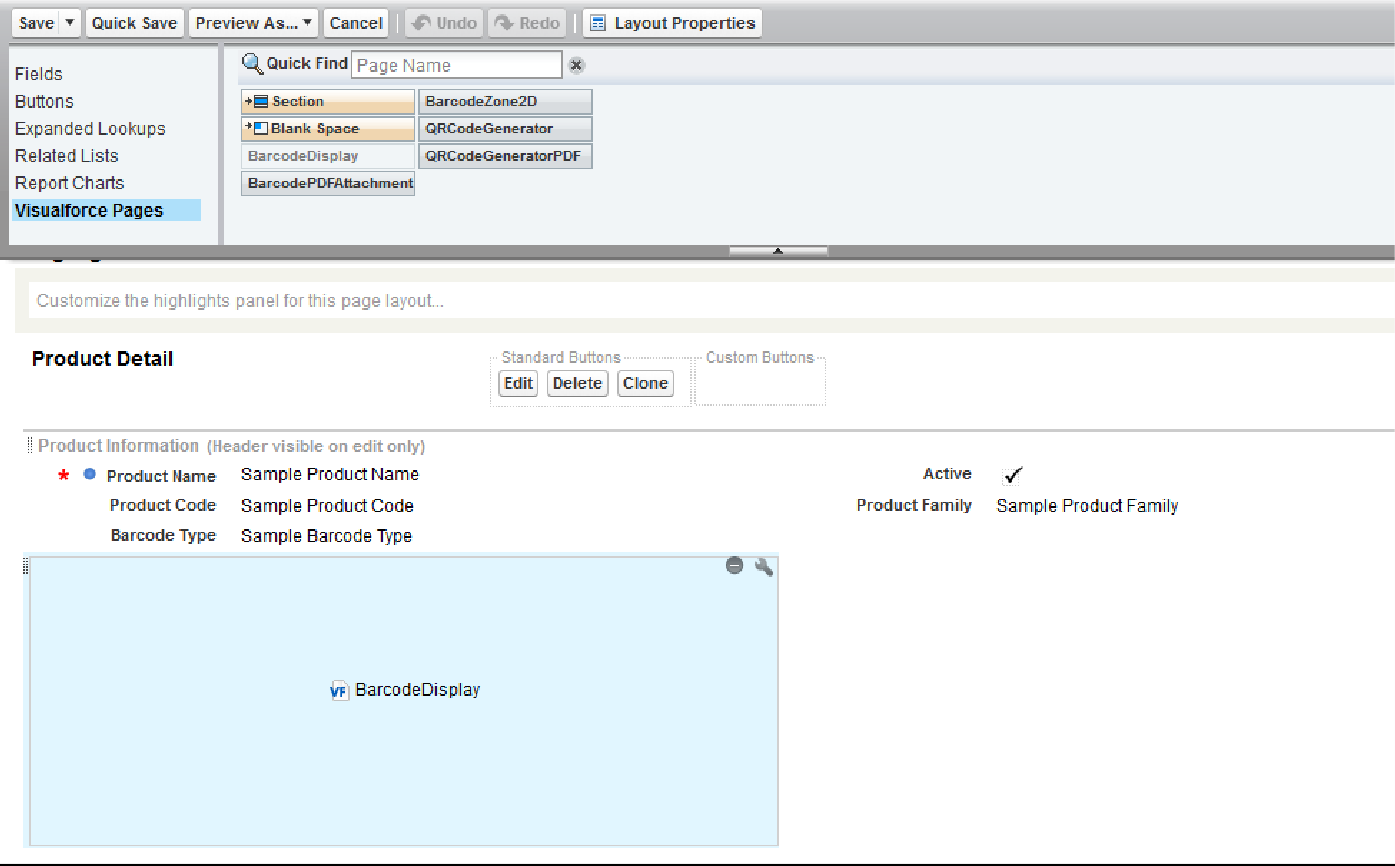
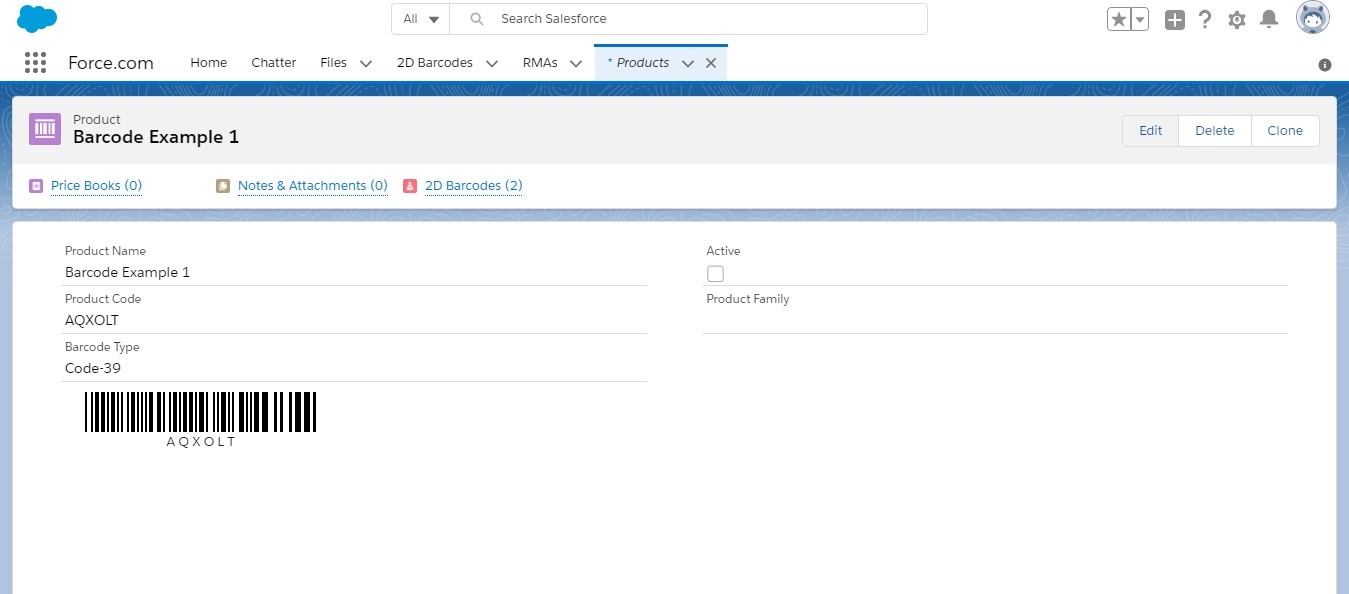
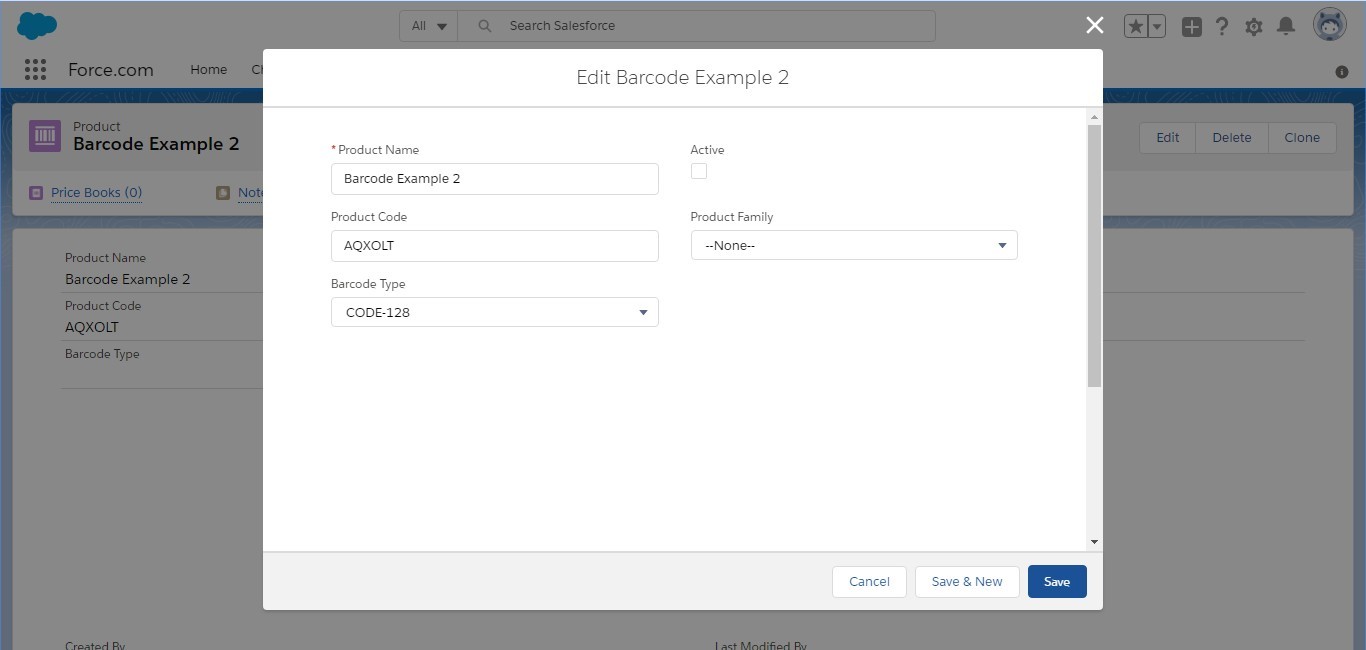
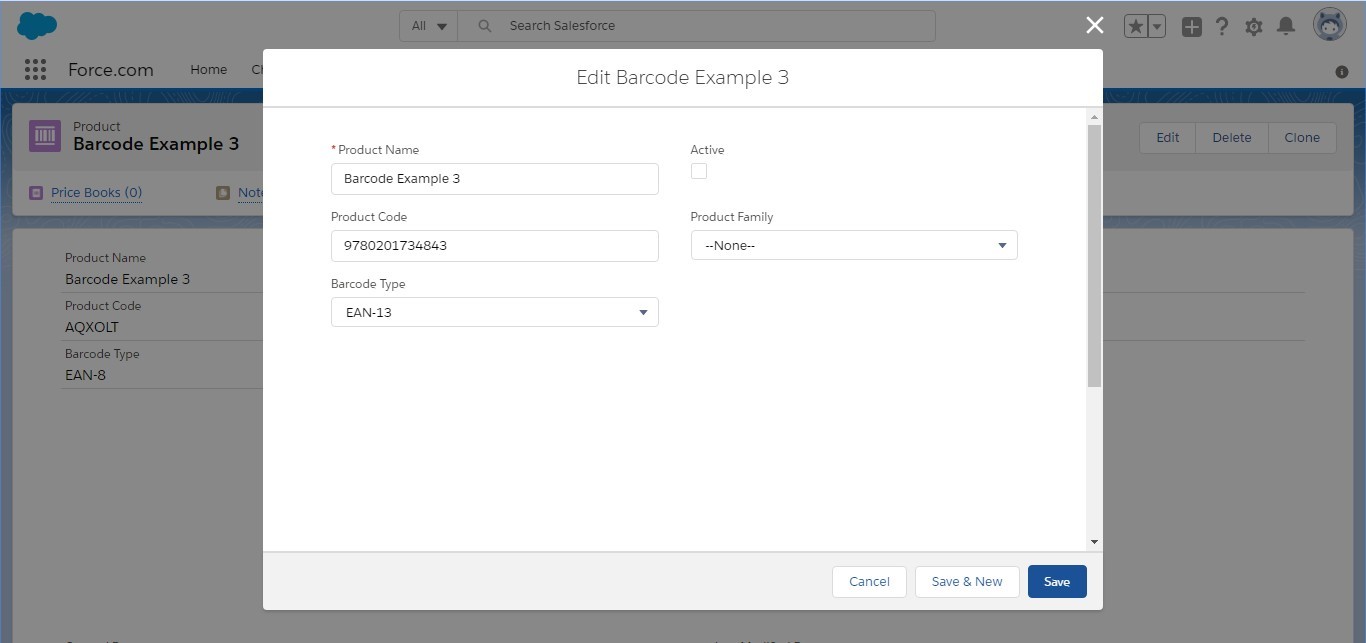
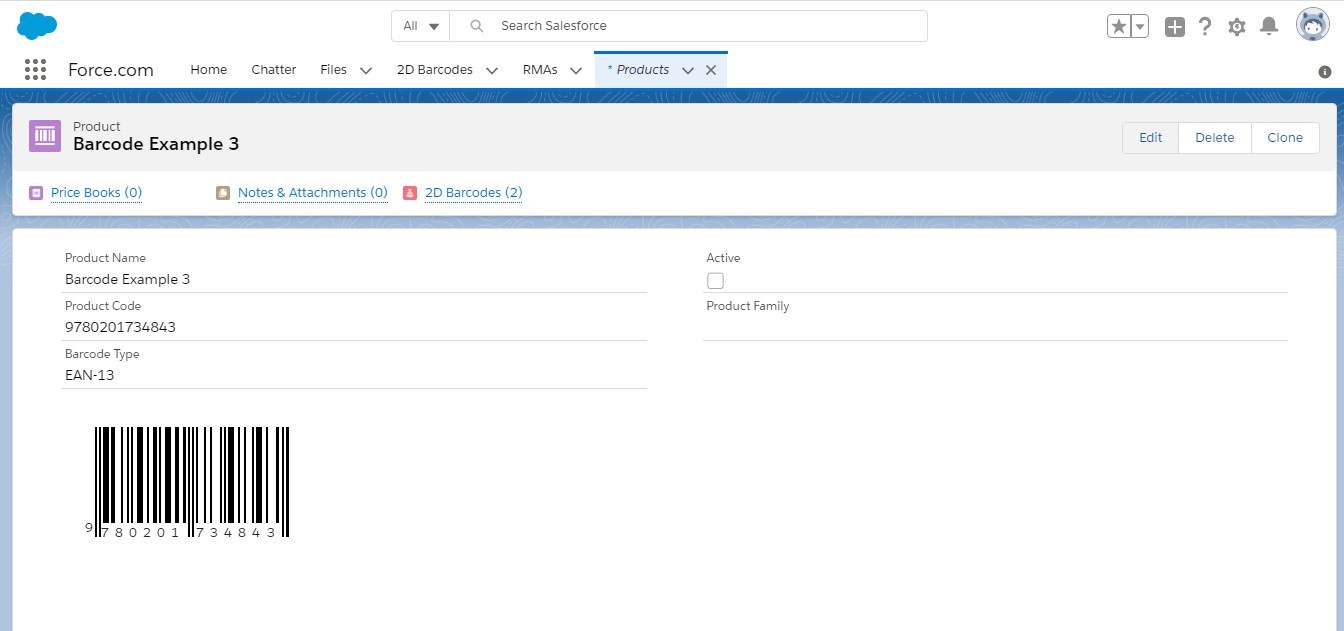
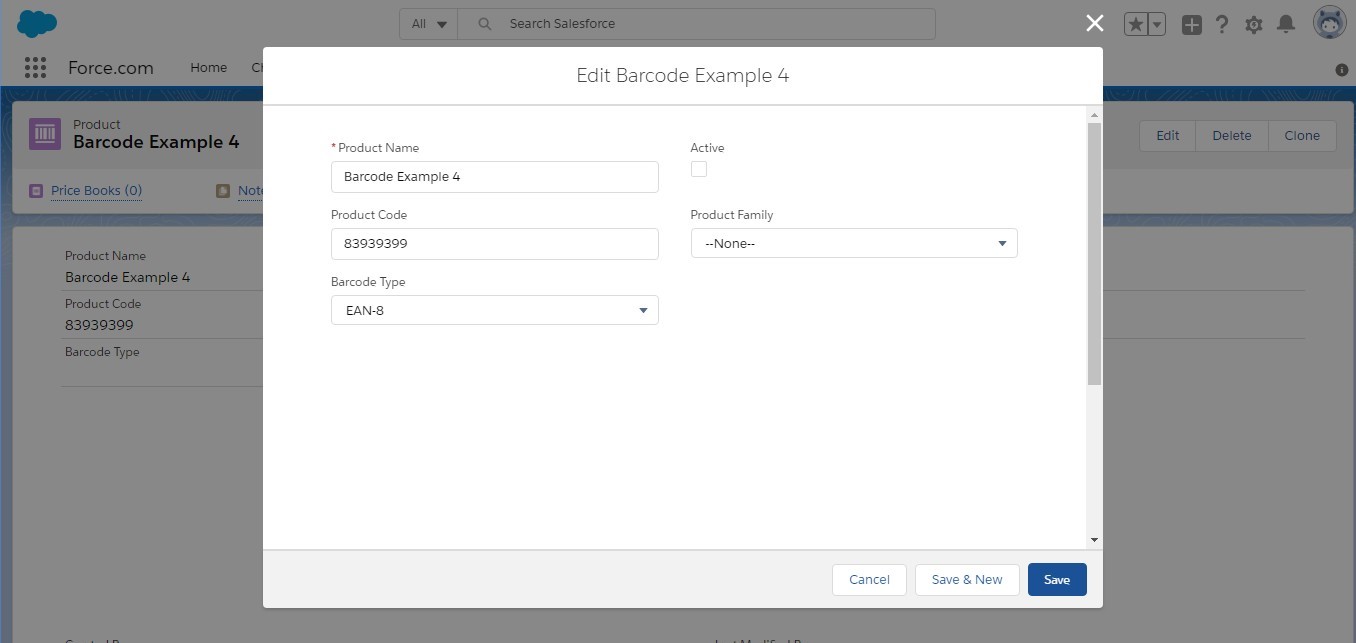
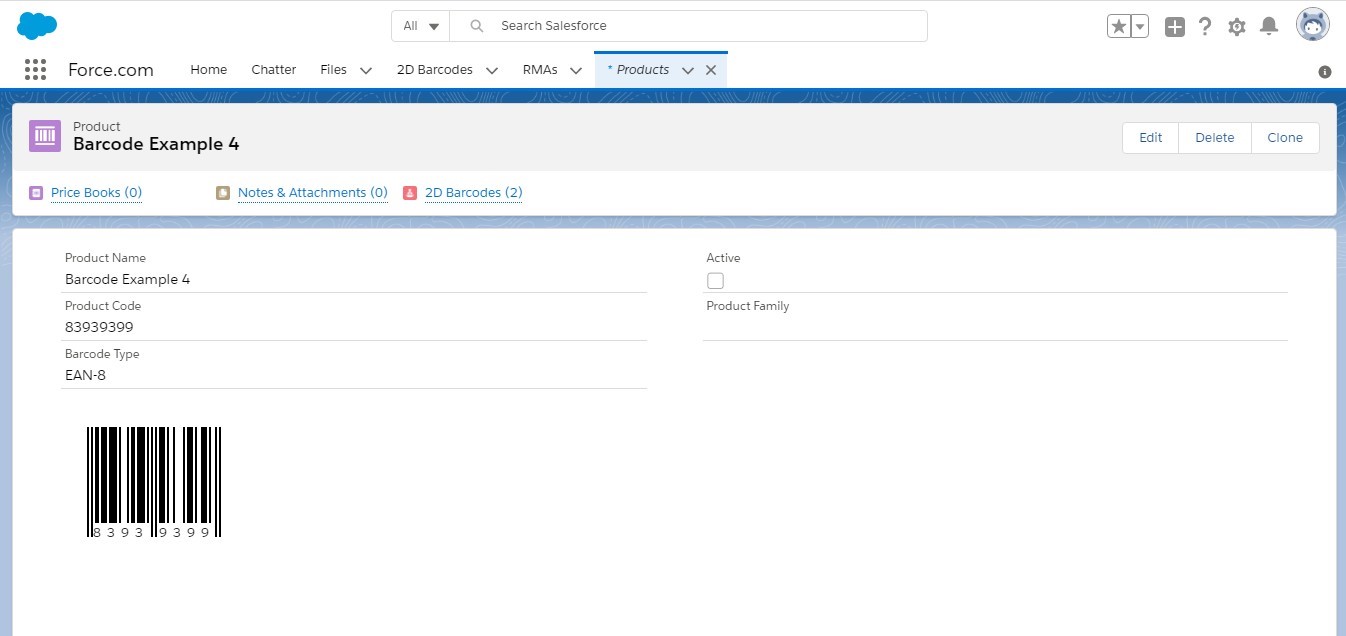
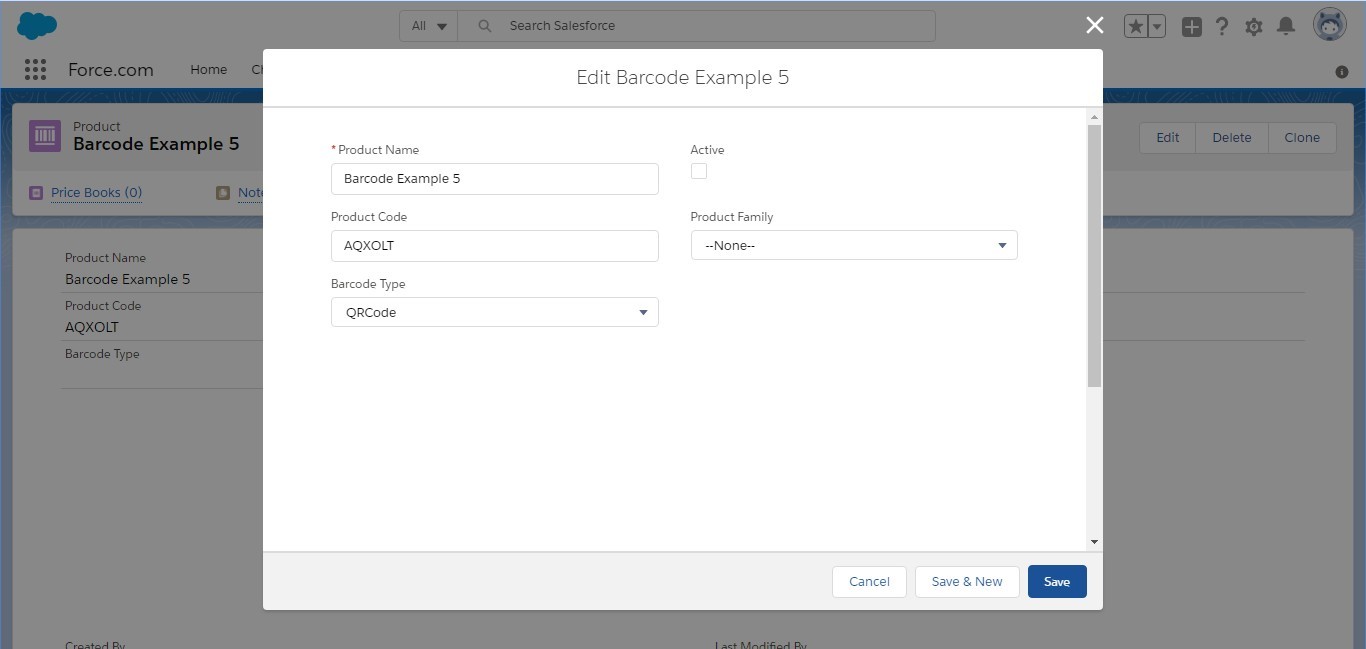
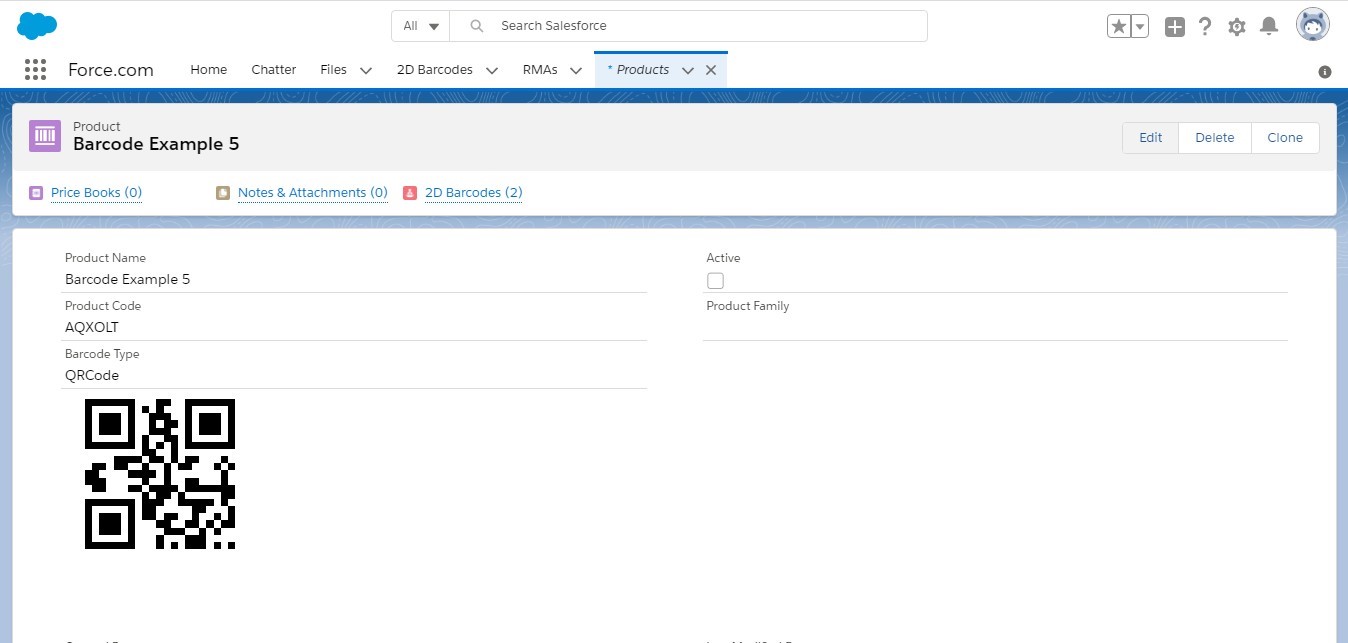
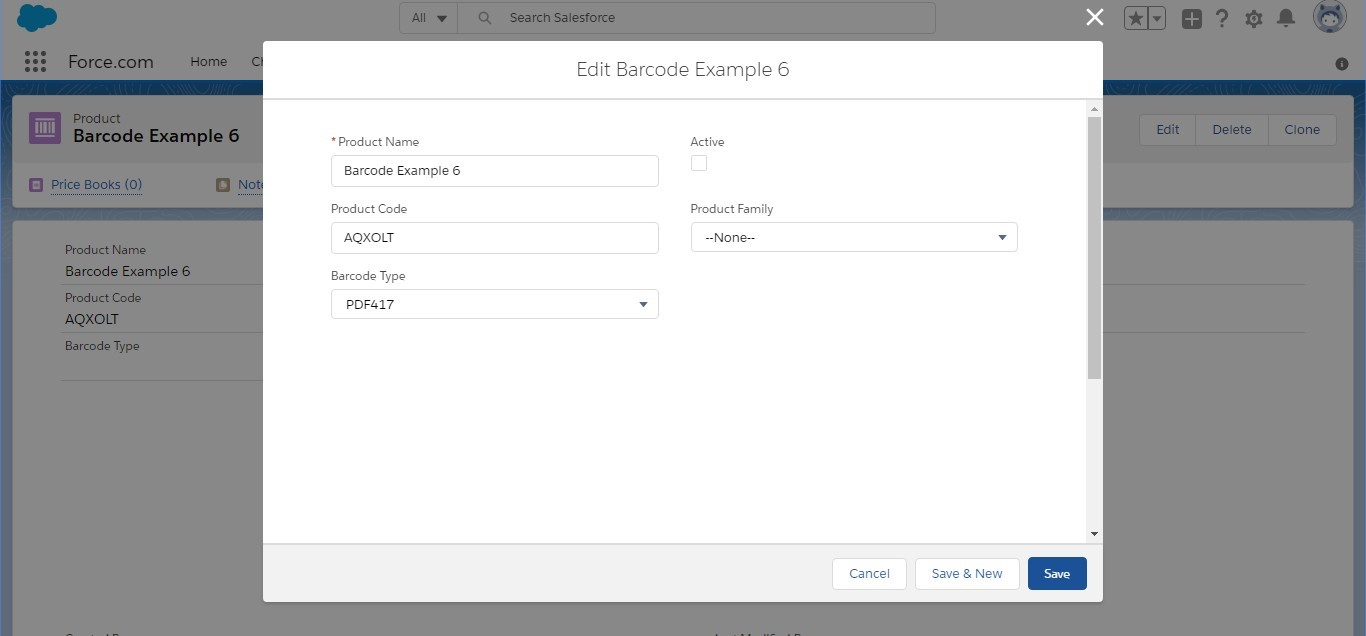
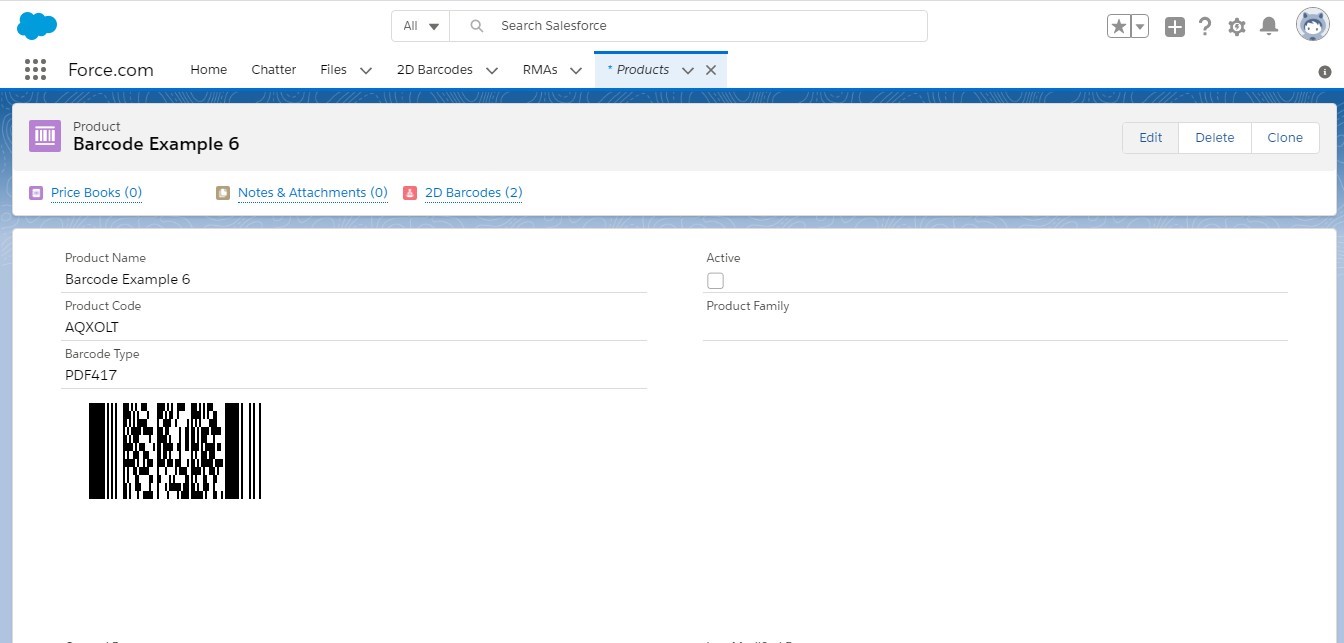
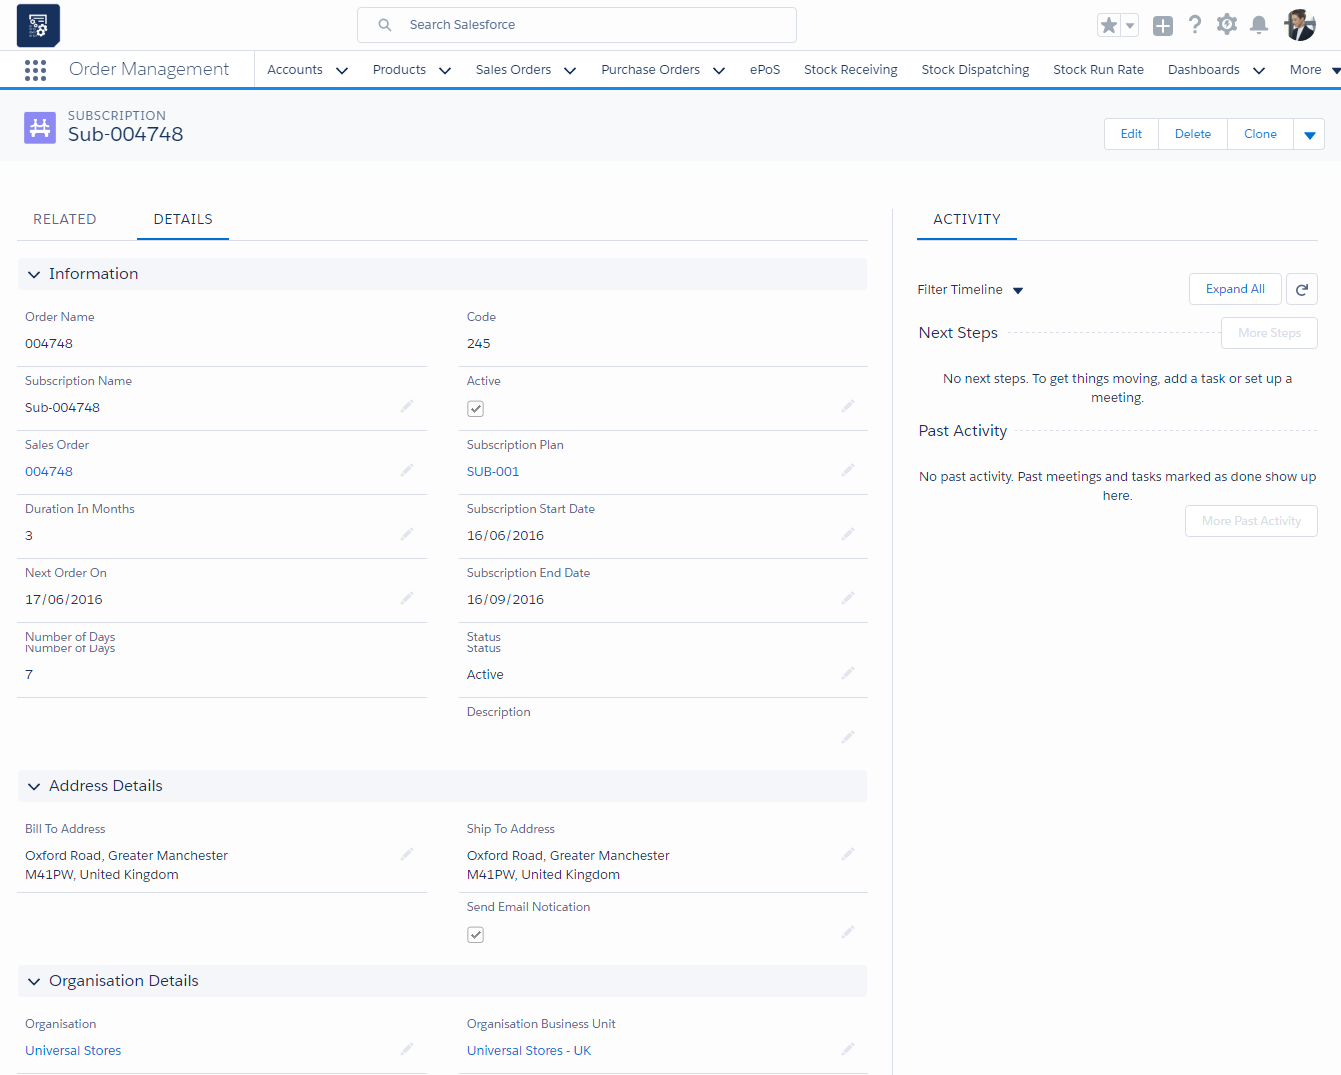
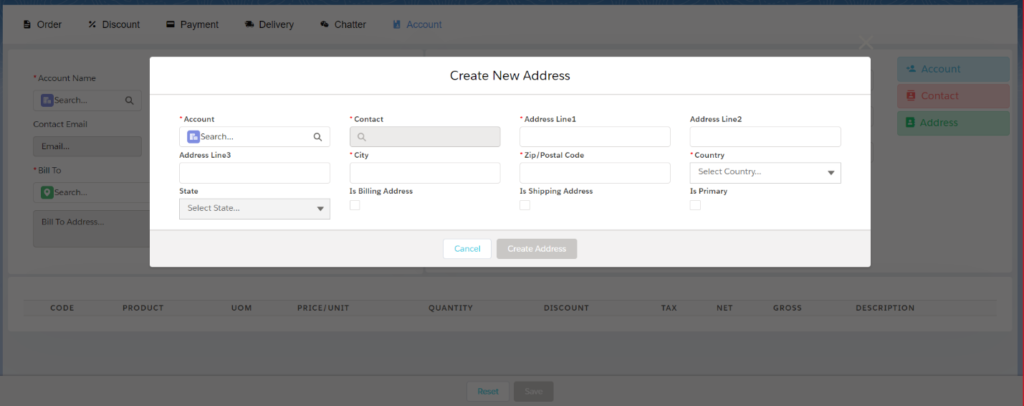
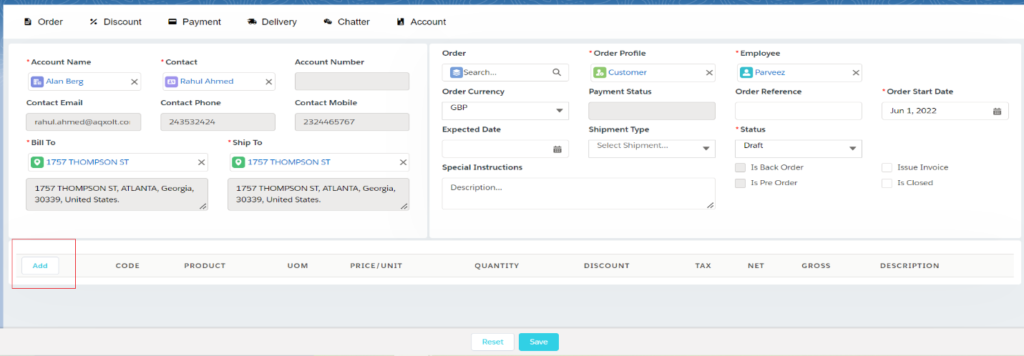
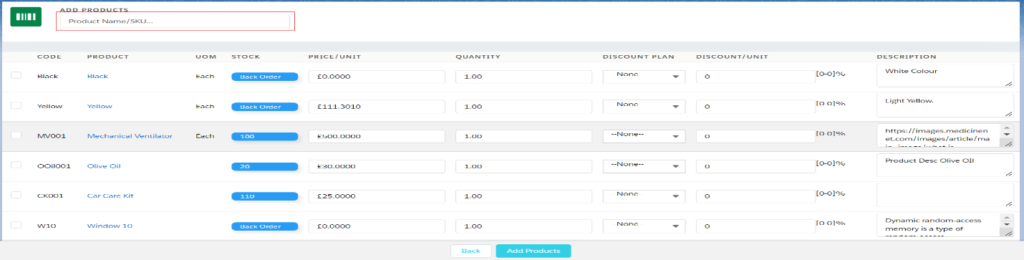
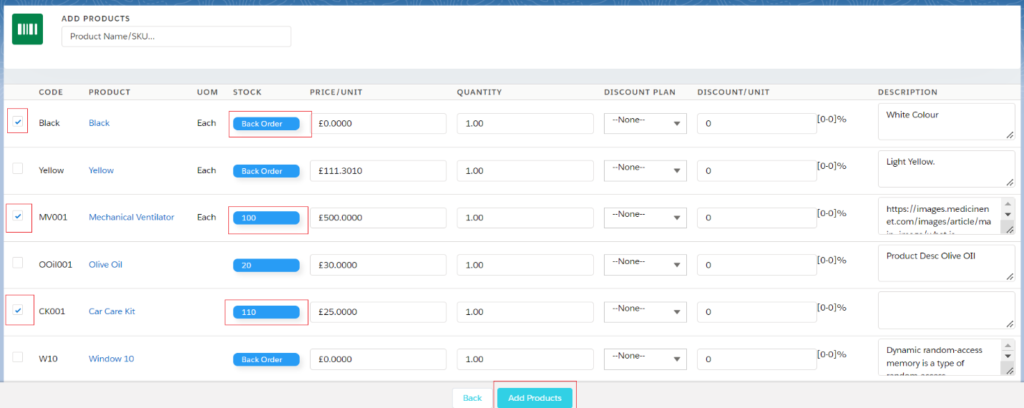
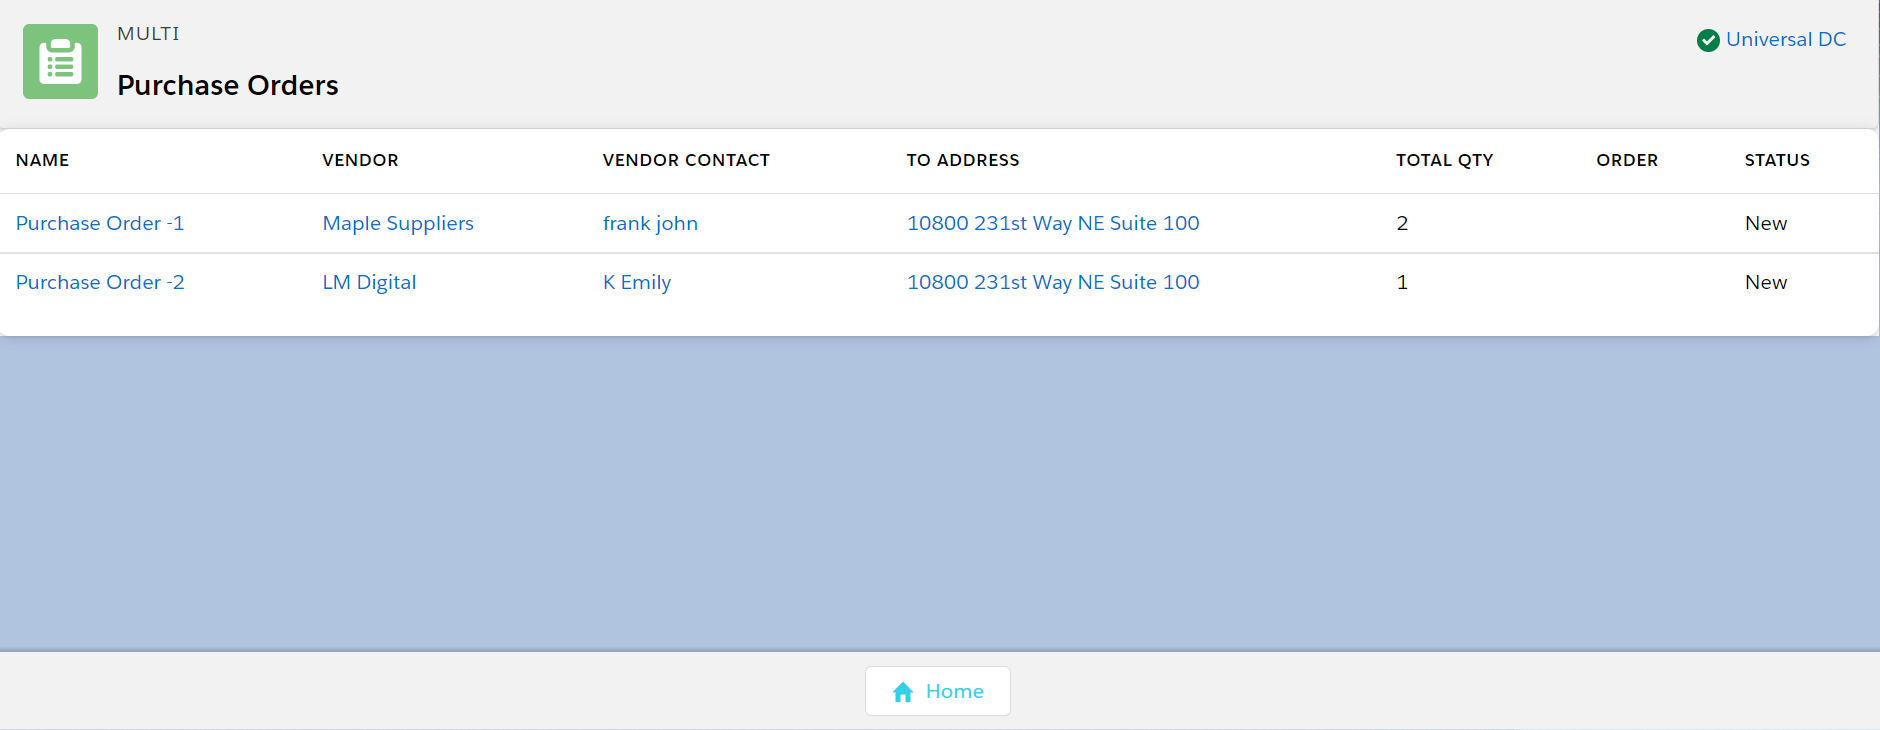
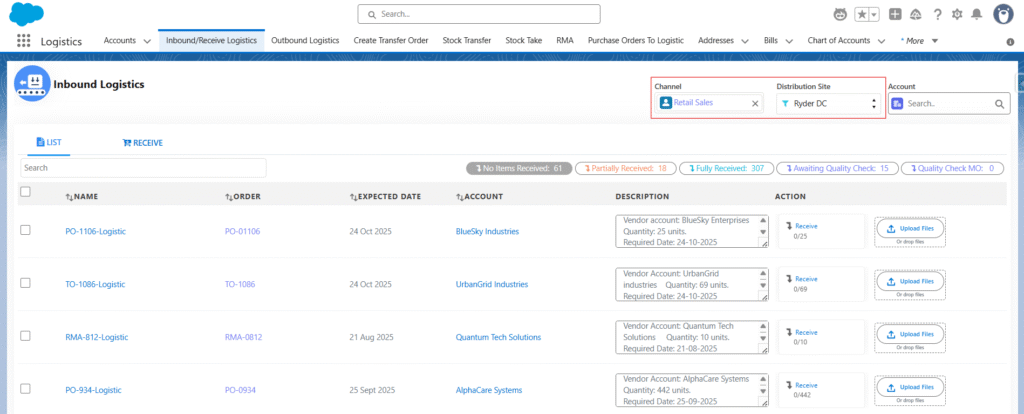
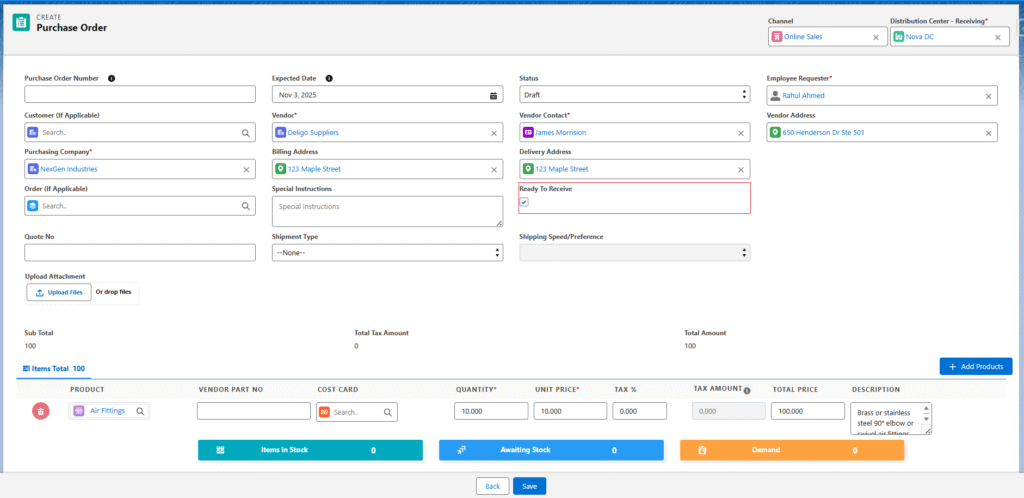
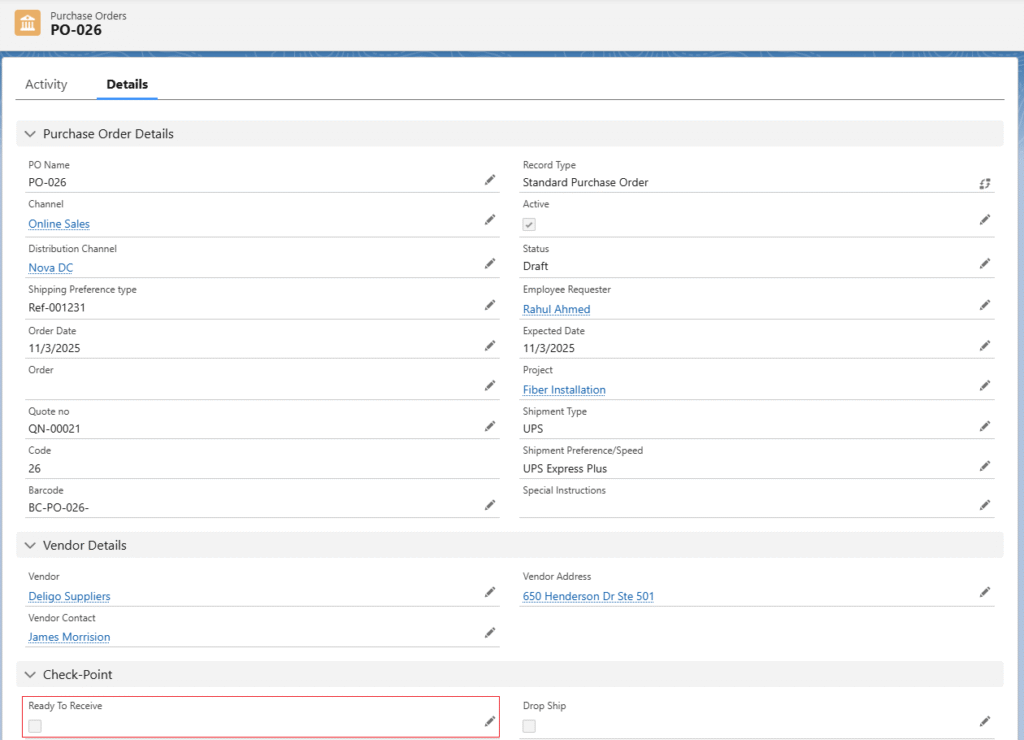
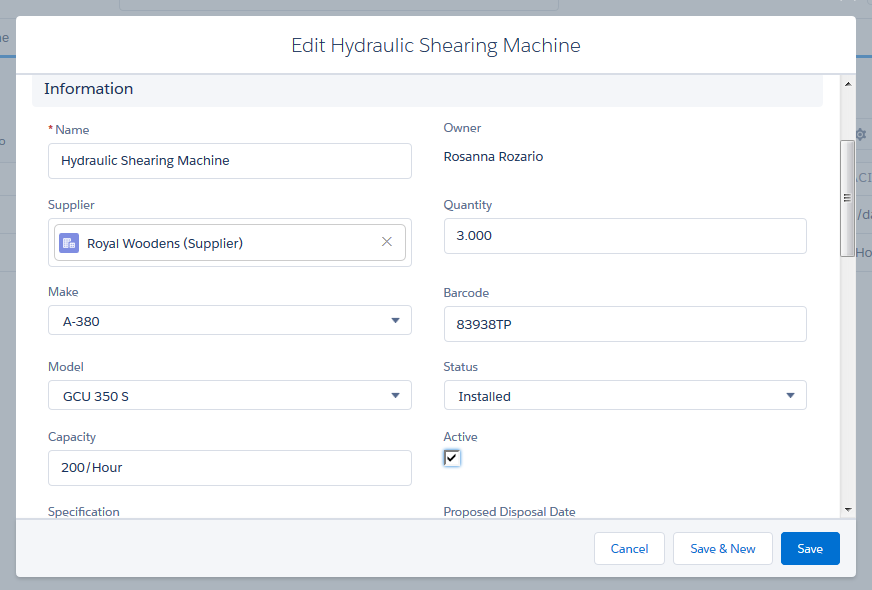 Systematically tracking assets is necessary across every industry to maintain accurate accounting records as well as real-time visibility of operations. For tracking purposes, each asset is tagged with a unique barcode identifier (e.g., make, model, serial number, etc.) and associated with a custodian or location.


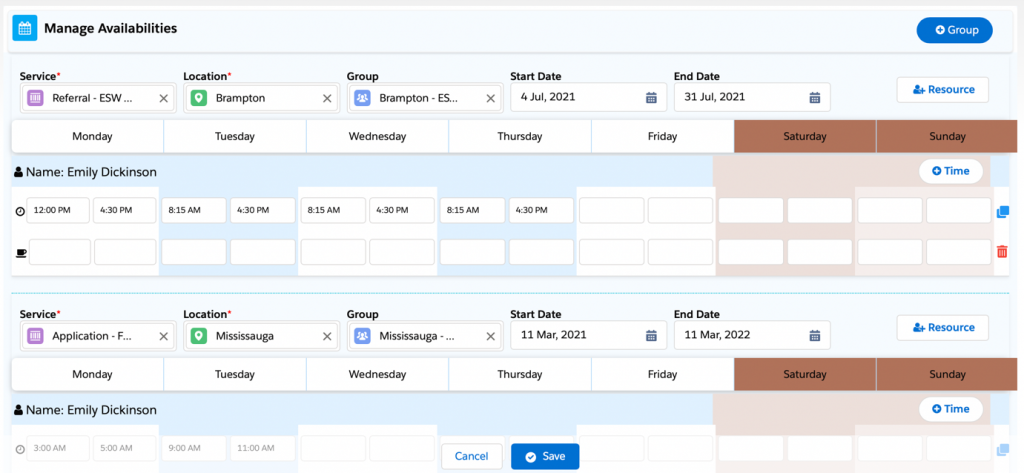
 2. Select the employee for whom a Leave request needs to be created from the list of employees
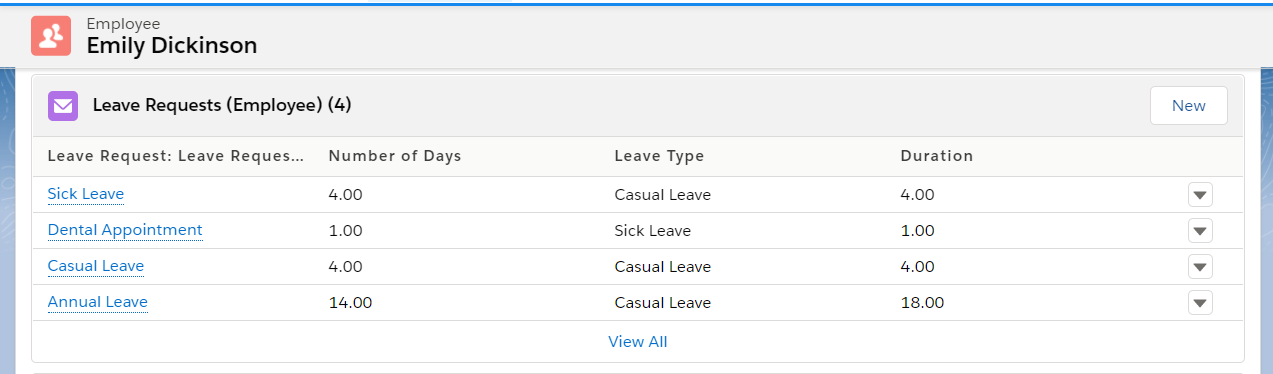
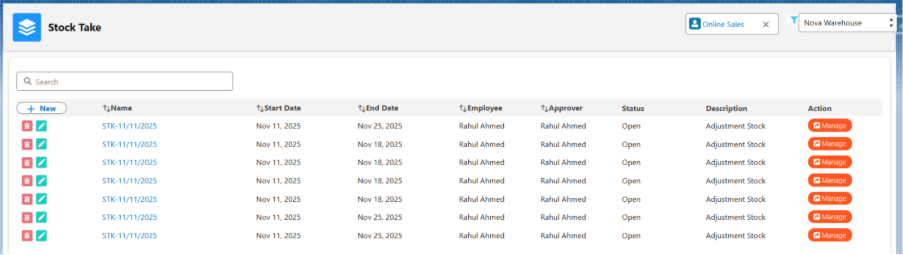
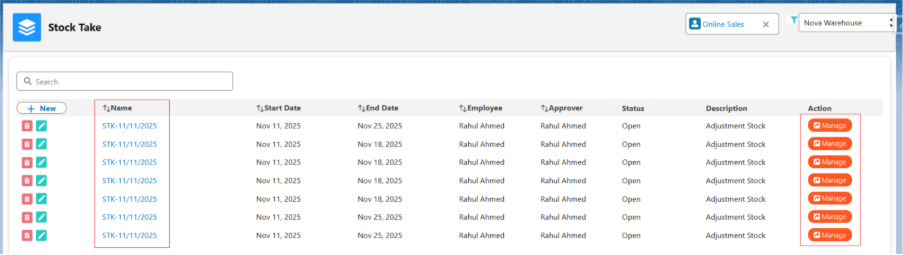
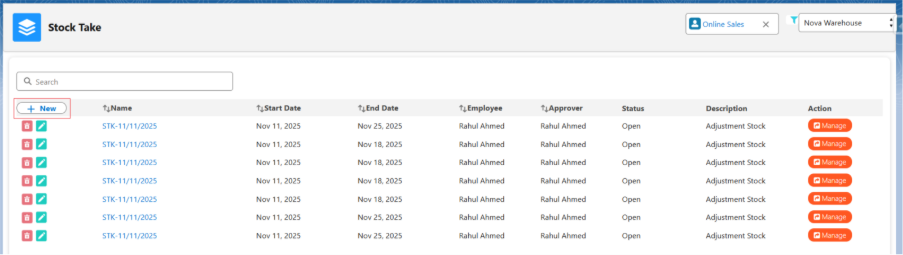
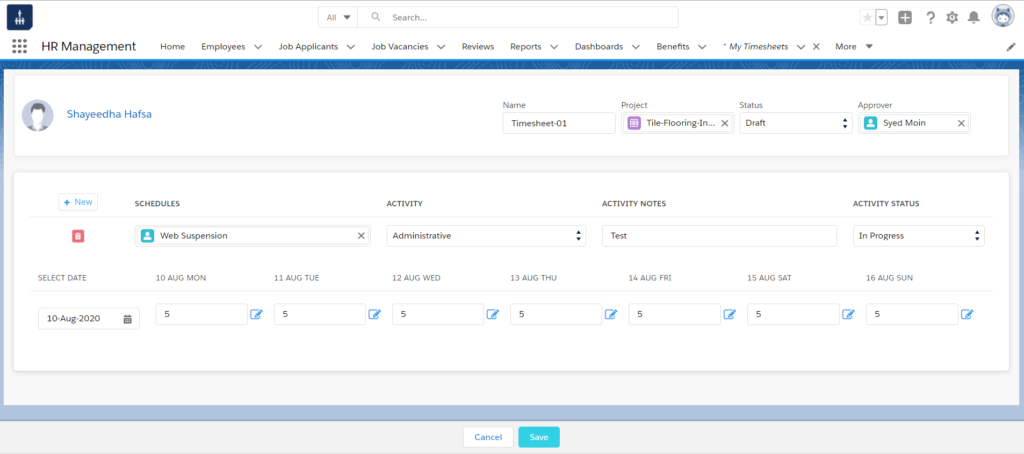
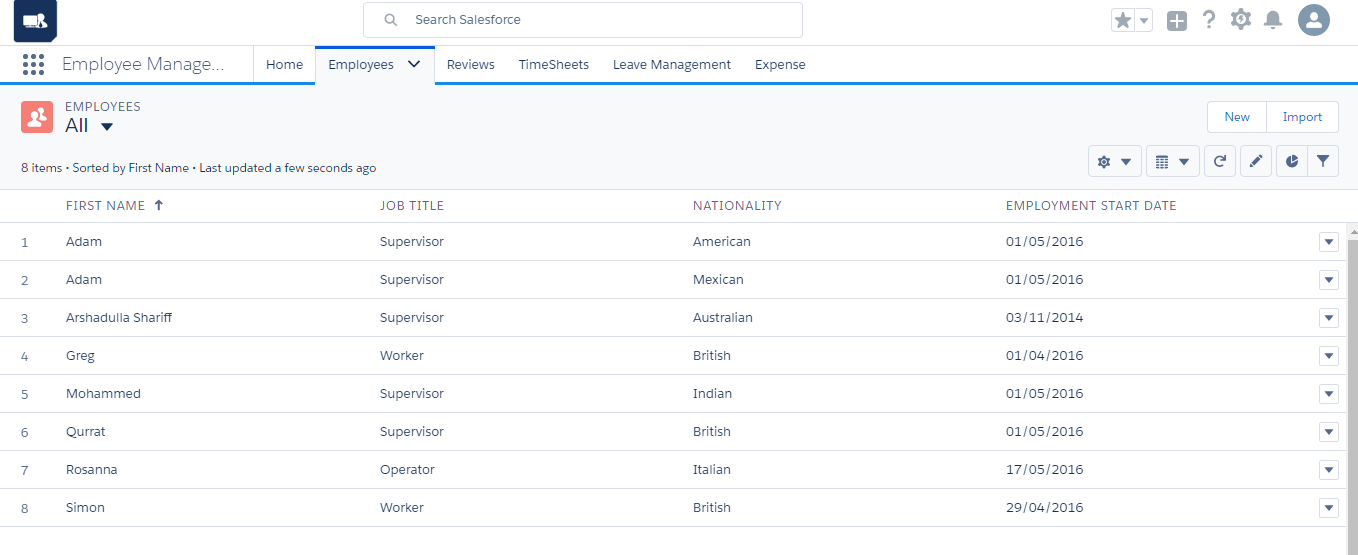
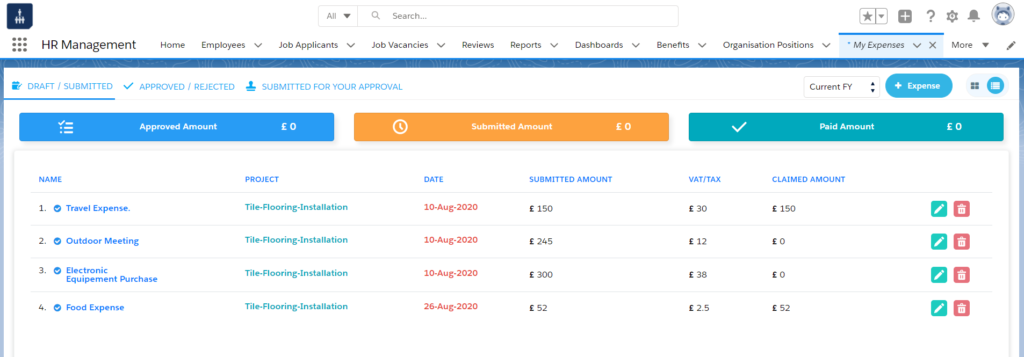
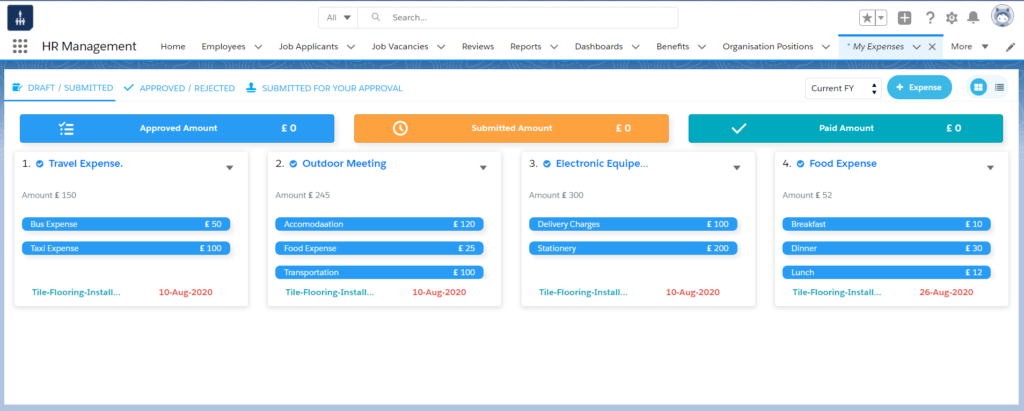
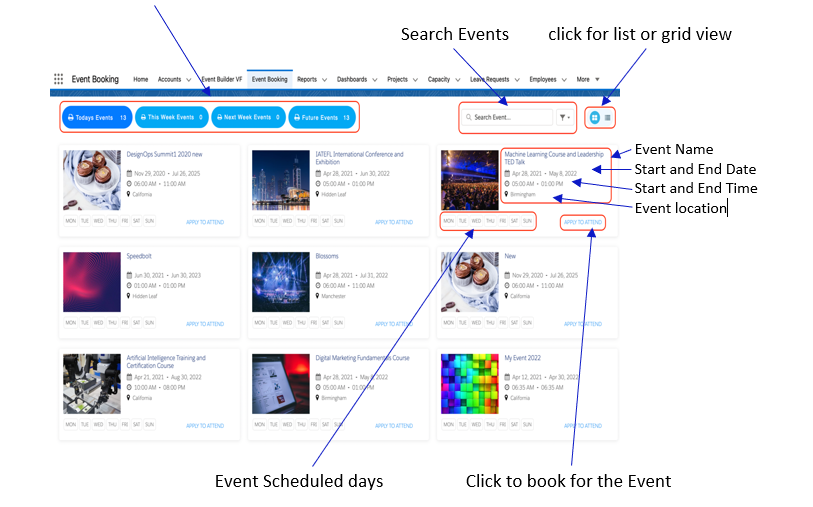
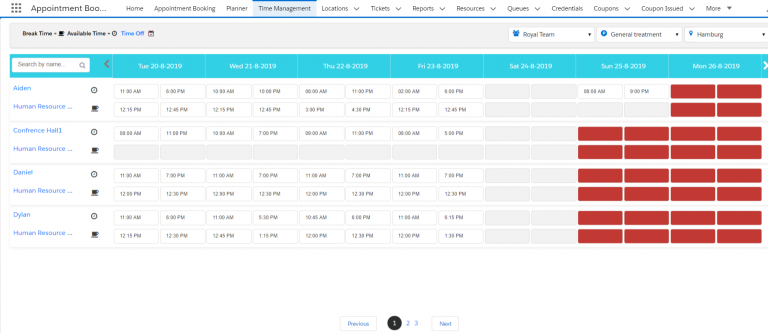
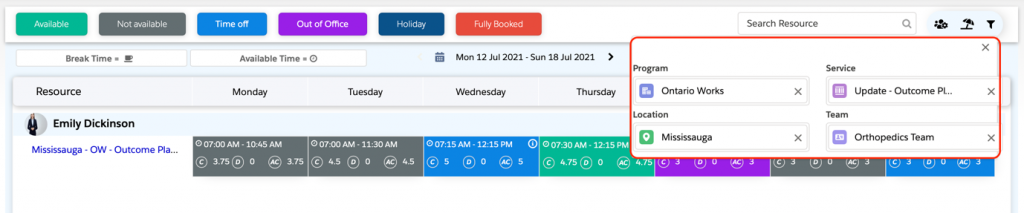
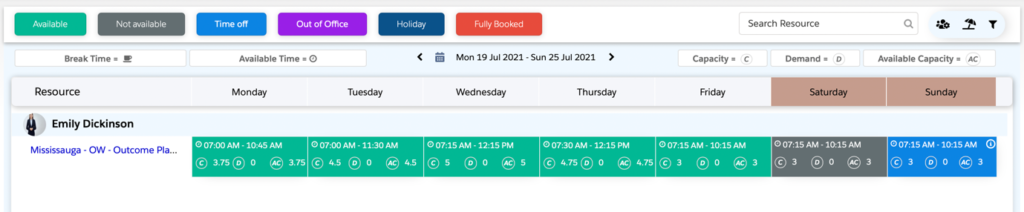
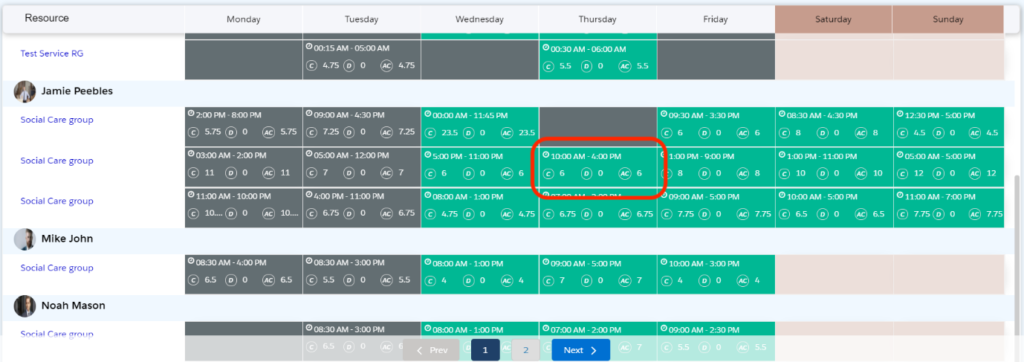
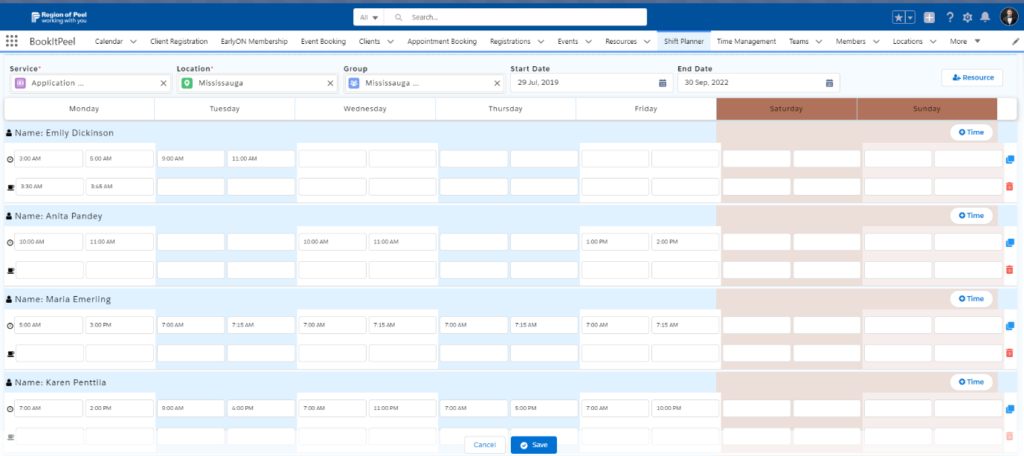
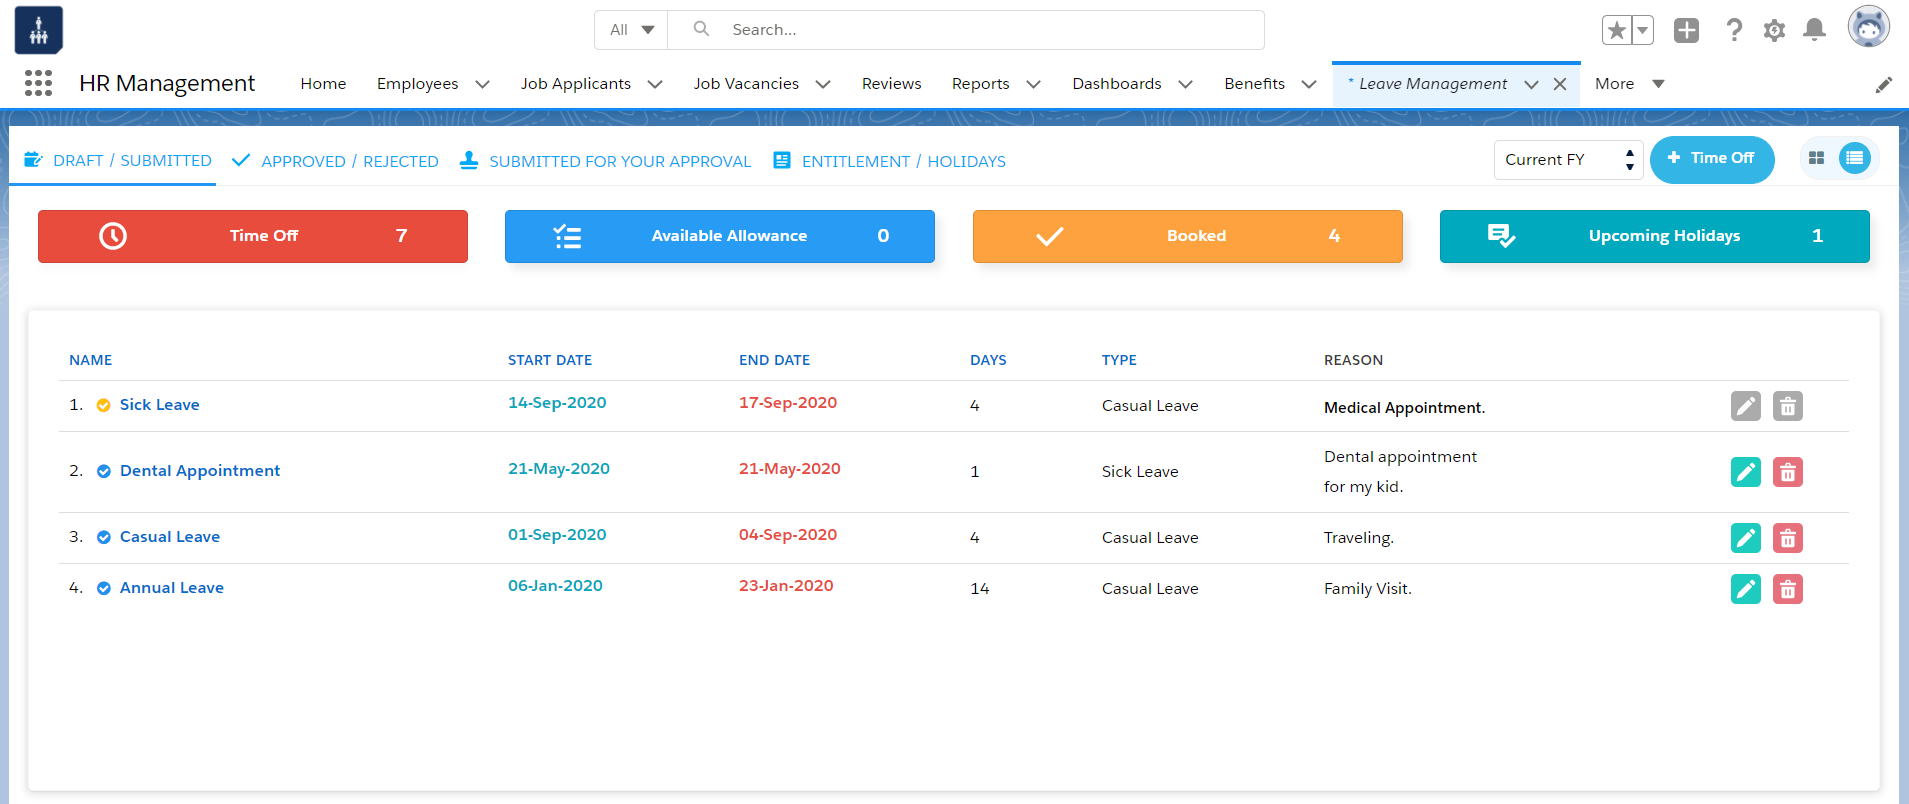 Grid View:
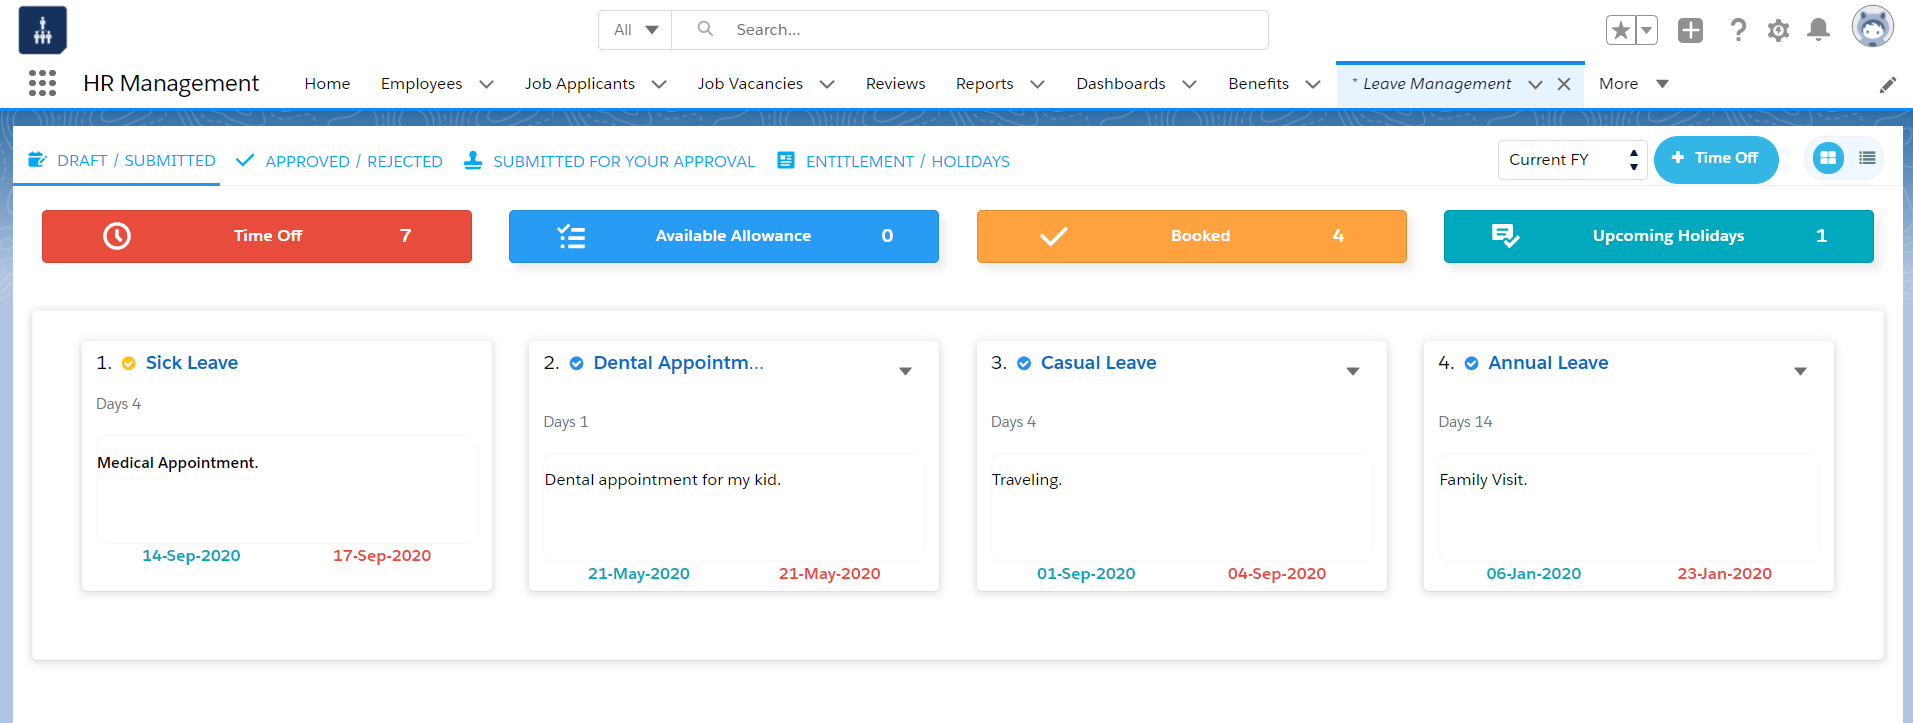 Fields to Note:
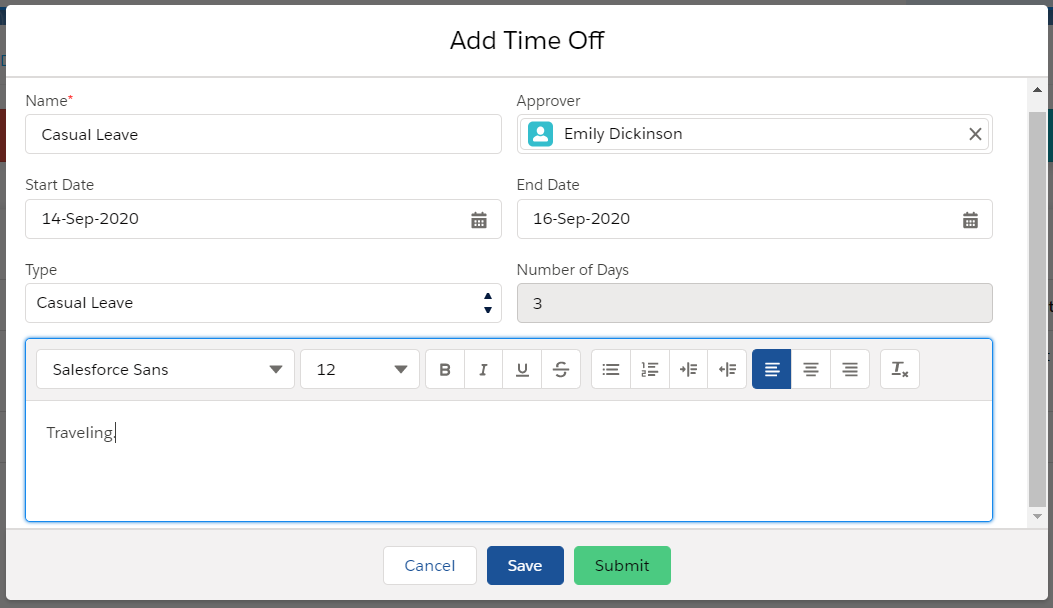
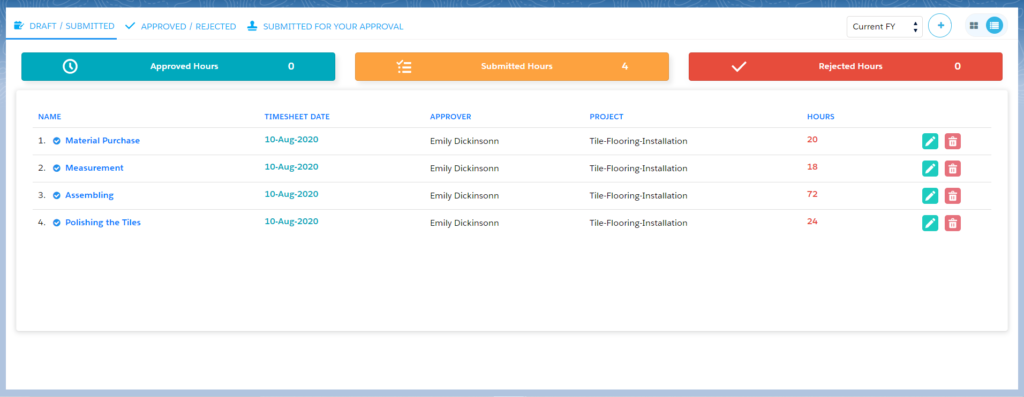
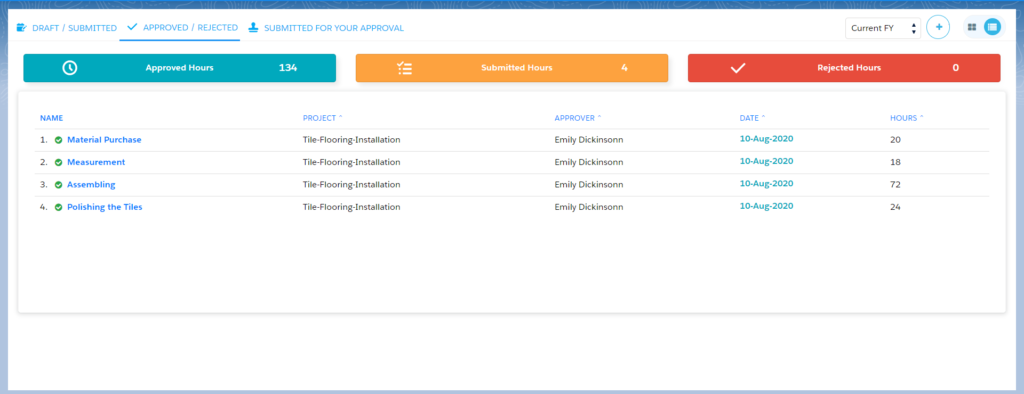
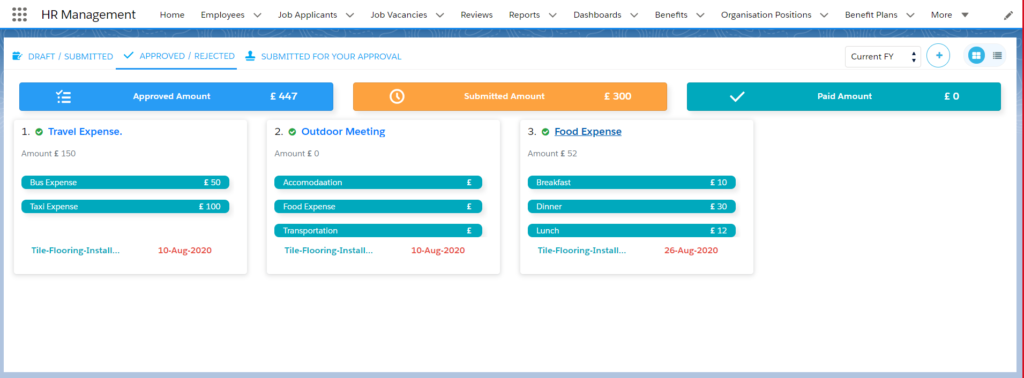
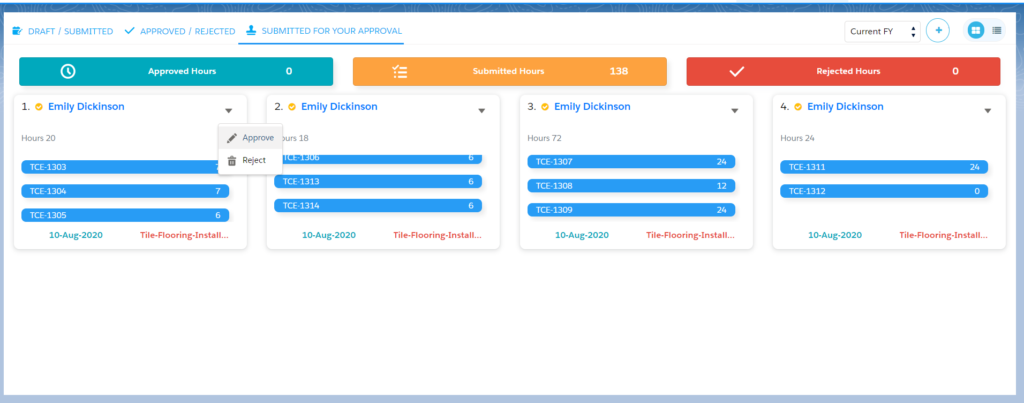
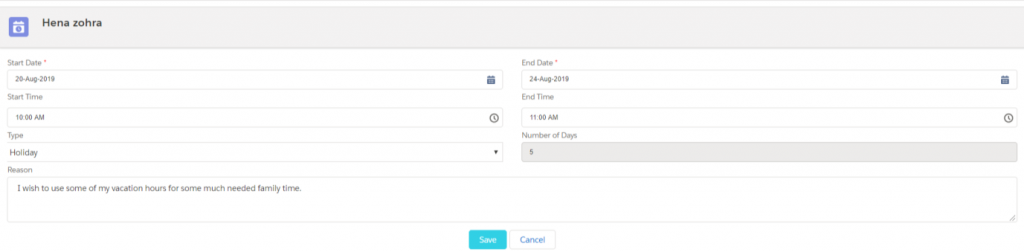
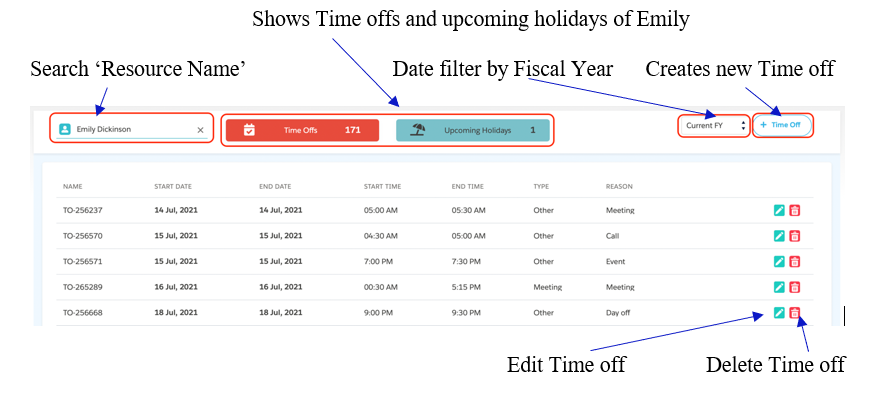
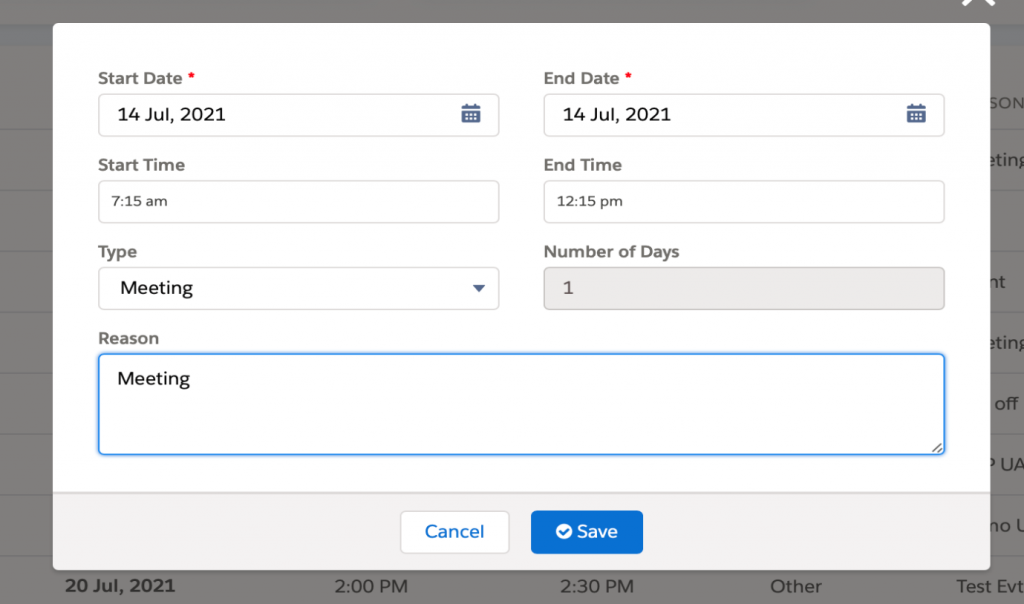
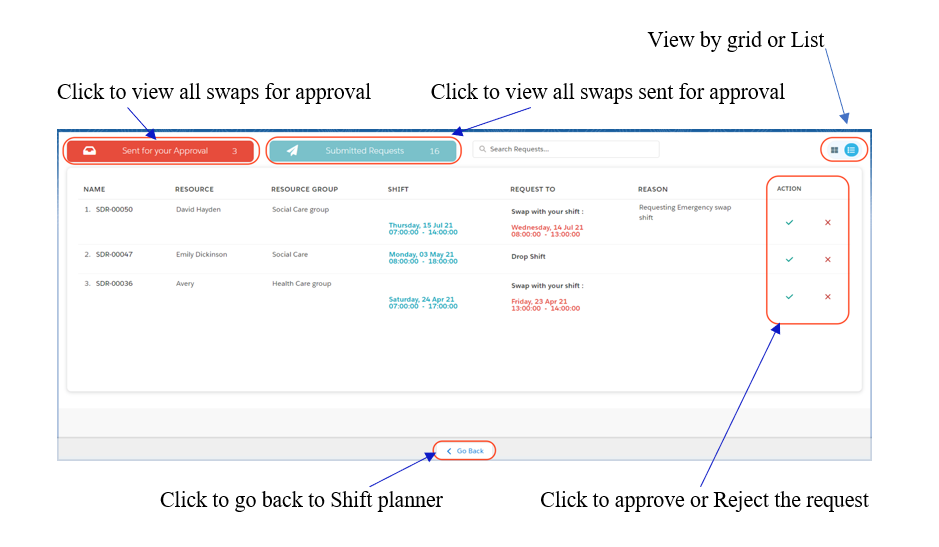
 Submitted for your Approval
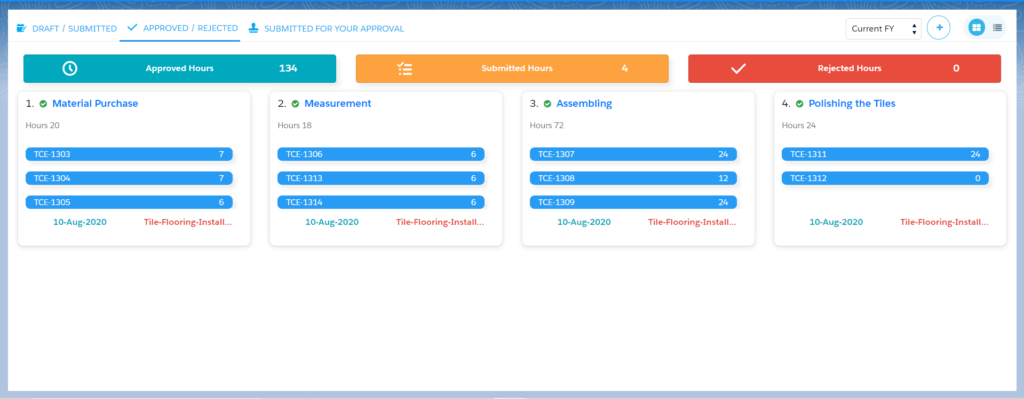
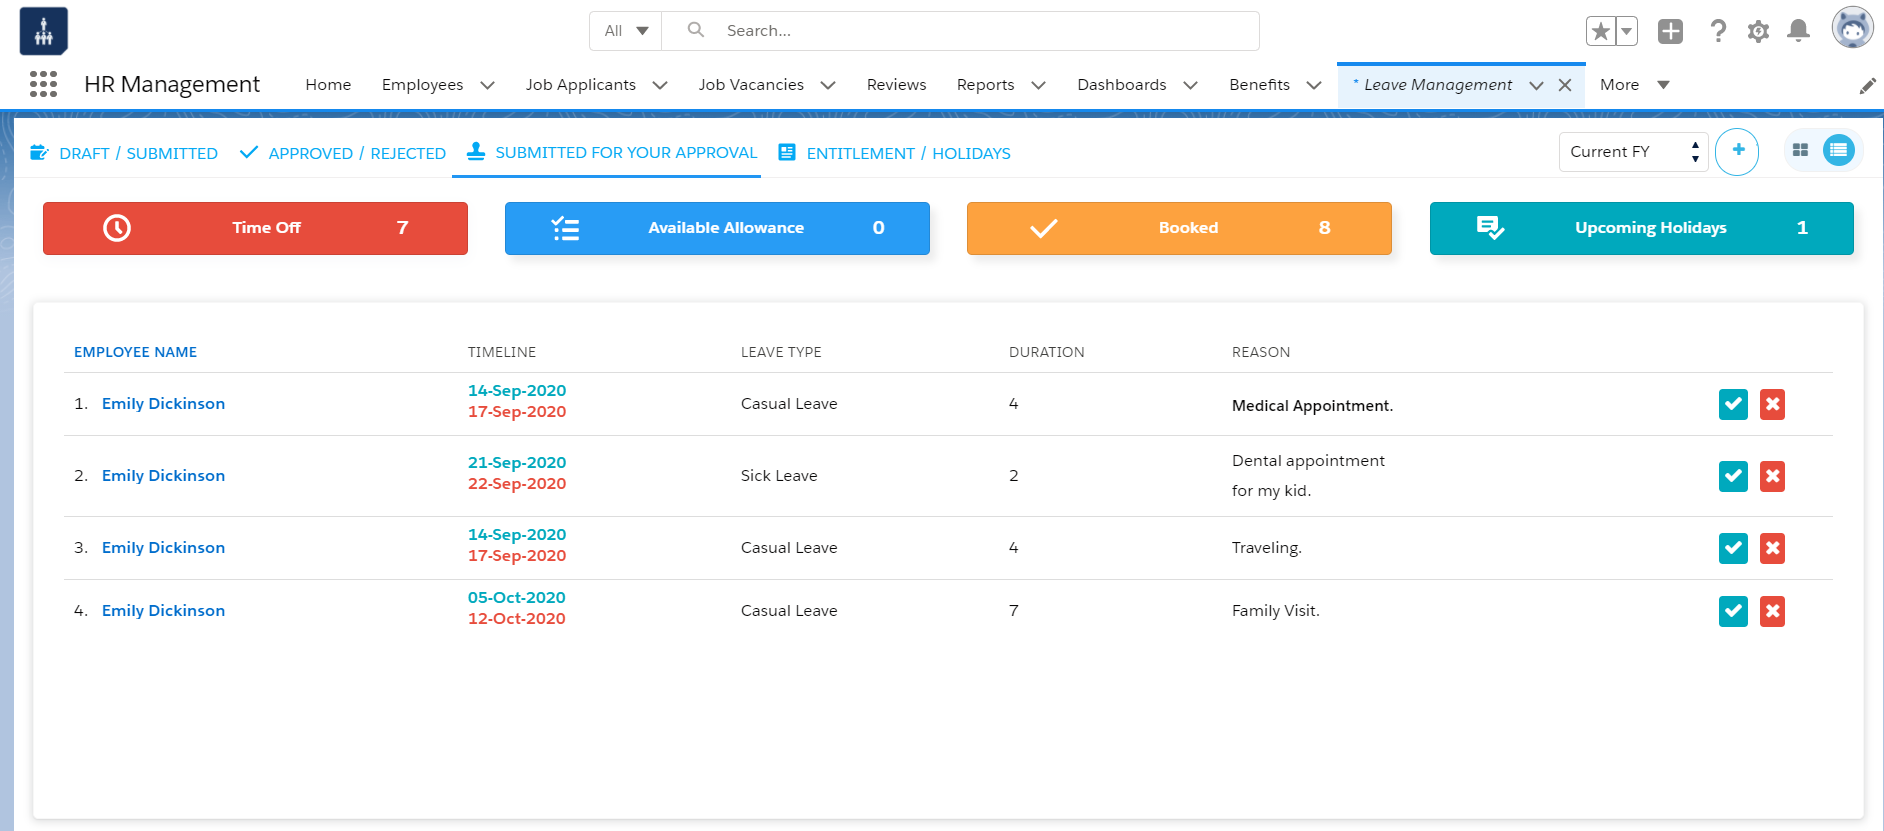 Leave Entitlement
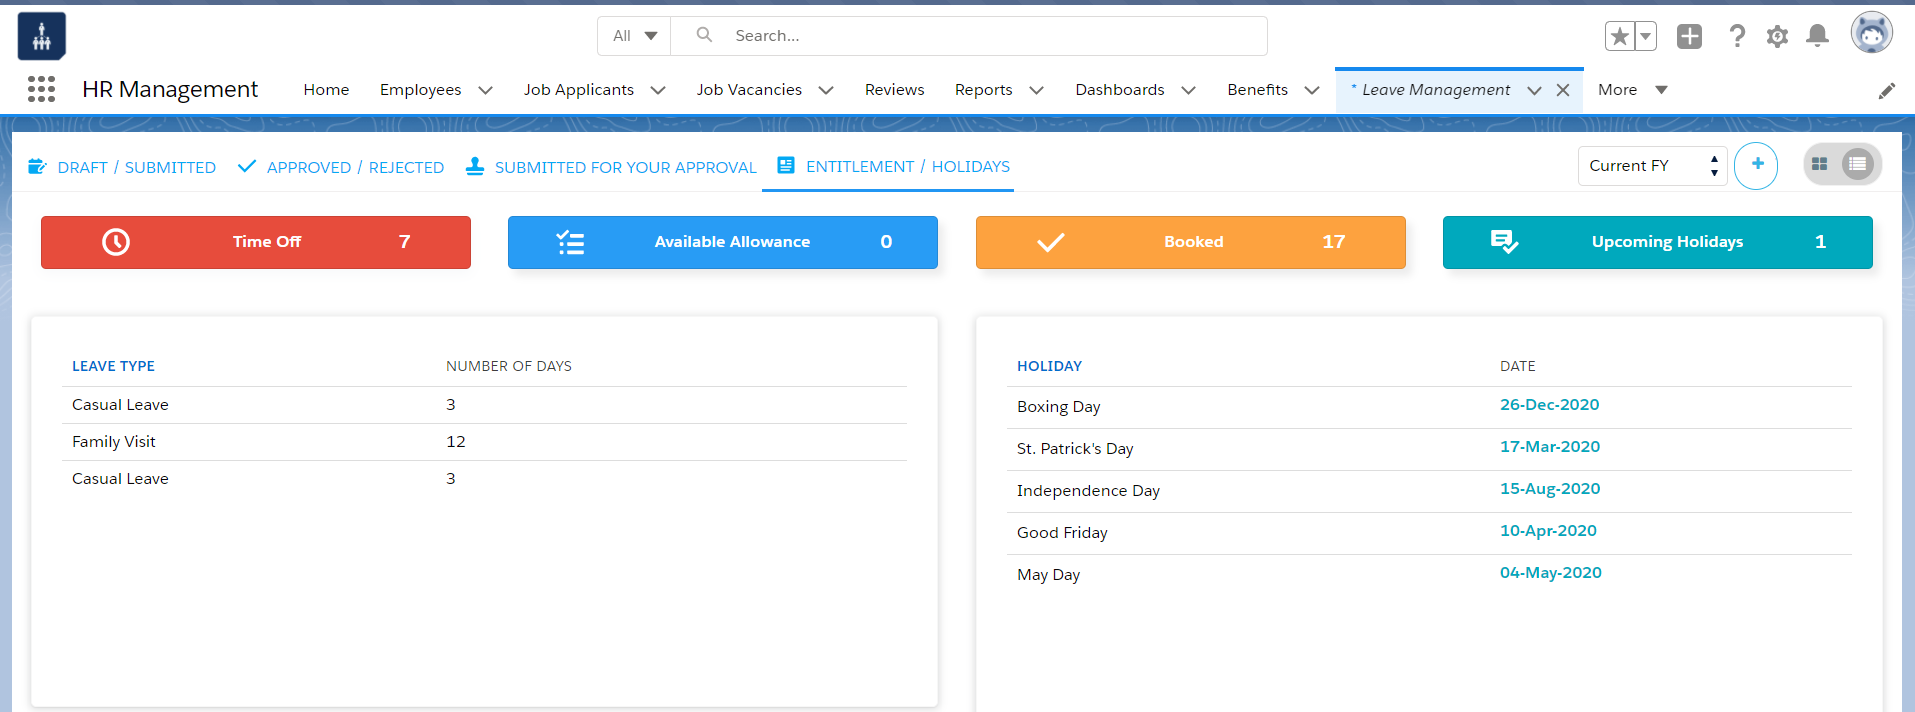


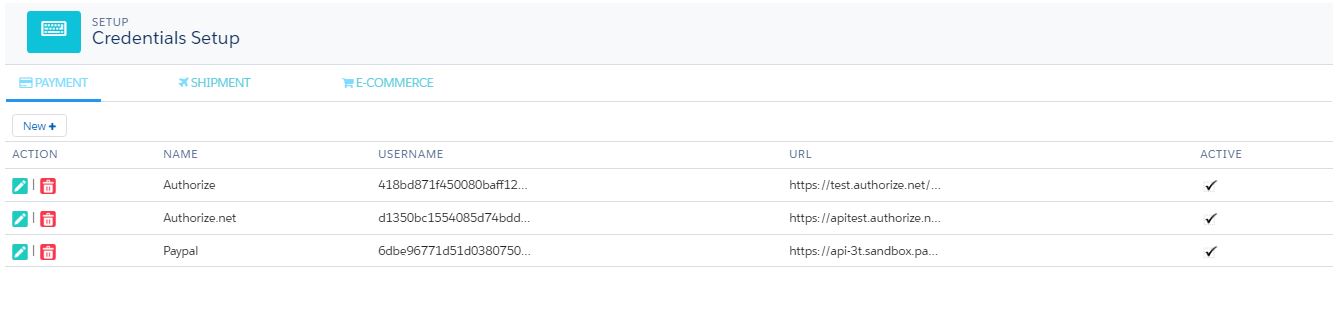


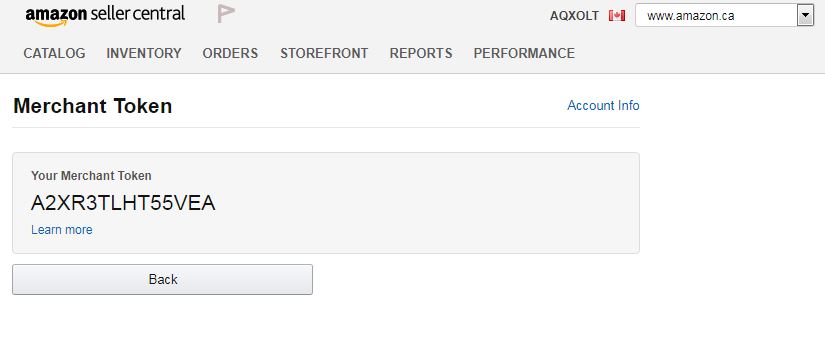

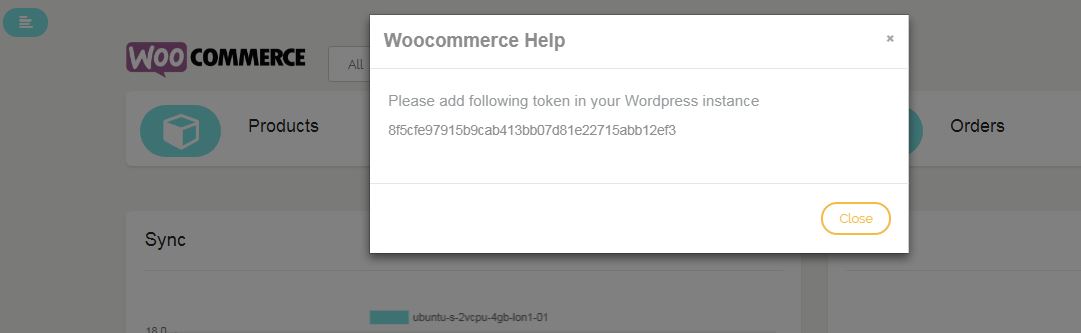
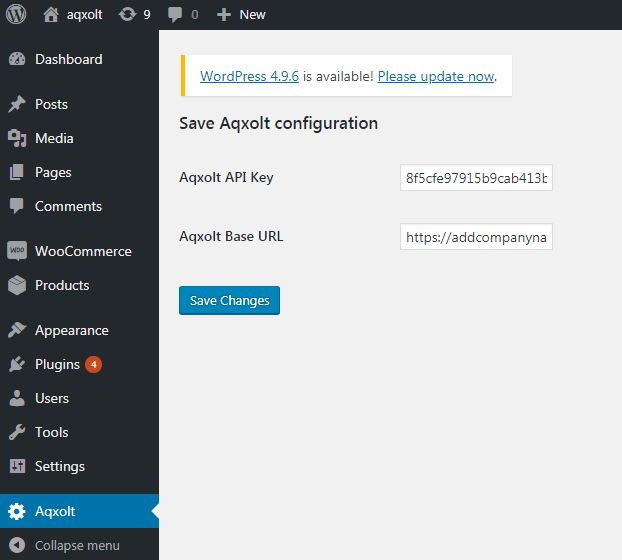


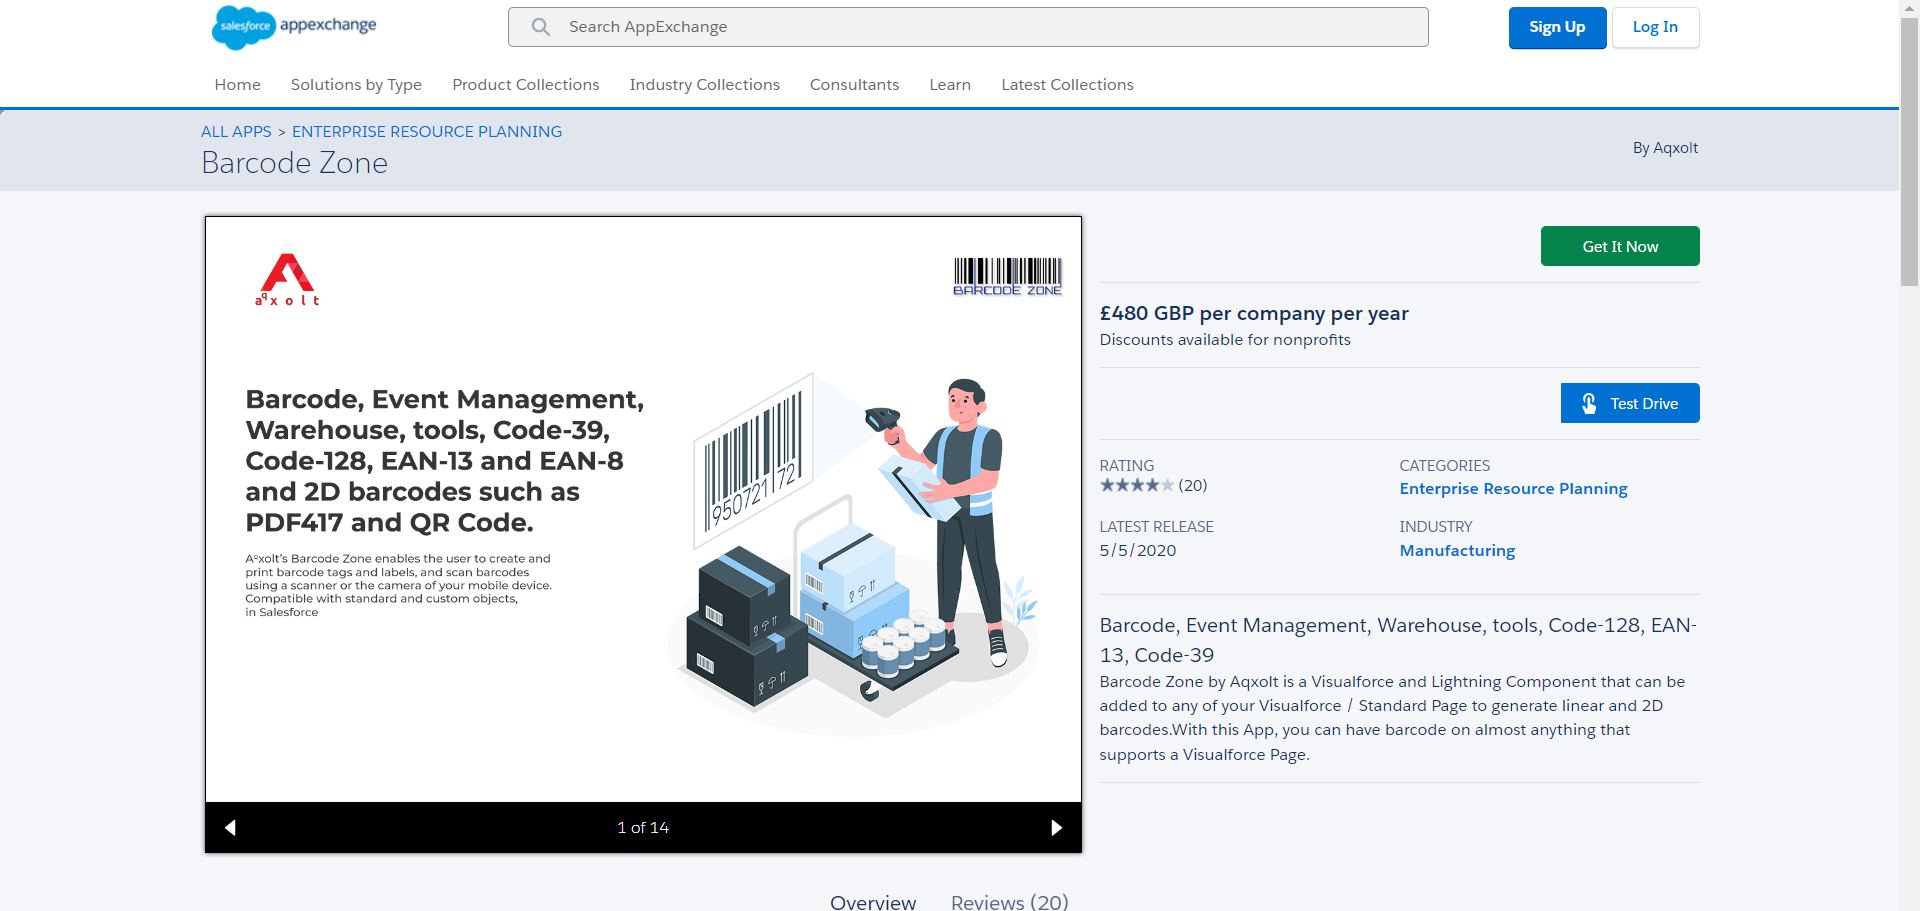
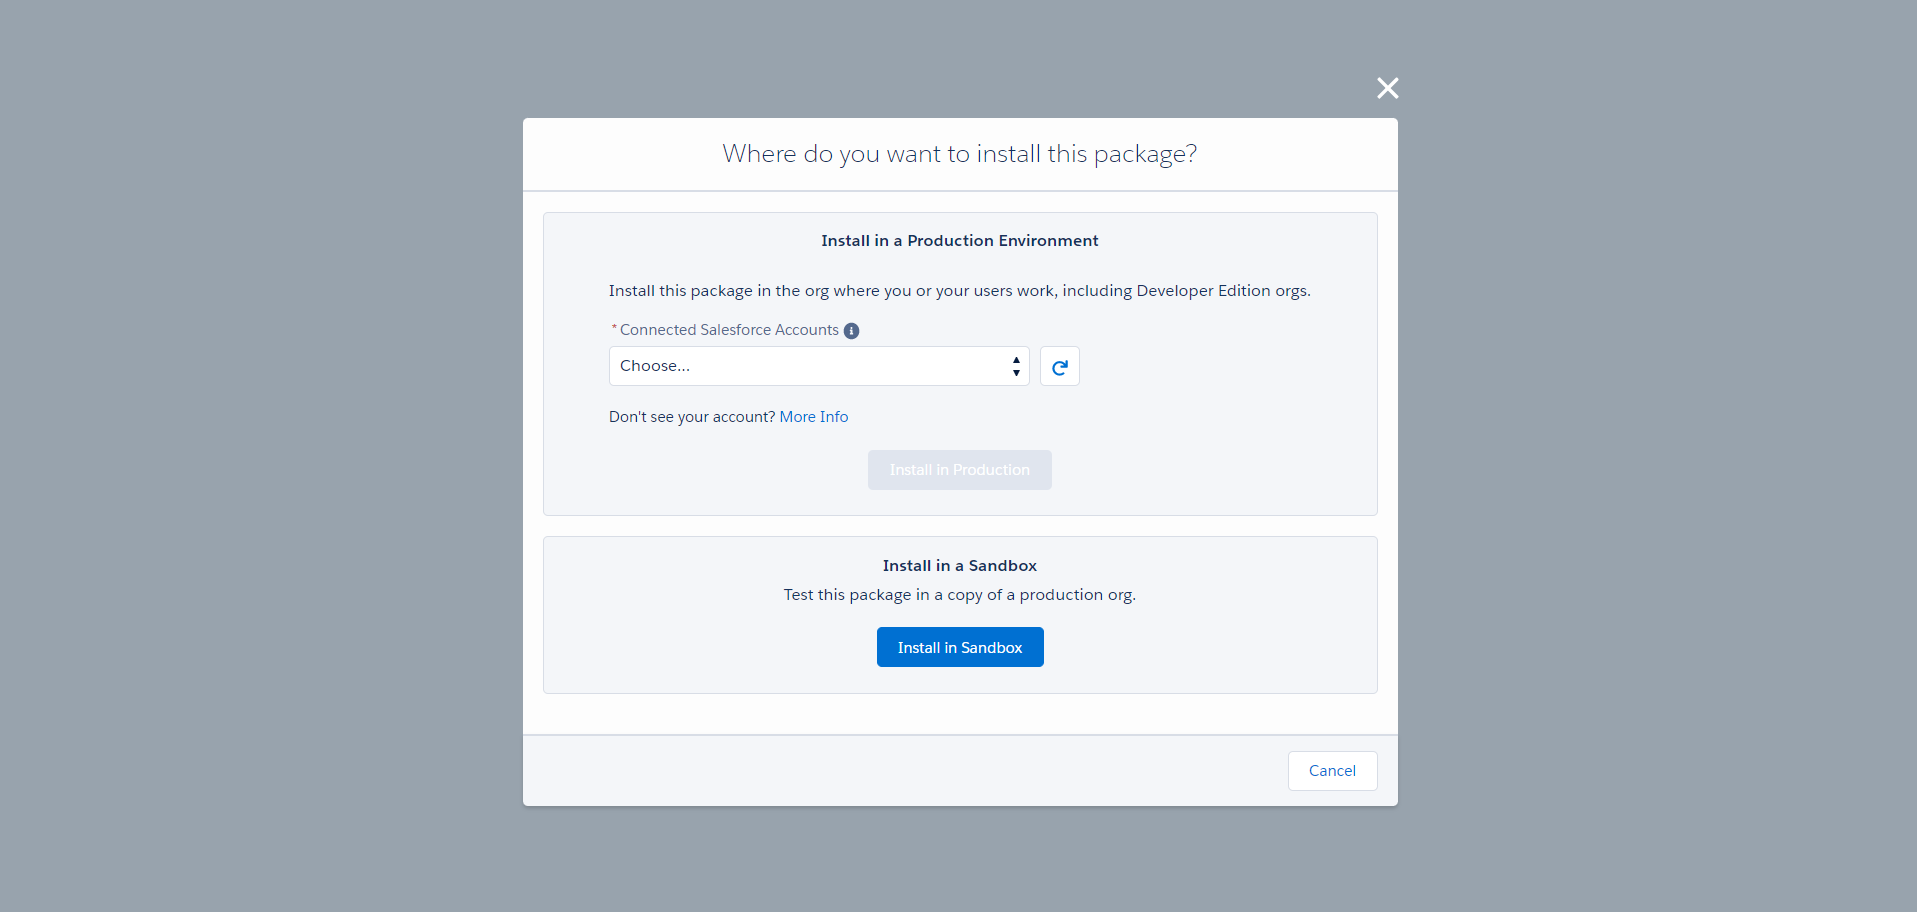
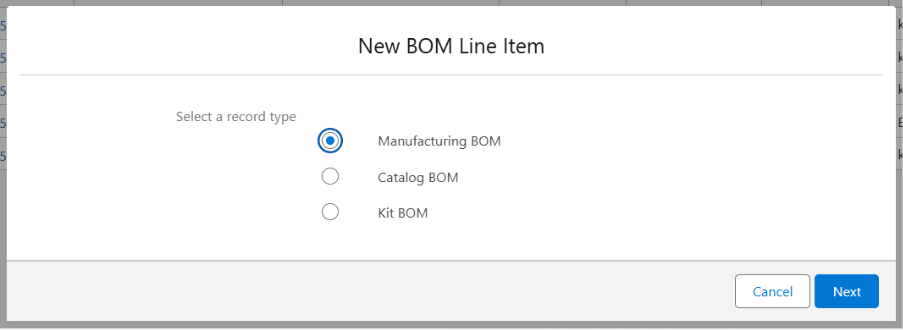
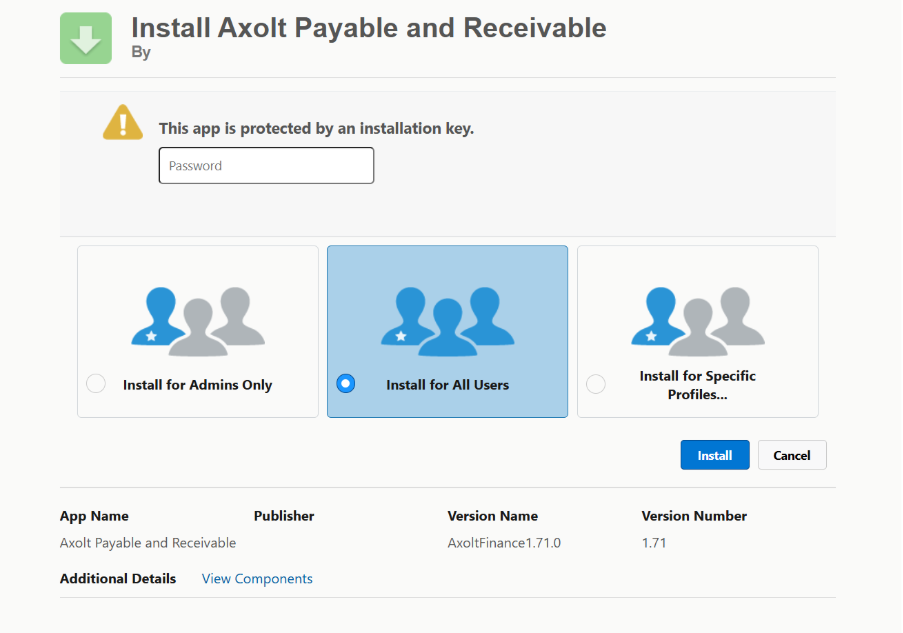
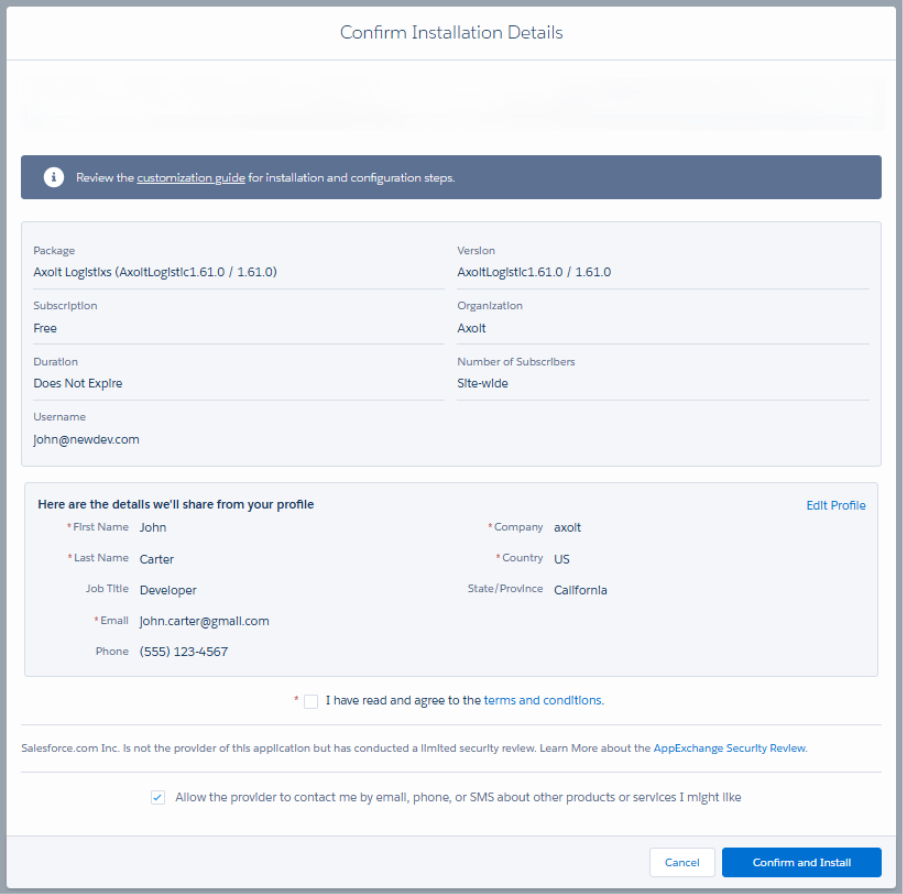
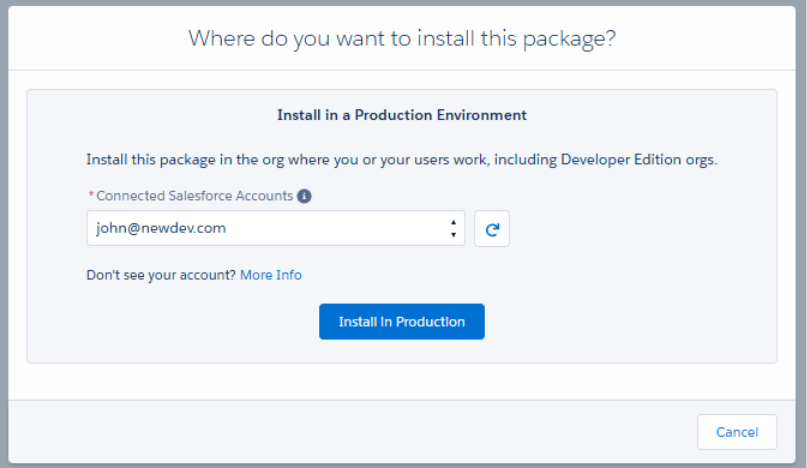
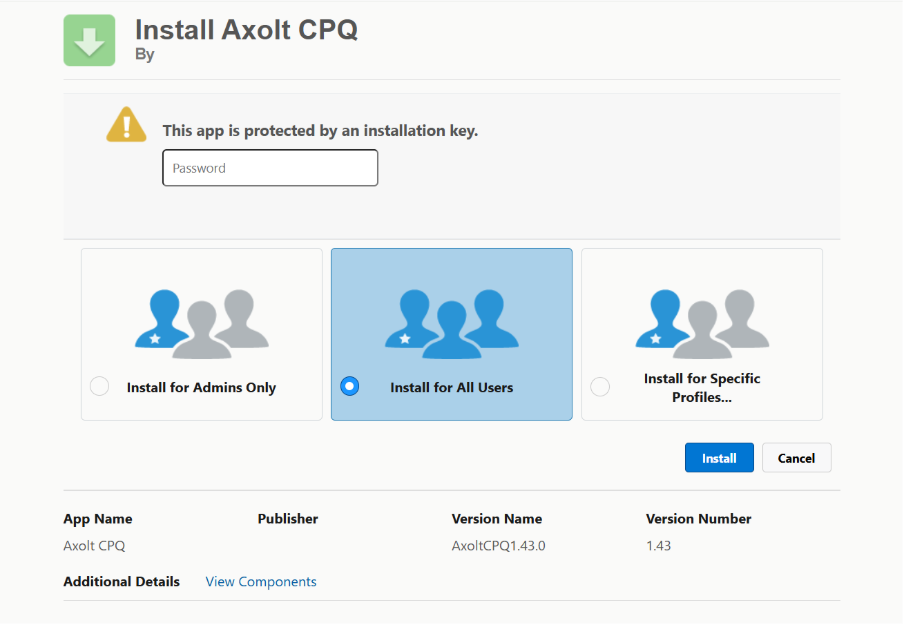
Step 3 Licensing Your users for Barcode Zone
- Navigate to Setup> Apps > Packaging> Installed Packages.
- In the list of installed Packages find the Barcode Zone app and click the “Manage Licenses” option under the actions section.
- Click on the “Add User” button in the Licensed User section.
- Select the user from the Available Users section; click the “Add” button.
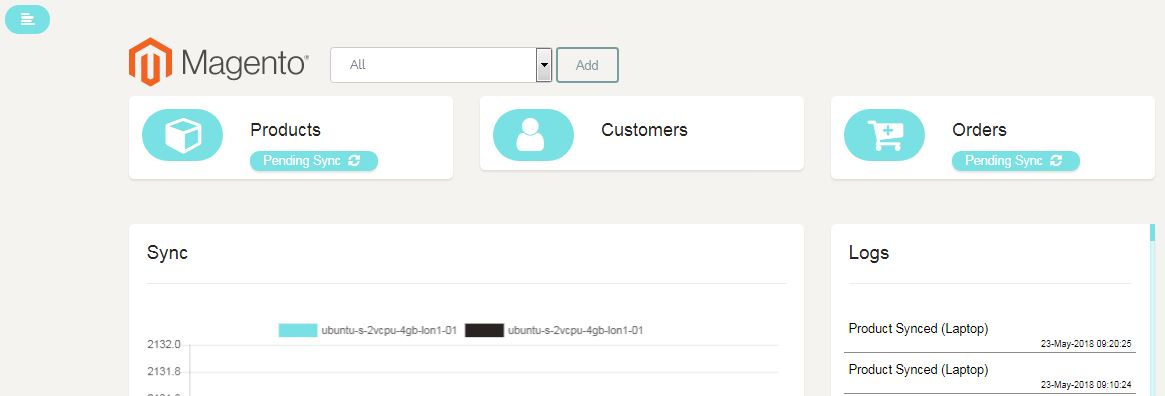
Validate Your Installation
- Click on the app launcher and notice that the “Print Barcodes” tab is available
- Select any of the applications from the App Launcher and notice its available Tabs.


 .
. ,
,  , Today, This Week, or This Month.
 .
. or Today
 or This Week
 or This Month
 )
)
 )
)


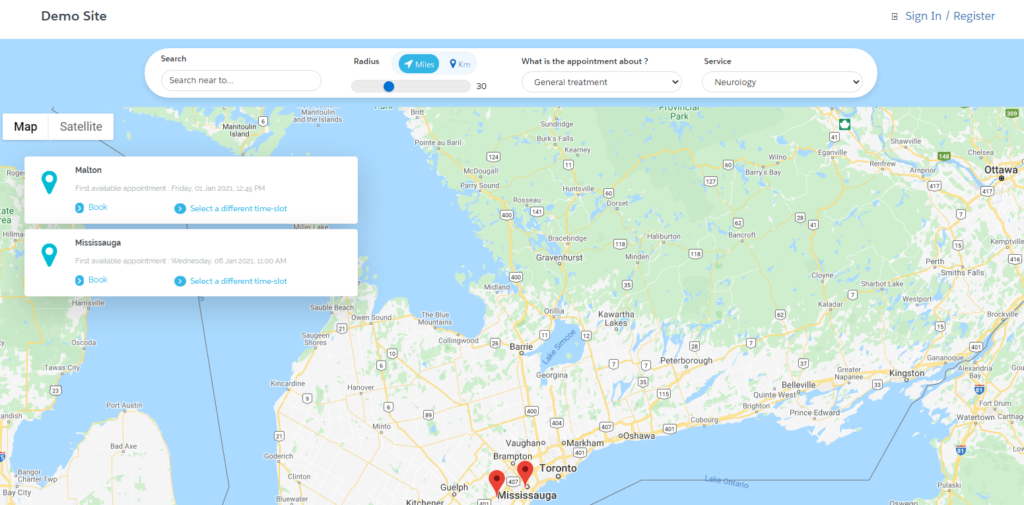
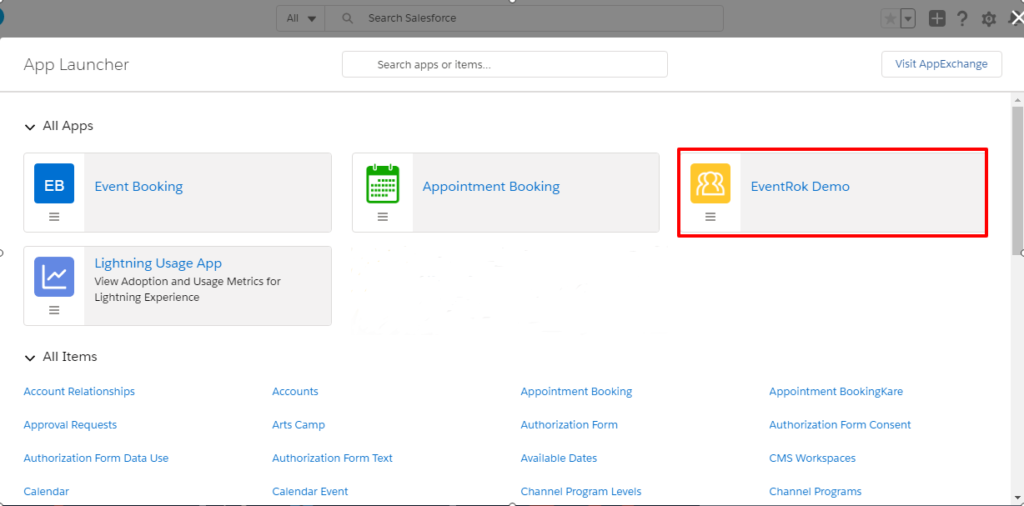
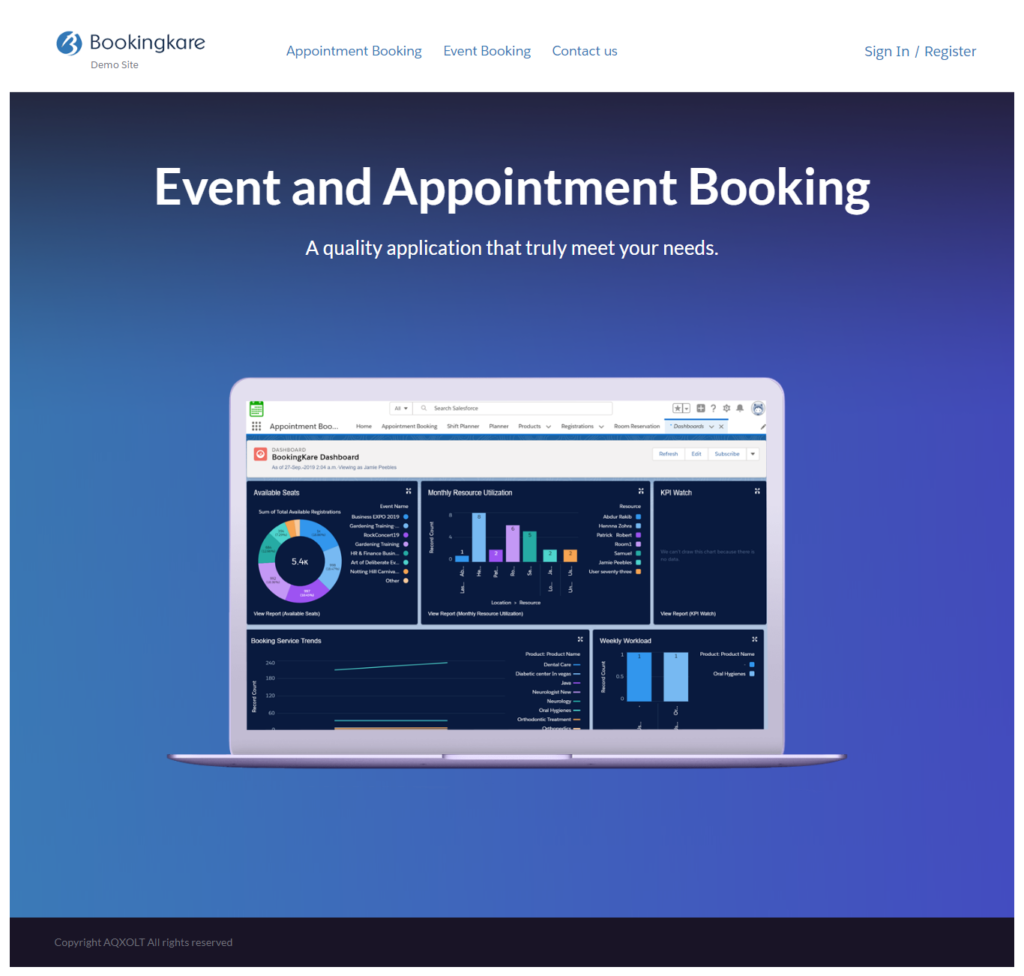
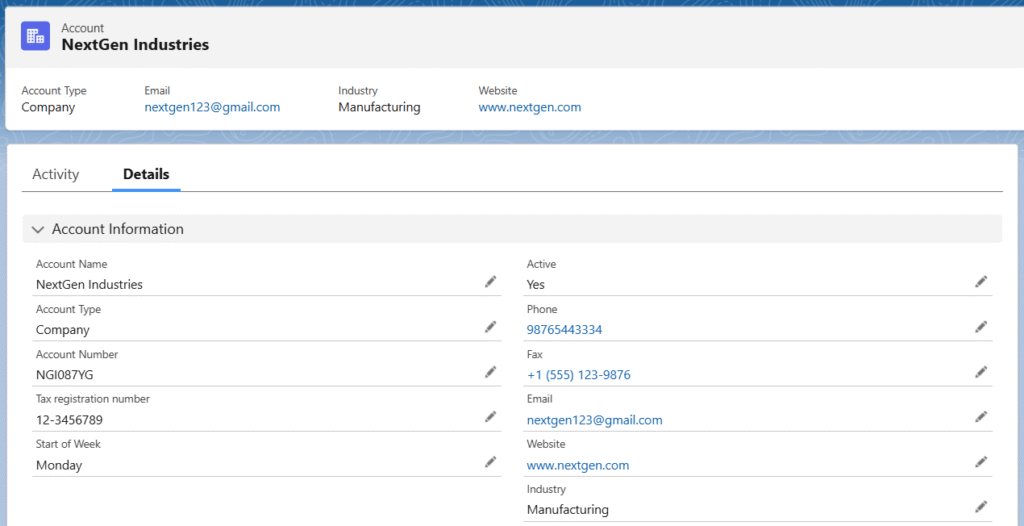
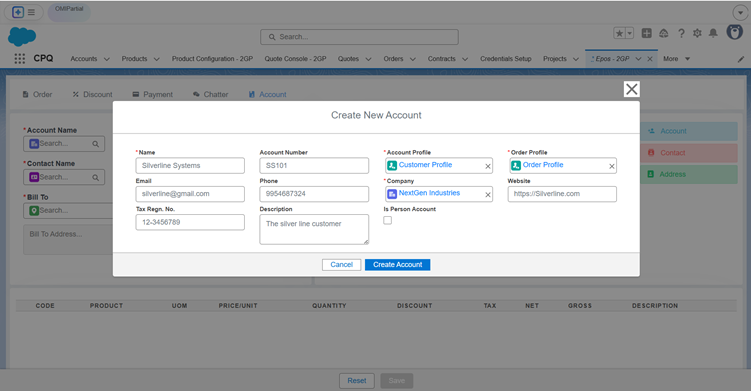
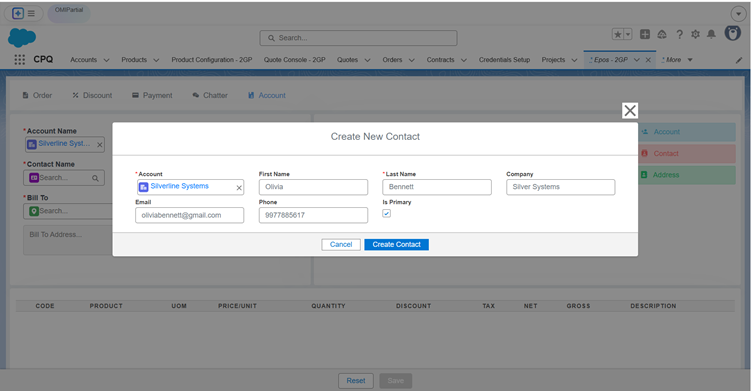
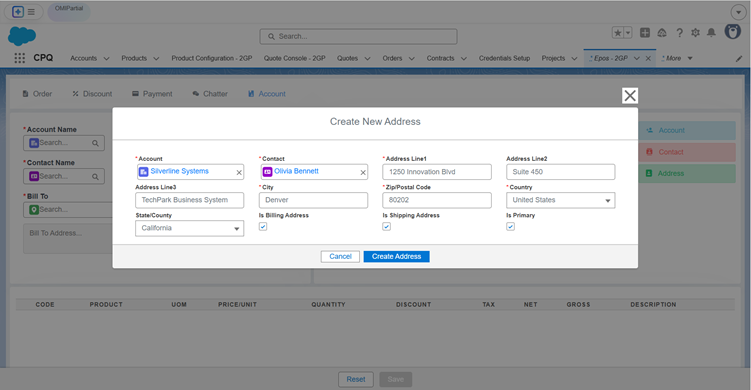
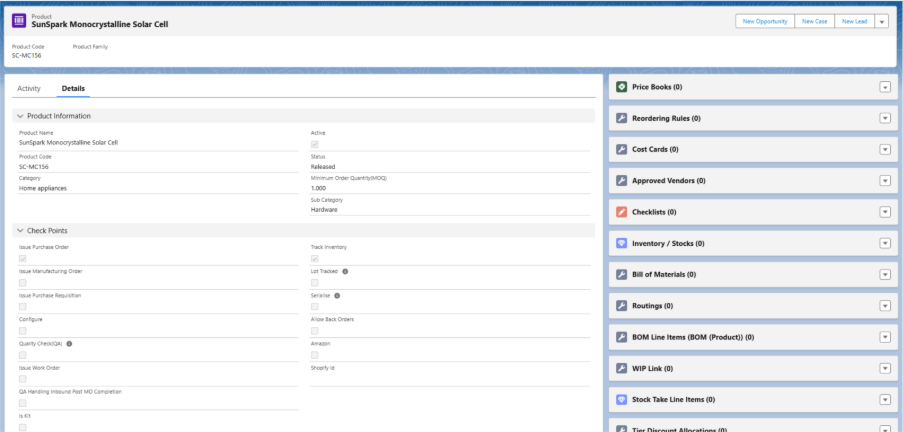
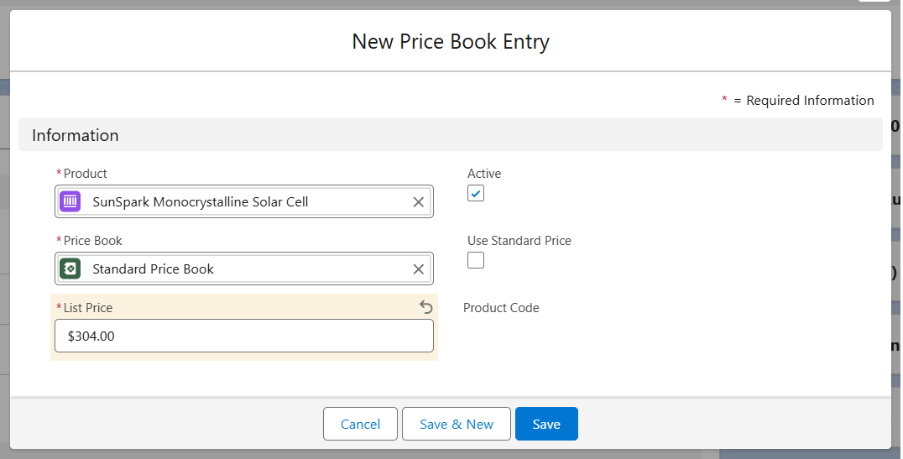
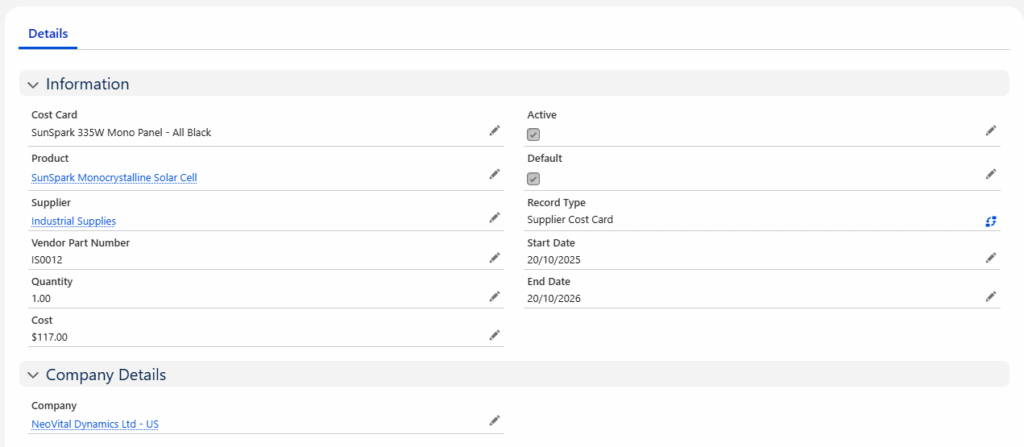
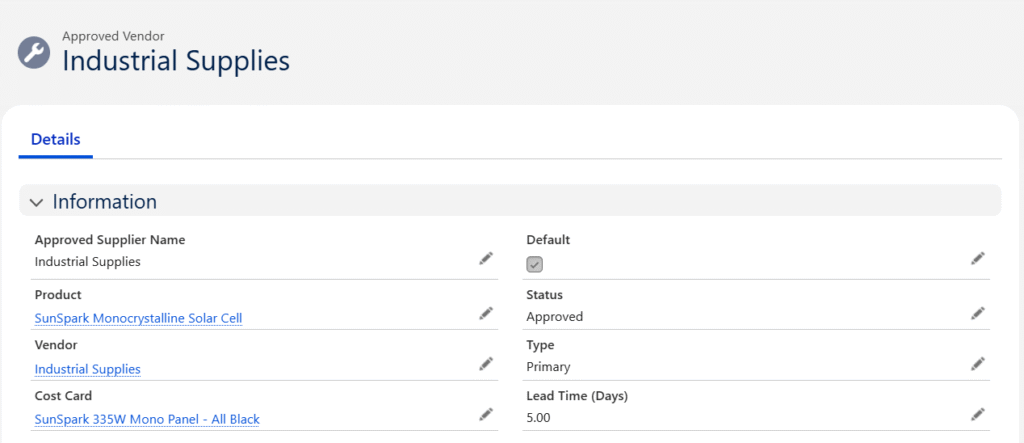
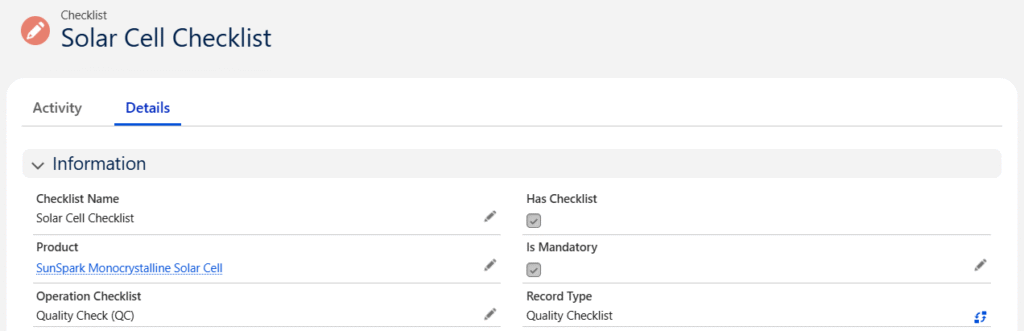
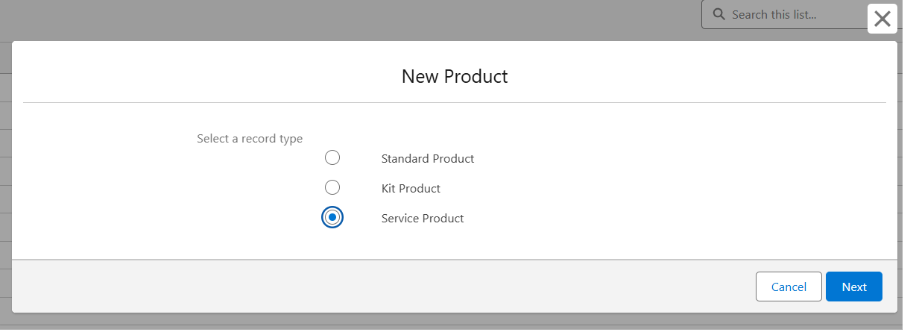
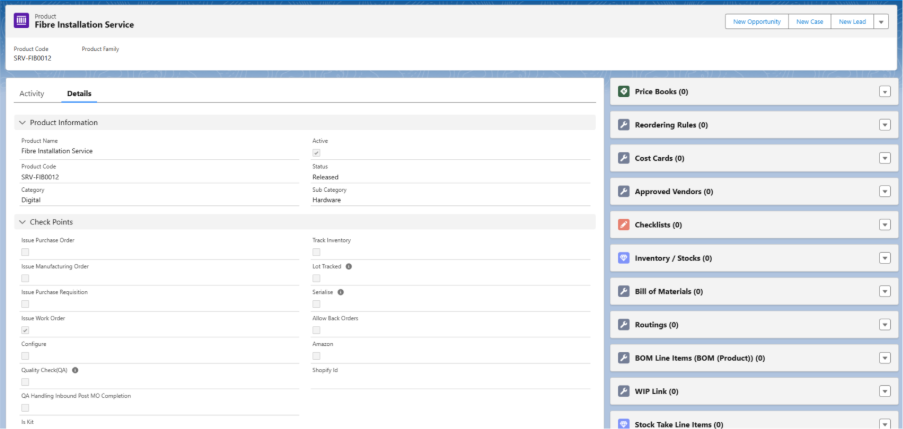
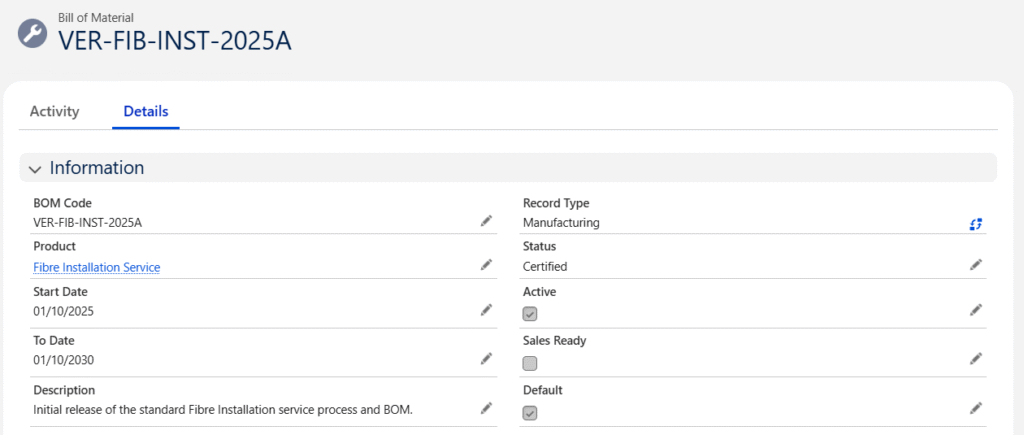
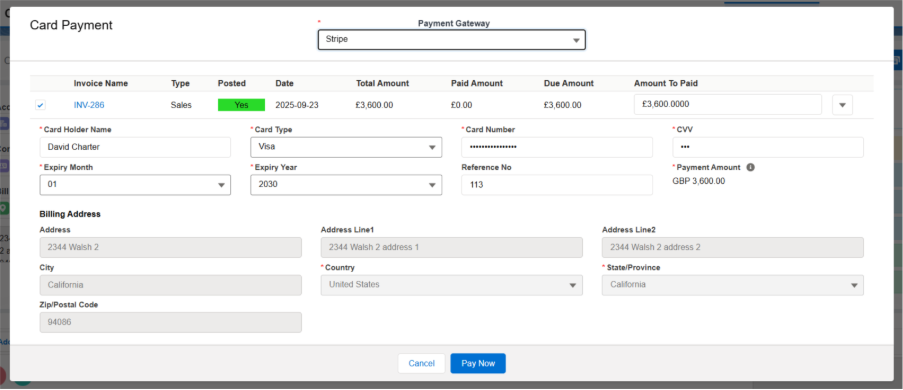
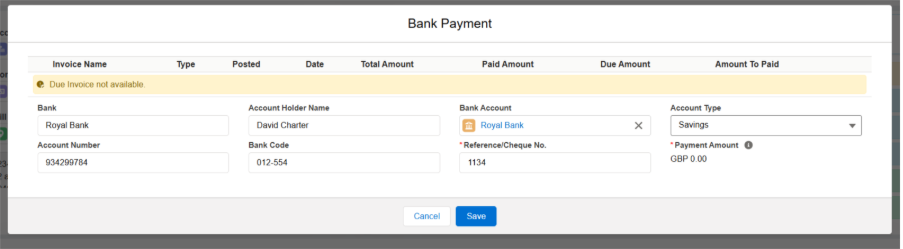
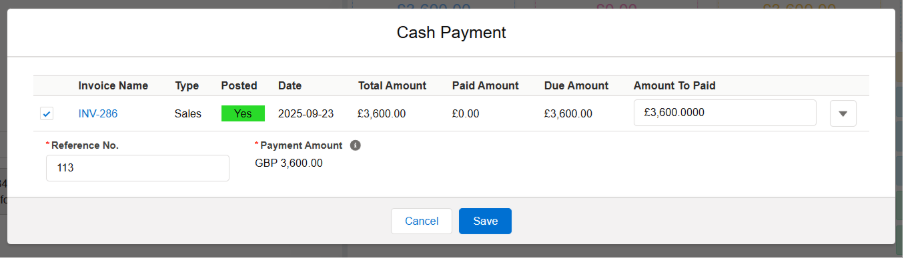
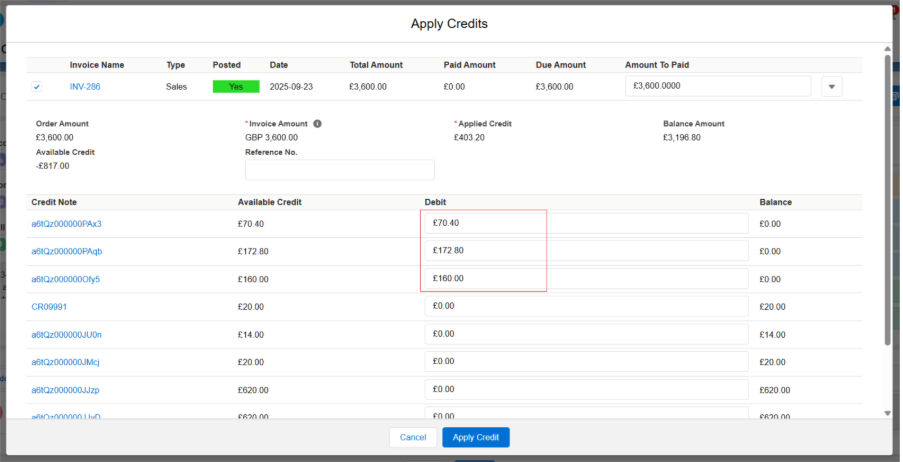
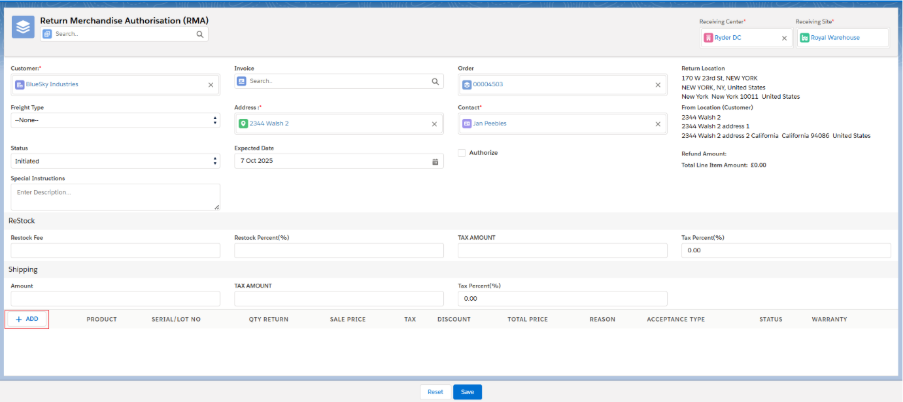
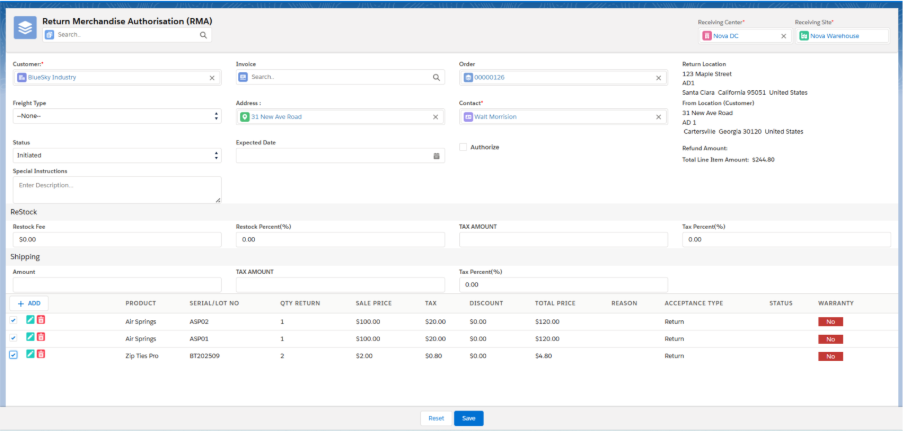
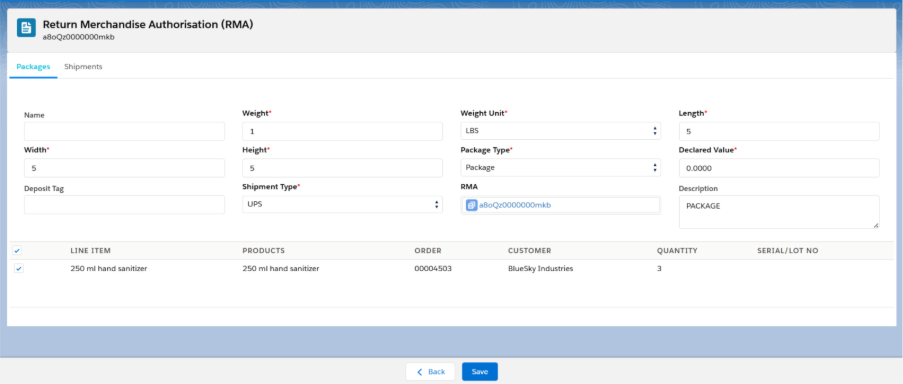
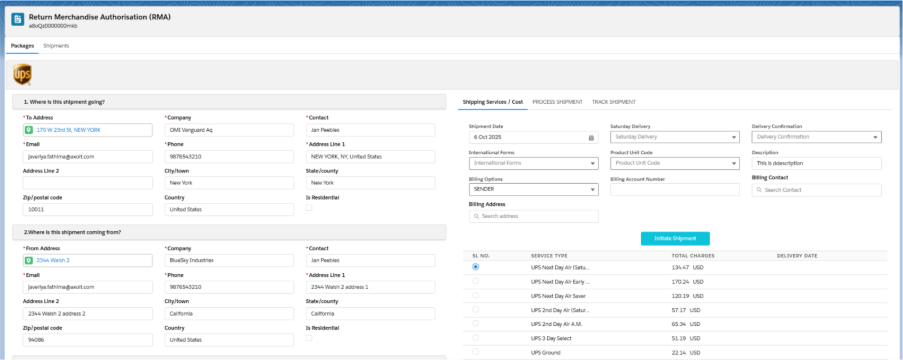
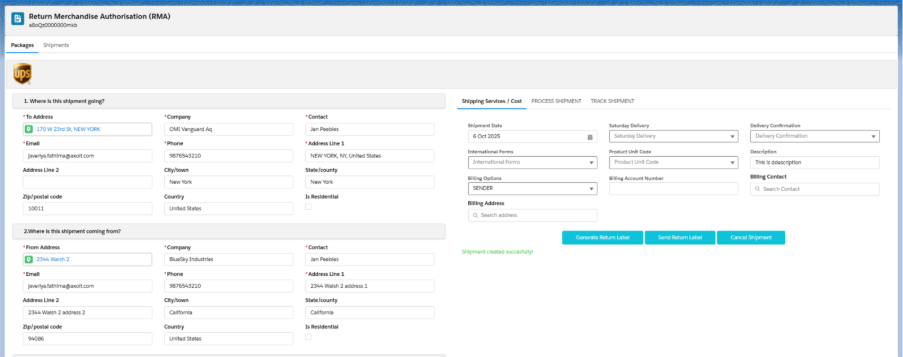
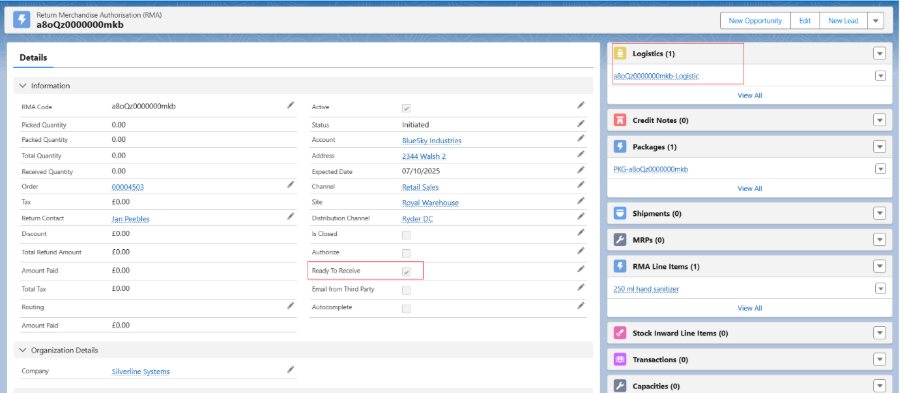
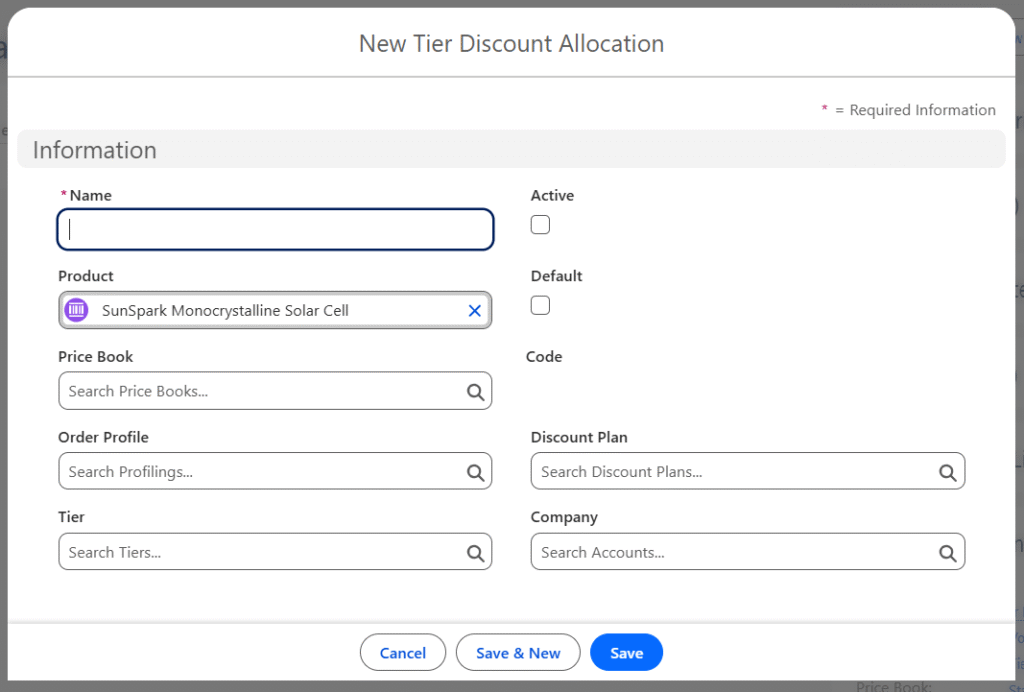
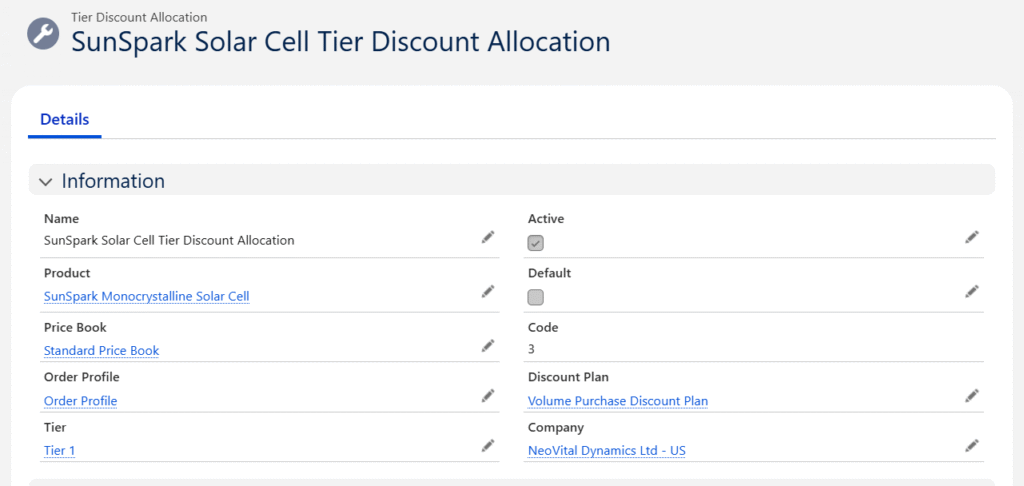
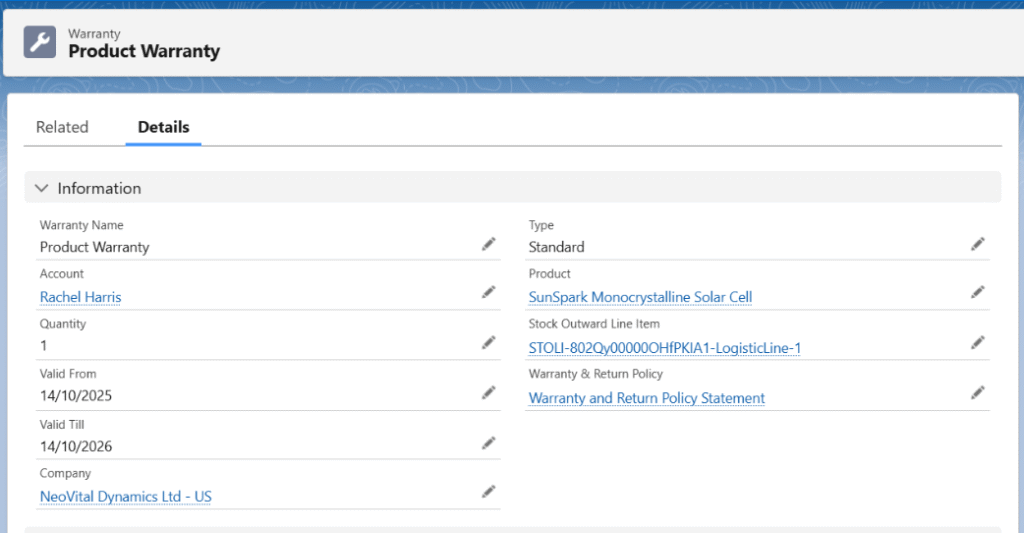
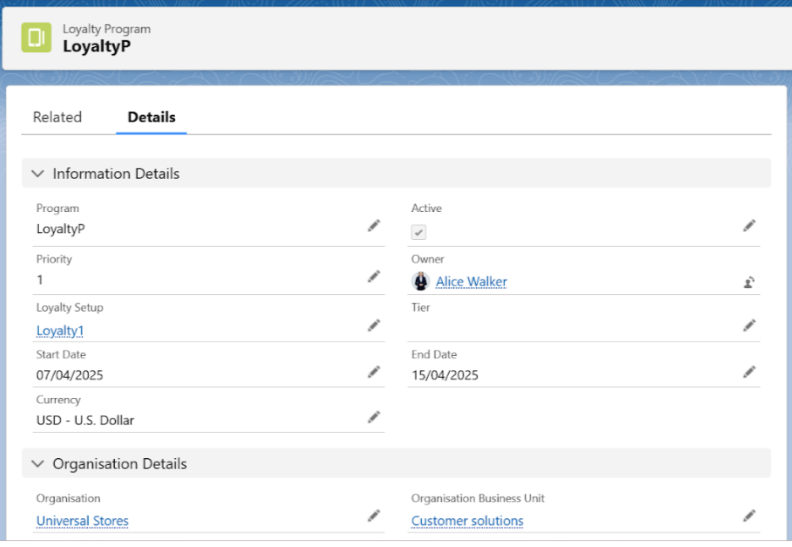
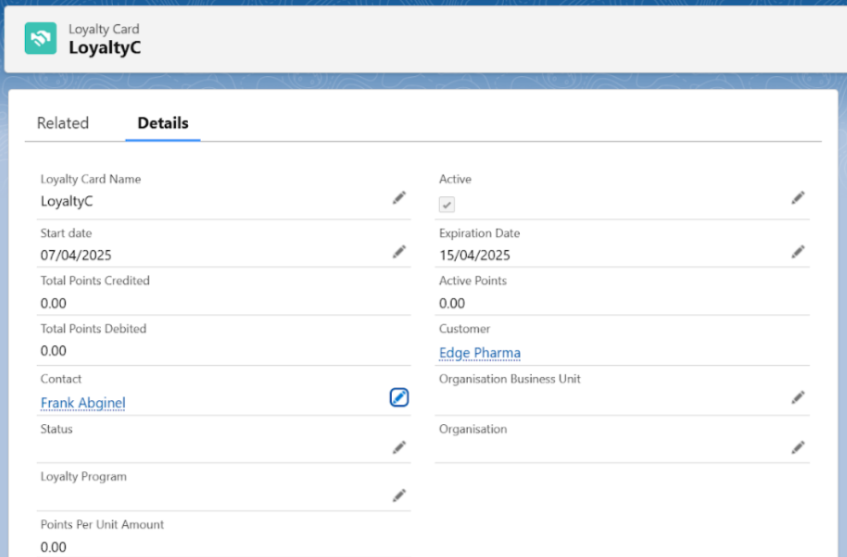
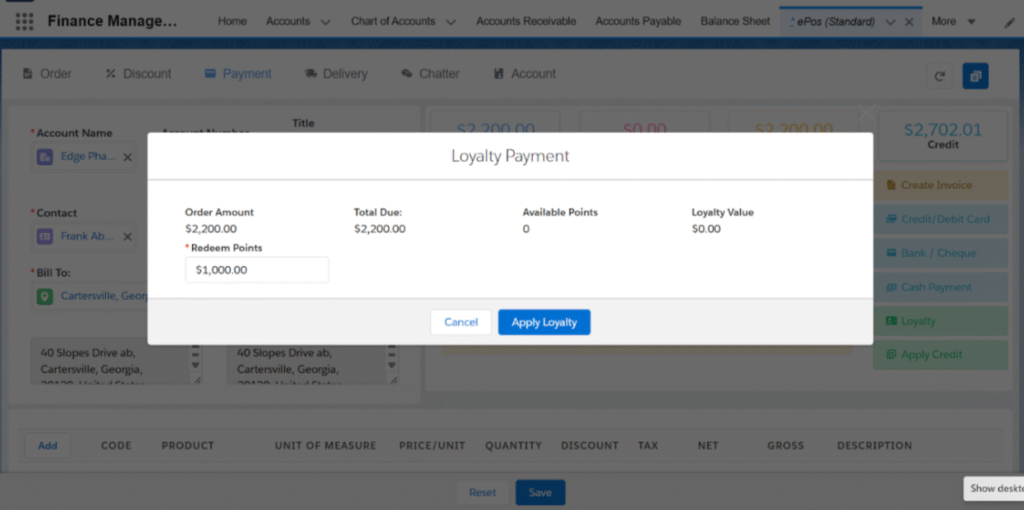
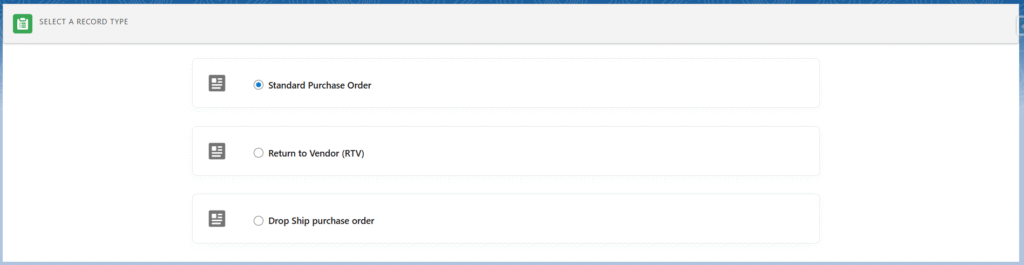
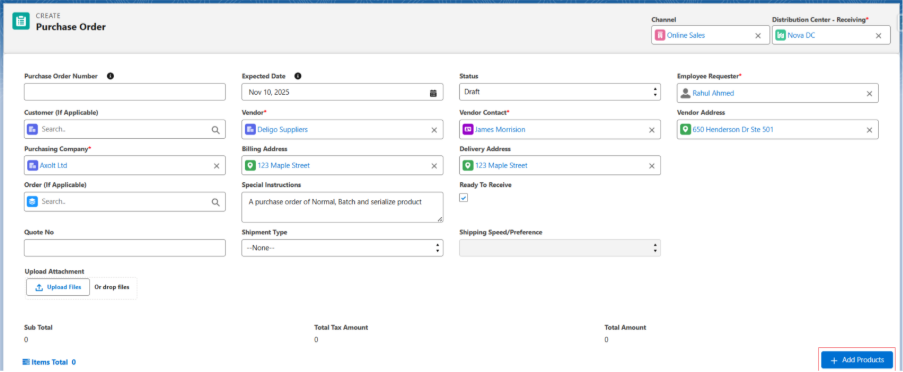
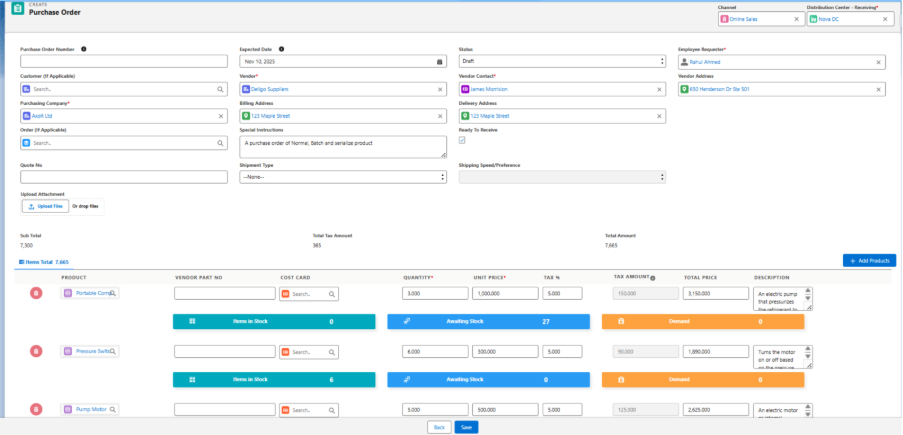
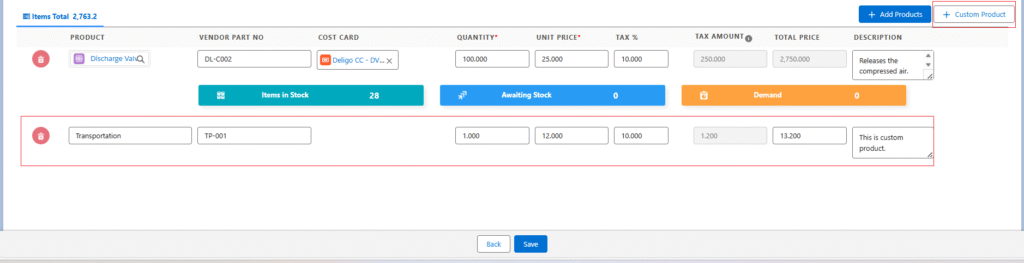
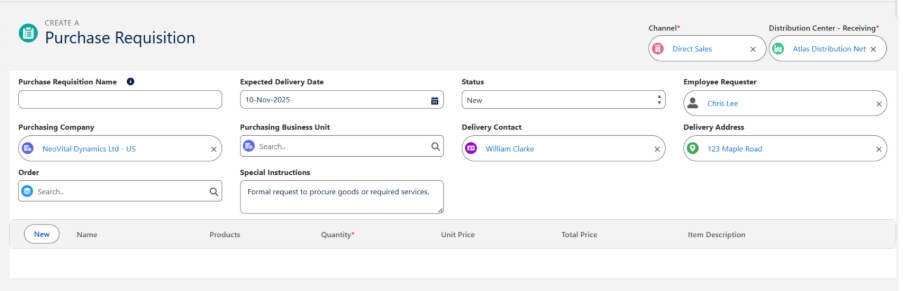
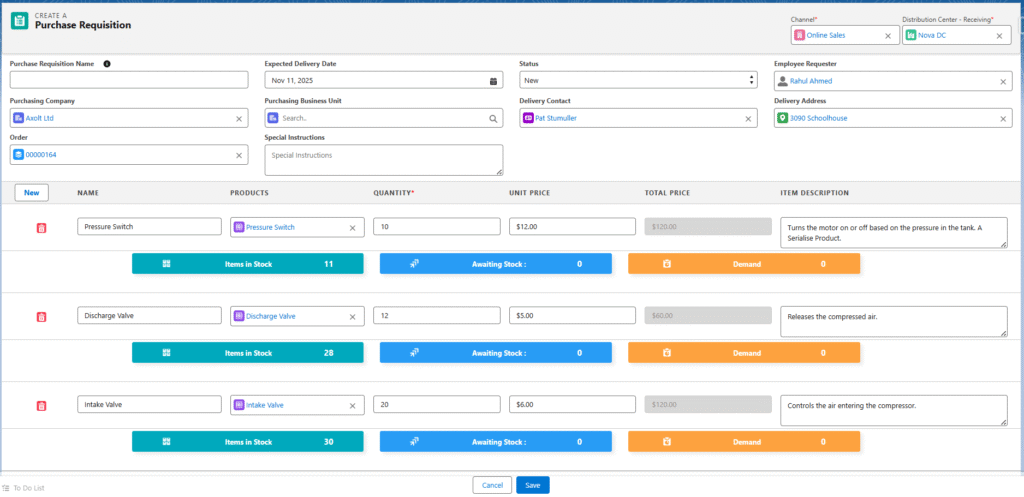
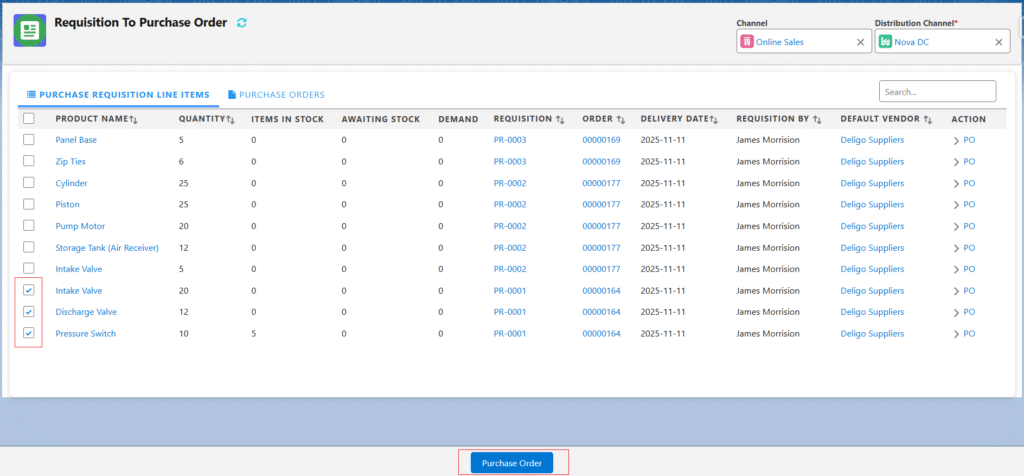
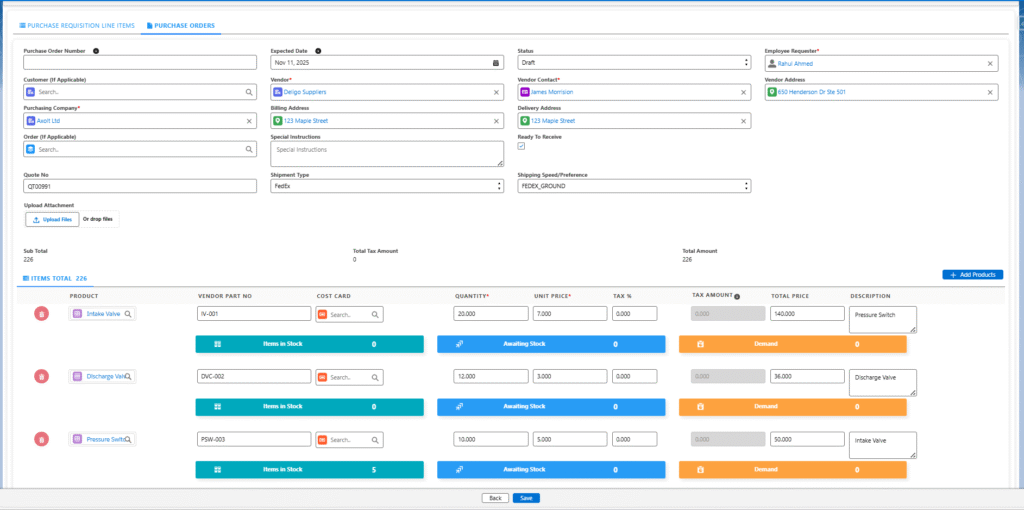
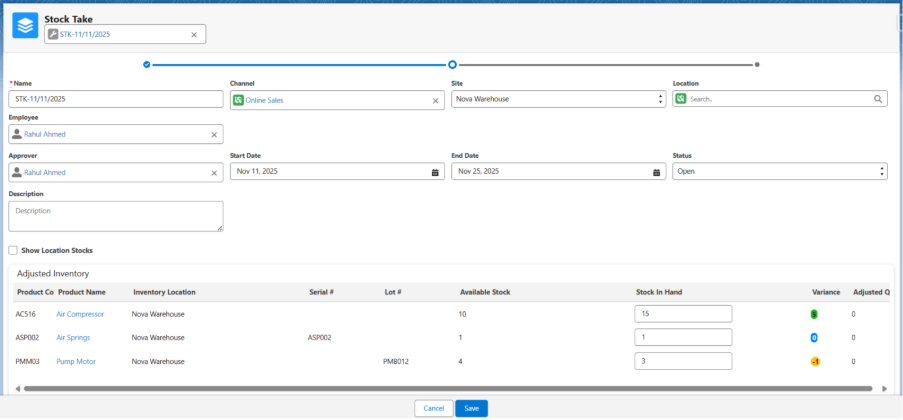
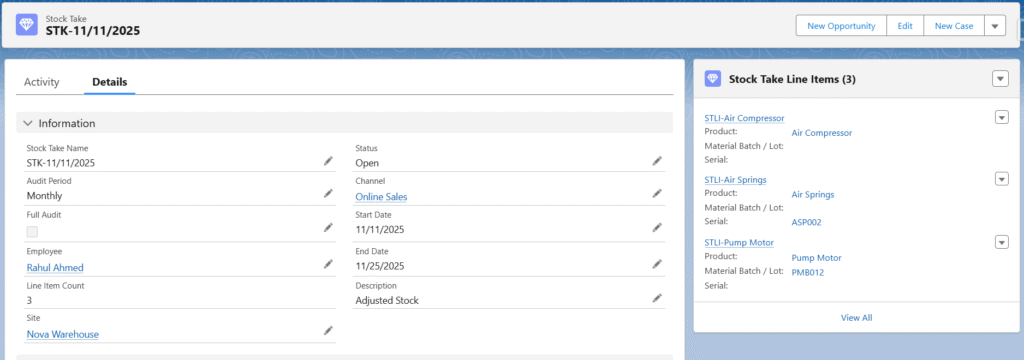
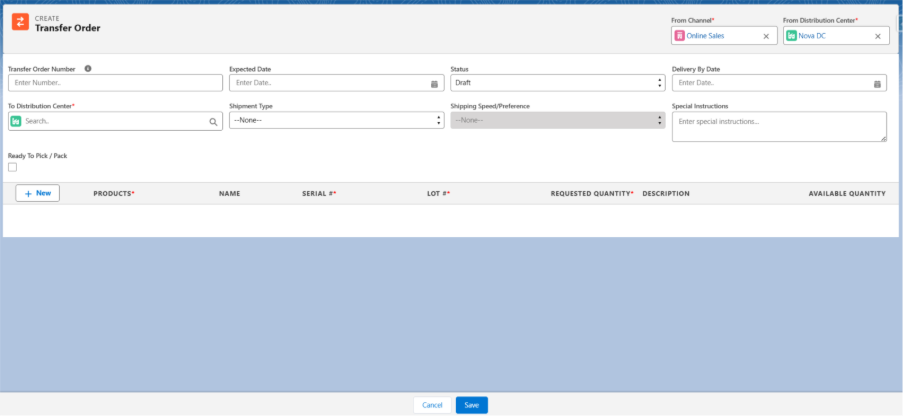
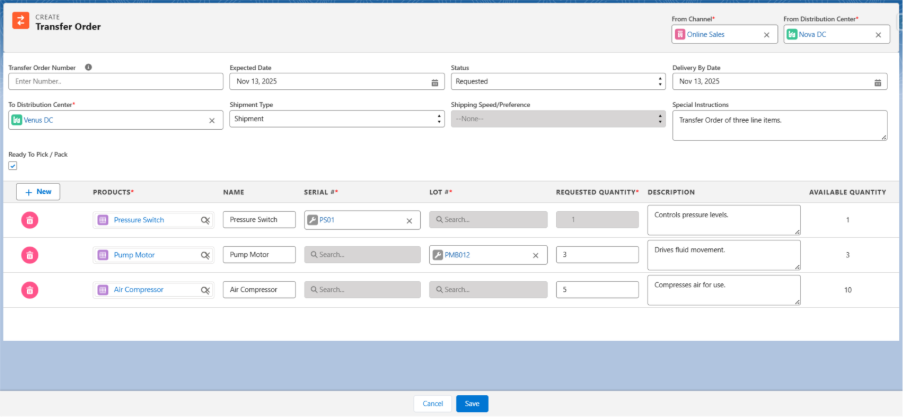
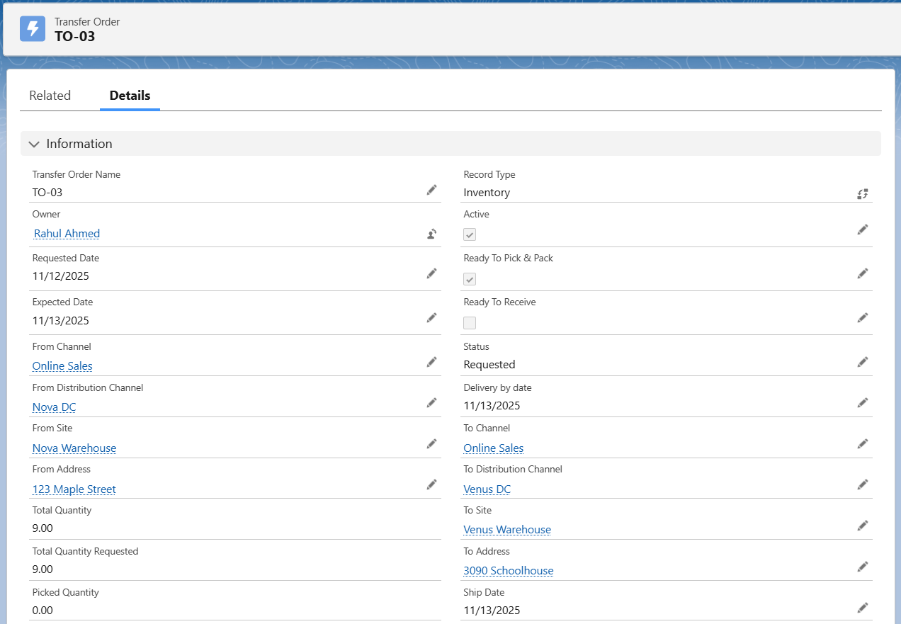
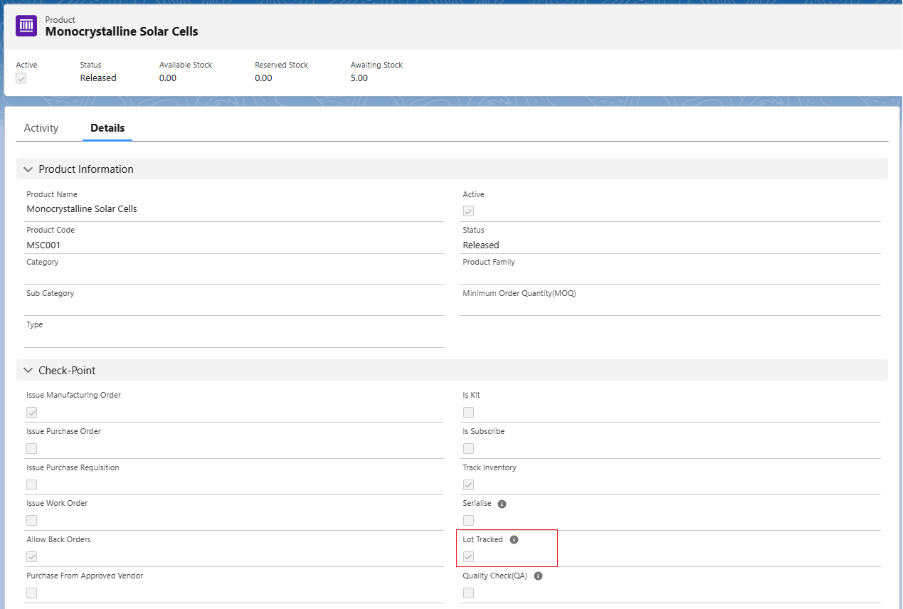
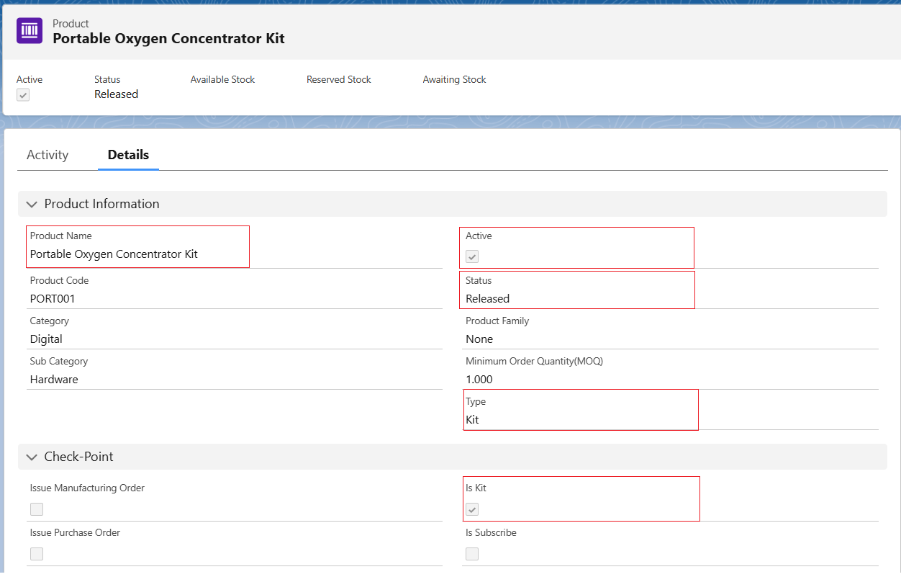
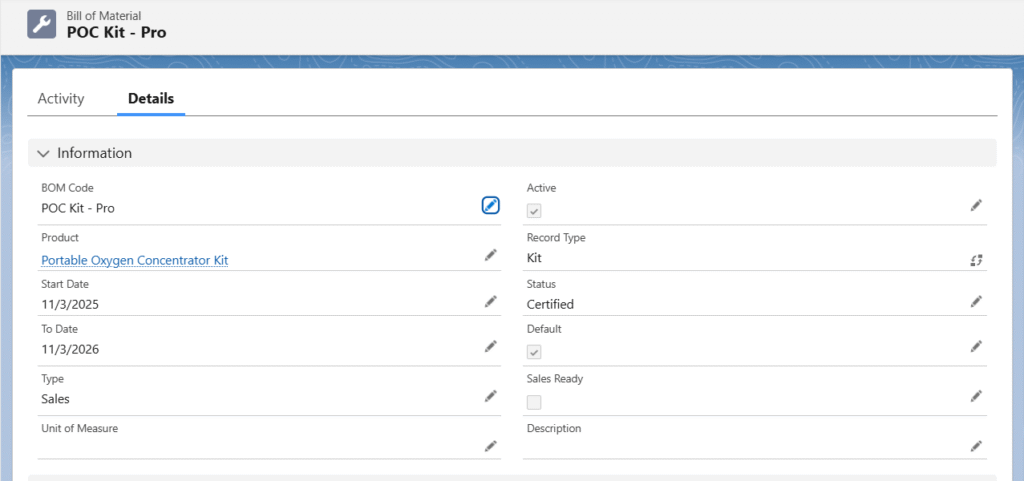
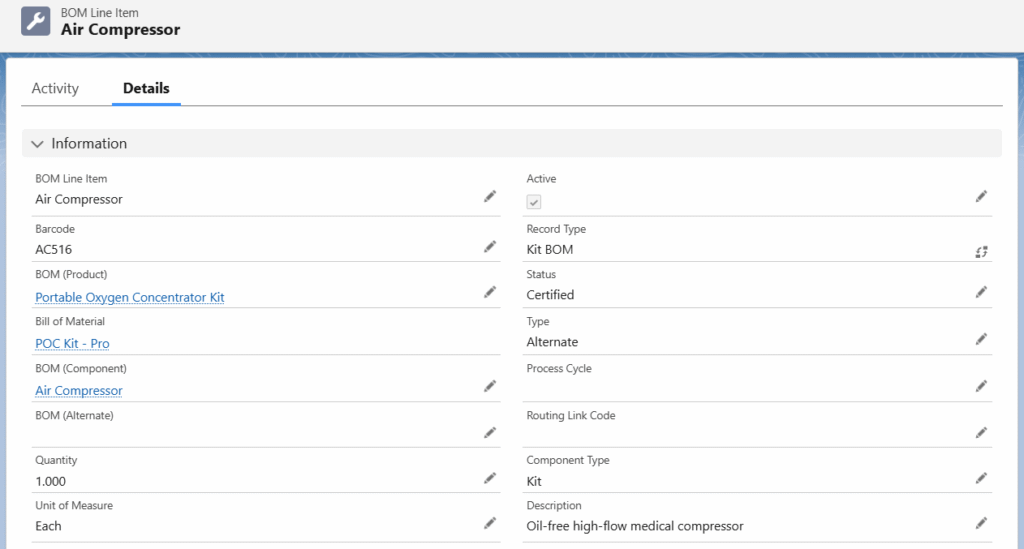
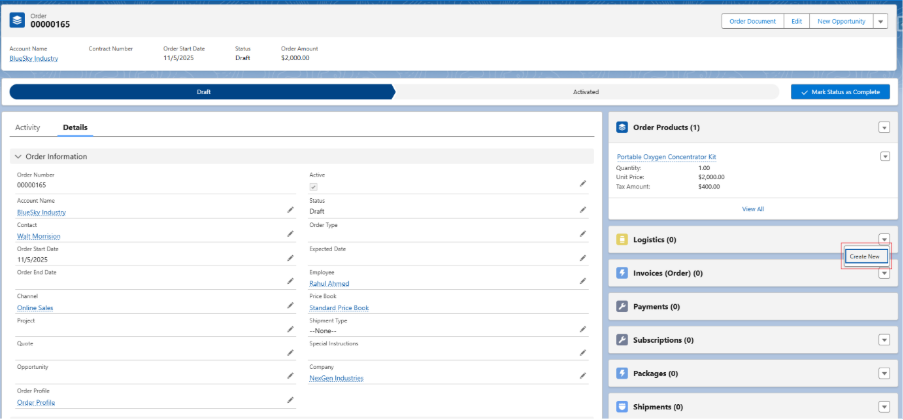
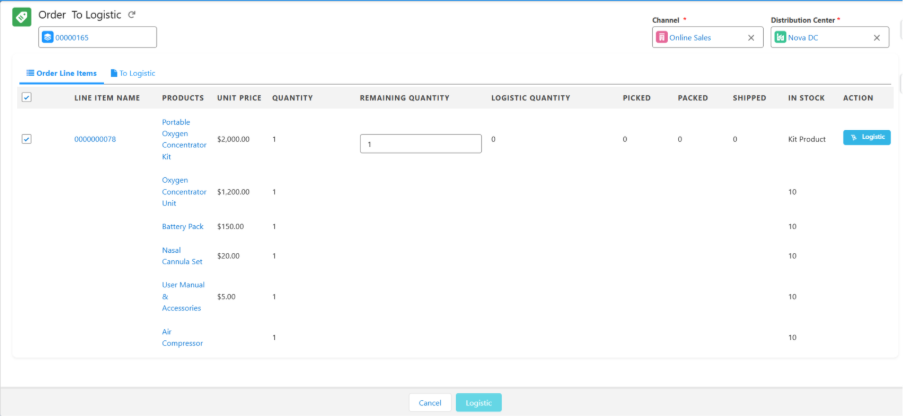
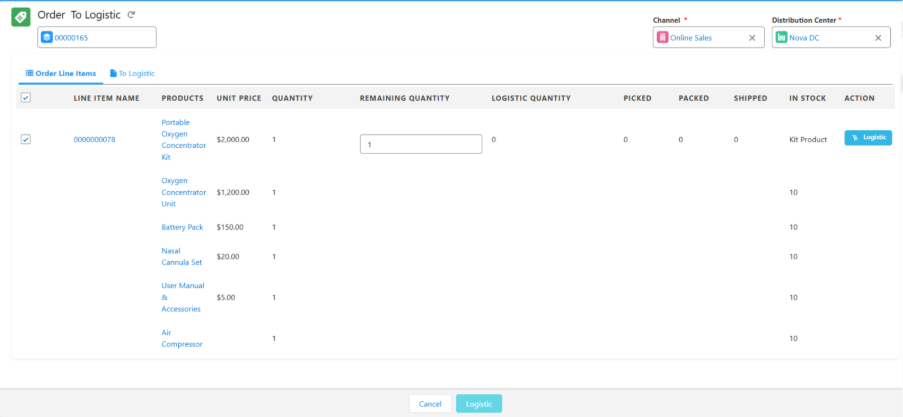
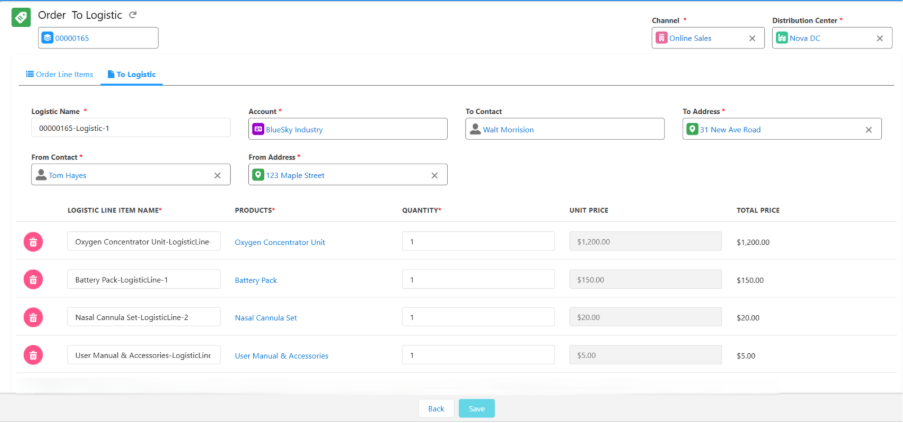
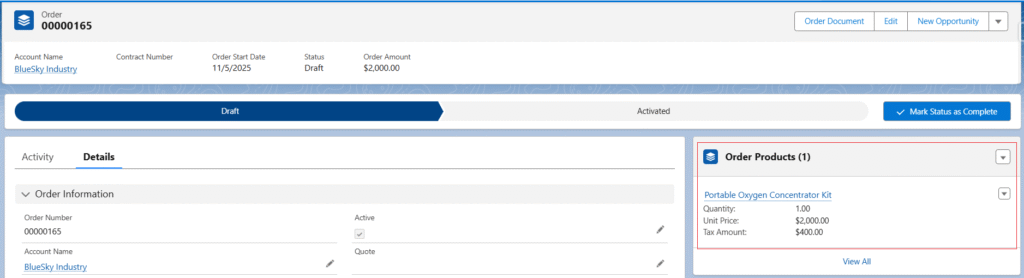
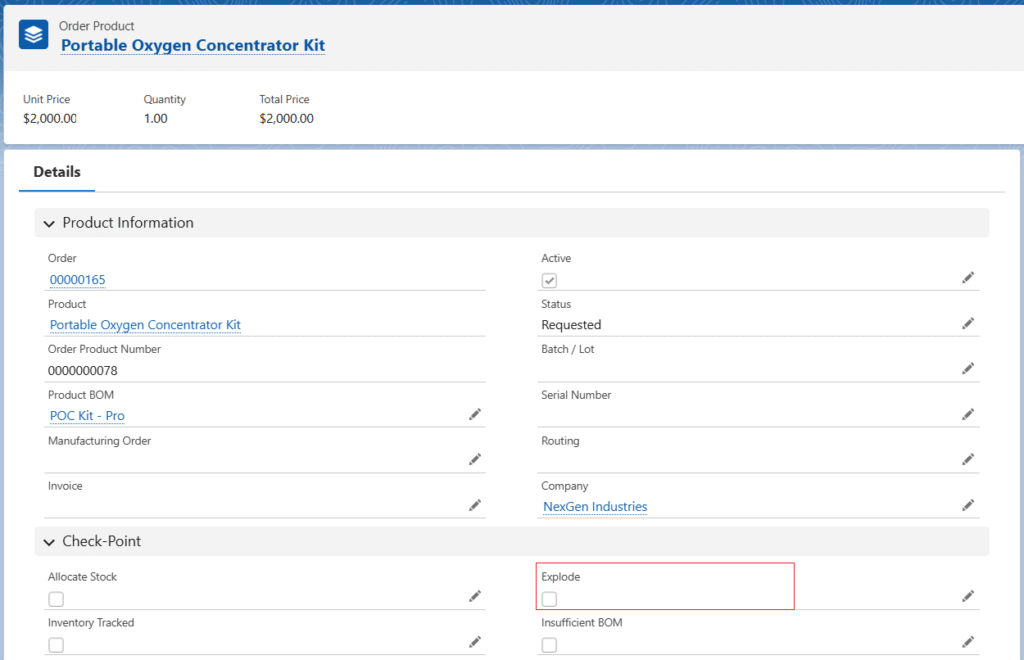
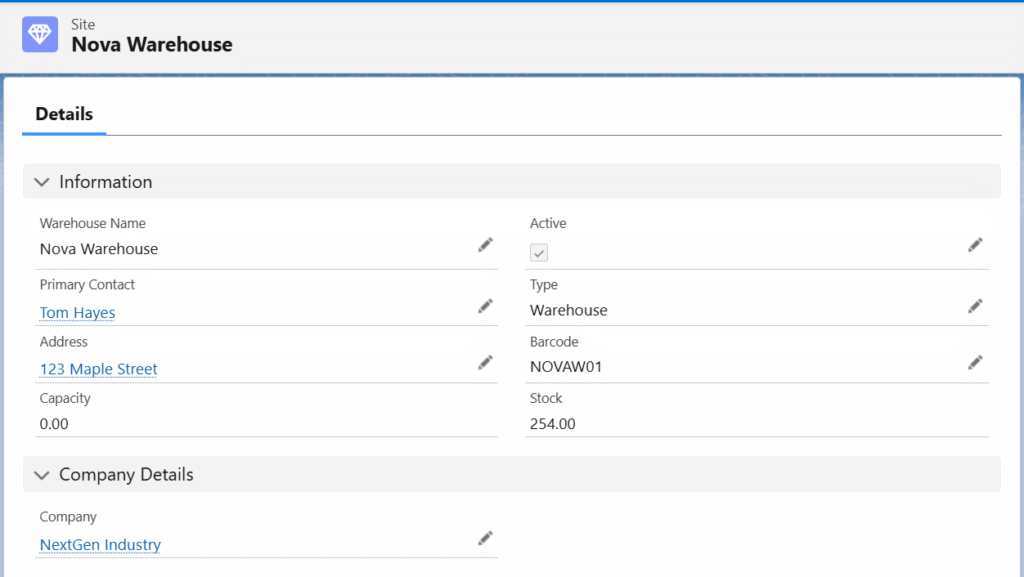
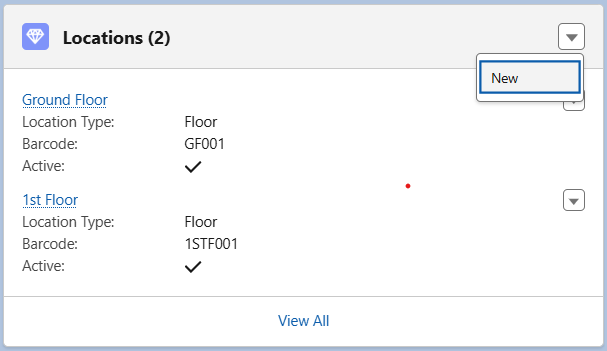
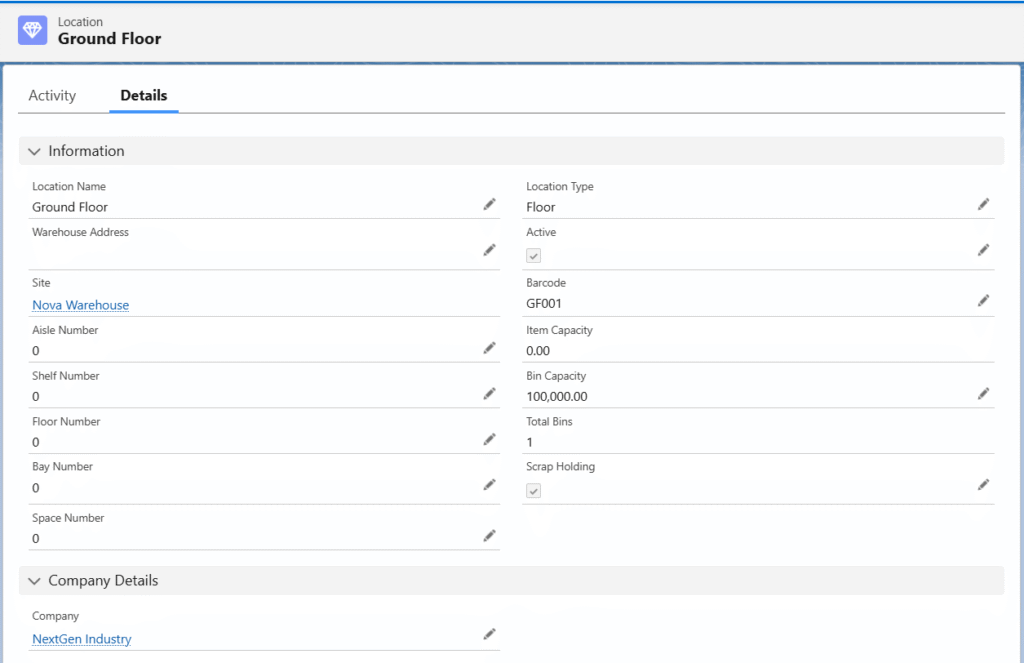
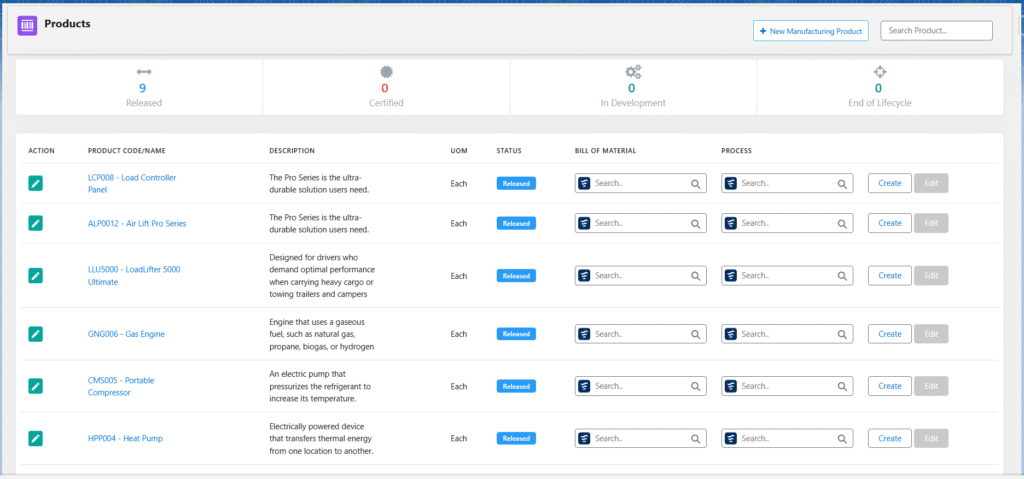
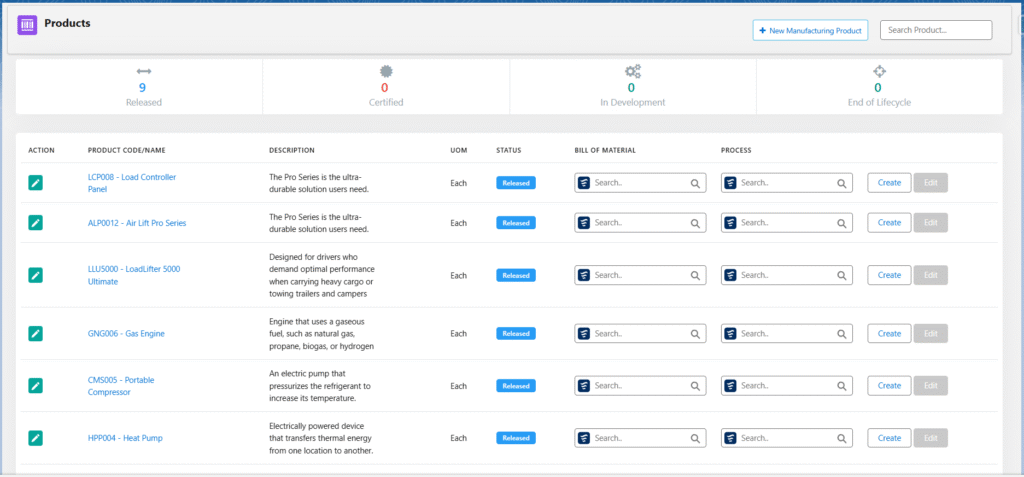
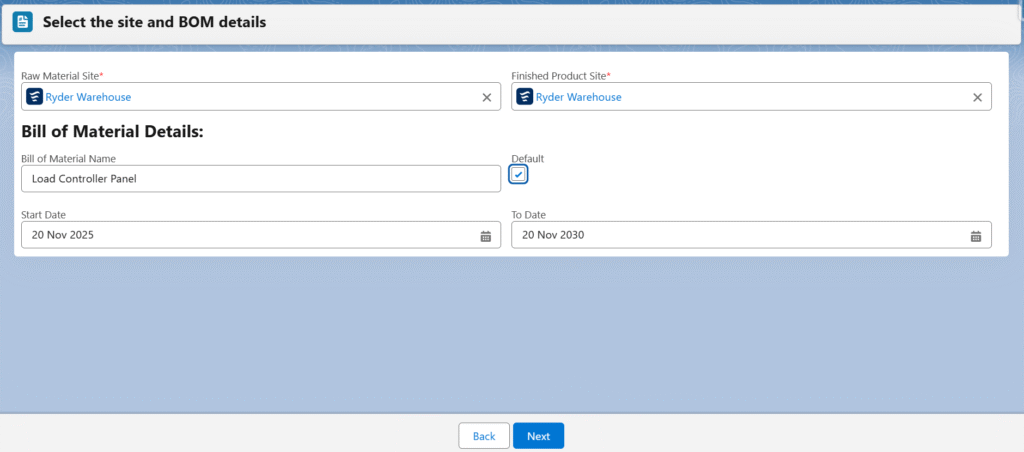
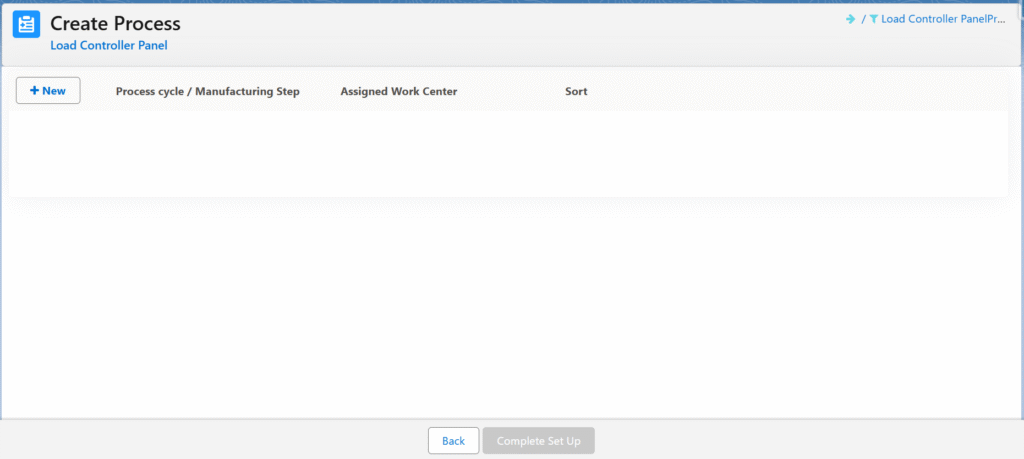
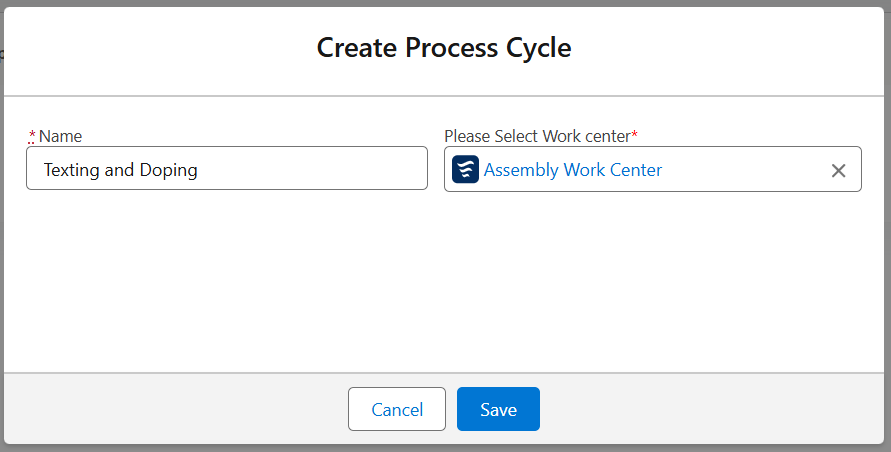
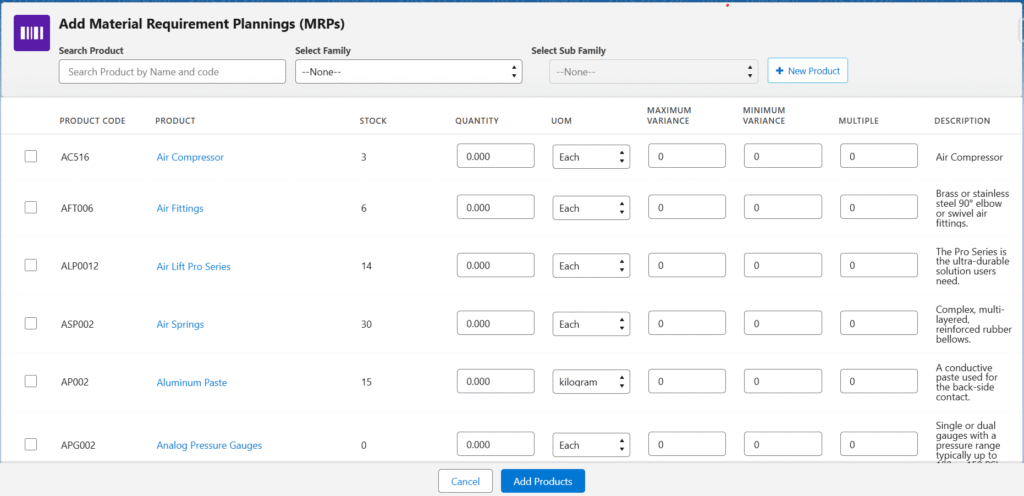
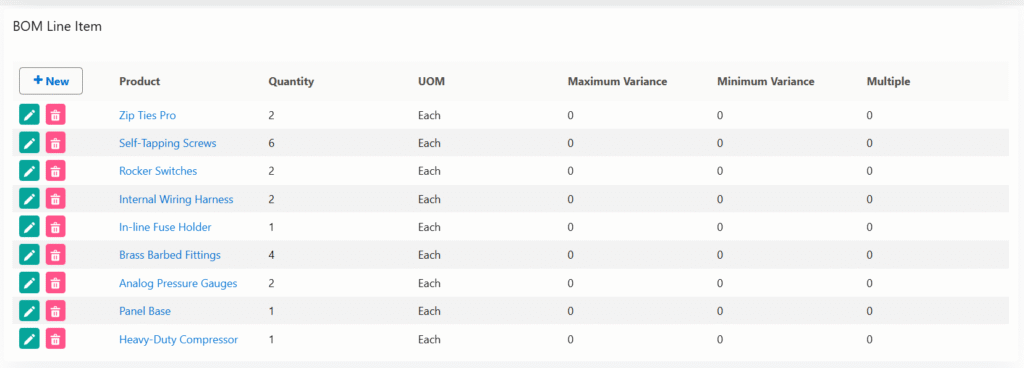
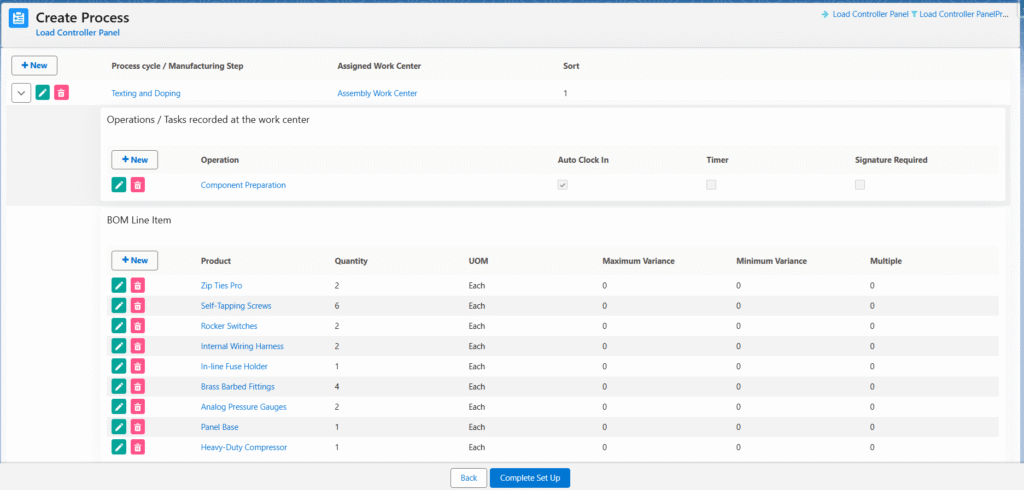
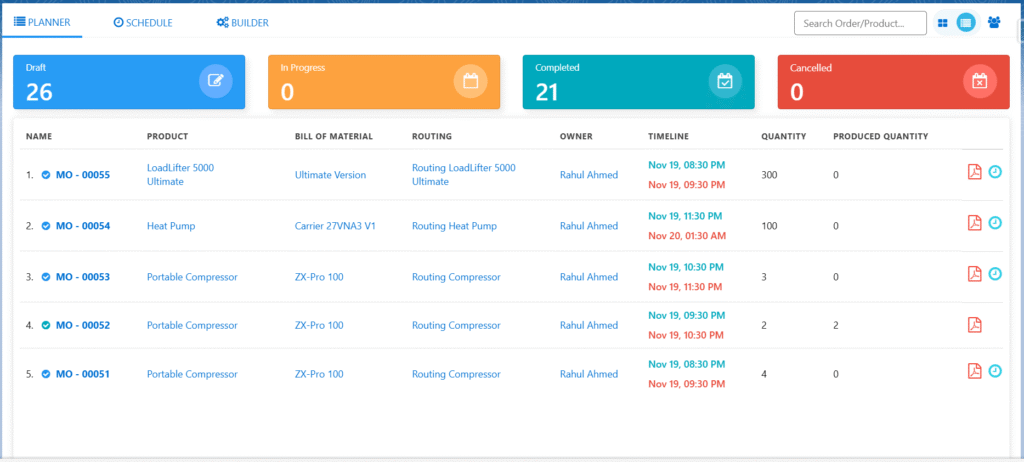
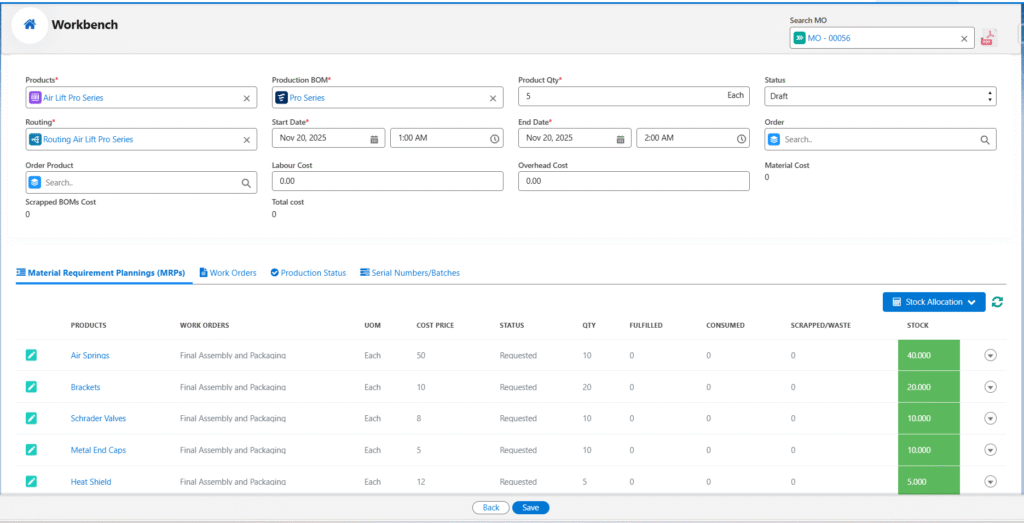
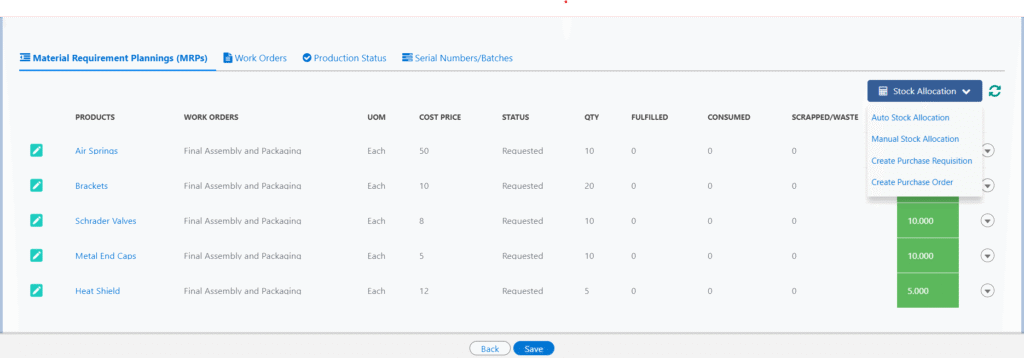
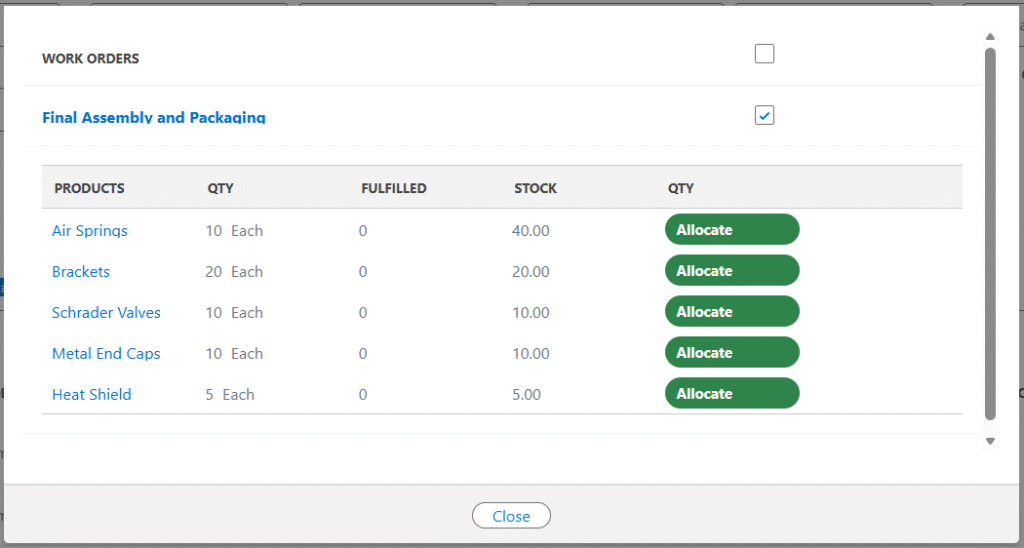
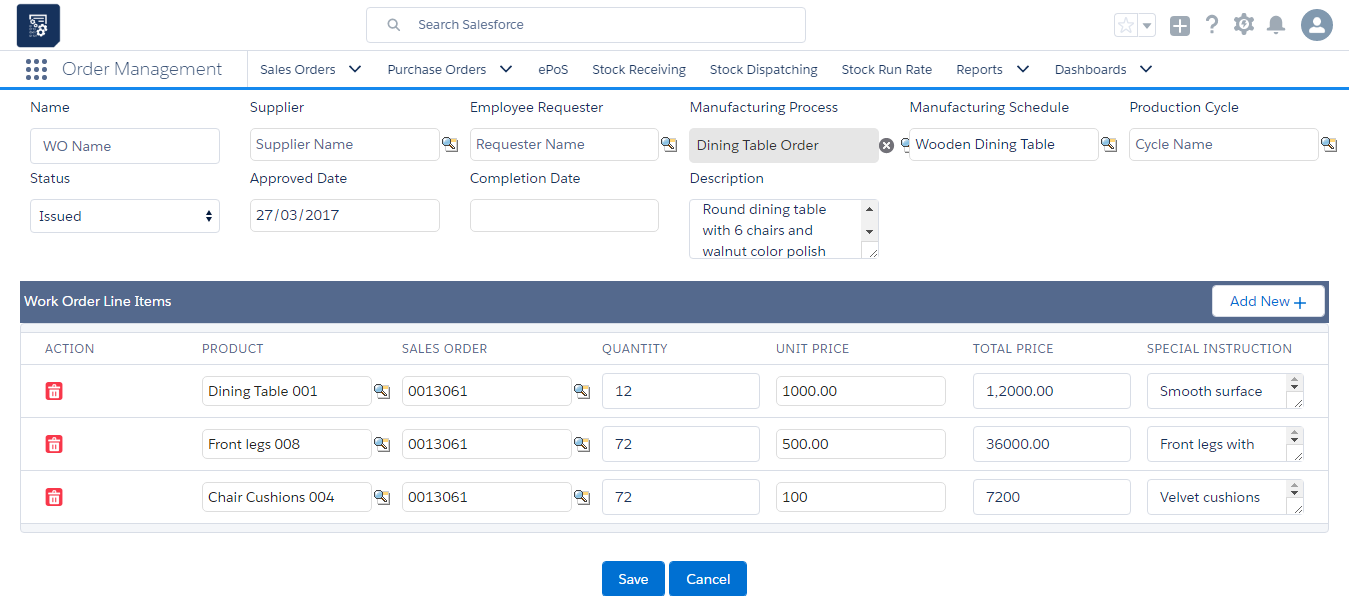
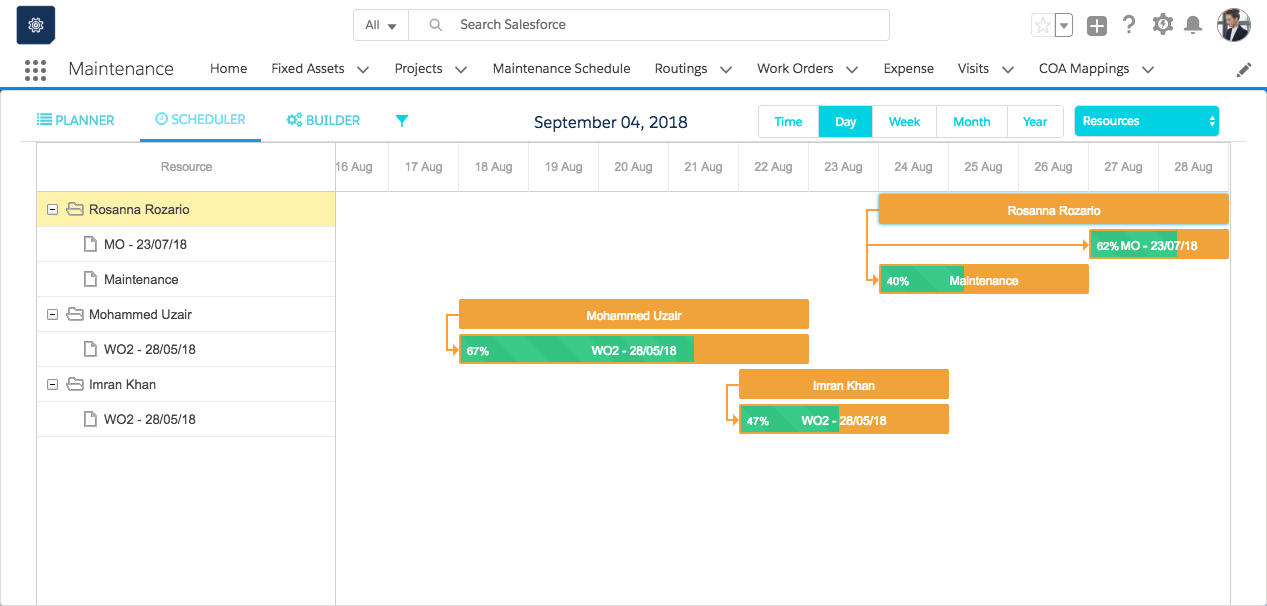
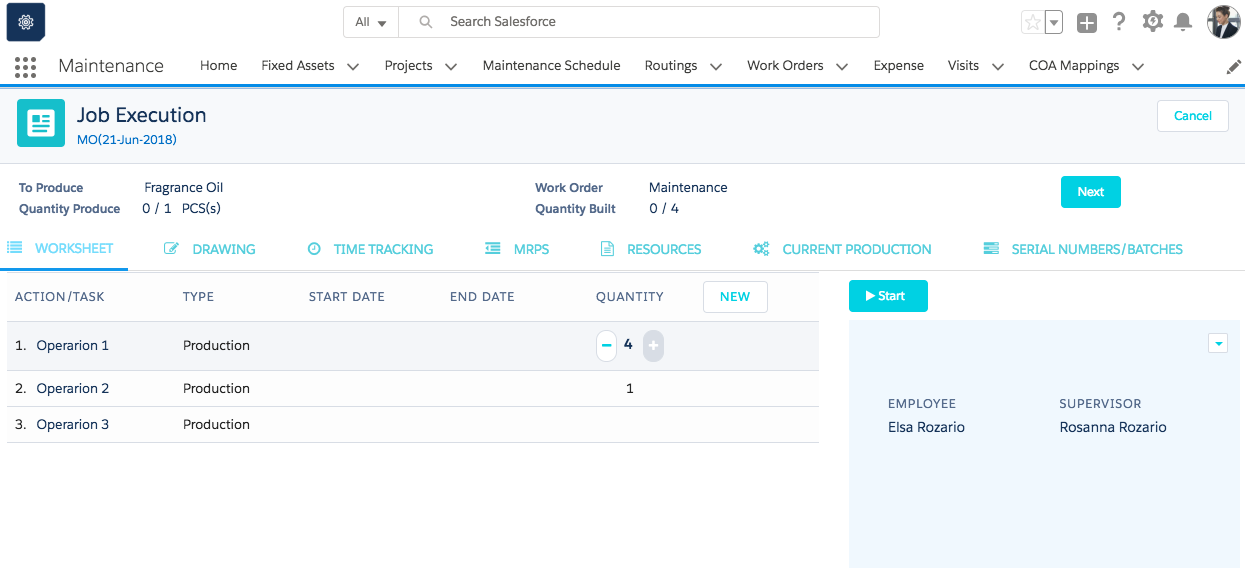
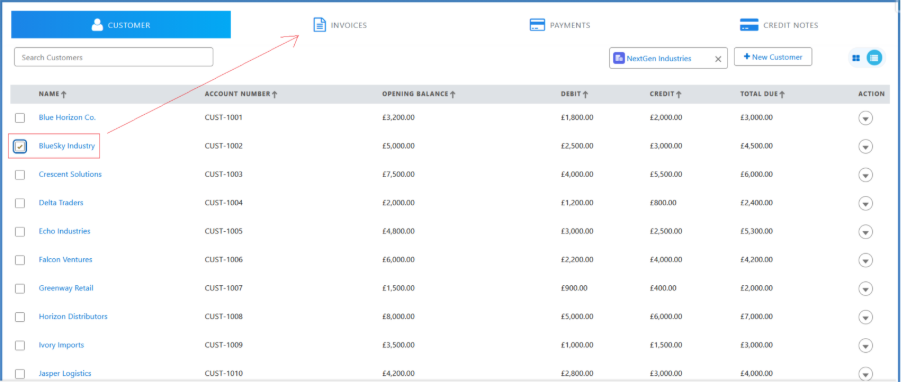
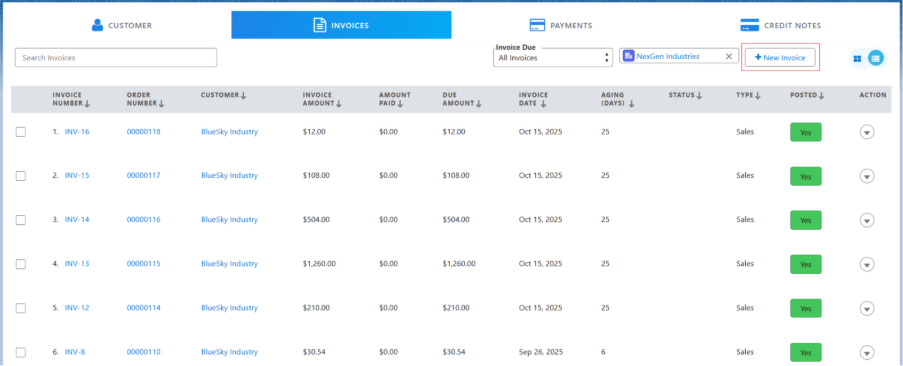
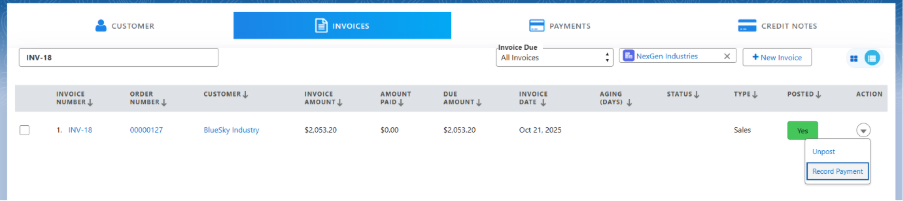
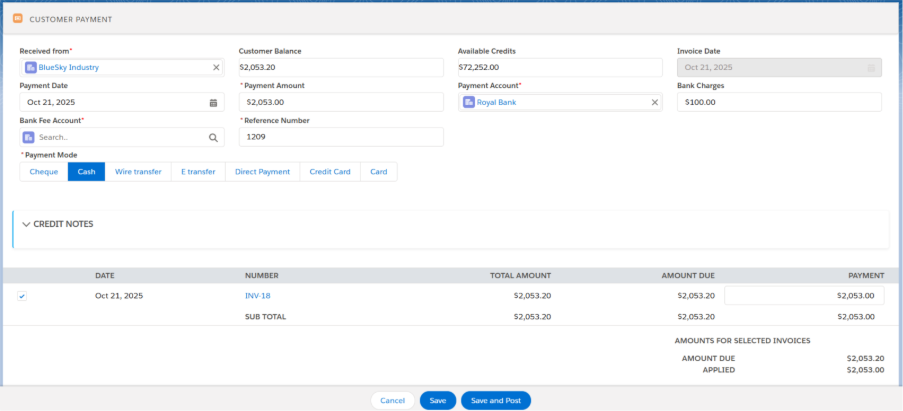
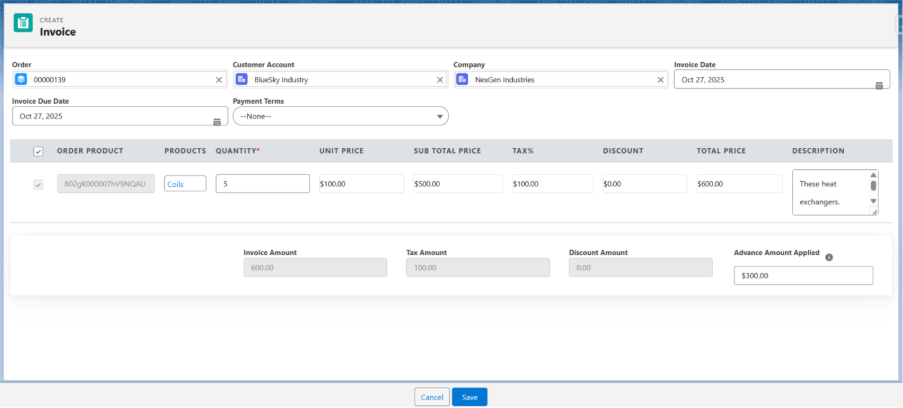
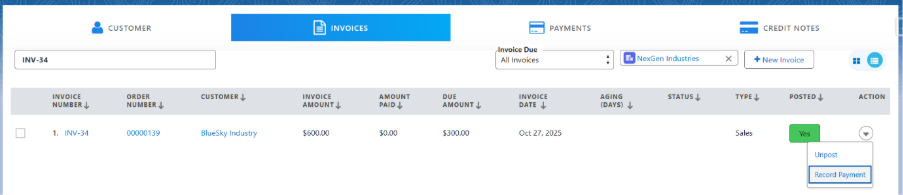
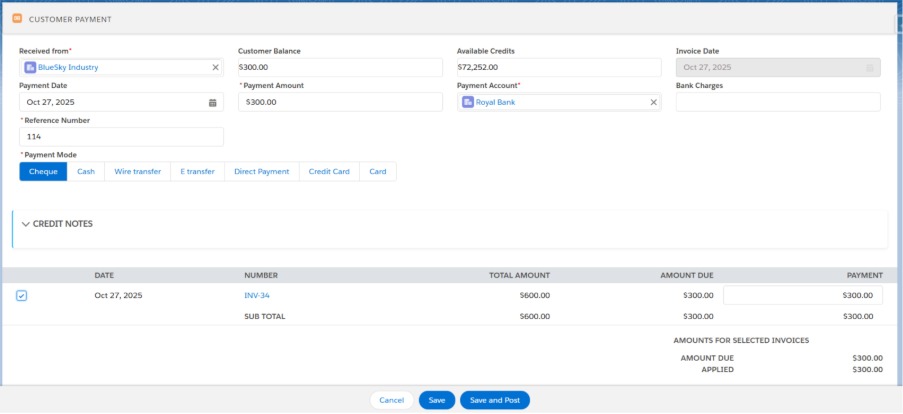
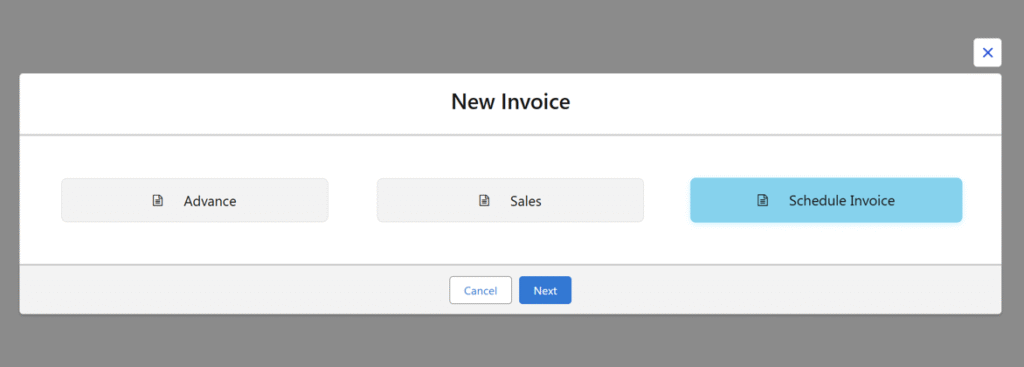
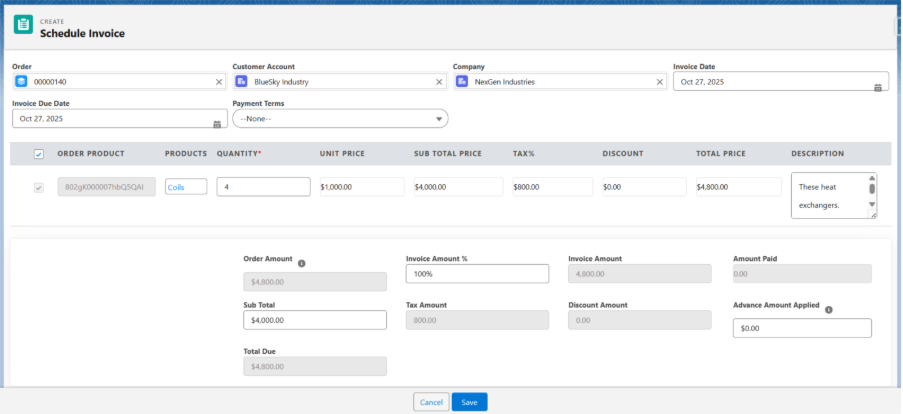
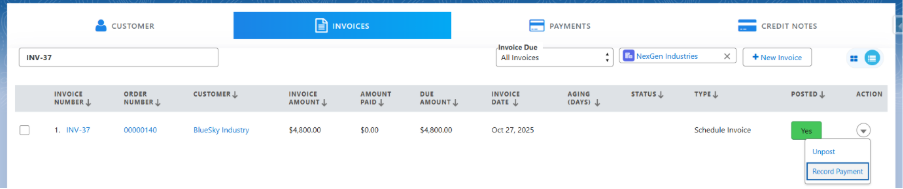
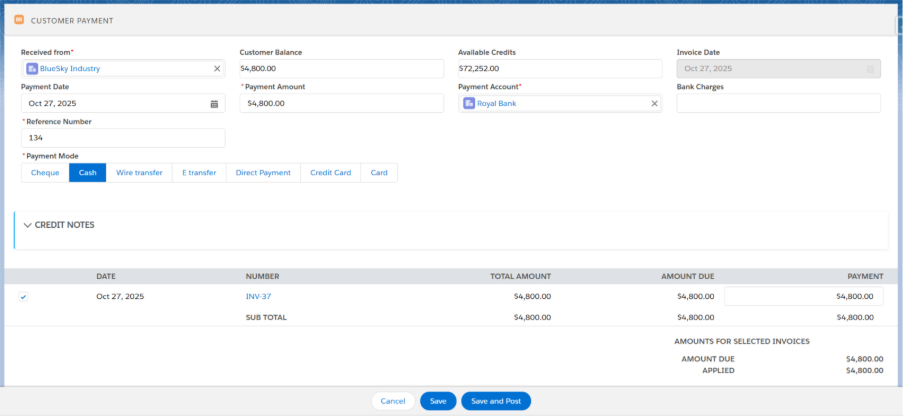
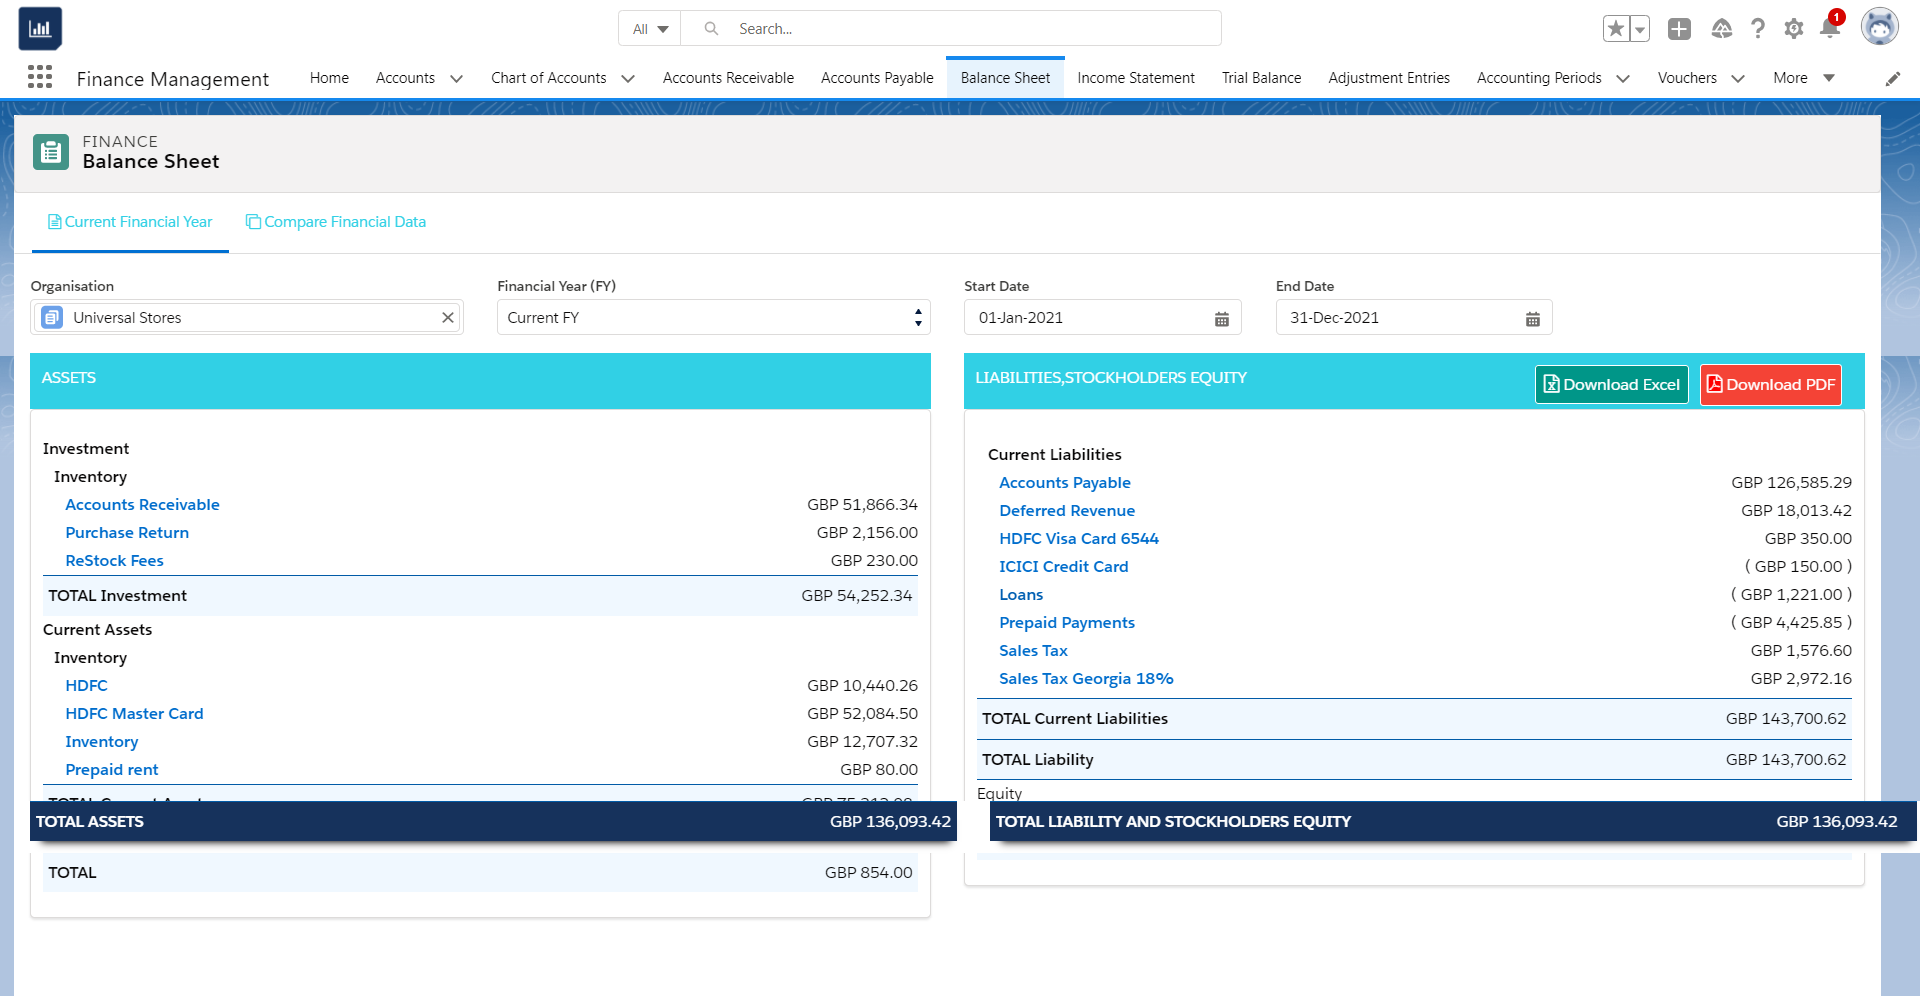
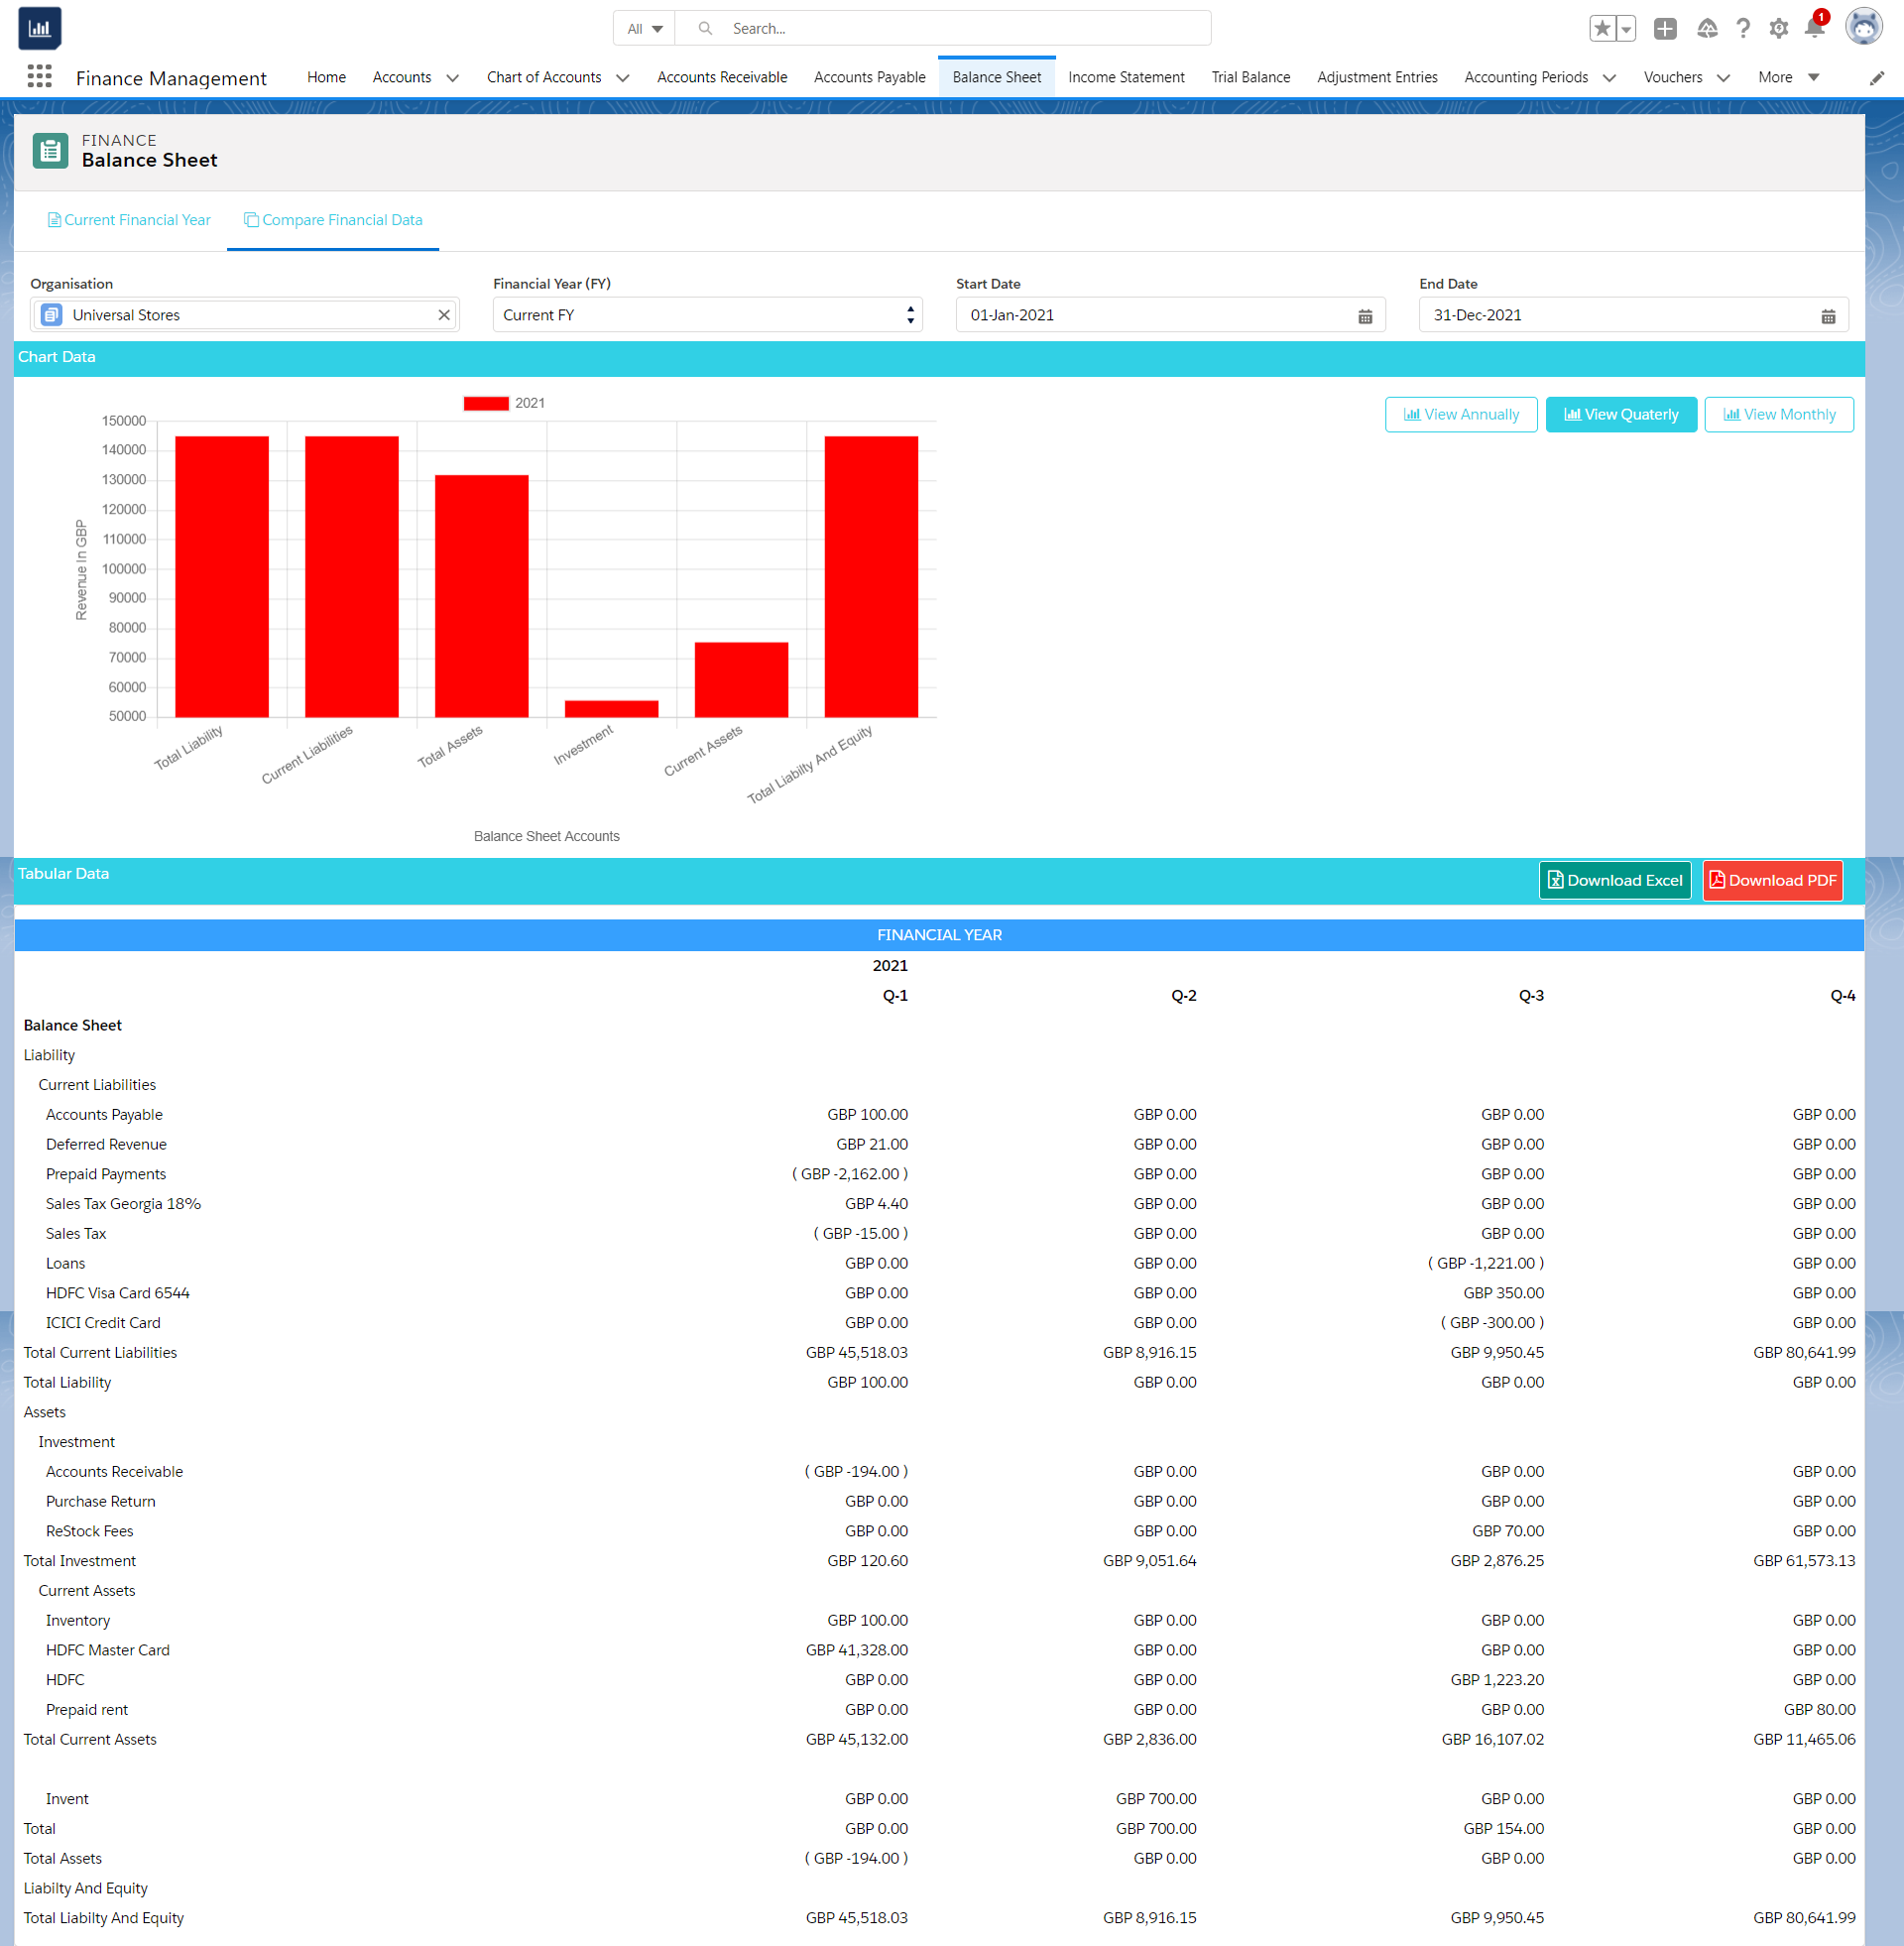
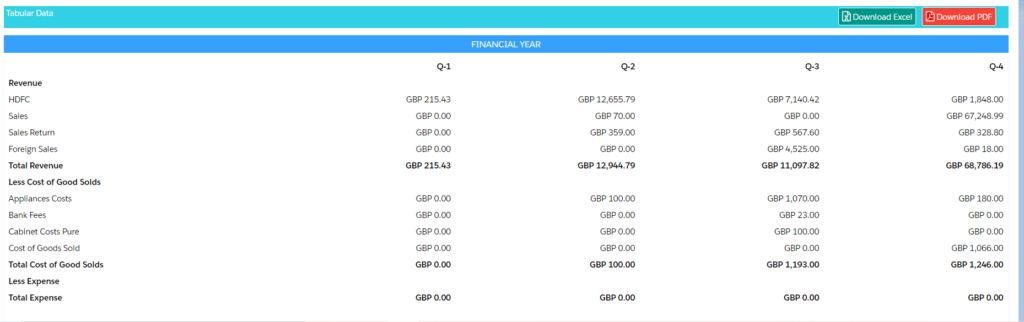
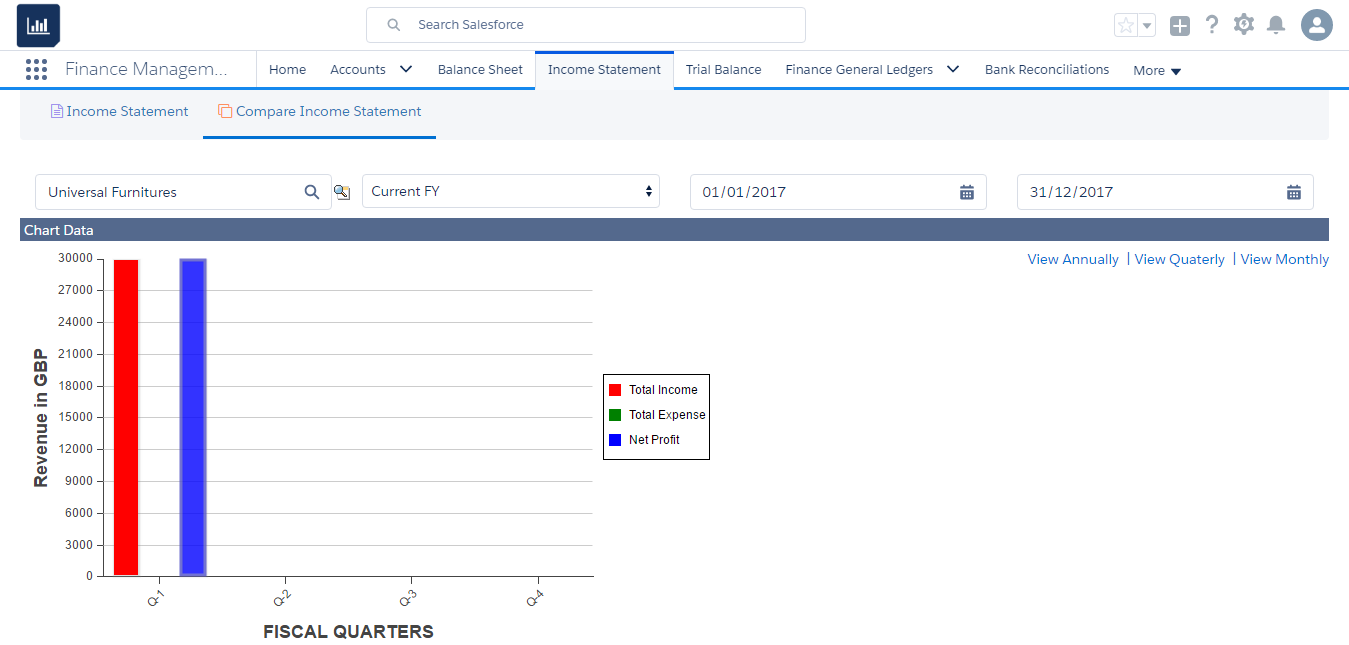
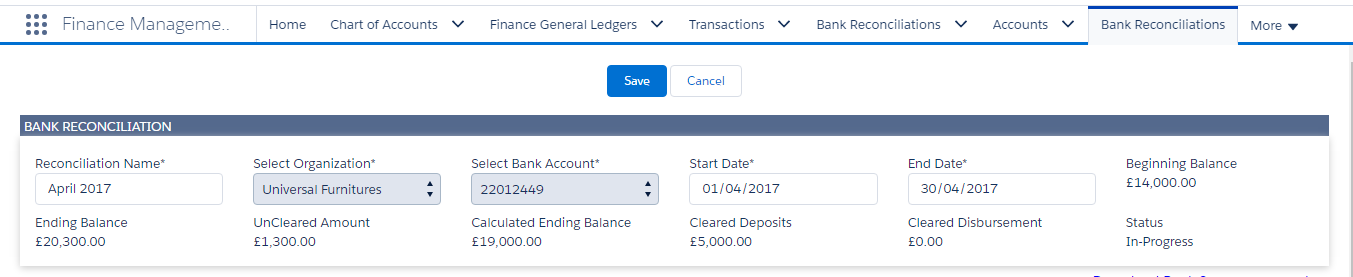
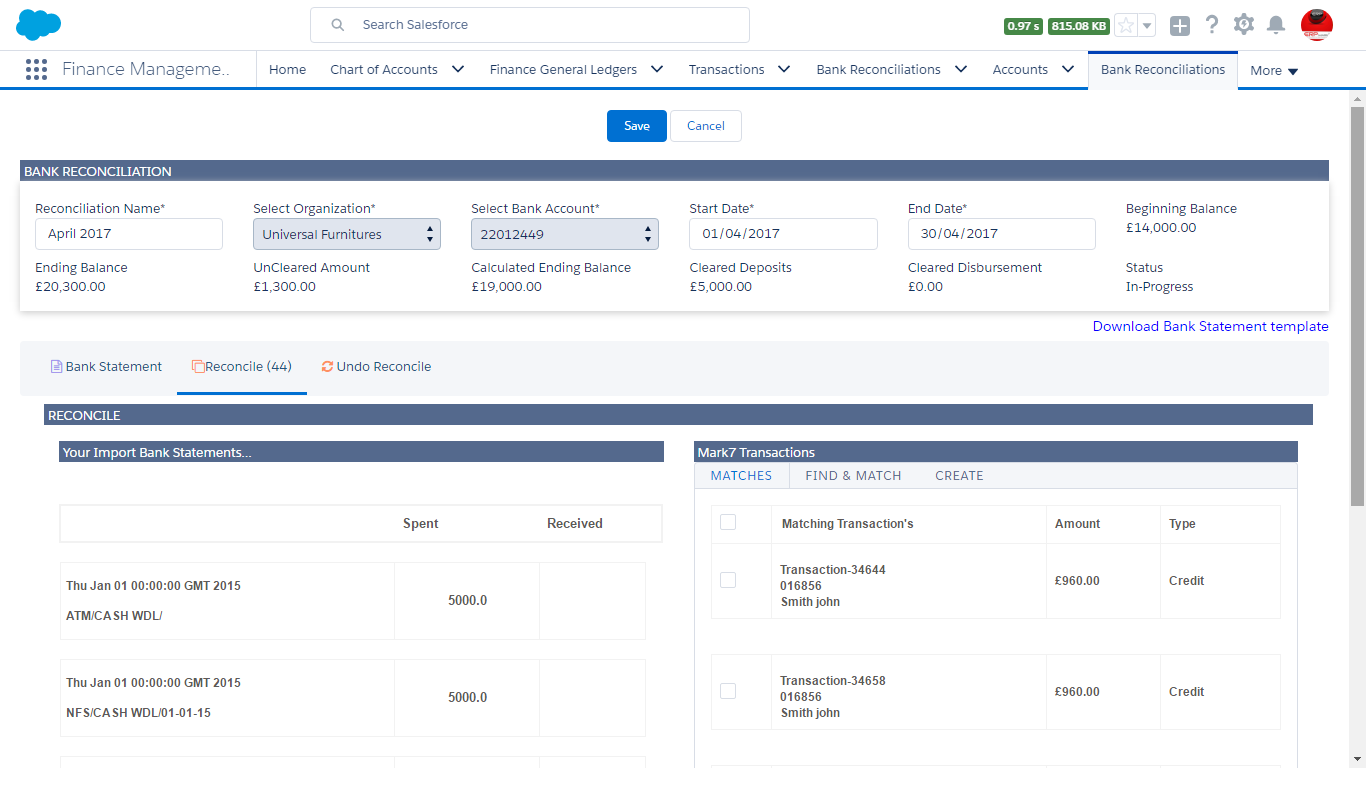
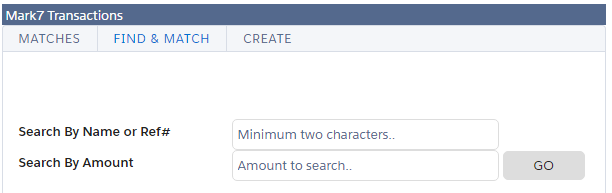
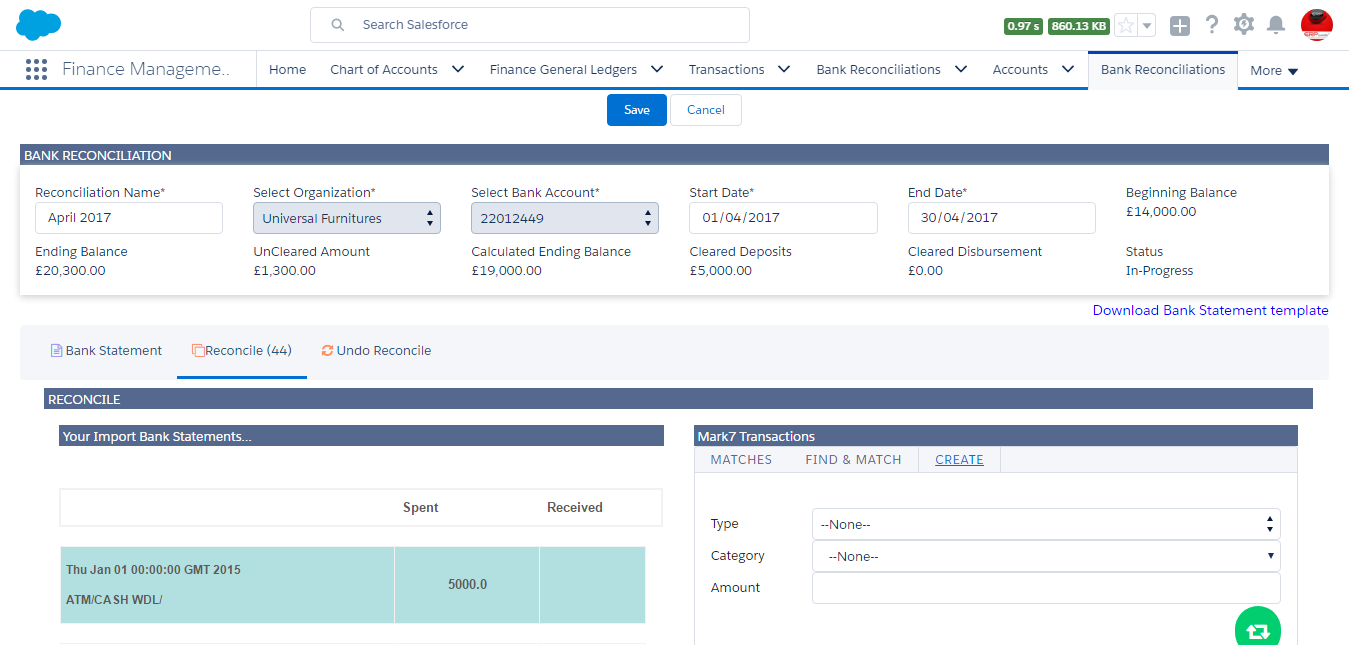
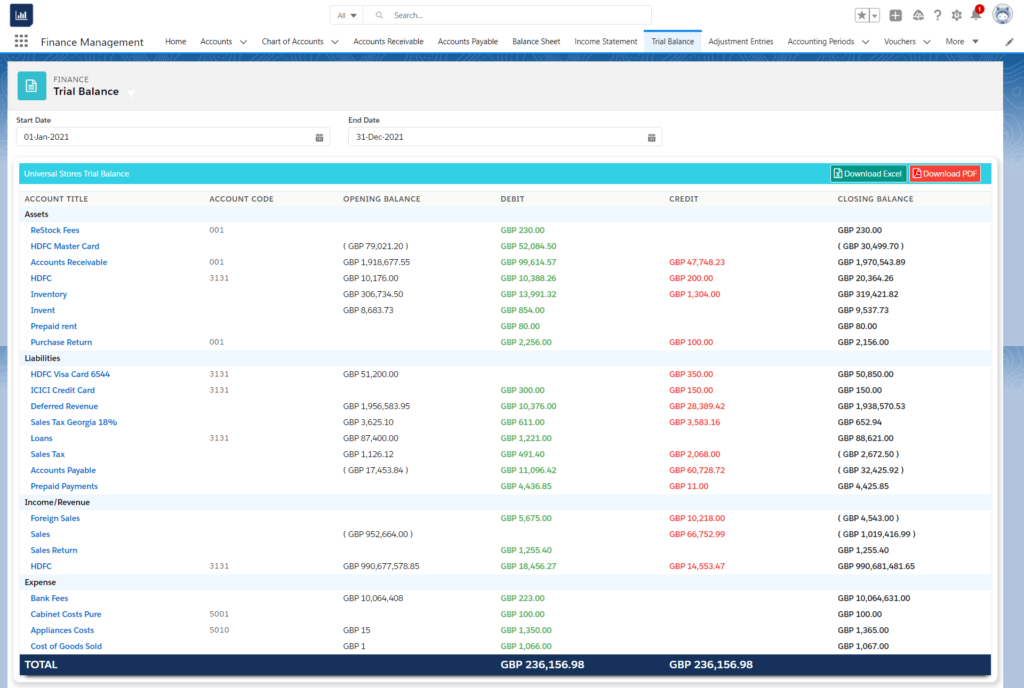
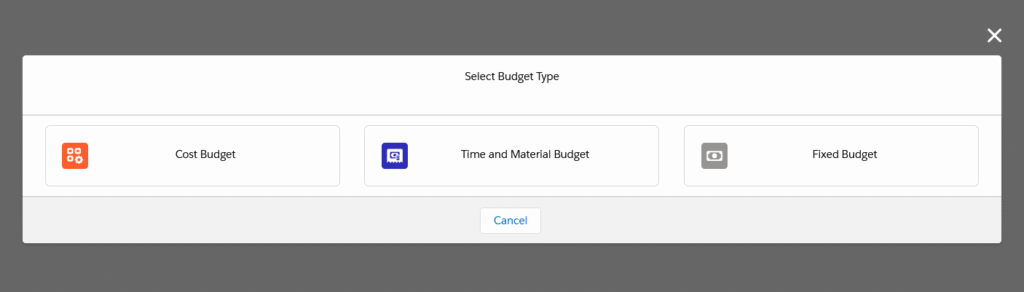
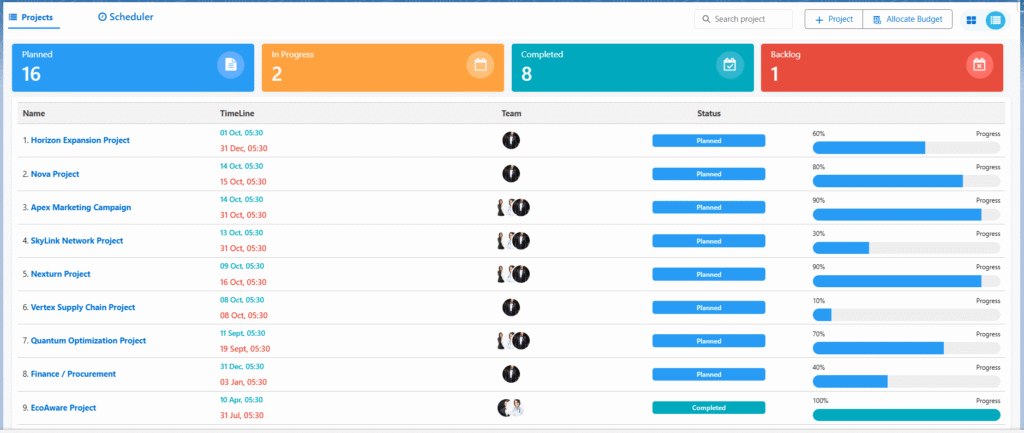
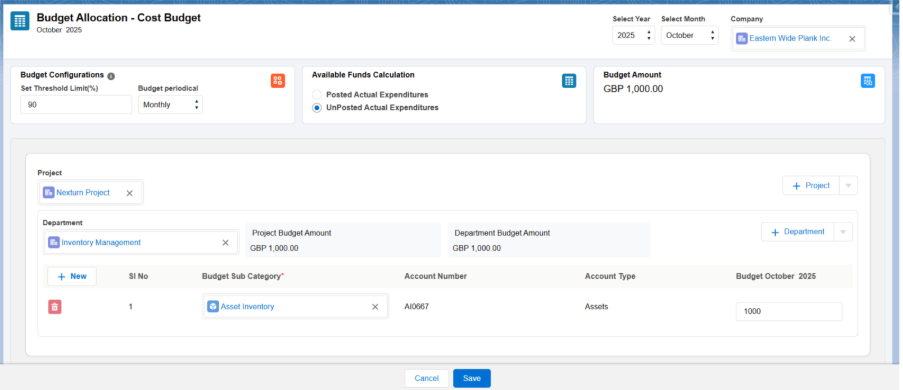
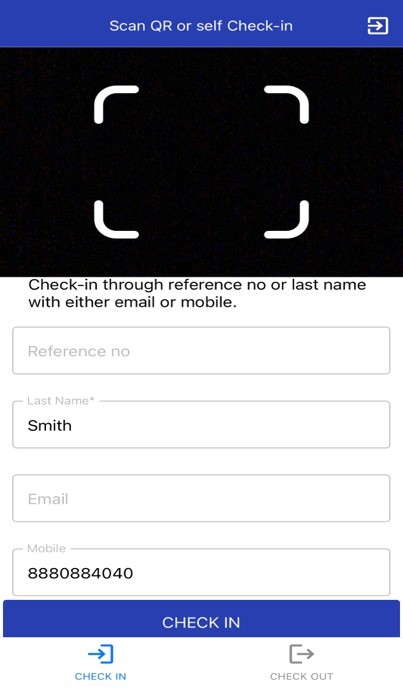
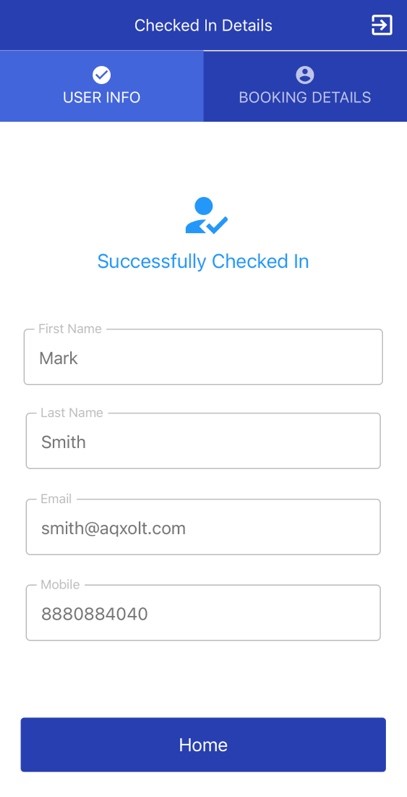
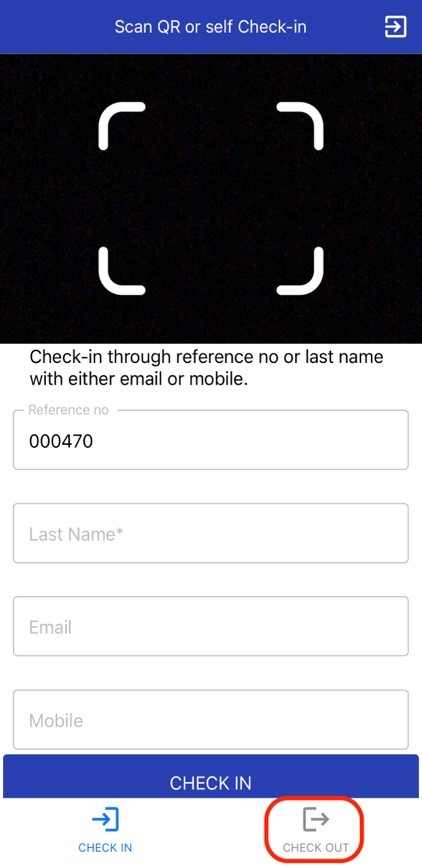
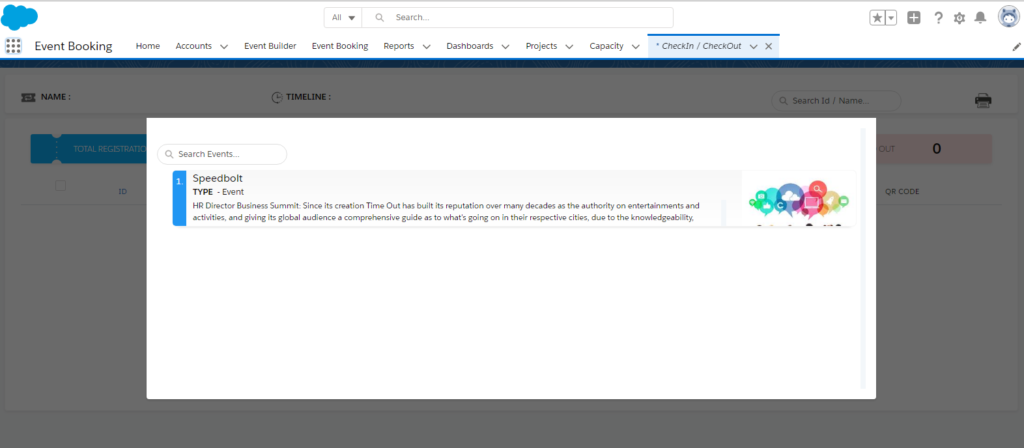
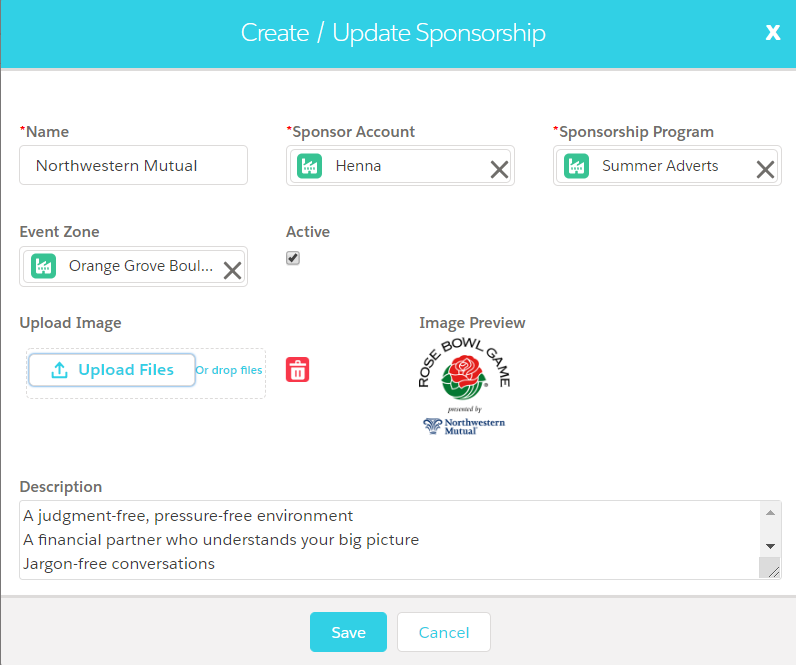
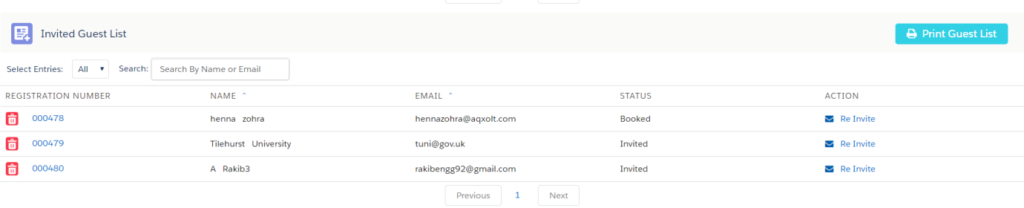
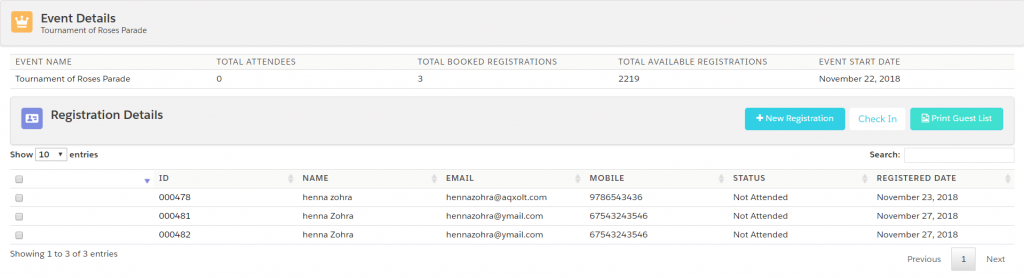
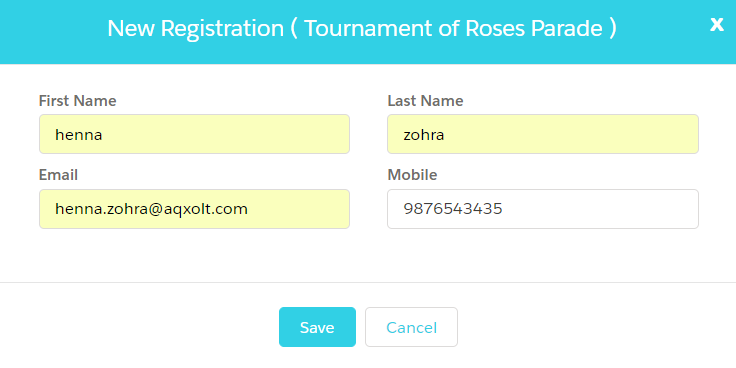
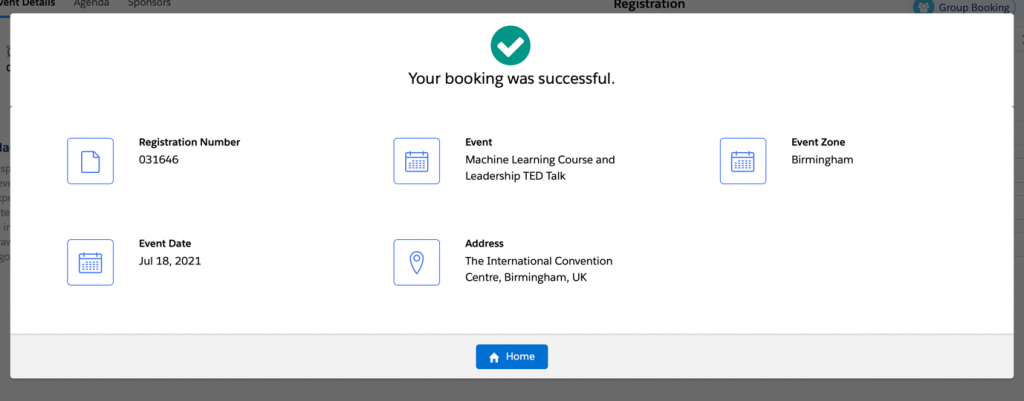
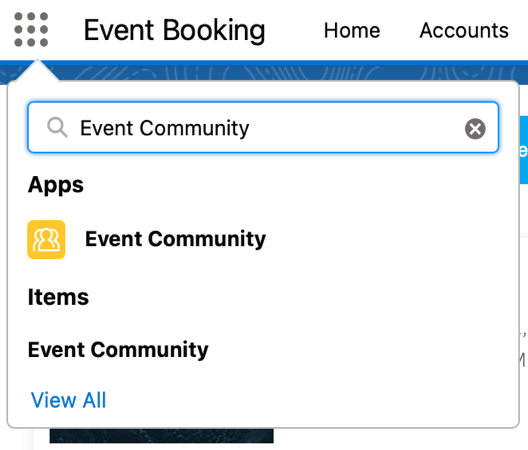
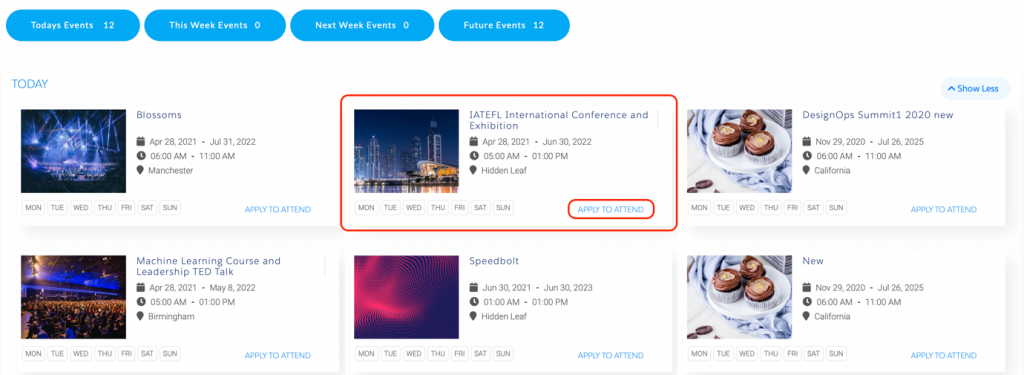
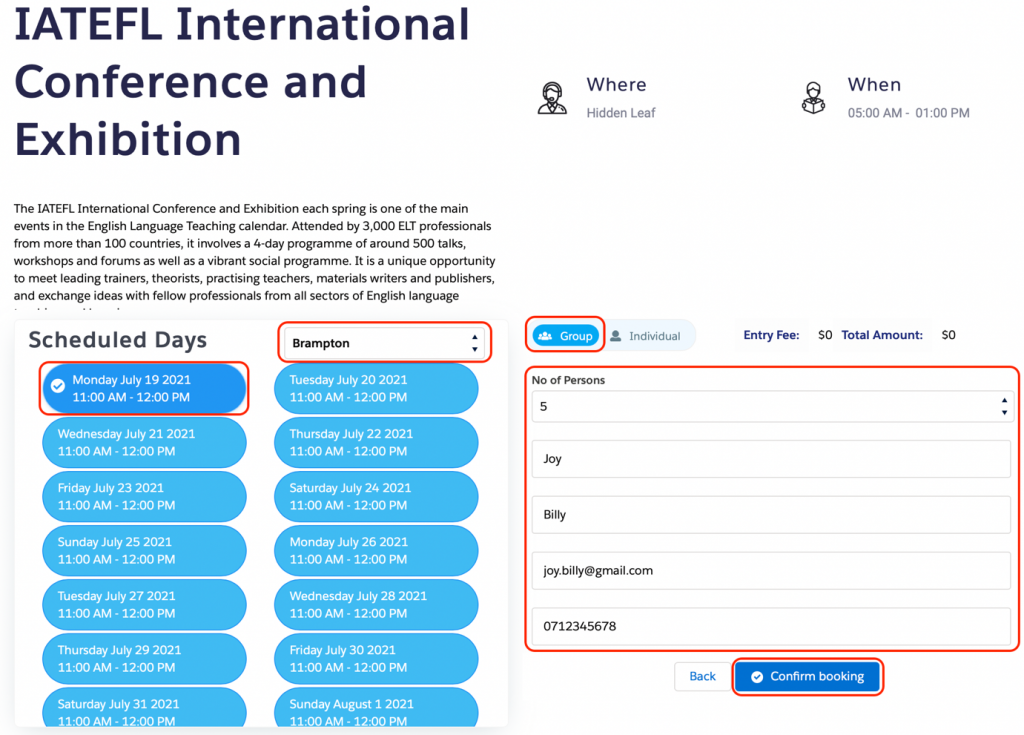
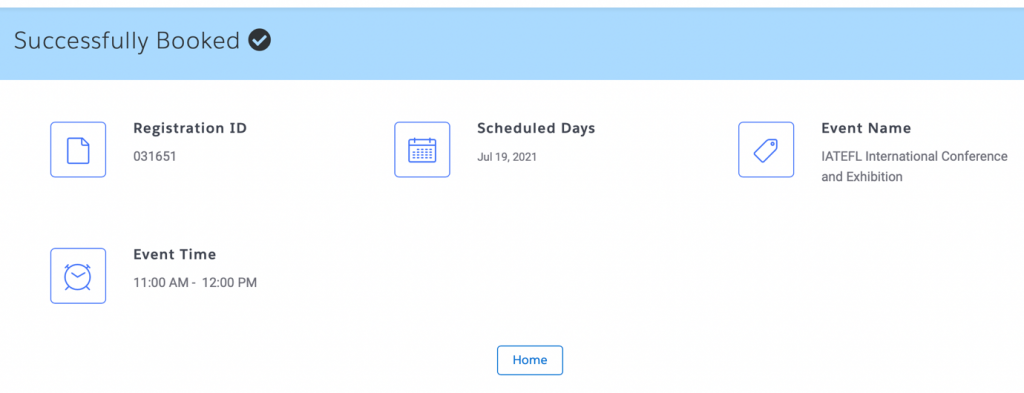
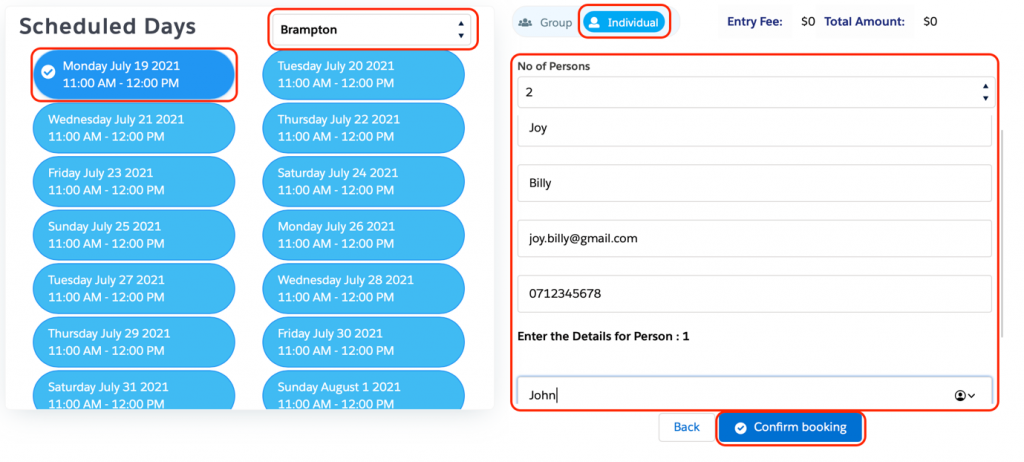
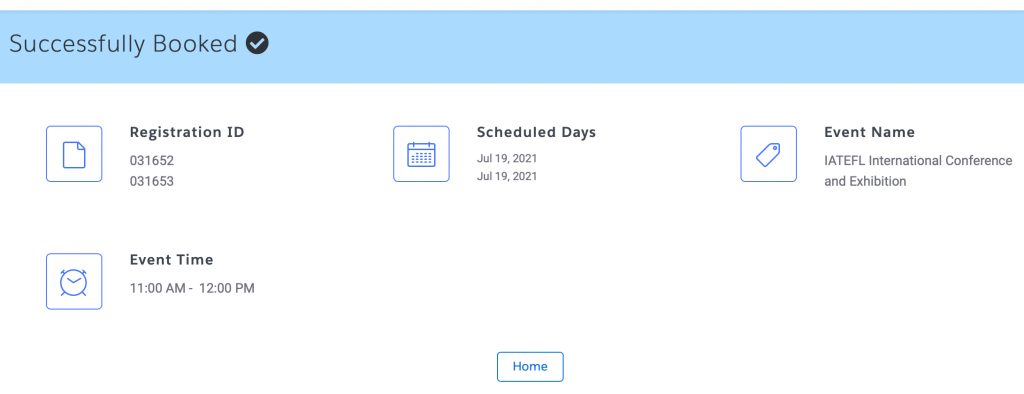
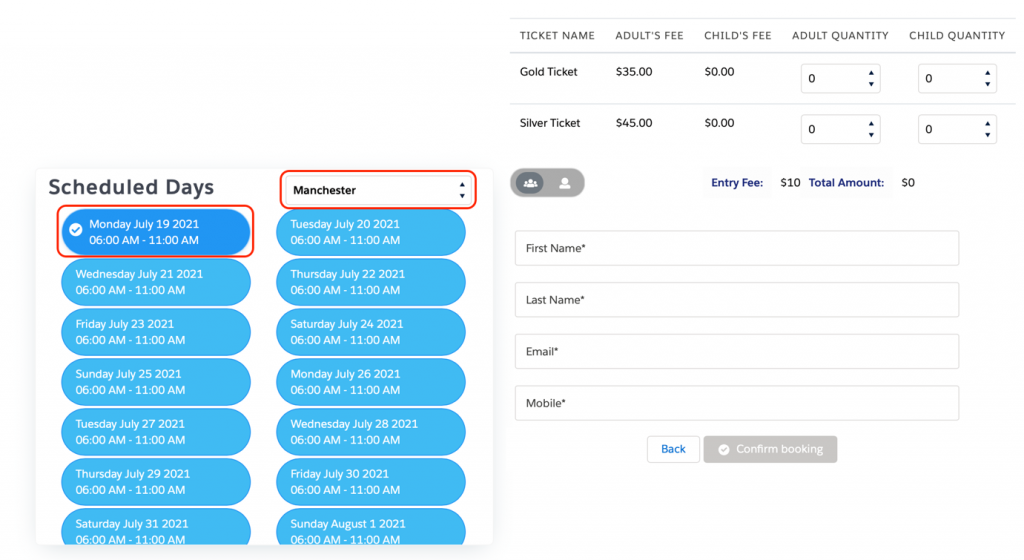
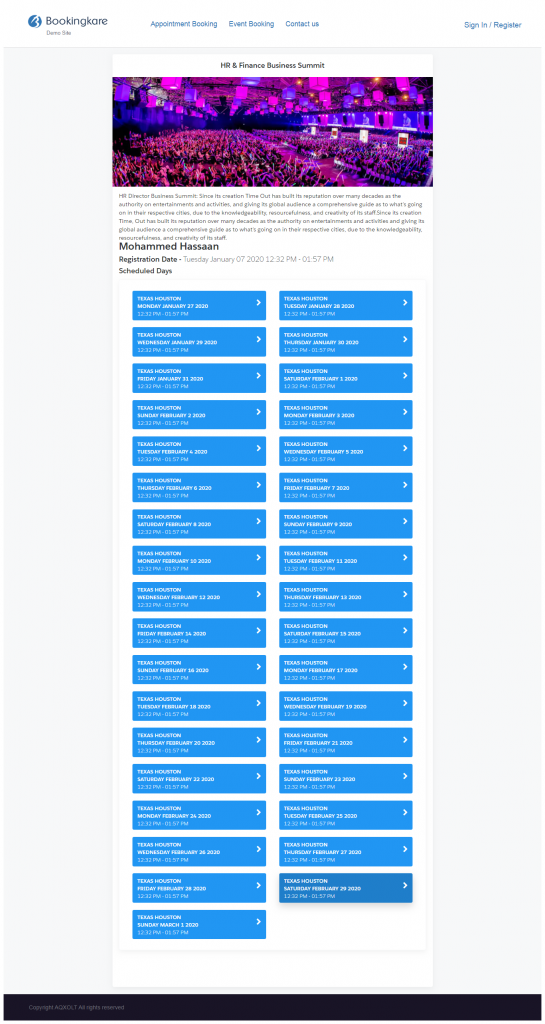
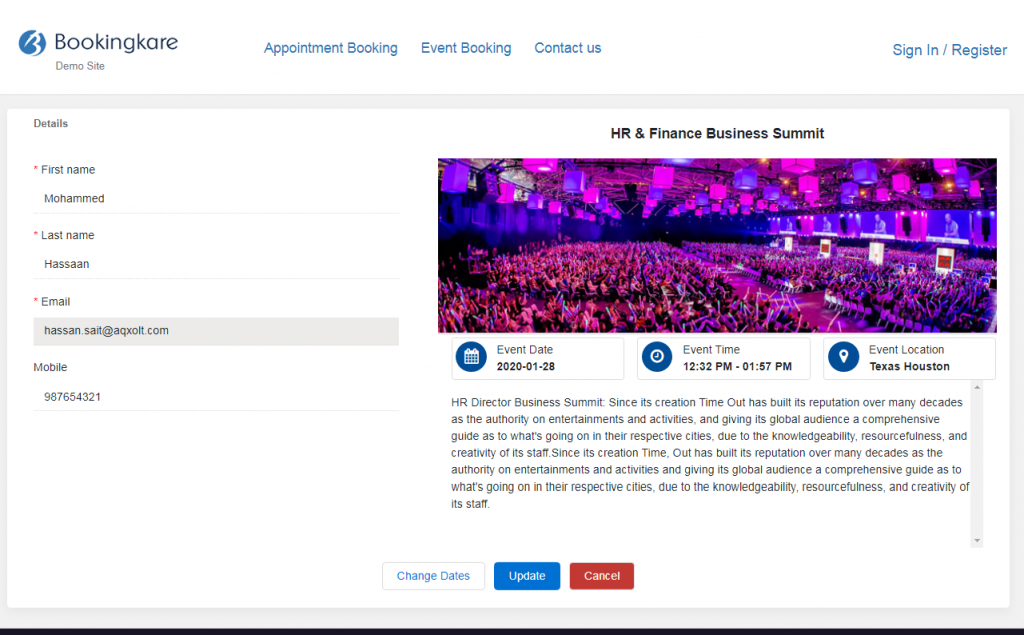
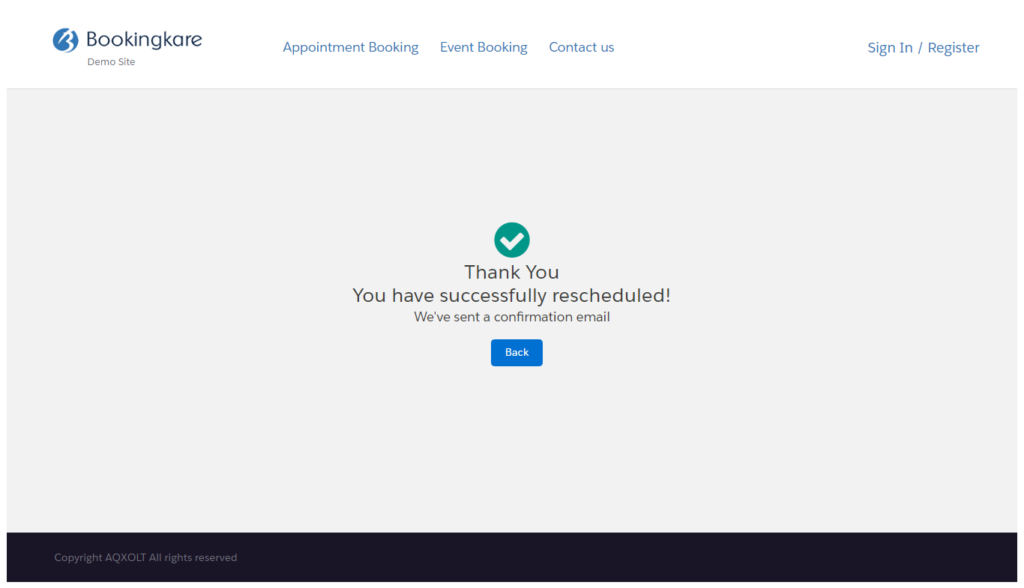
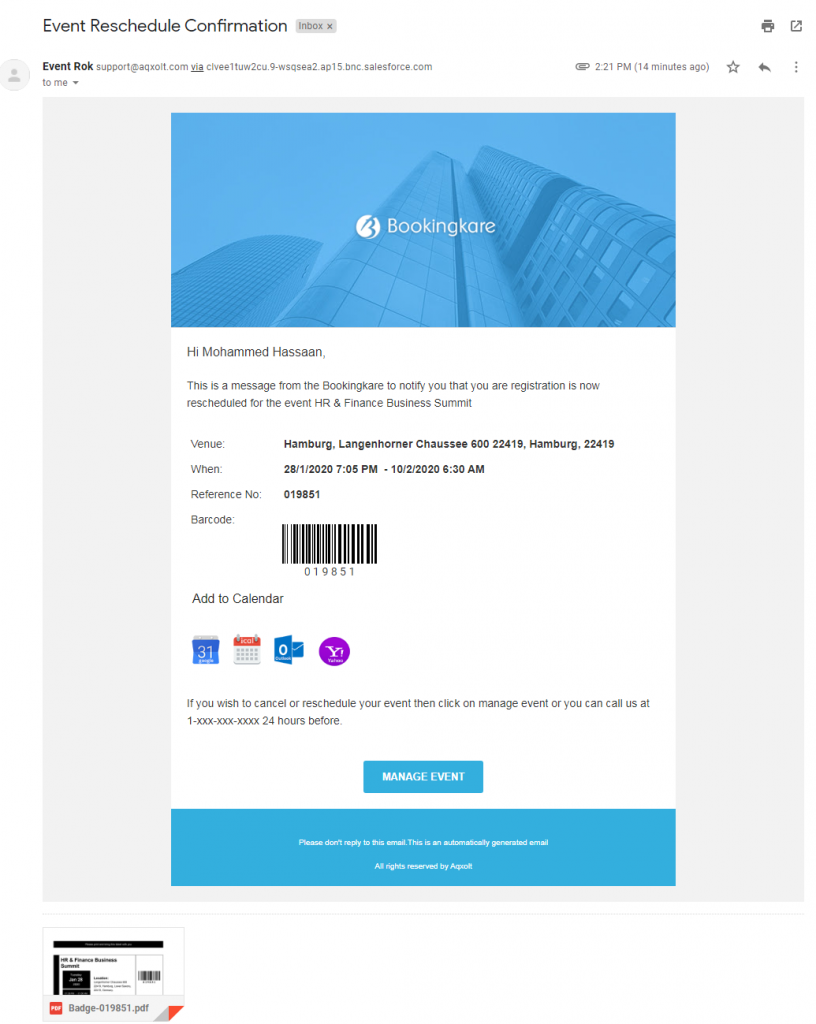
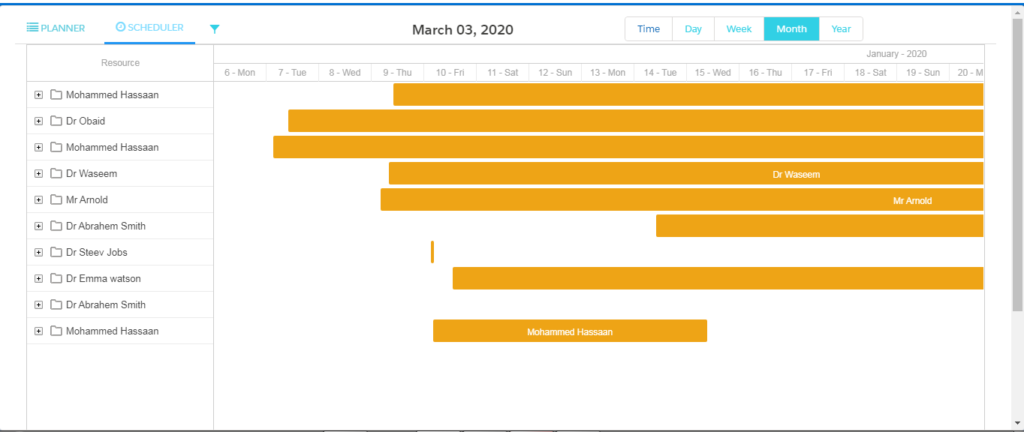
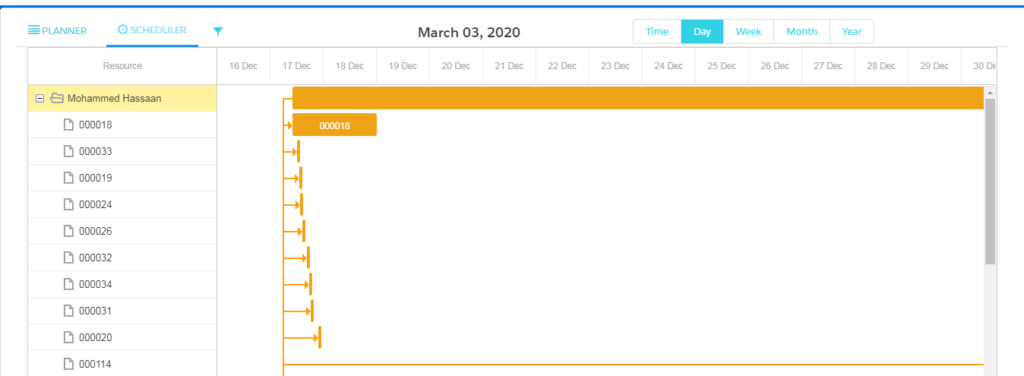
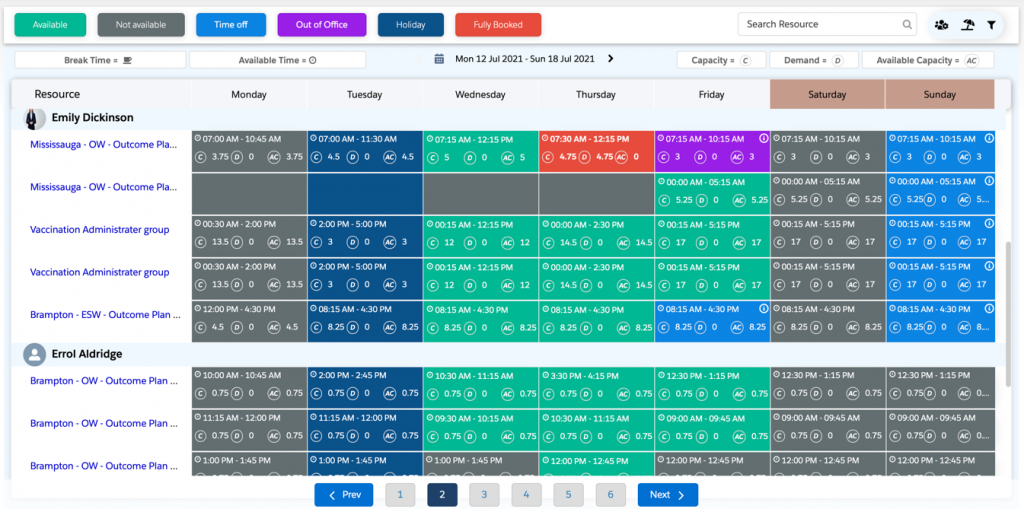
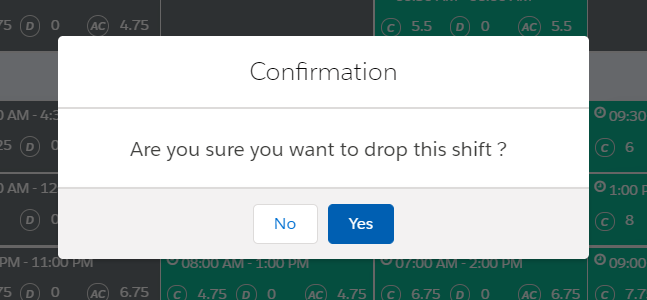
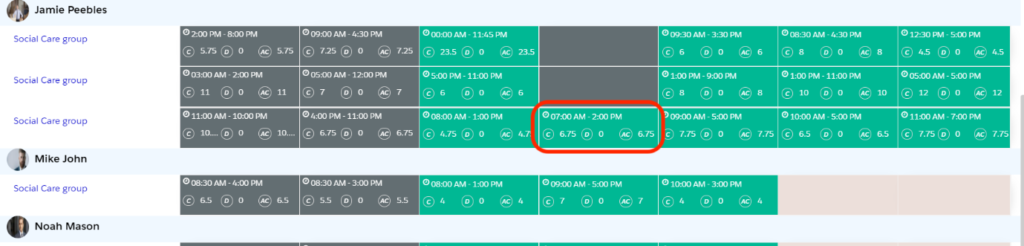
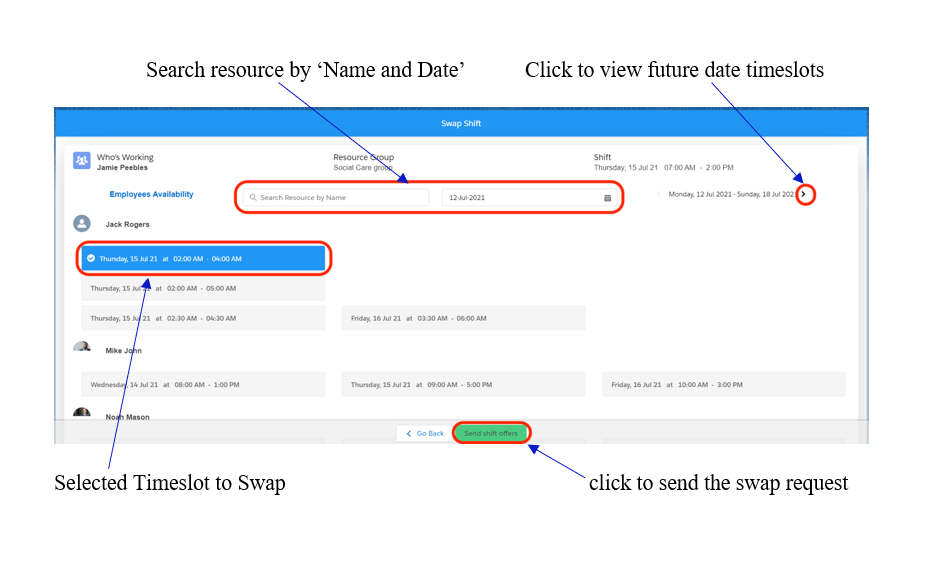
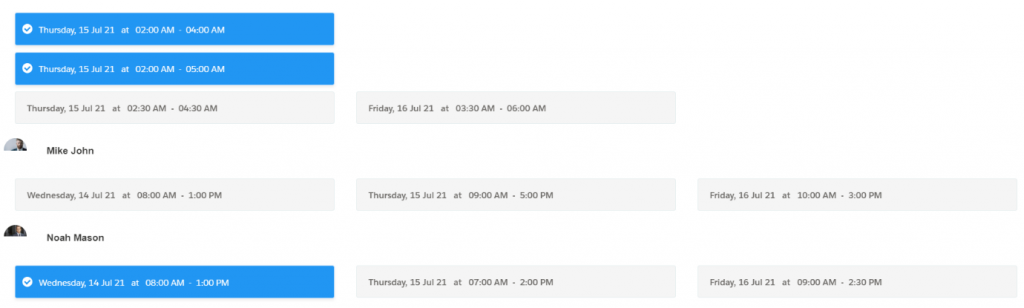
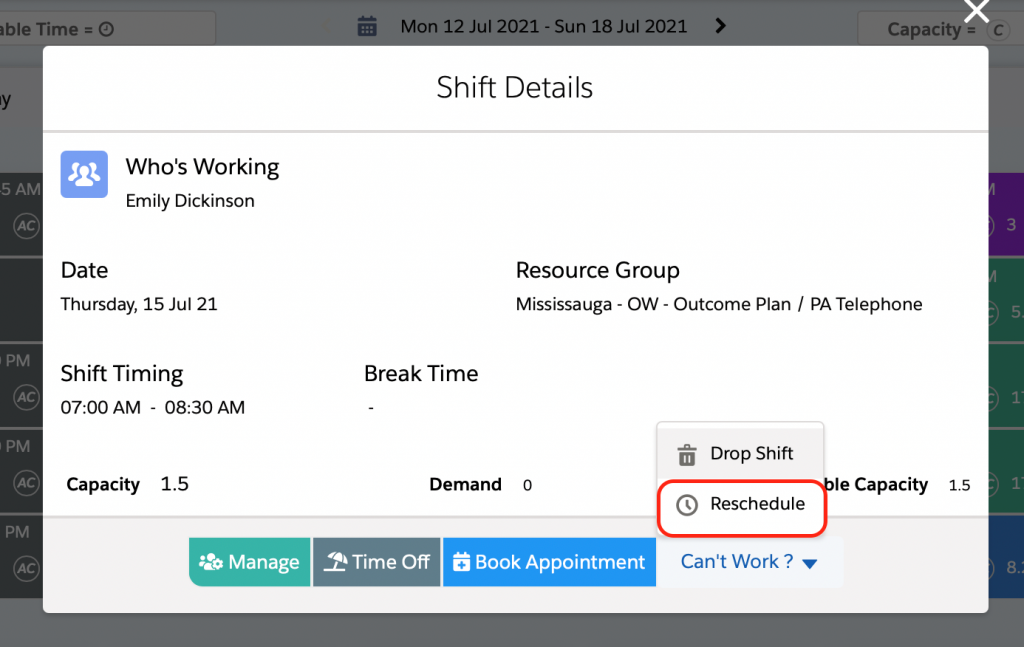
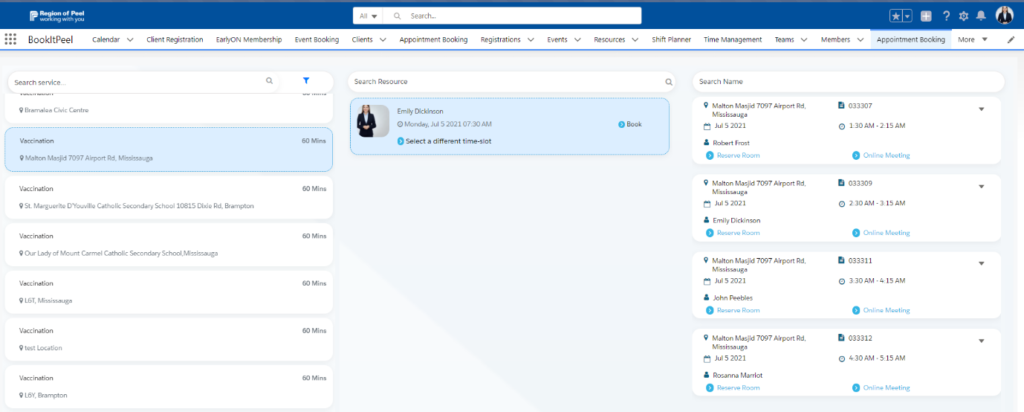
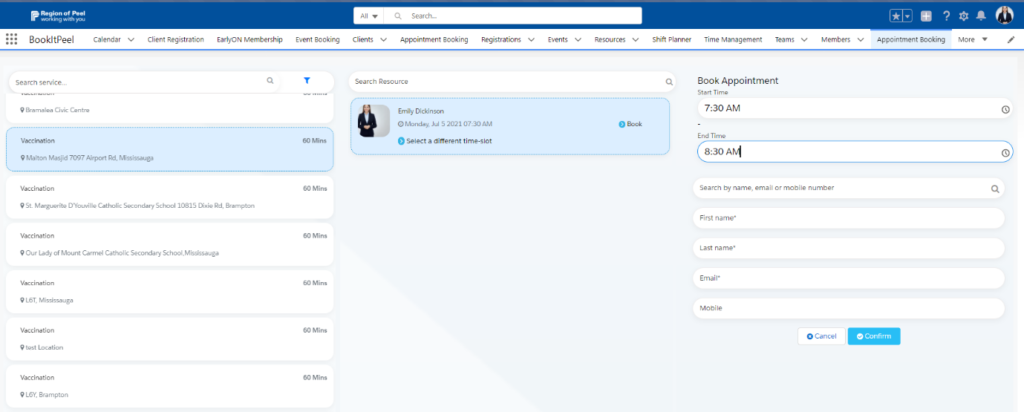
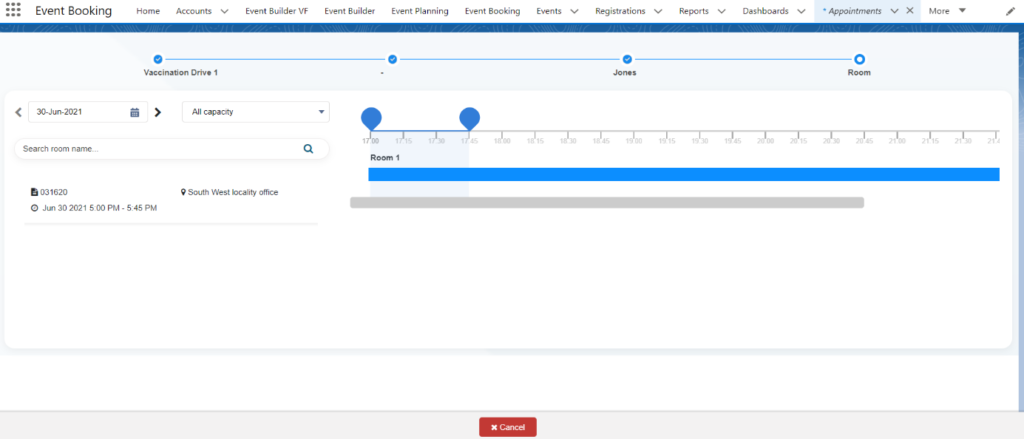
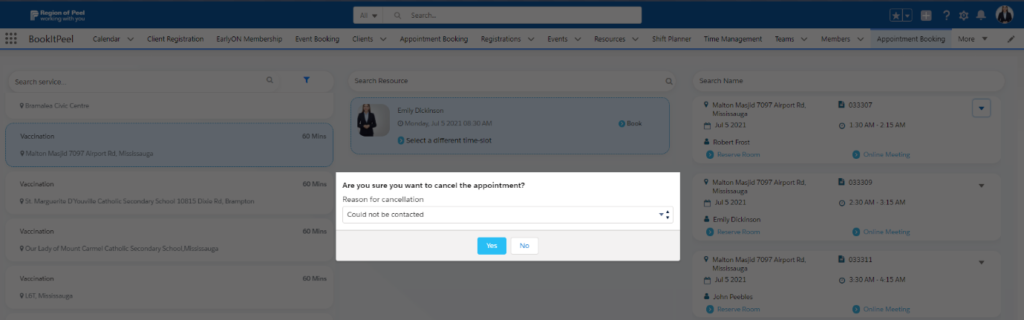
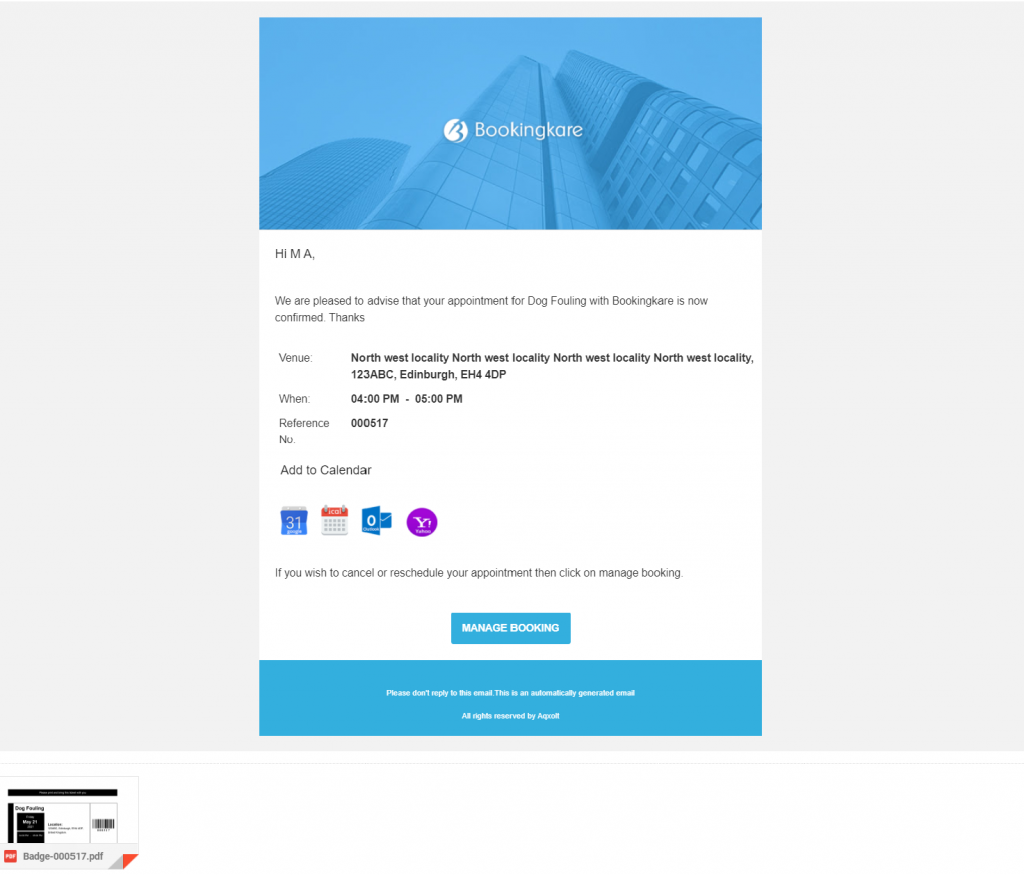
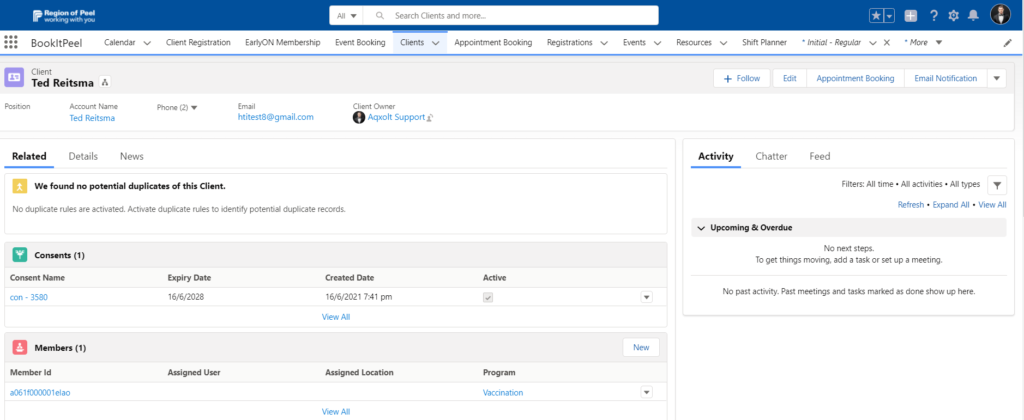
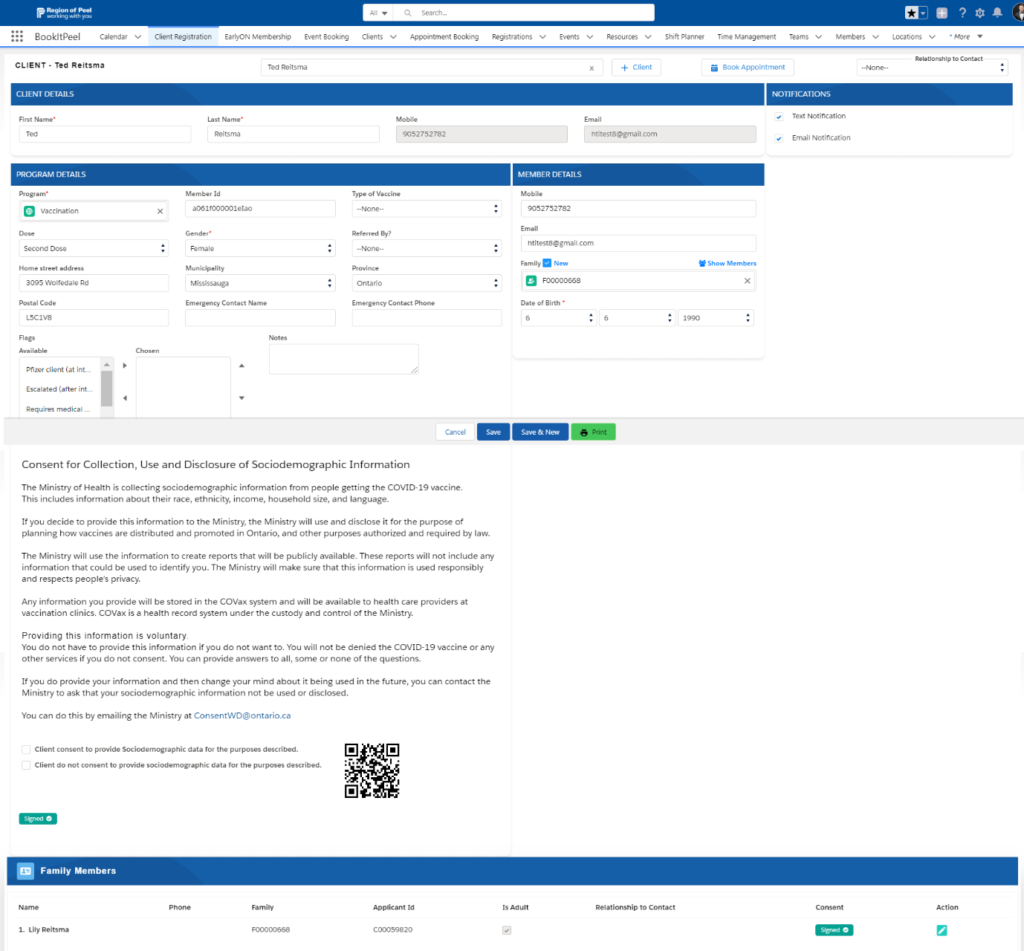
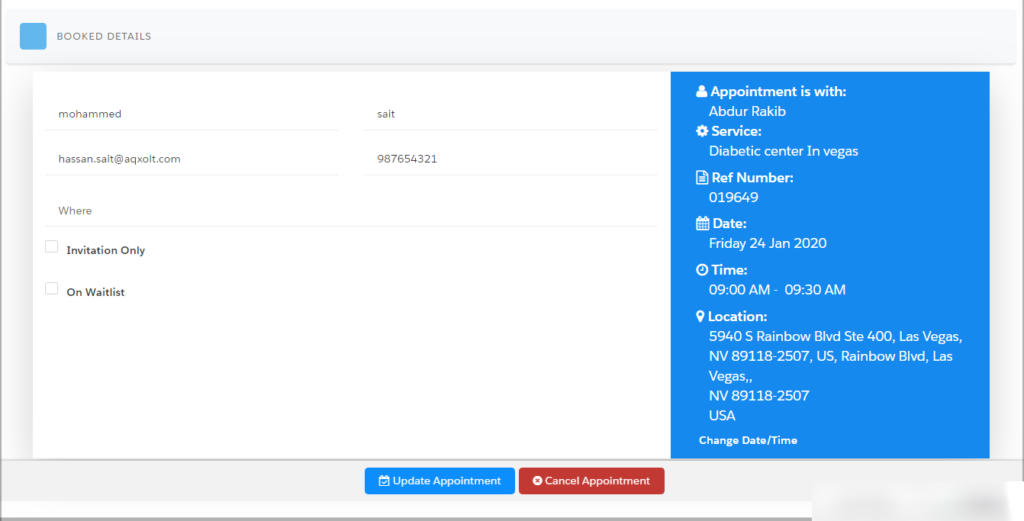
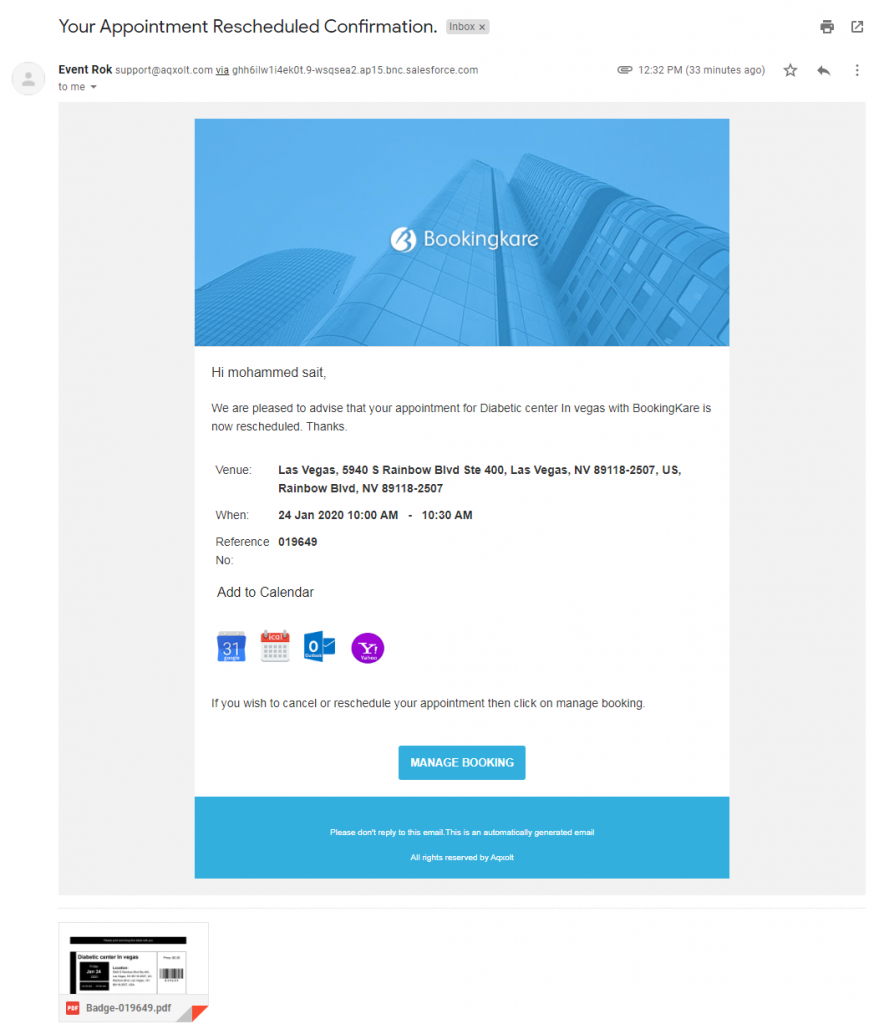
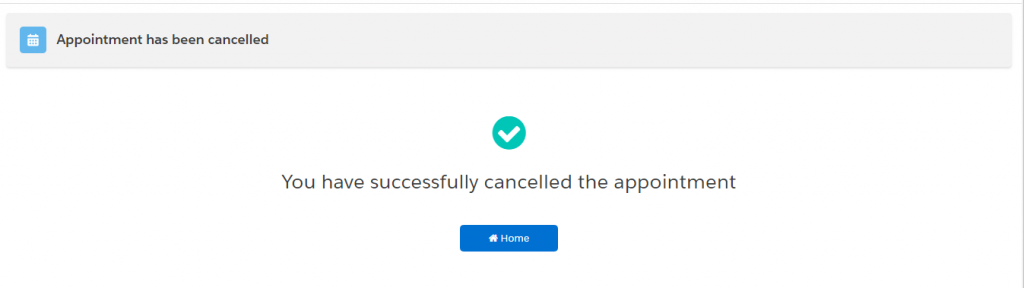
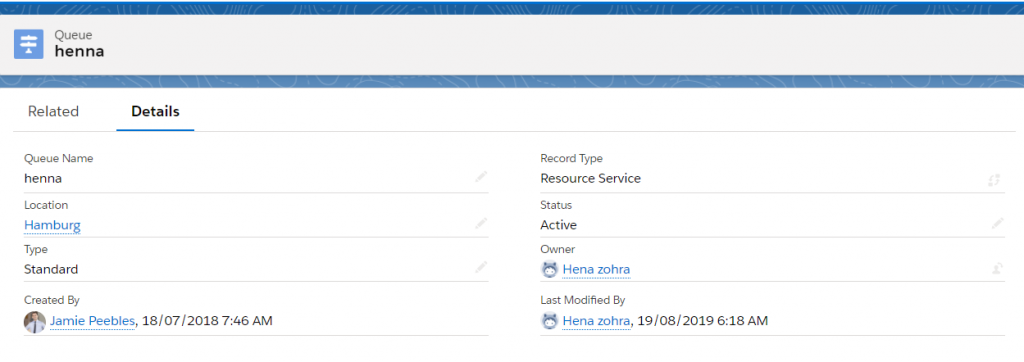
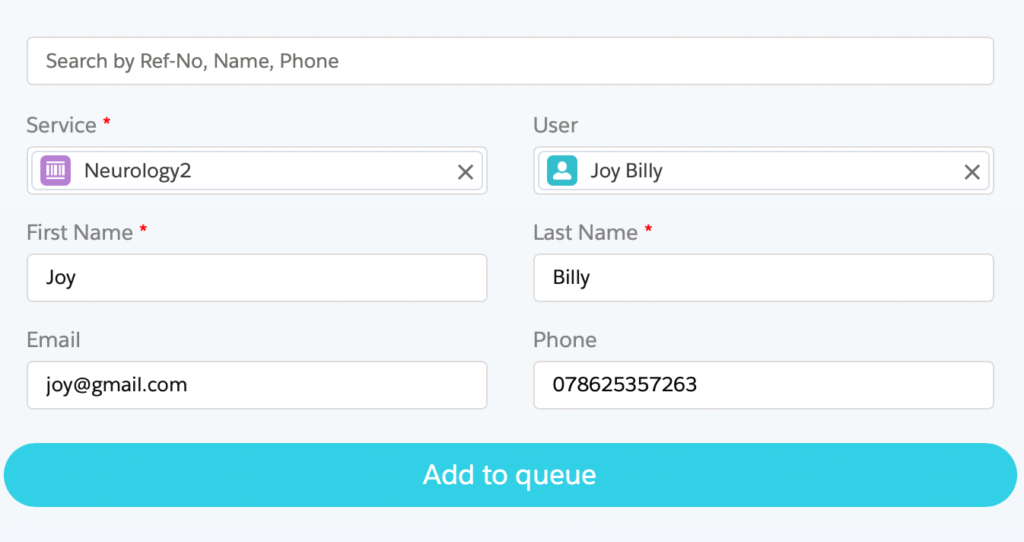
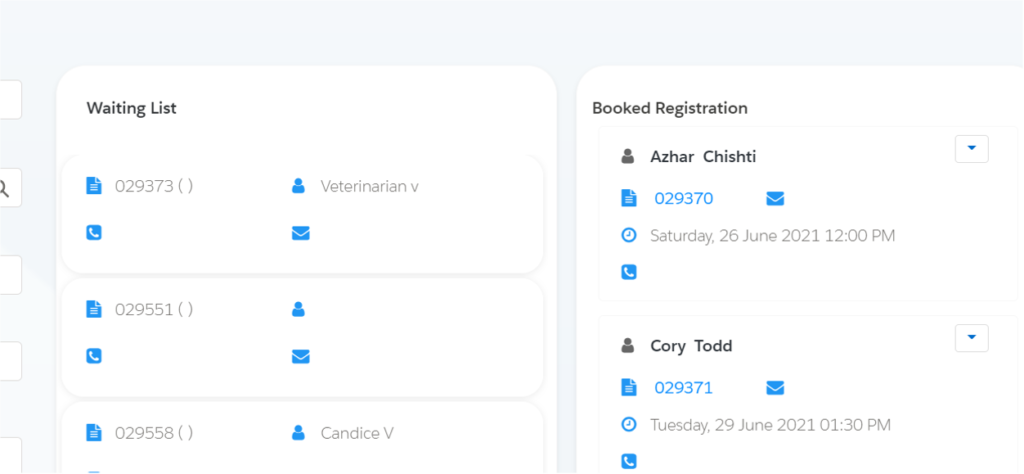
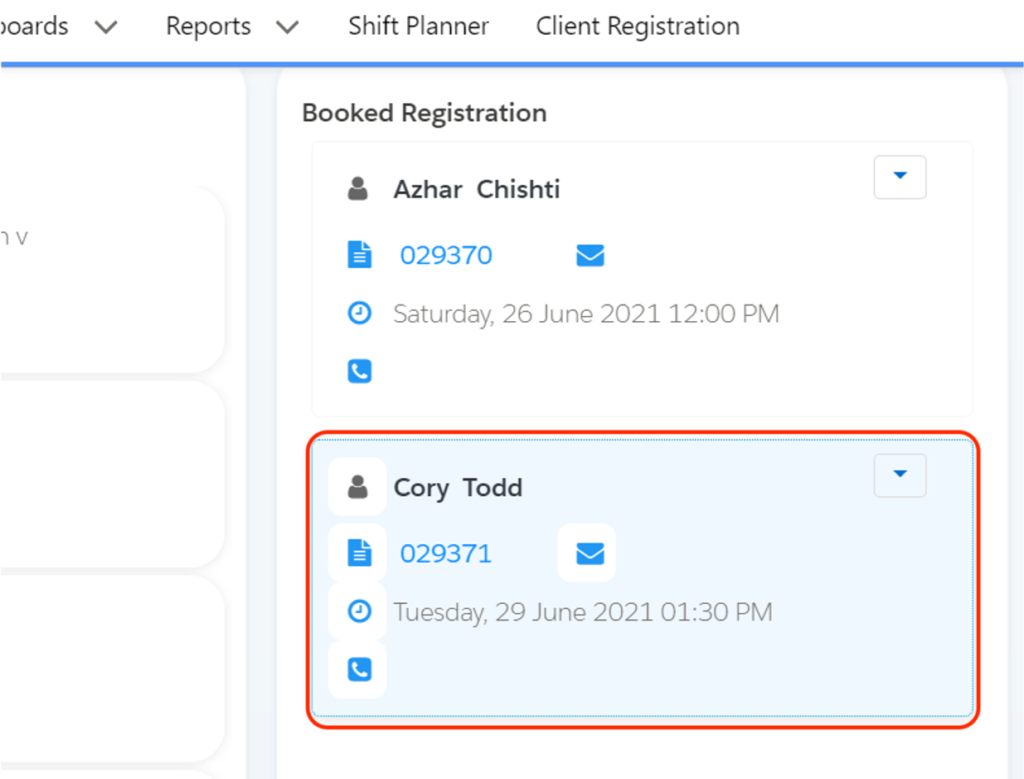
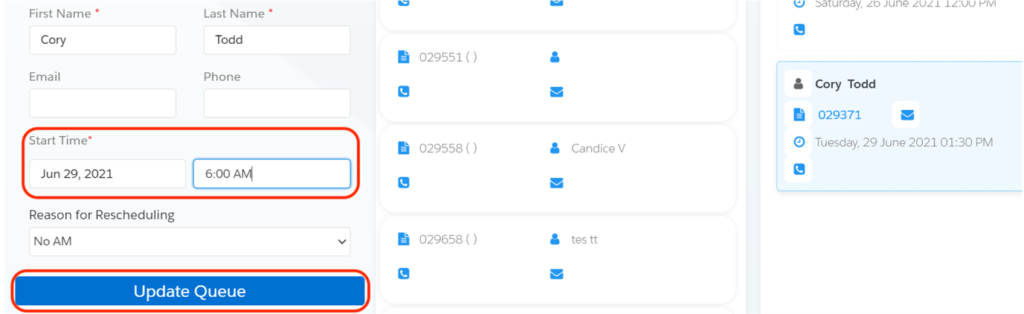
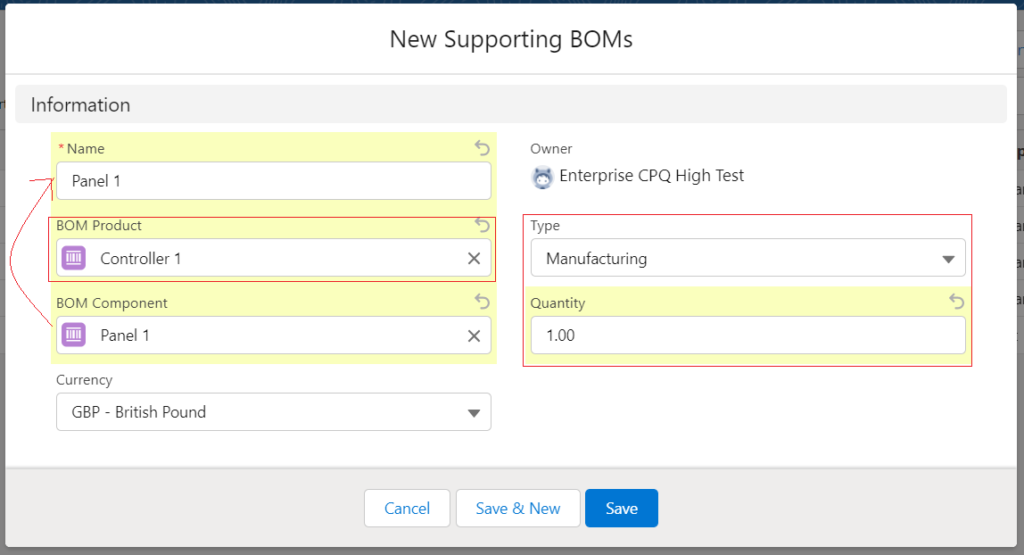
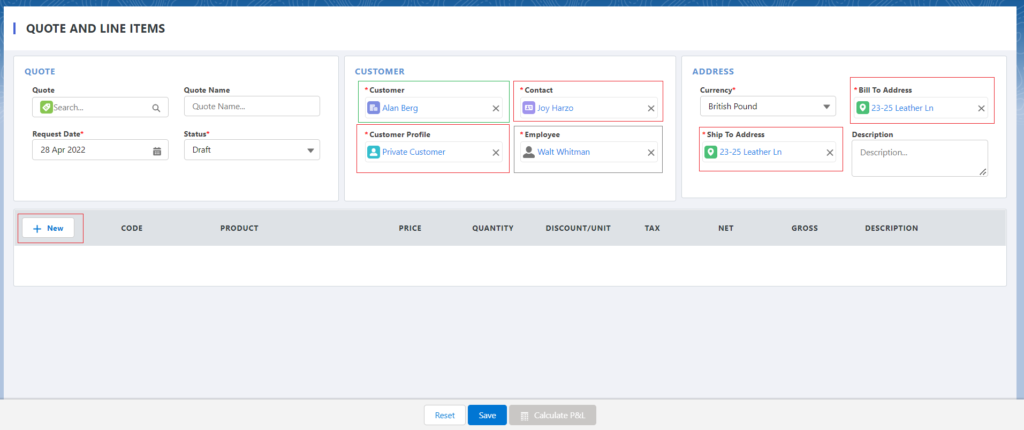
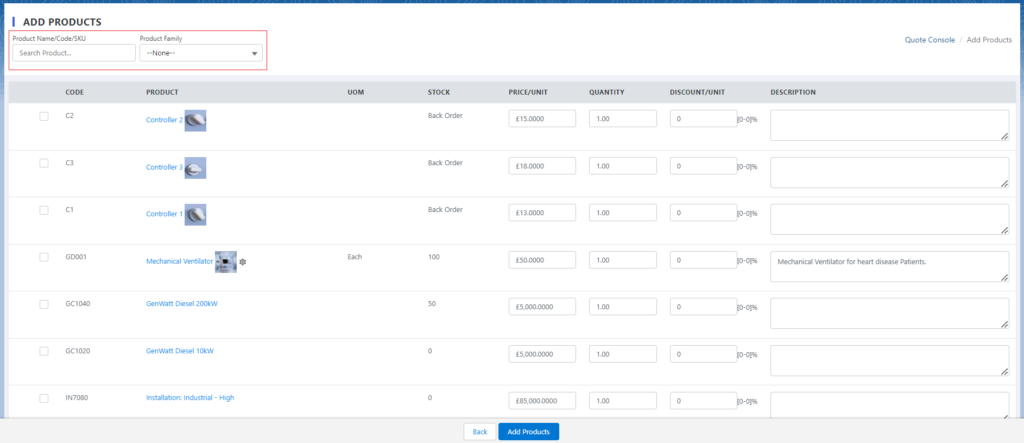
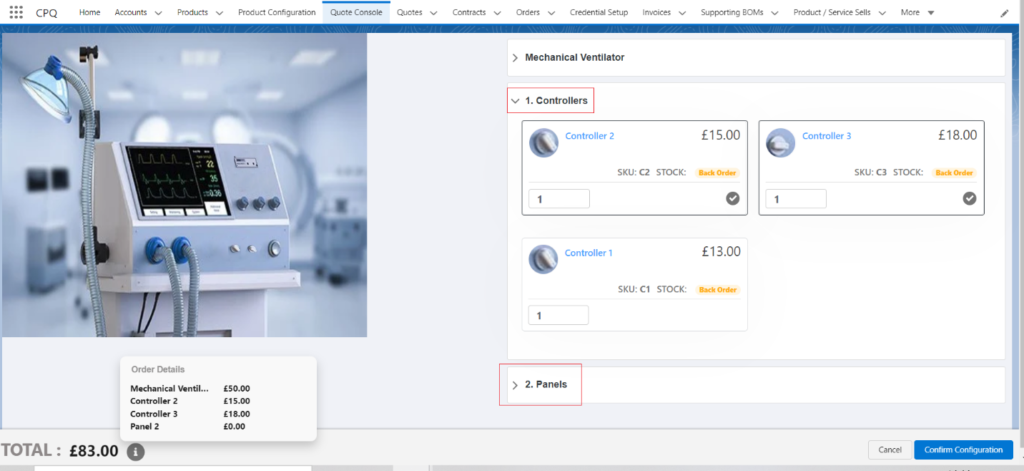
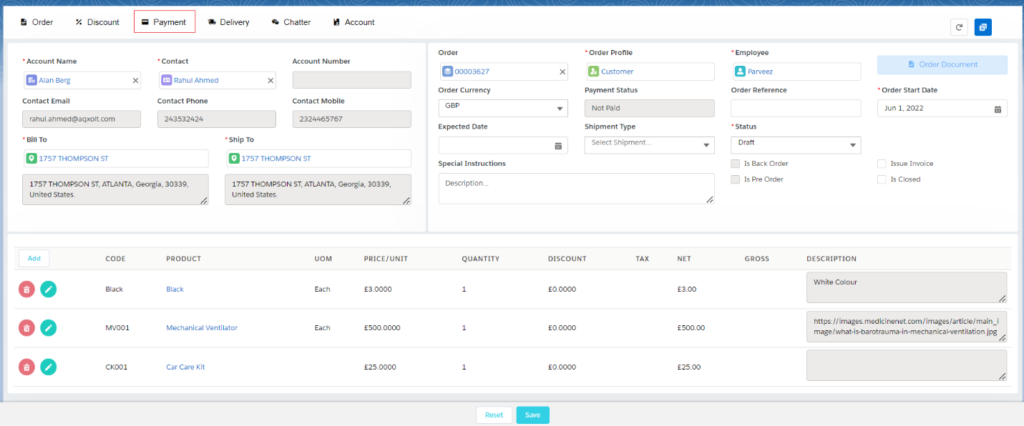
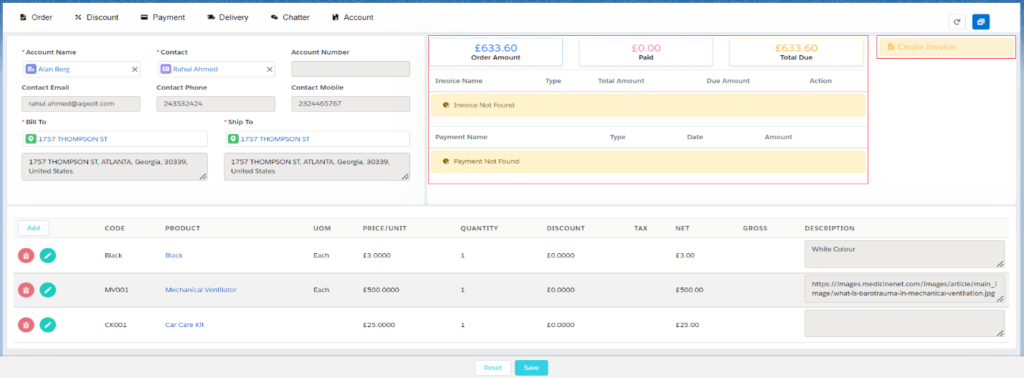
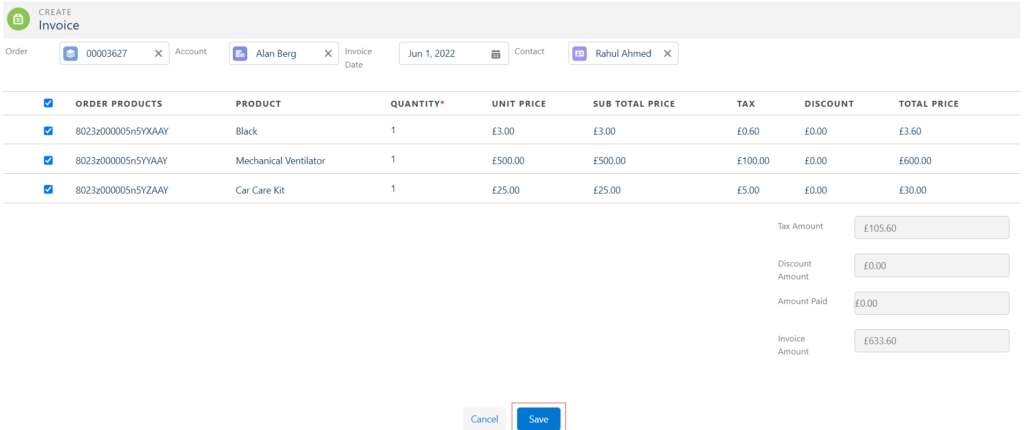
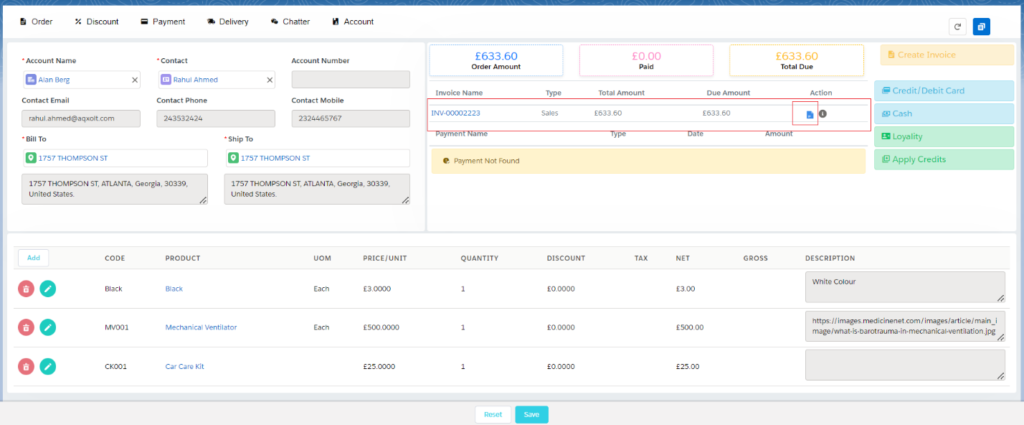
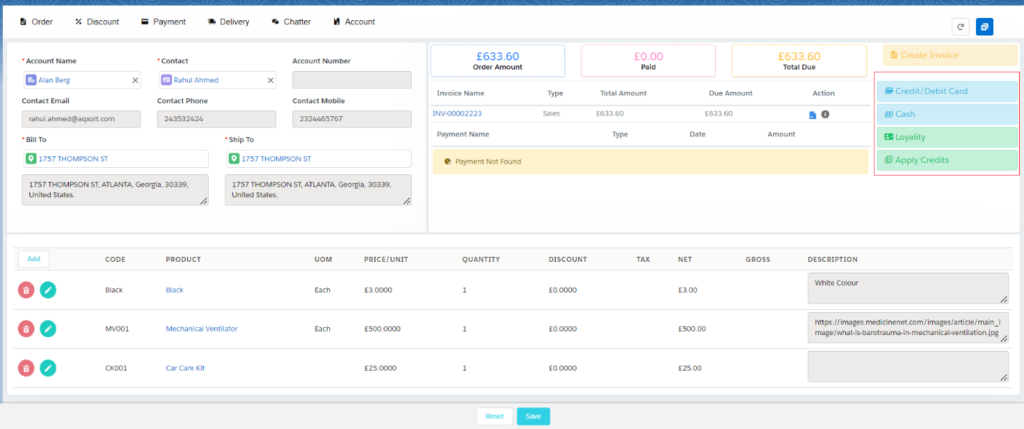
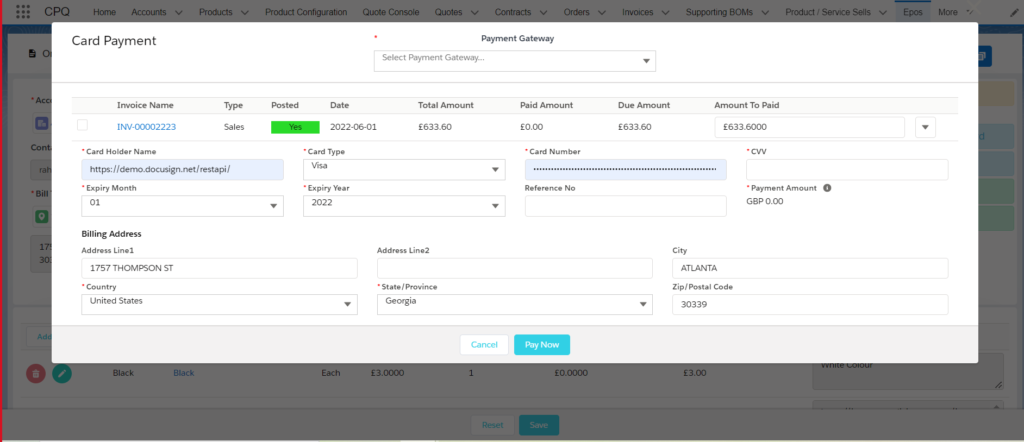
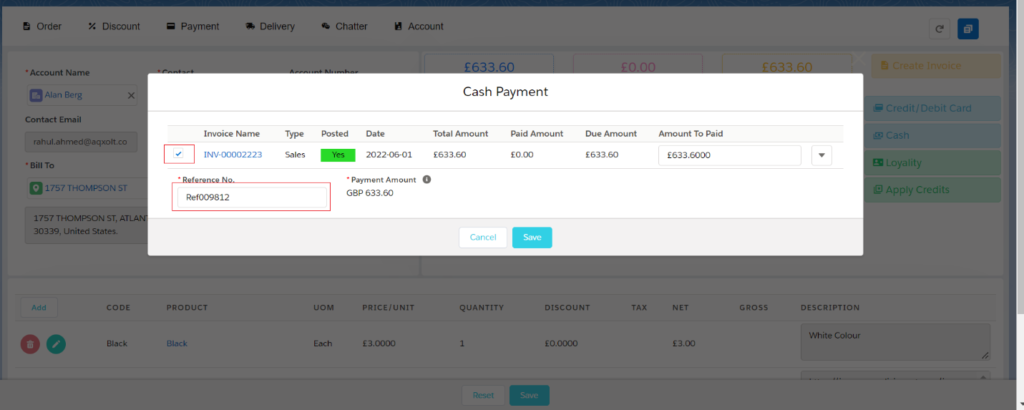
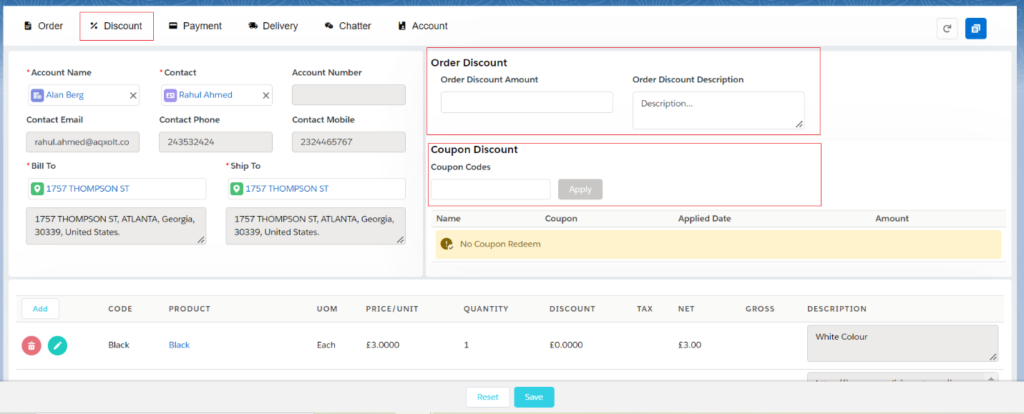
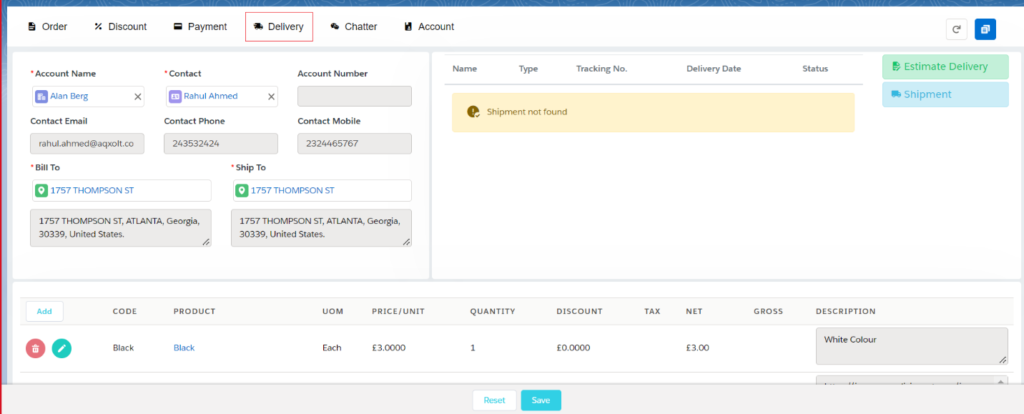
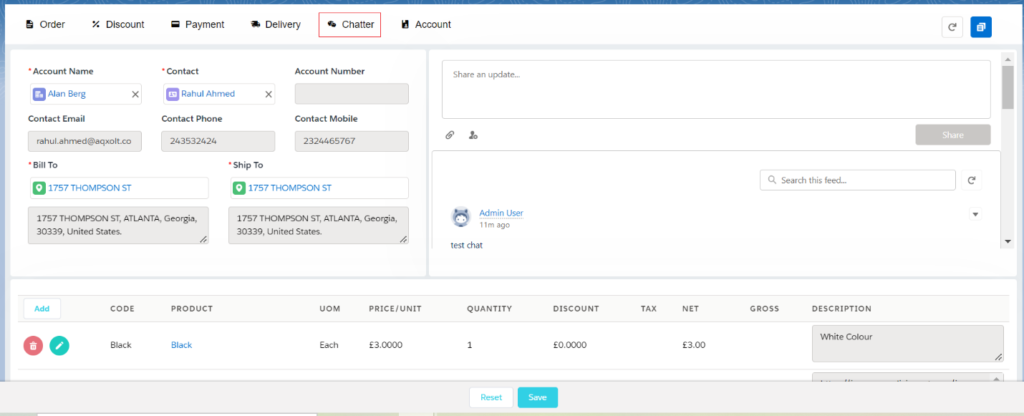
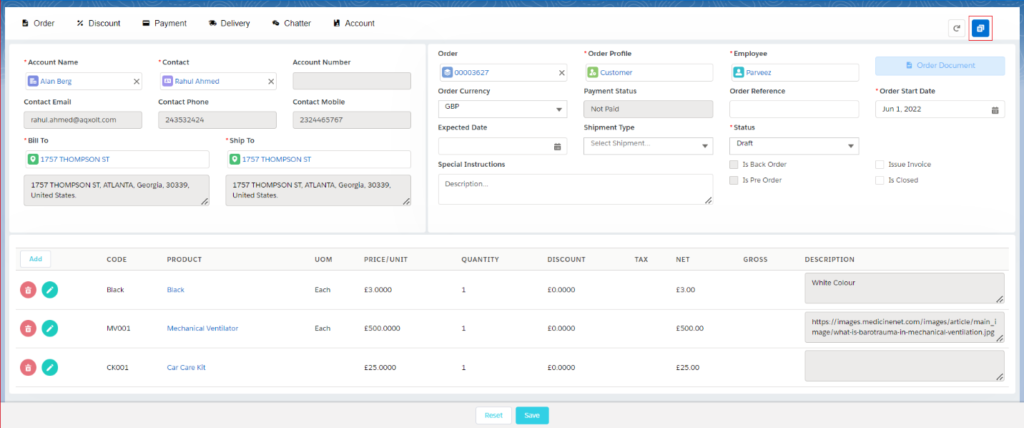
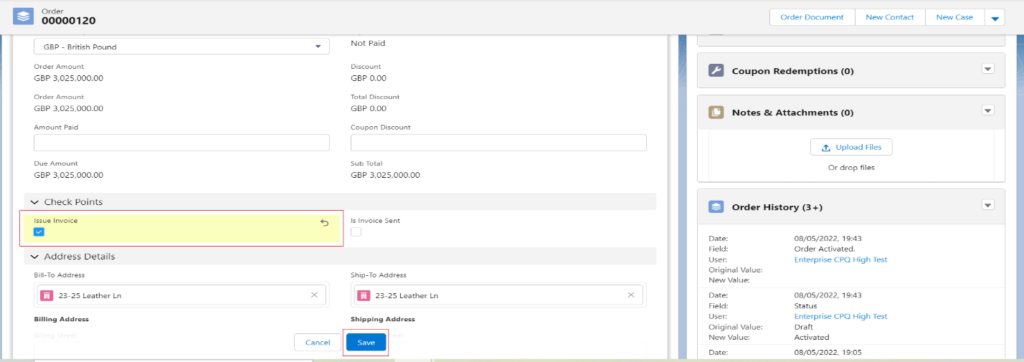
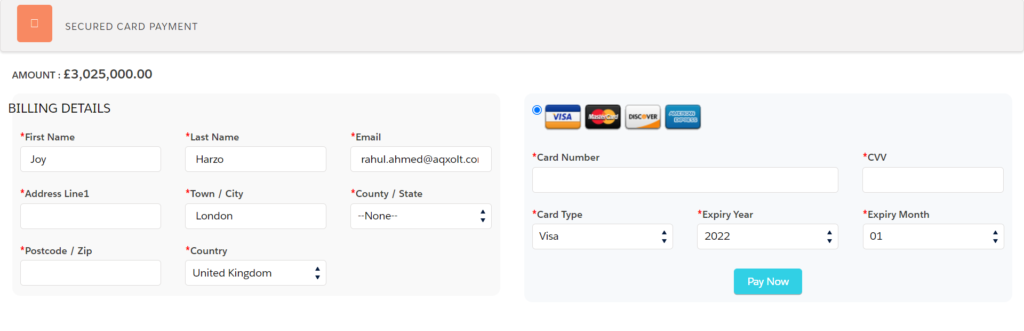
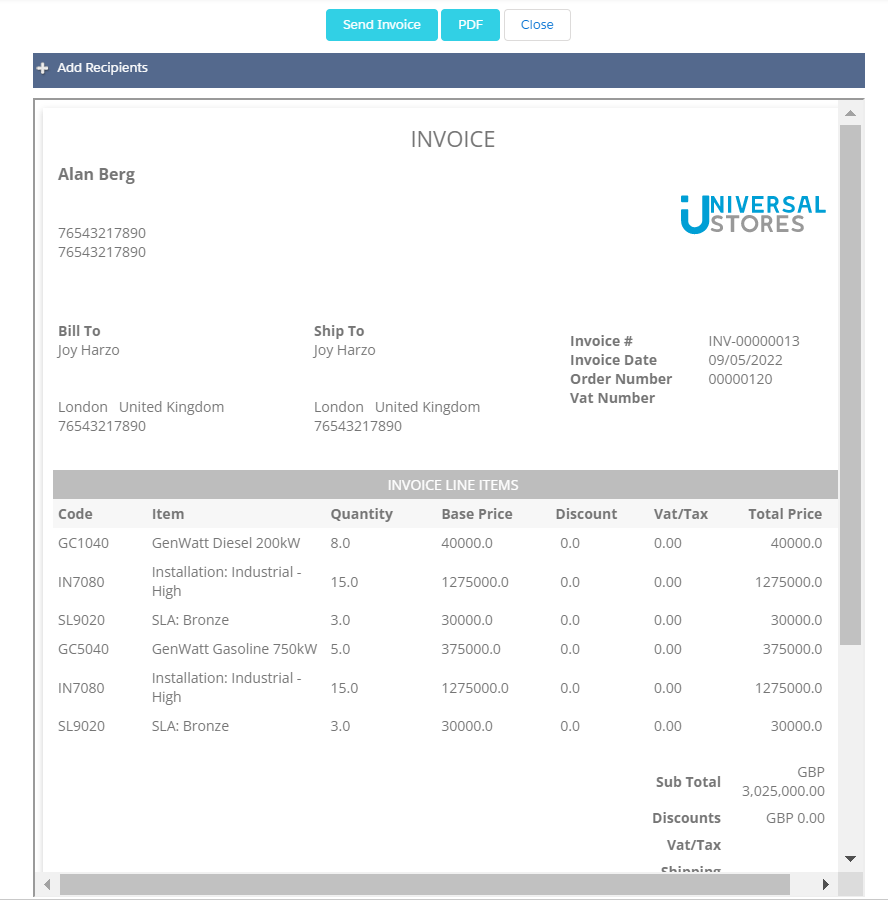
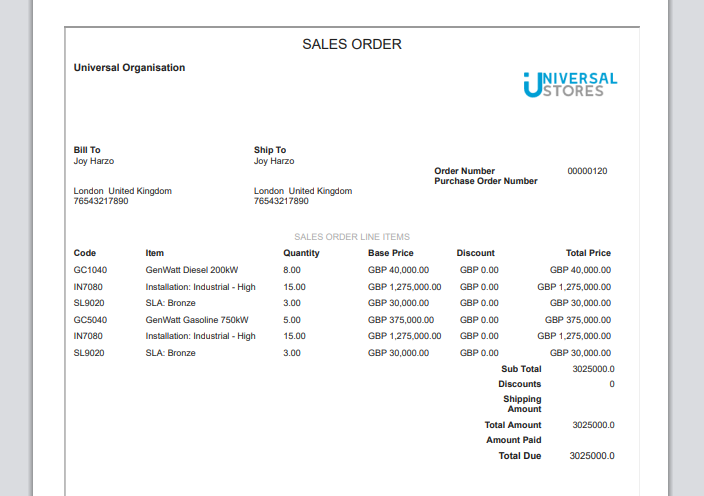
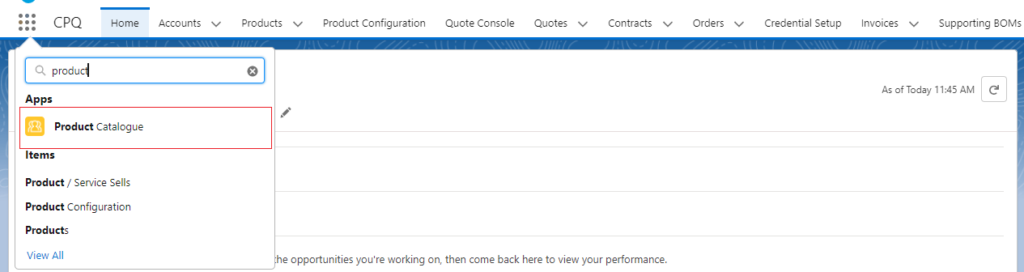
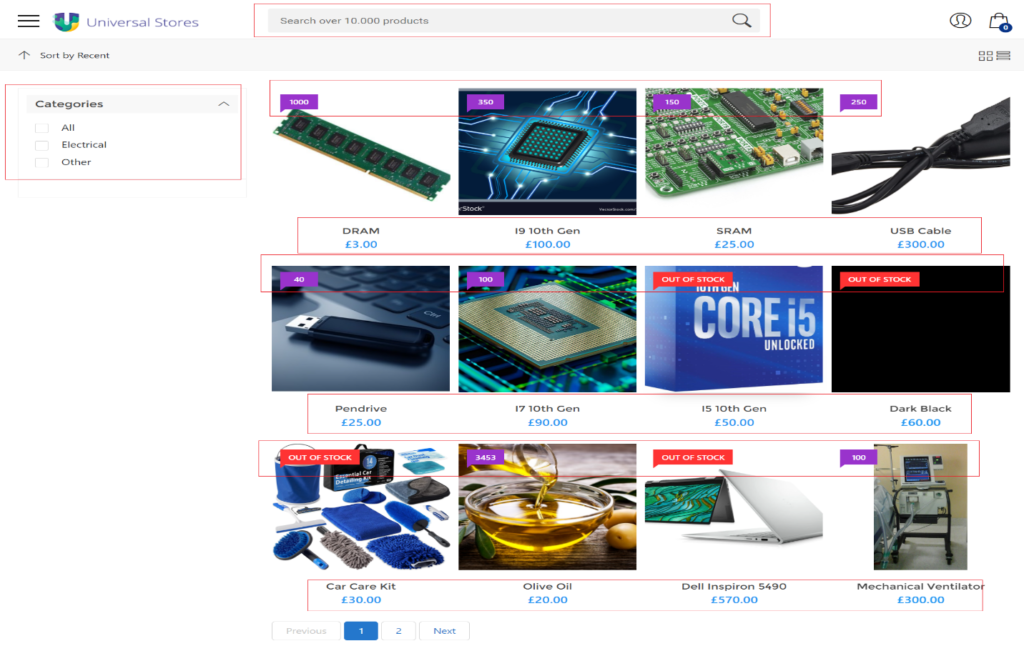
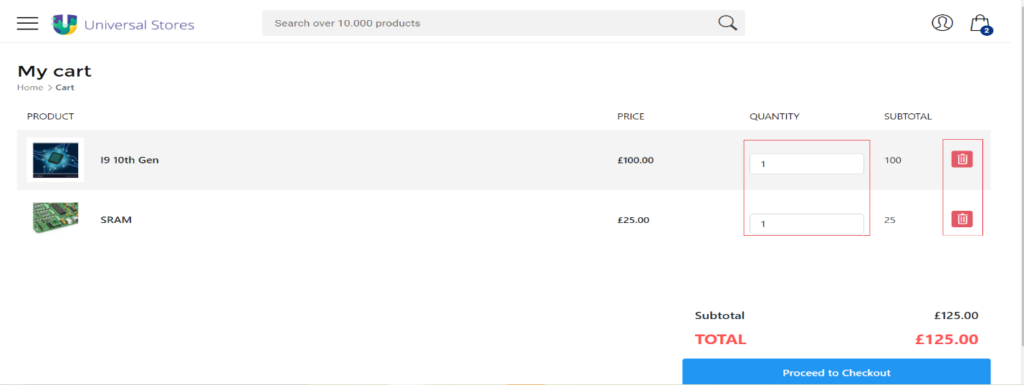
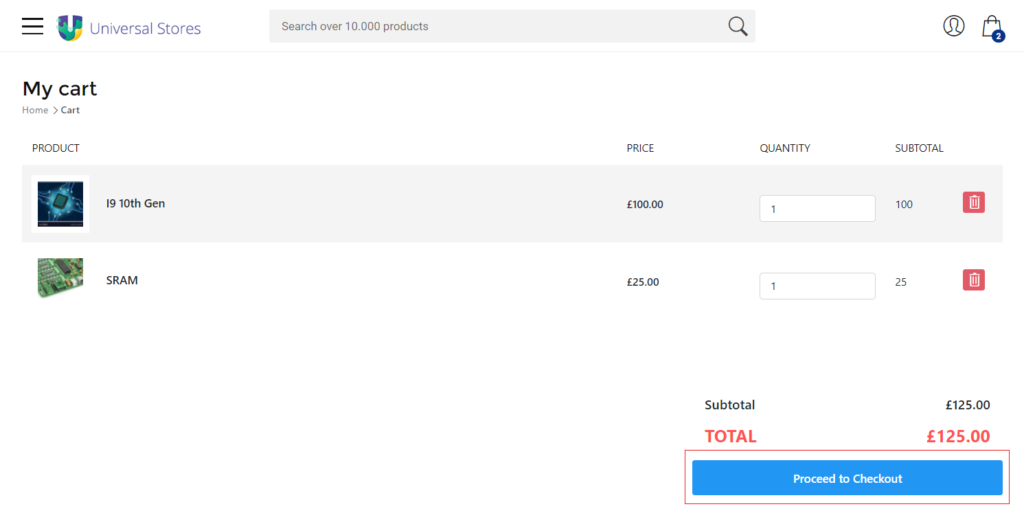
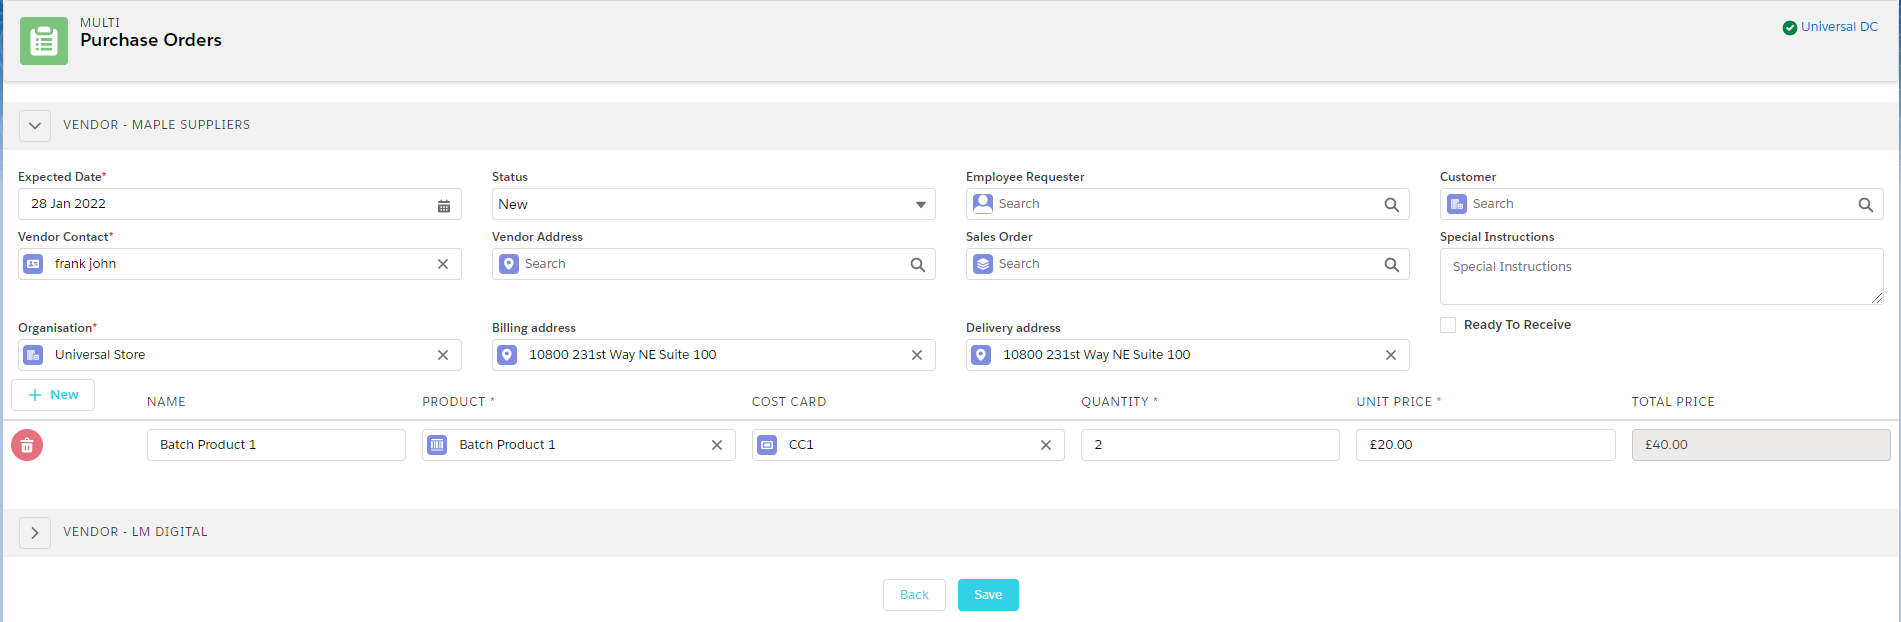
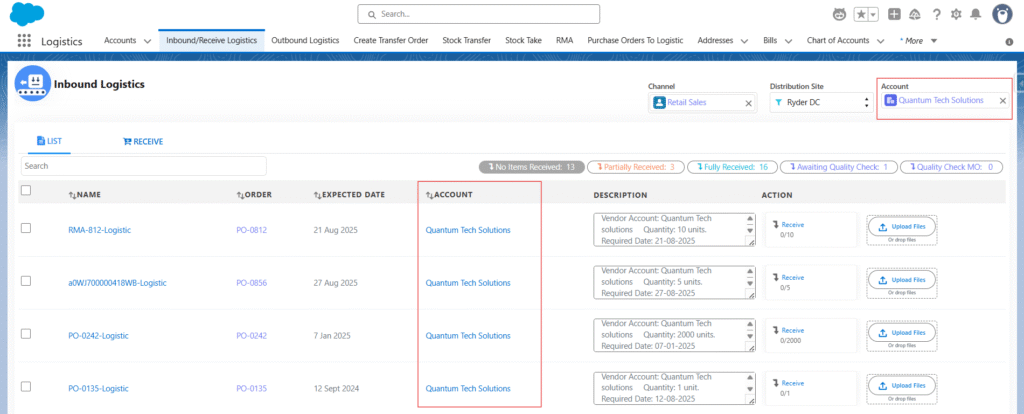
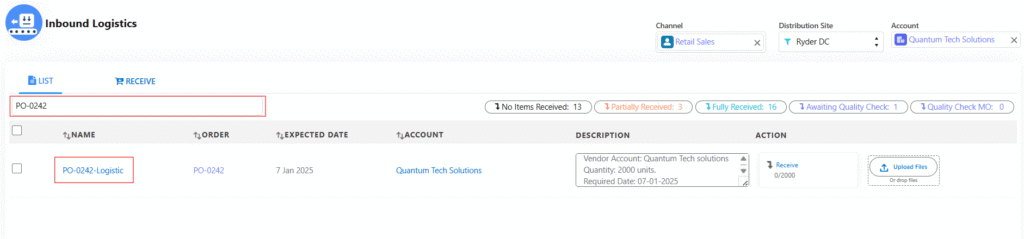
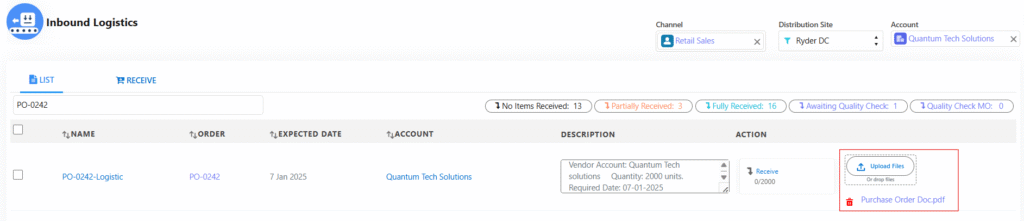
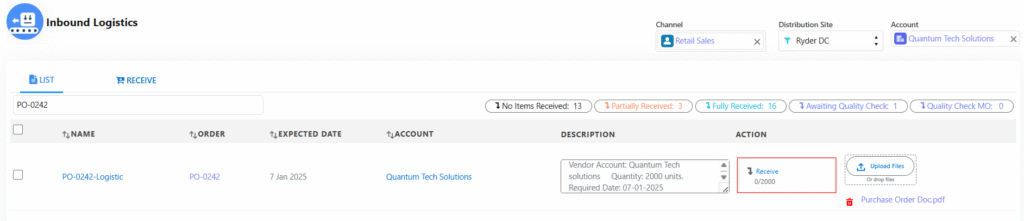
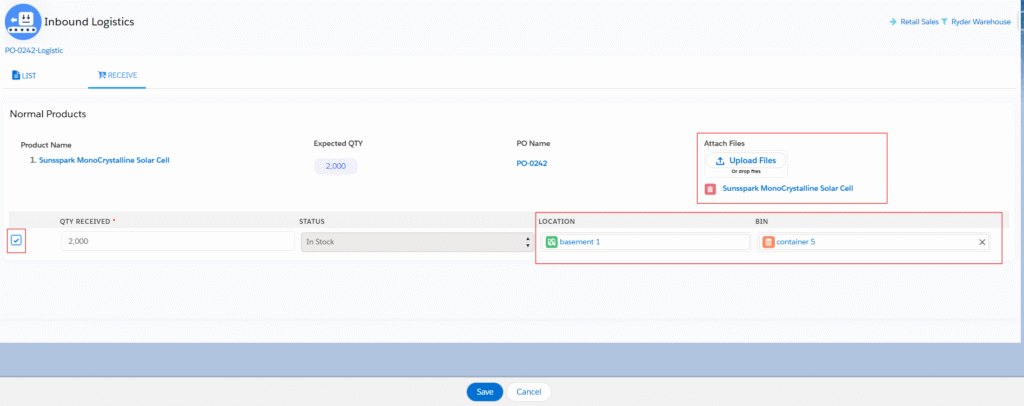
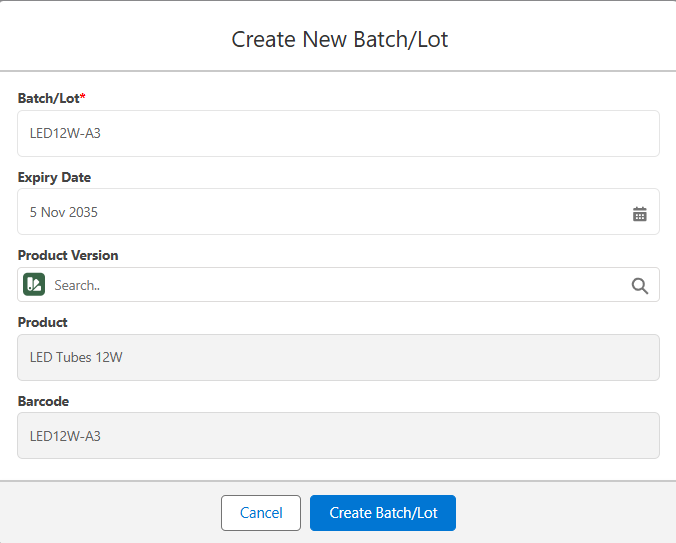
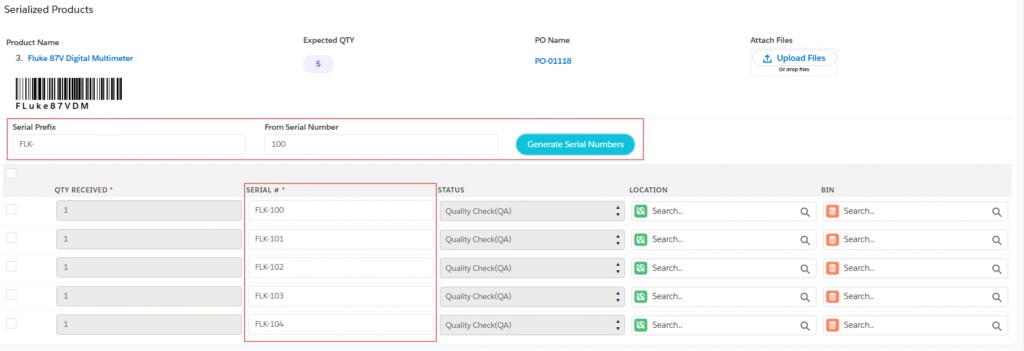
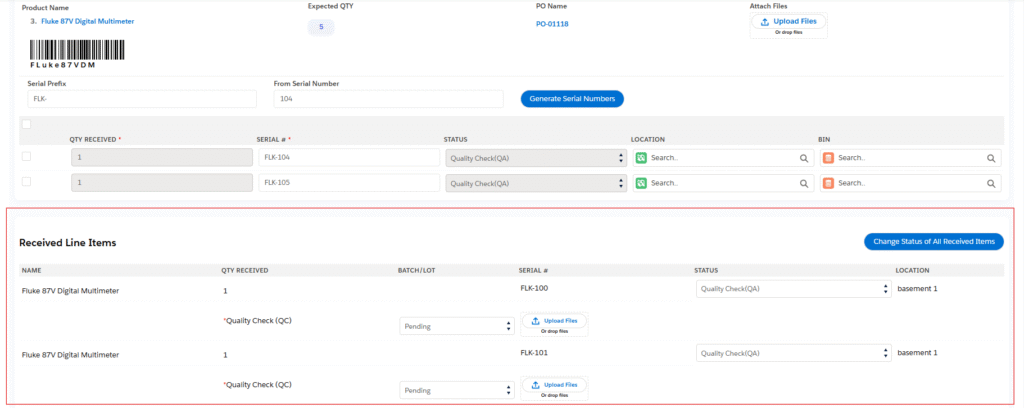
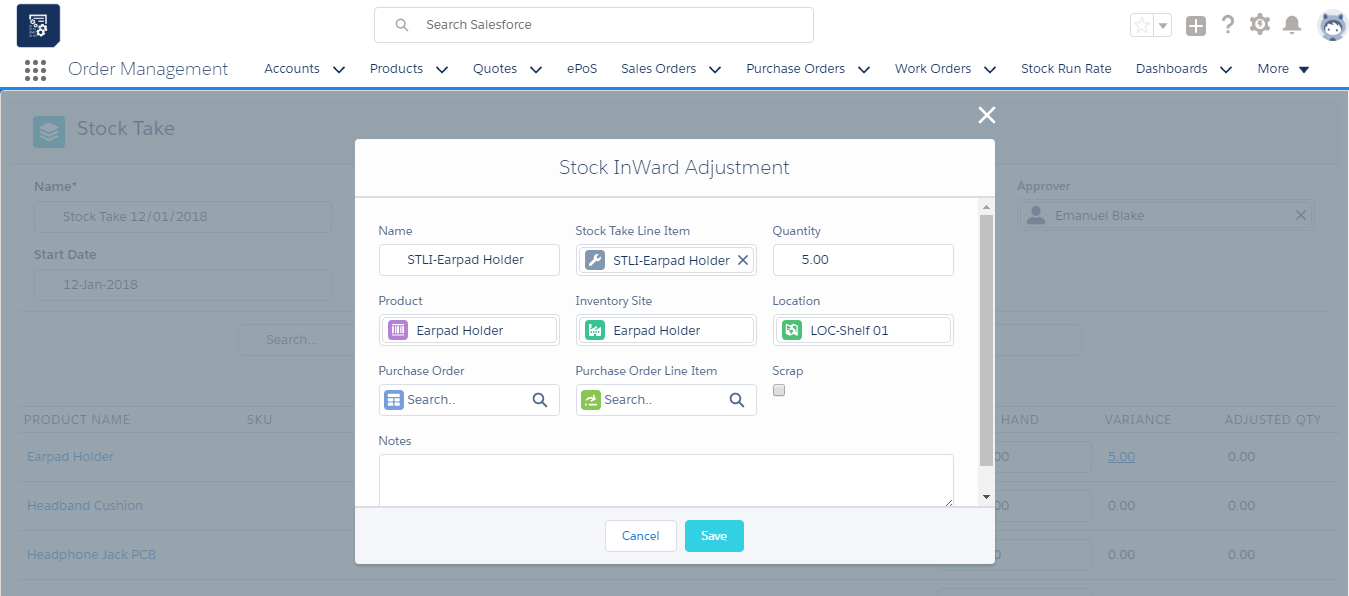
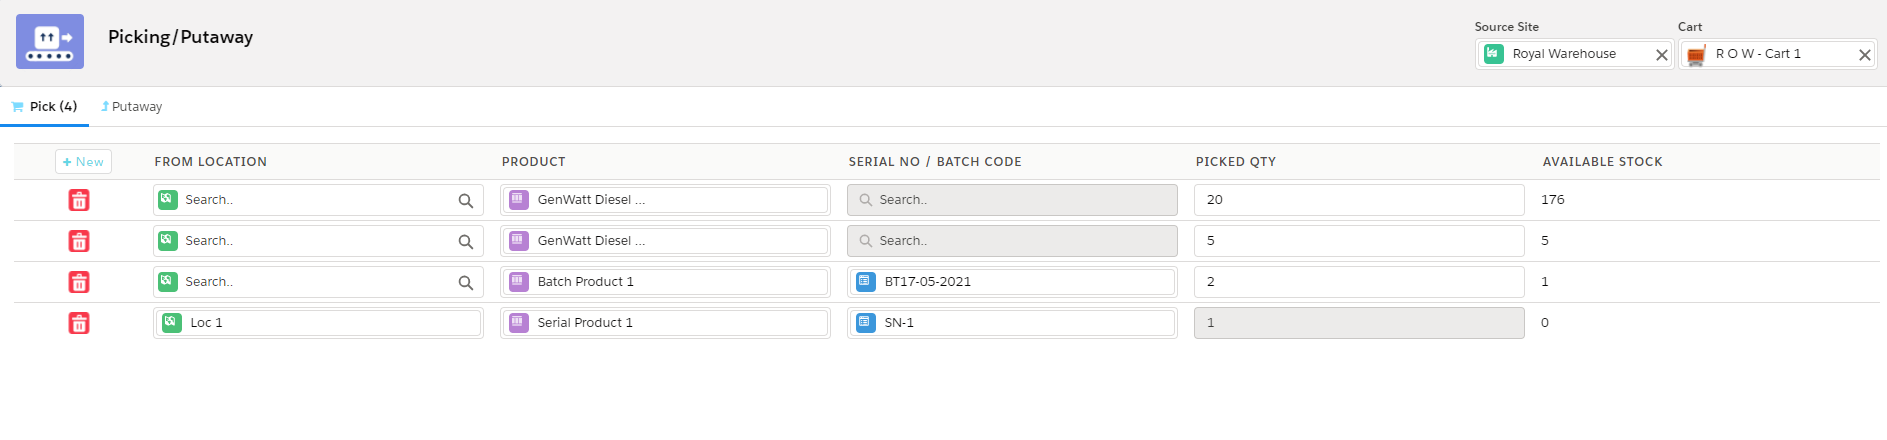
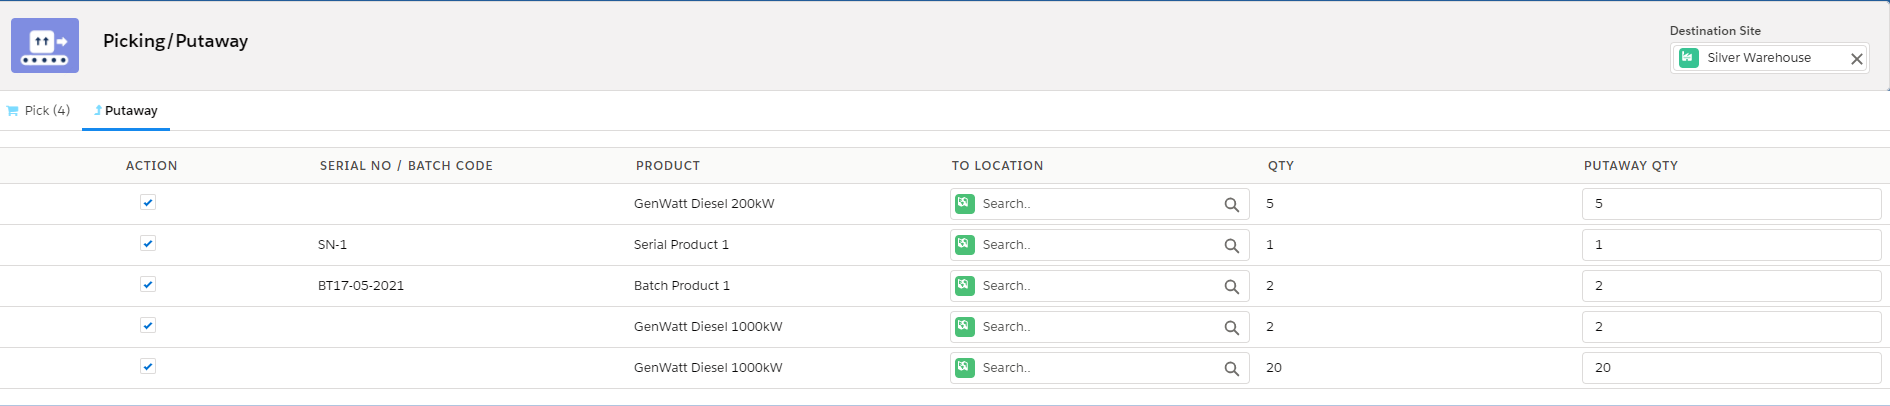
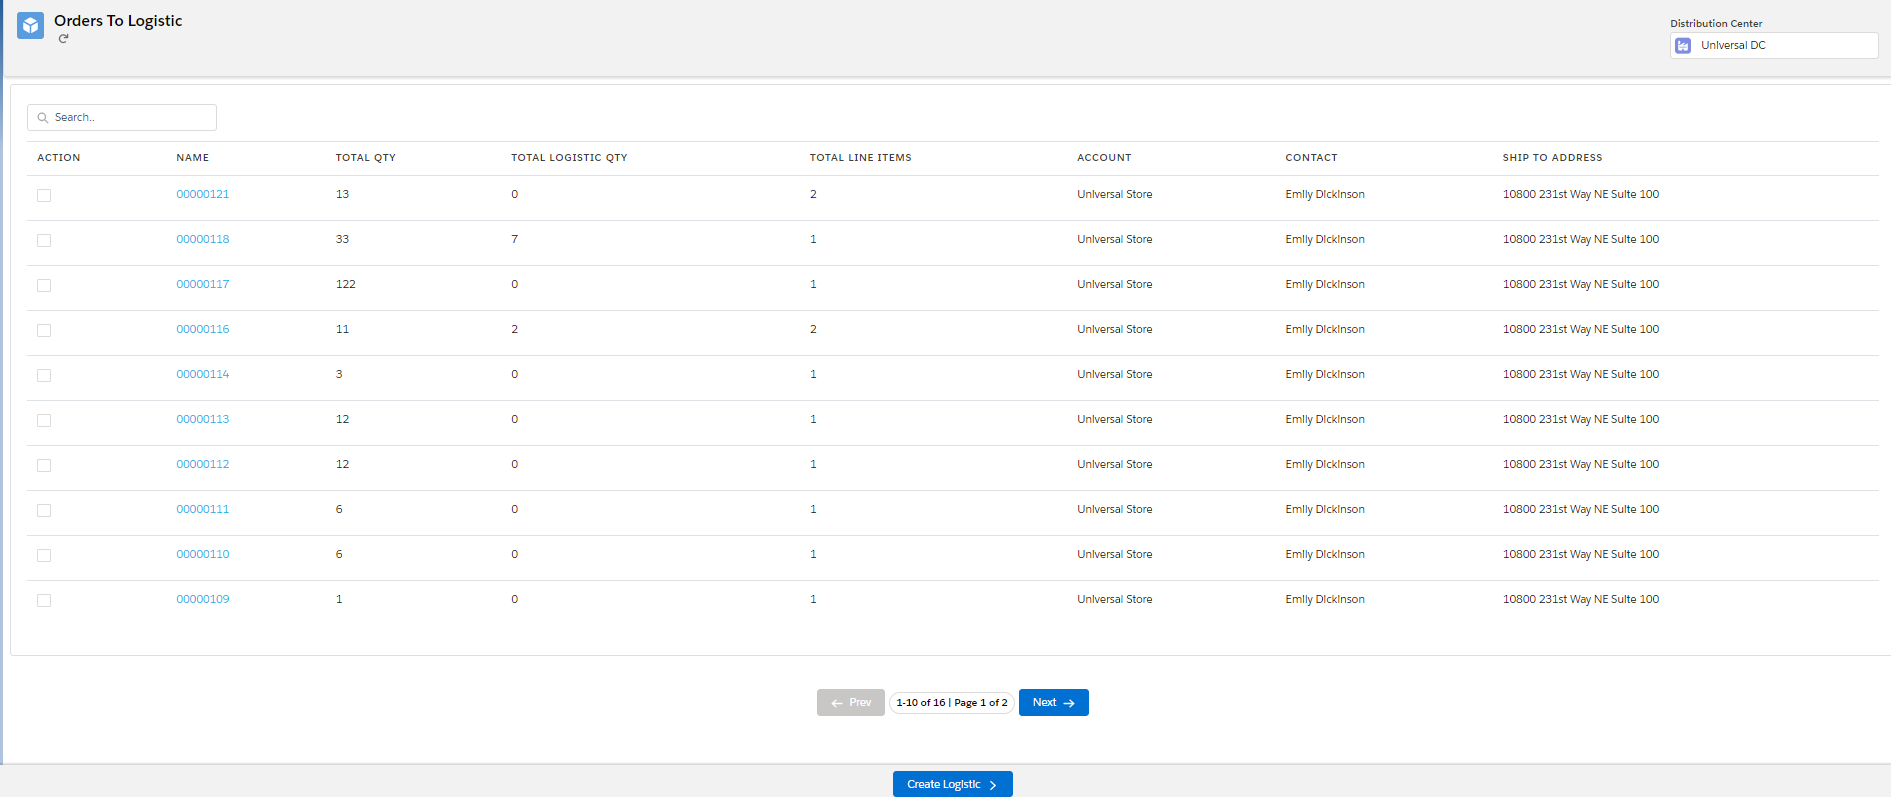
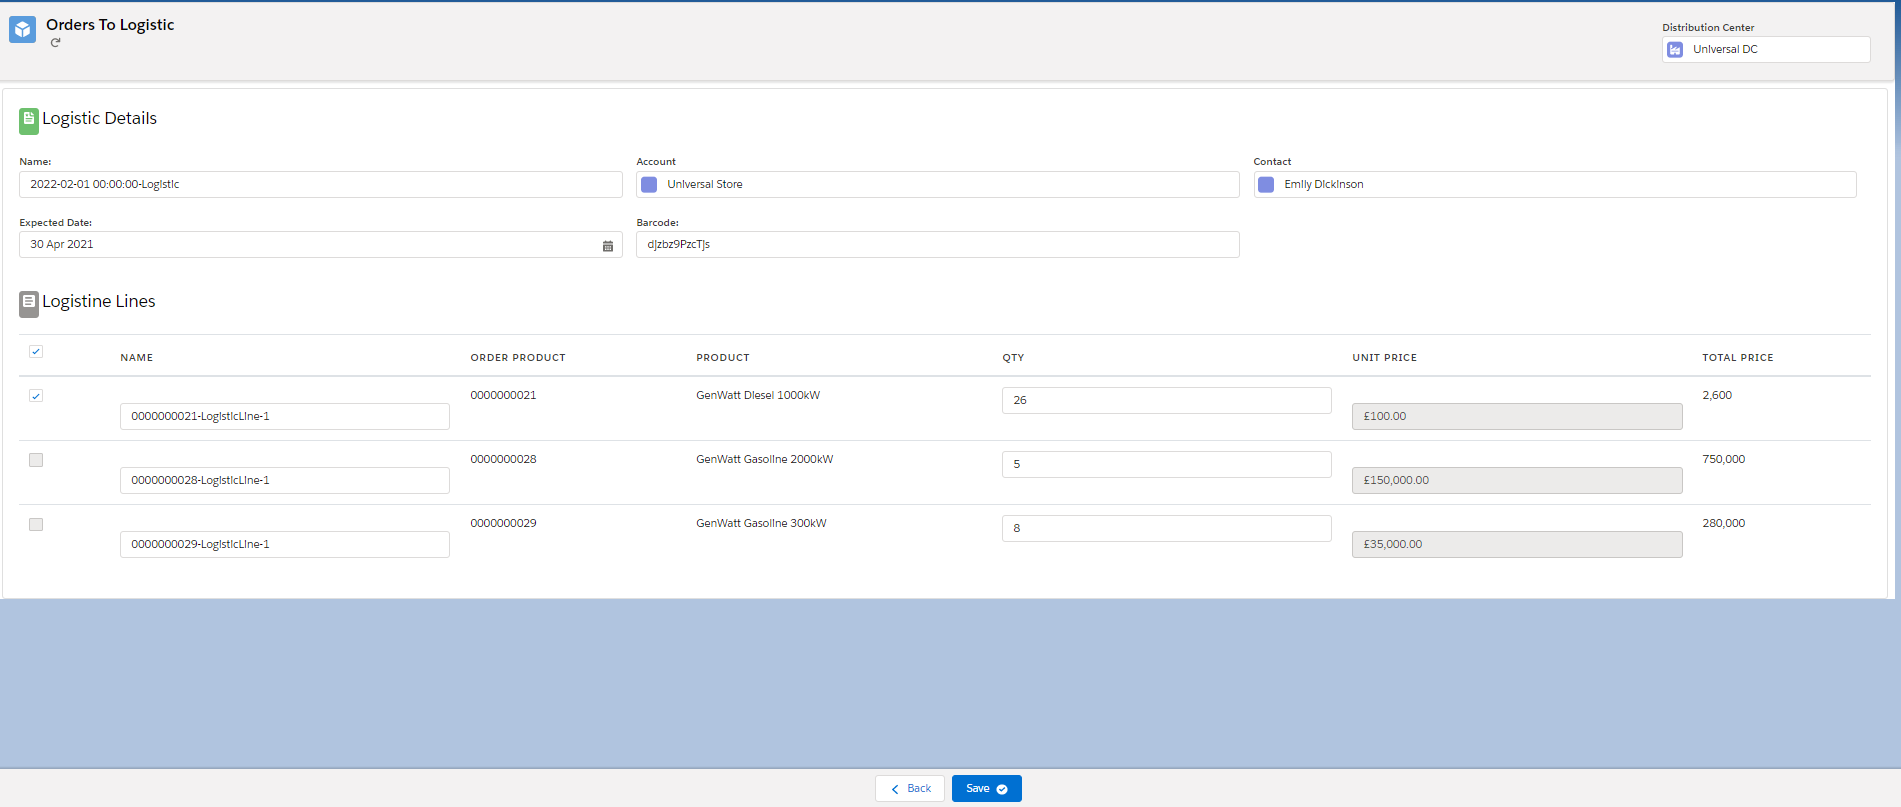
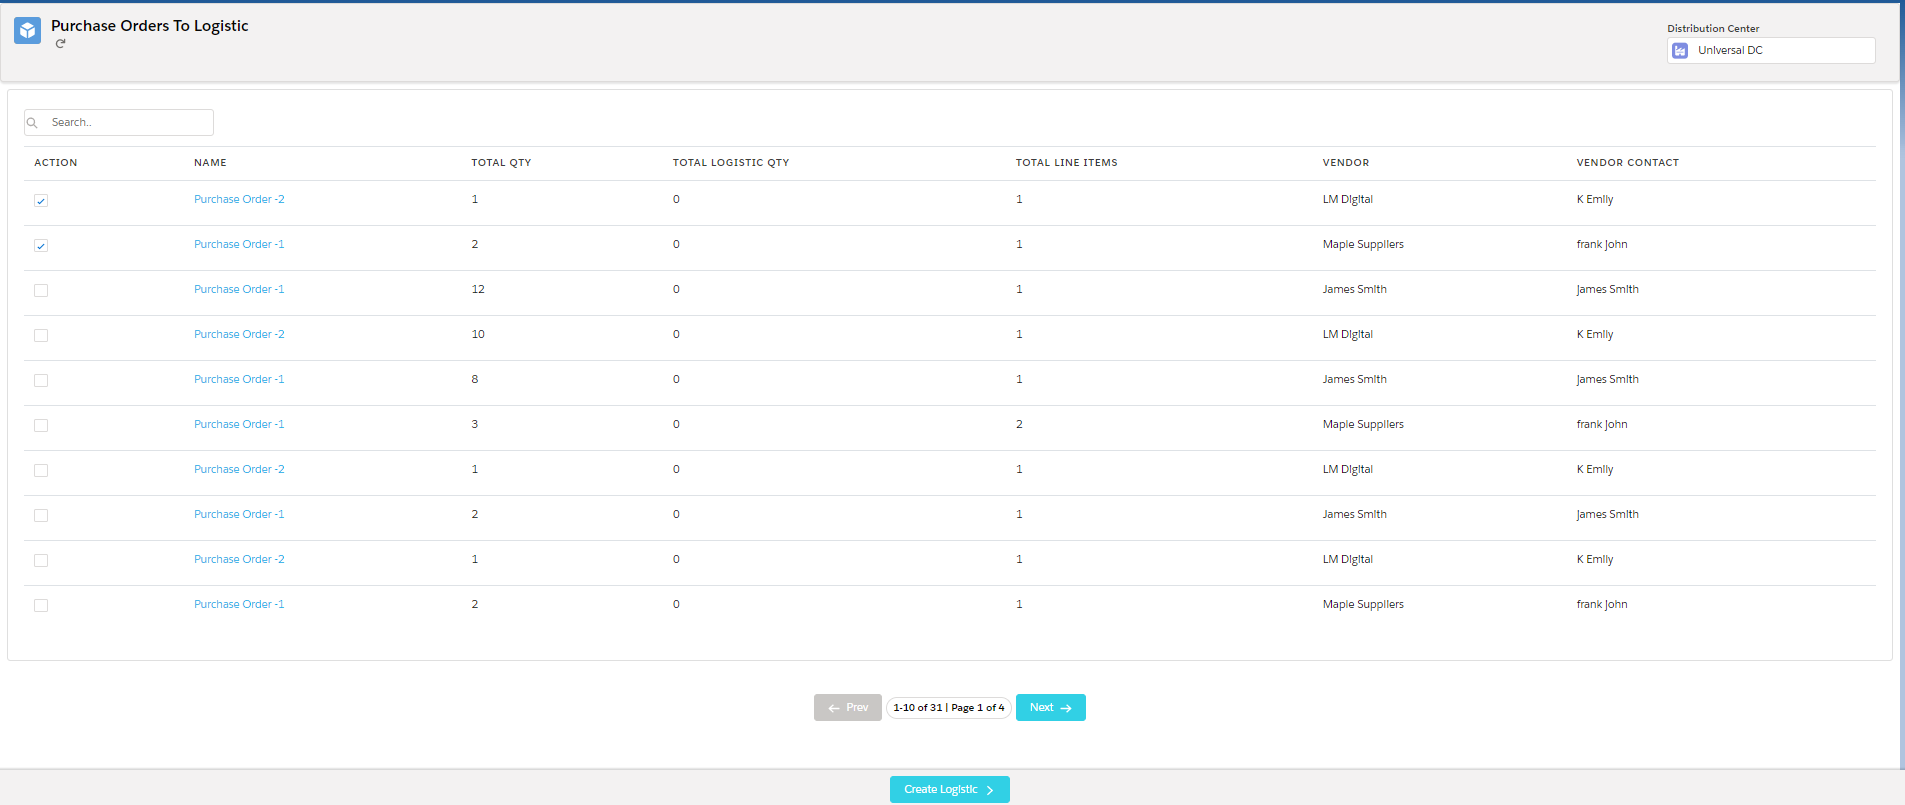
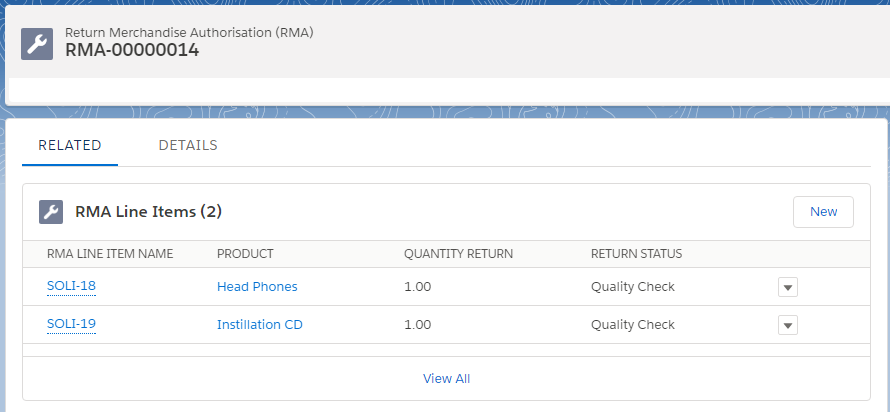
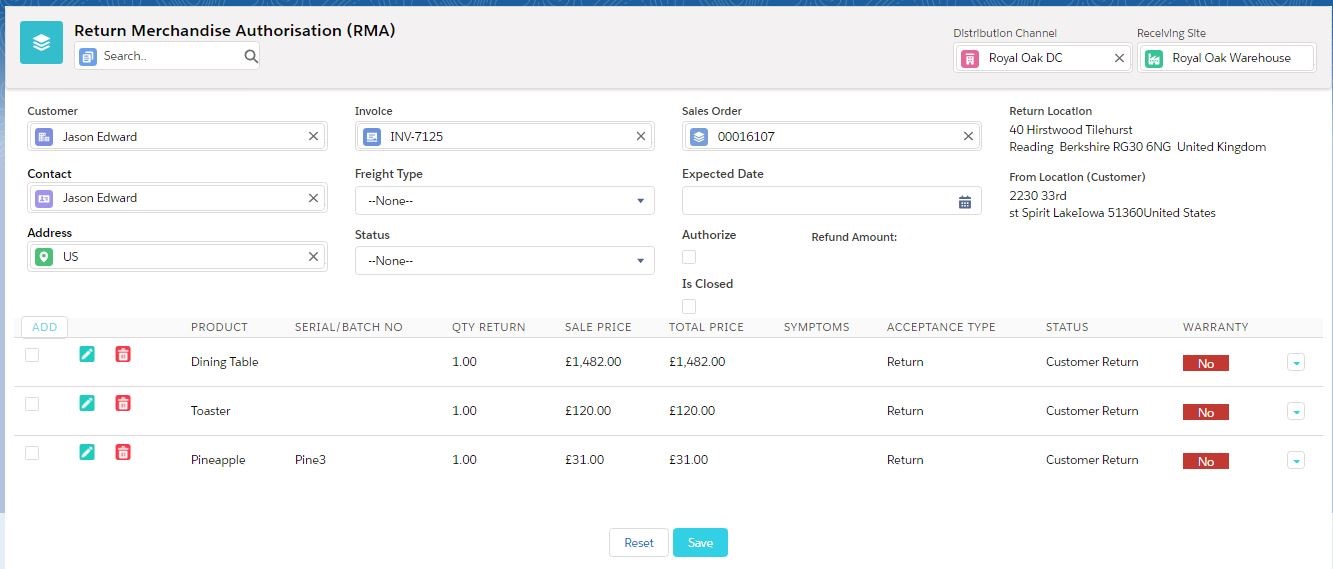
 ILLUSTRATIONS
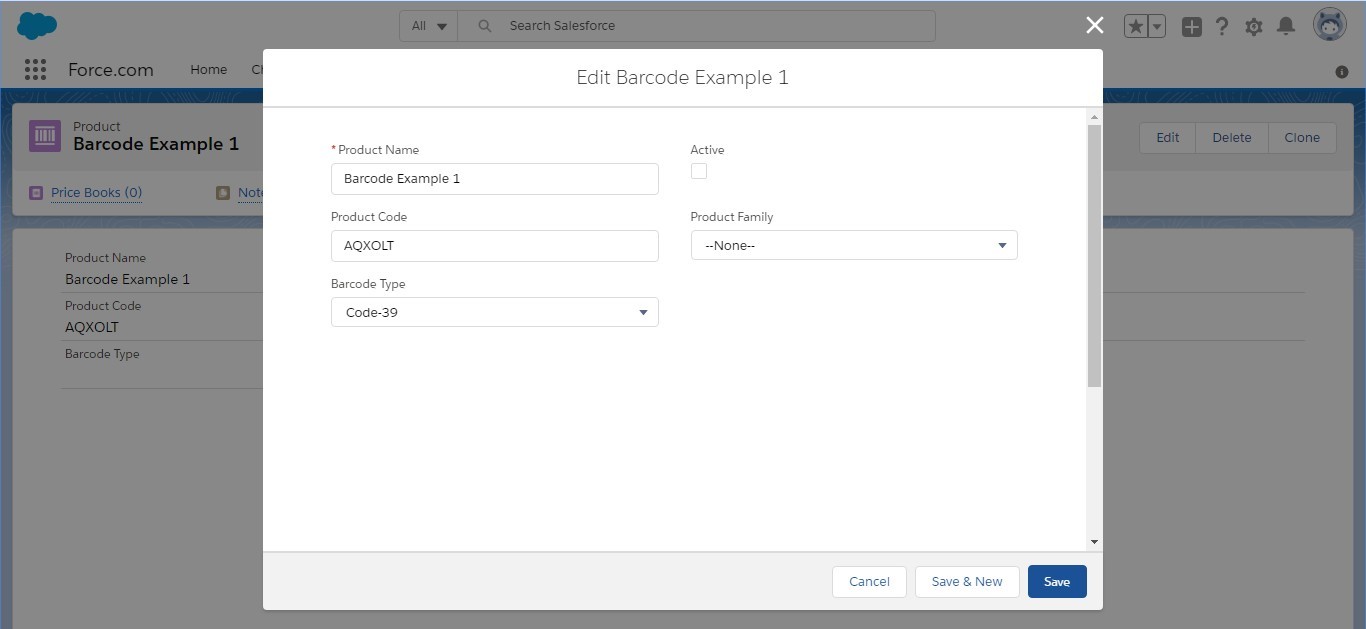


 Use Case Introduction:
 Business Benefits over Manual Systems:


